Technical Knowledge
The Cold Wave Is Coming! If The Laser Leveling Machine Is Not Used For A Long Time, You Need To Pay Attention To 10 Maintenance Tips
The cold wave is coming and the temperature drops sharply. In order to reduce the impact of low temperature on the laser leveling machine equipment, Wanshi Friendly reminds you to do a good job in keeping the laser leveling machine cold and warm to prevent "frostbite" incidents of the equipment, so as to avoid inconvenience to you. or cause unnecessary losses.
The cold wave is coming, how to maintain the laser leveling machine in winter?
01 "Great health care" in the off-season, "Roll up your sleeves and do it" in the peak season
When the winter cold wave hits, floor construction gradually enters the off-season, and the laser leveling machine is parked for a long time. It is necessary to pay attention to "equipment maintenance" and ensure that the laser leveling machine equipment is in good working condition at all times, so that it can be used for the first time when the construction peak season arrives. Invest in on-site work at once to seize market opportunities. However, low-temperature construction in winter is also a huge challenge and test for concrete and concrete laser leveling machines.
Do a good job of maintenance in the off-season and seize market opportunities in the peak season!
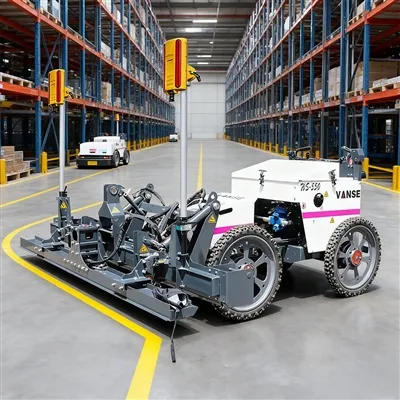
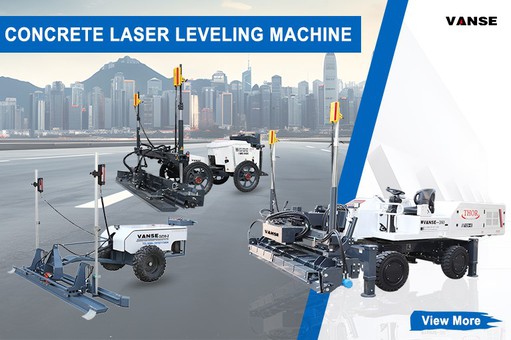
As the pioneer and leader of laser leveling machines, Wanshi concrete laser leveling machine product series can fully meet the concrete floor pouring and paving construction of different types of construction projects. Currently, it occupies more than 80% of the national market share and the global market share. It is also increasing year by year. Especially as an important construction equipment for high-end floors such as logistics warehouse floors, high-quality factory floors, garage floors, and ultra-flat wear-resistant floors, Wanshi Concrete Laser Leveling Machine plays a vital role for floor builders. effect.
02 Laser leveling machine, winter maintenance tips
Today, Wanshi will bring you tips on winter maintenance of concrete laser levelinging machines. I hope you can do a good job in winter maintenance of the equipment, protect your investment, and become your money-making machine!
1. Maintenance recommendations for large laser leveling machines and spreaders:
1) Add diesel and antifreeze suitable for the local temperature according to the area where the equipment is located.
2) When the device is idle, you should pay attention to the battery level. The battery can be removed when the equipment is parked for a long time. If it is difficult to start, an auxiliary battery can be added.
3) Replace the third engine filter.
4) Add butter in time and clean the piston rod and other parts of the oil cylinder.
5) The equipment needs to be cleaned and dried before being put into storage, otherwise the equipment will freeze and cause damage to the pipelines.
6) During winter construction, it is necessary to preheat the equipment and wait until the hydraulic oil reaches the working temperature before proceeding with construction.
2. Maintenance suggestions for small laser leveling machines:
1) After construction, clean the machine, move it to a ventilated and sunny place, and dry it in the sun and blow dry to prevent freezing.
2) Butter should be added in time.
3) Clean the engine carburetor, replace the air filter element, and replace the oil filter element. If it is difficult to start, add an auxiliary battery.
4) The equipment needs to be preheated before use.
If something happens to your device, don't worry!
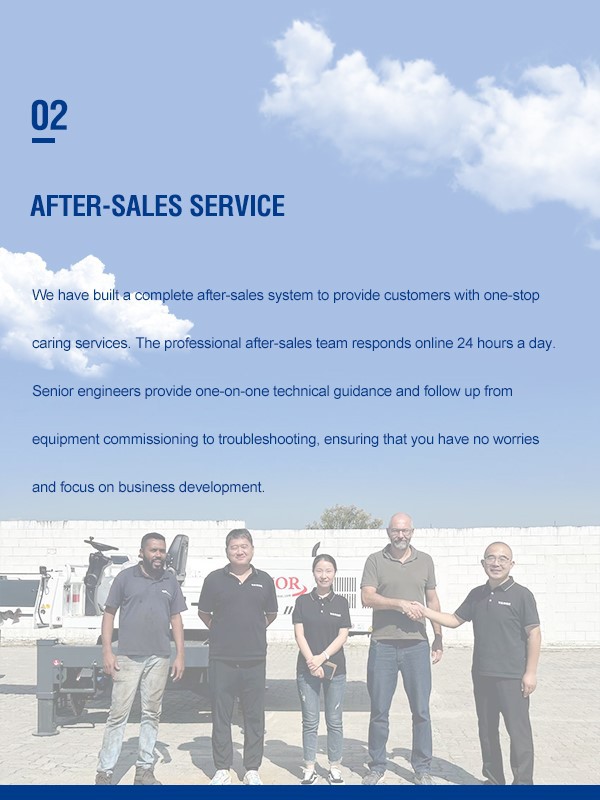
When you choose Wanshi equipment, you also choose to have worry-free after-sales protection. We provide all customers with high-quality after-sales service 7 days x 24 hours x 365 days.
Wanshi provides 7 days x 24 hours x 365 days round-the-clock service
If you have any problems with the operation of your device, you are welcome to contact us at any time. Remote telephone after-sales guidance is an efficient after-sales support method. Our after-sales service engineers will contact you as soon as possible and help you restore normal operation of the equipment as soon as possible.
Thanks to All the Friends Who Support and Trust Shandong Vanse Machinery Technology Co., Ltd.
If you want to know more about Shandong Vanse Machinery Technology Co., Ltd. or have any questions, please feel free to contact us:
Our Factory
Shandong Vanse Machinery Technology Co., Ltd.
Share this article

About the Author: Shandong Vanse Machinery Technology Co., Ltd.
Shandong Vanse Machinery Technology Co., Ltd. is a high-tech manufacturer specializing in concrete construction machinery, including laser screeds and related equipment. The company integrates R&D, production, and global sales, with products exported to over 60 countries and widely used in infrastructure projects worldwide.
Previous Post
Next Post
Related Articles
You Might Also Like
How to Control the Quality of Ultra-Large Laser-Leveled Wear-Resistant Concrete Floors
Quality control for ultra-large laser-leveled, wear-resistant concrete floors requires a comprehensive process encompassing "pre-construction prevention, in-construction control, and post-construction acceptance." Combining the technical characteristics (laser precision leveling and the synergistic effect of wear-resistant materials) with the challenges of ultra-large-scale construction (temperature cracking, flatness control, and interface bonding), a control system is established across five core dimensions: personnel, materials, equipment, process, and environment. This can be broken down into the following key steps: Pre-construction preparation for ultra-large flooring directly impacts subsequent quality stability, focusing on addressing three key issues: "unified technical standards, adequate resource allocation, and proactive risk mitigation." Drawing Refinement and Technical Briefing: Based on the building's function (e.g., load and flatness requirements for factories and logistics warehouses must be clearly defined), floor compartment design should be refined (extra-large areas should be divided into 6m×6m or 8m×8m compartments to avoid thermal stress cracking). Key parameters should be clarified, including laser leveling accuracy (typically ±3mm/2m), wear-resistant material dosage (approximately 5-7kg/m2 for metallic aggregates, 3-5kg/m2 for non-metallic aggregates), and concrete strength grade (minimum C30, flexural strength ≥4.0MPa). Technical briefings should be conducted for all employees, with a focus on training laser operators, concrete vibrators, and wear-resistant material spreaders to ensure that all positions understand the key technical aspects of flatness control, wear-resistant layer bonding, and crack prevention. Risk Contingency Plan Development: To address potential issues that may arise during large-scale construction (e.g., insufficient initial setting time for concrete resulting in inability to apply the wear-resistant layer, laser equipment failure resulting in uneven flatness, and cracking due to high summer temperatures), develop a contingency plan: Confirm the initial setting time of concrete with the commercial concrete mixing plant in advance (adjusted to the temperature; ≥4 hours in summer, ≥6 hours in winter), and add a retarder if necessary. Keep one or two spare sets of core concrete laser leveling components (such as laser transmitters and receivers) to prevent interruptions to construction due to equipment failure. Prepare awnings and spray cooling equipment for summer construction, and thermal blankets and electric blankets for winter construction to maintain a temperature difference between the inside and outside of the concrete at ≤25°C. Materials are the core of floor quality. Three key materials, concrete, wear-resistant materials, and surface treatment agents, require full-process inspection: Material Type Key Control Points Inspection Standards Ready-mixed concrete 1. Mix Ratio: Crushed stone particle size 5-20mm (avoid large particles that affect smoothness), sand content 35%-40%; Slump test for each truck upon arrival. Compressive/flexural test blocks are retained according to specifications (one set per 100m³; less than 100m³ is counted as one set). 2. Slump: 120 ± 20mm (slump too large will cause sanding, too small will make vibration difficult); 3. Initial Setting Time: Adapt to the construction schedule (single-chamber construction requires leveling and wear-resistant layer application to be completed before initial setting). Wear-resistant material 1. Composition: Metallic aggregates (such as iron filings and corundum) must have a carbon content ≤ 0.2%, and non-metallic aggregates (such as quartz sand) must have a hardness ≥ Mohs 7; Sampling is randomly sent for inspection upon arrival to test compressive strength (≥60MPa) and abrasion resistance (wear loss ≤0.3g/cm²). 2. Moisture Content: ≤ 1% (avoid clumping that affects spreading uniformity); 3. Adhesion: No risk of delamination at the concrete interface. Interface treatment agent Used at the interface between the concrete base and the wear-resistant layer (if separate-chamber construction requires treatment of the interface between new and old concrete), high adhesion and crack resistance are required. Bond strength is also tested upon arrival (≥1.5MPa). Expired or clumped products are strictly prohibited. The core equipment for laser-leveling wear-resistant flooring is the concrete laser leveling. Its accuracy directly determines the flatness of the floor, so key control measures are required: Equipment Calibration: 24 hours before construction, calibrate the concrete laser leveling blade, vibrator, and laser receiver using a standard calibration ruler (2m straightedge) to ensure the laser transmitter's leveling error is ≤0.1mm/m and the screed blade's flatness error is ≤0.5mm. Equipment Selection: For very large areas (single area ≥1000㎡), a "large concrete laser leveling" (working width ≥2.5m) should be used, combined with a small walk-behind concrete laser leveling for corners (within 300mm of the wall). Equipment Maintenance: Before construction daily, check the equipment's fuel, hydraulic oil, and vibrator motor. After work, clean the screed blade and laser head to prevent concrete residue from affecting subsequent use. Large-scale floor construction requires a "divided-cell flow" approach. The connection between processes within each cell (concrete pouring → laser leveling → wear-resistant layer application → joint cutting and maintenance) is central to quality control, requiring on-site supervision of these five key processes. Separate compartment pouring: Strictly divide the construction area according to pre-designed compartment gaps, using the "skip compartment method" (with ≥48 hours between each compartment) to avoid temperature cracking caused by continuous pouring. The "slant layer method" is used during pouring, with each layer ≤300mm thick. The placement speed is matched to the laser leveling speed (approximately 10-15 m³/h). Vibration Control: After concrete placement, first use an inserted vibrator (vibration interval ≤500mm, vibration time 15-20 seconds, until no bubbles escape) to achieve compaction. Then, use a laser leveler to perform a simultaneous "vibration + leveling" operation (vibration frequency 3000-5000 times/minute) to ensure concrete density (rebound strength must meet the standard) while avoiding excessive vibration that can cause aggregate sinking and surface sanding. Benchmark Setting: The laser transmitter must be set up in a location away from the construction area and free from vibration interference (such as nearby fixed structures). Set the laser baseline according to the design elevation and recheck the baseline every two hours to prevent transmitter drift. Working Path: The concrete laser leveling uses a staggered back-and-forth method (first pass horizontally, second pass vertically). The screed height must be fine-tuned based on the concrete slump (higher slumps, lower slumps). Ensure the finished concrete surface is ≤3mm/2m flat. (Use a 2m ruler for immediate inspection, and correct any unsatisfactory areas immediately.) Corner Treatment: For areas beyond the concrete laser leveling's reach, such as walls and column bases, manual leveling is performed using a small handheld concrete laser leveling with an aluminum alloy screed to ensure consistent flatness across the entire surface. The timing and uniformity of spreading wear-resistant material directly impacts its bond with concrete. Spreading should be done in two stages, with strict timing controls. First Spreading: After the concrete is poured and leveled, wait until the surface moisture has evaporated to the point where no visible indentation is observed when pressed with a finger (approximately 1-2 hours before initial setting). Apply 60% of the total amount of material, evenly spreading using a "plum blossom" pattern (avoiding any accumulation). After spreading, use a grinder (with a circular disc) at low speed to embed the wear-resistant material into the concrete surface. Second Spreading: 30-60 minutes after the first grinding, when the surface of the wear-resistant material has initially set, spread the remaining 40% of the wear-resistant material. Use a grinder (with a different blade) at high speed until the surface is smooth and scratch-free. Control the grinding pressure to avoid thinning the wear-resistant layer; the thickness should be ≥ 3mm. Large-area floors are most susceptible to shrinkage cracks, requiring stress relief through slitting. Key control points: Joint cutting time: Start 24-48 hours after concrete pouring (adjusted to the temperature, within 24 hours in summer and within 48 hours in winter), when the concrete strength reaches 25%-30% of the design strength (rebound value approximately 20 MPa). Avoid premature joint edge cracking and delayed joint cutting, which can cause random cracking. Joint cutting parameters: Compartment joints should be "through joints" (depth ≥ 1/3 of the floor thickness; for example, for a 150mm thick floor, the joint depth should be ≥ 50mm). Longitudinal and transverse joint spacing should be designed based on the compartment design (6-8m), with a joint width of 5-8mm. Polyurethane sealant should be applied promptly after joint cutting to prevent rainwater from seeping into the base layer. Temporary contraction joints: If the area of a single compartment is large (≥ 1000 m2), temporary contraction joints (one every 3-4m, 20-30mm deep) should be installed during pouring. These temporary contraction joints will be extended to through joints during subsequent joint cutting. Inadequate curing can lead to sanding and insufficient strength on the concrete surface. Therefore, a "covering + watering" curing method is necessary. Curing Time: Within 12 hours after finishing the wear-resistant layer, immediately cover with plastic film and geotextile (to prevent rapid evaporation). Curing period: ≥7 days (if using impermeable concrete, curing period: ≥14 days). Curing Frequency: Water 3-4 times daily (increase to 5-6 times in summer) to ensure the geotextile is constantly moist to prevent the concrete surface from drying out and cracking. During winter curing, cover with a thermal blanket and maintain an ambient temperature of ≥5°C (if temperatures fall below 5°C, winter construction measures, such as adding antifreeze, are required). After completion of ultra-large floor construction, a comprehensive inspection is required in accordance with the "Concrete Structure Construction Quality Acceptance Code" (GB50204) and the "Technical Code for Wear-Resistant Concrete Floors" (JGJ/T 337), focusing on the three core indicators of flatness, wear resistance, and crack control. Appearance Inspection: A comprehensive inspection of the floor surface is required. The floor must be free of sanding, peeling, exposed surfaces, or scratches. The wear-resistant layer must be uniform in color with no significant color variations. Crack Inspection: A crack width gauge is used to inspect for cracks. "Non-through surface cracks" (width ≤ 0.2mm) are permitted. "Through cracks" or cracks with a width greater than 0.2mm are strictly prohibited. If excessive cracks are found, the cracked area must be chiseled out (extending 100mm), and the concrete and wear-resistant layer must be re-poured. After rectification, re-inspection will be conducted. Test Items Testing Method Qualification Criteria Smoothness Using a 2m straightedge and a feeler gauge, test at five points (evenly distributed) per 100 m2, recording the maximum deviation. Deviation at any point ≤ 3mm/2m, and a pass rate ≥ 95% Abrasion Resistance Using the Taber Abrasion Test, sample a representative area (100 mm × 100 mm) and weigh it after 500 cycles of abrasion. Abrasion loss ≤ 0.3g/cm² (metal aggregate wear layer), ≤ 0.5g/cm² (non-metal aggregate wear layer) Compressive Strength Concrete test blocks were collected according to specifications (one per 1000 m2) and tested after 28 days of standard curing. Concrete compressive strength ≥ design value (e.g., C30 ≥ 30MPa), flexural strength ≥ 4.0MPa Adhesive Strength Using the Pull-Out Test, samples (50 mm diameter) were taken at the interface between the wear-resistant layer and concrete, and the pull-out strength was measured. Bond strength ≥ 1.0MPa, with failure mode being "cohesive failure of concrete" (not interfacial debonding) After acceptance, finished product protection measures must be implemented to prevent subsequent construction (such as equipment installation and pipeline laying) from damaging the floor: Do not allow heavy equipment (such as forklifts or cranes) to directly roll over the floor (a steel plate is required). Avoid sharp objects (such as rebar or steel pipes) from striking the floor surface. If holes need to be drilled in the floor (e.g., to install a floor drain), use specialized drilling equipment. Manual chiseling is strictly prohibited to prevent cracking of the surrounding concrete. Large-scale floor construction is susceptible to extreme environmental impacts, such as high temperatures, low temperatures, and strong winds. Targeted adjustments to control measures are required: During high-temperature construction (temperature ≥30°C): Adjust the concrete pouring time to the morning and evening (avoid the high-temperature period of 10:00 AM to 4:00 PM); Pour the concrete immediately after arrival to avoid prolonged standing (this shortens the initial setting time); Immediately cover the wear-resistant layer after finishing to maintain moisture, and increase the watering frequency (once every hour). Low-temperature construction (temperature ≤ 5°C): Add antifreeze to the concrete (dosage according to the instructions, strictly prohibit exceeding the standard) to ensure the concrete enters the mold at a temperature ≥ 10°C. After construction, cover with a thermal blanket and electric heating blanket to maintain an ambient temperature ≥ 5°C. Extend the curing period (≥ 10 days) and remove the insulation only after the concrete strength reaches 70%. In strong winds (wind speed ≥ 5m/s): Suspend the application of the wear-resistant layer (to prevent the material from being blown away by the wind); Immediately cover the concrete with plastic sheeting after pouring (to prevent rapid evaporation of surface moisture and resulting in sanding). Through the above full-process and multi-dimensional quality control, the three core quality problems of "poor flatness, peeling of the wear-resistant layer, and shrinkage cracks" of ultra-large-area laser-leveled wear-resistant concrete floors can be effectively solved, and ultimately the floor's "high strength, high wear resistance, and high flatness" requirements can be achieved. Note: The parameters provided in this document are for reference only and are not mandatory. Due to differences in technical characteristics between different brands and models of laser levelers, please consult the manufacturer for a suitable solution before actual operation. This reference document assumes no responsibility for any issues arising from failure to follow the manufacturer's instructions.Can concrete polishing machines replace power trowels for achieving mirror-finish super flat floors?
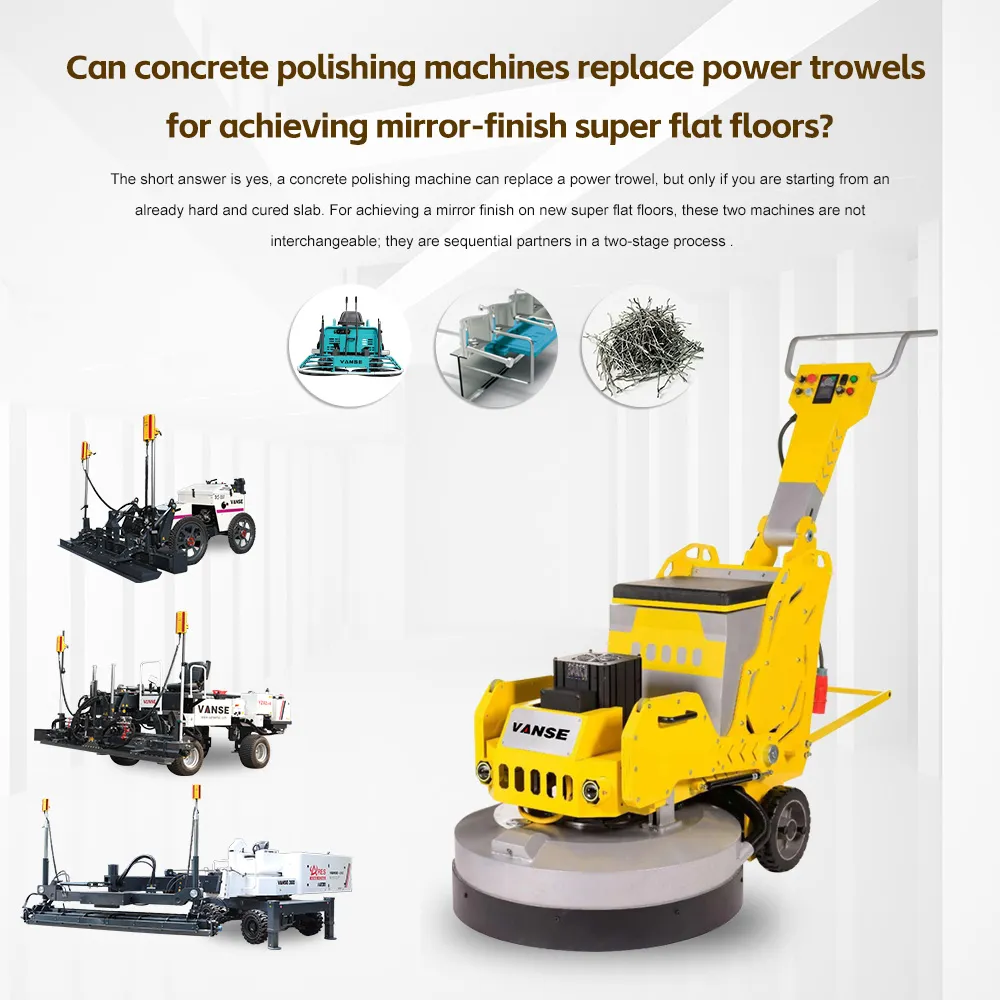
The short answer is yes, a concrete polishing machine can replace a power trowel, but only if you are starting from an already hard and cured slab. For achieving a mirror finish on new super flat floors, these two machines are not interchangeable; they are sequential partners in a two-stage process . To understand why, you have to look at when in the concrete's life cycle each machine operates. A power trowel works on wet, setting concrete, while a polishing machine works on hard, cured concrete. Feature Power Trowel (Finishing Stage) Concrete Polisher (Hardening Stage) When to Use During the concrete's initial set (while still plastic/hardening) . After the concrete has fully cured (typically 28+ days) . How it Works Uses steel blades to float, compact, and "burnish" the surface paste, creating a temporary mechanical shine . Uses abrasive diamond pads to physically grind down the surface, exposing the aggregate and creating a permanent structural shine . Result Creates the initial dense, smooth surface required before any polishing can happen. This is the foundation. Removes the top layer to achieve the final desired gloss level (from satin to mirror). This is the final art. Goal Densification & Profile Creation. To prepare a flat, cured slab ready for polishing. Aesthetics & Durability. To reveal the aggregate and create a long-lasting, high-gloss finish . Think of it like building a piece of fine furniture. You cannot start with a rough log and immediately apply varnish. You need a plane to make it flat first. The power trowel's job is to create a perfectly flat and dense foundation. As we discussed in your previous question about operation time, the trowel burnishes the surface. If you try to use a polishing machine on a floor that hasn't been properly power-troweled, the slab will be too rough and uneven. The polisher would have to remove far too much material to achieve flatness, which is inefficient and costly . Once the concrete is cured, the polishing machine takes over. You attach diamond abrasive pads (starting coarse and moving to very fine, like 3,000 grit) . This process physically cuts the surface, revealing the inner beauty of the stone and creating a shine that is part of the material itself, not just a surface effect . Technically, yes, a power trowel can be converted into a high-speed polishing machine, but this is for the polishing phase only. The Conversion: You can buy a conversion kit (planetary grinding heads) that attaches to the bottom of a power trowel, allowing it to hold diamond polishing pads . The Advantage: This is incredibly fast. A converted ride-on power trowel can polish over 10,000 square feet a day, making it ideal for massive warehouses . The Trade-off: A converted trowel is less precise than a dedicated planetary grinder and cannot get close to walls or into corners. You would still need a smaller, walk-behind grinder for the edges . Regardless of which machine you use for polishing, you must apply a chemical hardener called a densifier (usually lithium silicate) after the initial grinding passes . This chemical reacts with the concrete to make it rock-hard, allowing it to accept a high-gloss polish. Without it, the surface will remain chalky and dull. In short: Use the power trowel to build the perfect canvas. Then, bring in the polisher to create the artwork. If you are planning a project, knowing the desired final gloss level (e.g., matte, satin, or high-gloss mirror) will help determine exactly which grit progression you need for the polishing phase. Let me know if you'd like more details on that. Contact us NOW Note: The parameters provided in this document are for reference only and are not mandatory. Due to differences in technical characteristics between different brands and models of laser levelers, please consult the manufacturer for a suitable solution before actual operation. This reference document assumes no responsibility for any issues arising from failure to follow the manufacturer's instructions.How does the concrete laser leveling machine ensure the work effect and quality during the leveling process?
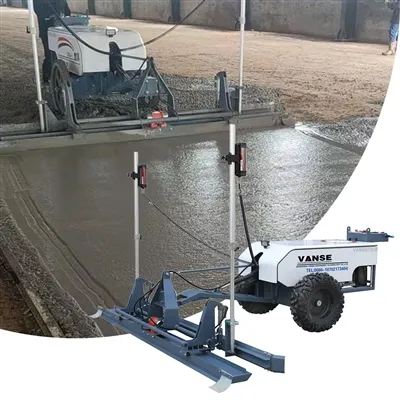
As a key equipment in modern building construction, the concrete laser leveling machine's leveling effect and quality directly affect the flatness and service life of the concrete floor. In order to ensure the work effect and quality during the leveling process, fine control and operation are required from multiple dimensions. •••▶ Preparation before operation ◀••• 1. Site Assessment: Before starting grading work, conduct a detailed assessment of the construction site. Check the basic condition of the ground, including the pouring quality, flatness, strength, etc. of the concrete. Understanding the condition of the ground will help you choose the appropriate leveling method and parameters. 2. Equipment inspection: Conduct a comprehensive inspection of the concrete laser leveling machine to ensure that the equipment is in good working condition. Check key components such as laser systems, power systems, transmission systems, and control systems to ensure that they can operate normally and provide stable performance. 3. Set parameters: Set appropriate leveling parameters according to construction requirements and ground conditions. This includes adjustments to the laser system, leveling speed, leveling depth, etc. The setting of parameters should take into account the flatness of the ground, construction efficiency and quality requirements. •••▶ Operations during leveling ◀••• 1. Maintain a stable traveling speed: During the leveling process, the operator should maintain a stable traveling speed. Avoid speeds that are too fast or too slow to avoid affecting the leveling effect and quality. A stable travel speed helps ensure uniform force on the ground, reducing unnecessary fluctuations and errors. 2. Adjust the laser system in time: The laser system is the core component of the mixed soil laser leveling machine and provides accurate leveling reference lines. During the leveling process, operators should pay close attention to the status of the laser system and adjust the height and position of the laser line in a timely manner to ensure leveling accuracy and stability. 3. Even distribution and vibration: Before leveling, the concrete should be evenly distributed and vibrated. The fabric should be even and avoid any accumulation or voids. Vibration should be sufficient to improve the compactness and strength of the concrete. 4. Control the leveling depth: The leveling depth is an important factor affecting the leveling effect and quality. Operators should control the leveling depth according to ground conditions and construction requirements. Leveling that is too deep will cause the ground to be too thin, affecting the strength and flatness; leveling that is too shallow will not be able to effectively eliminate uneven ground problems. 5. Pay attention to observation and adjustment: During the leveling process, the operator should always pay attention to the changes in the ground. If problems such as waves, bulges or depressions are found on the ground, leveling parameters should be adjusted in time or other measures should be taken to repair them. •••▶ Quality control after leveling ◀••• 1. Ground inspection: After the leveling work is completed, a comprehensive inspection of the ground should be carried out. Check the flatness, levelness, verticality and other indicators of the ground to ensure that it meets the construction requirements. If problems are found, they should be repaired and adjusted in time. 2. Test block production and testing: According to the construction requirements, test blocks are made and corresponding strength and durability tests are performed. Through the test results of the test blocks, the quality and performance of the concrete during the leveling process can be evaluated. 3. Maintenance: After the leveling work is completed, the concrete laser leveling machine should be cleaned and maintained in a timely manner. This helps extend the life of the equipment and ensures stable performance the next time you work on it. •••▶ People skills and training ◀••• 1. Improve operating skills: Operators should have good operating skills and be able to master the operating essentials of the concrete laser leveling. Through regular training and skill assessment, the skill level of operators can be improved and the stability and accuracy of the leveling process can be ensured. 2. Enhance quality awareness: Operators should fully understand the importance and quality requirements of leveling work. By strengthening quality education and publicity, operators will increase their sensitivity and attention to quality issues, thereby paying more attention to details and quality control in their work. •••▶Coordination with other construction links ◀••• 1. Coordination with the pouring process: The leveling work of the concrete laser leveler is carried out after the concrete is poured. Therefore, coordination with the pouring process is crucial. Pouring should ensure that the concrete is evenly distributed and free of bubbles and voids, providing a good foundation for leveling work. 2. Connection with subsequent maintenance: After the leveling work is completed, subsequent maintenance work needs to be carried out, such as watering, covering, etc. Work closely with the street coordinators in the subsequent maintenance process to ensure that the ground is not damaged during the maintenance process and remains in good condition. •••▶Technical updates and equipment upgrades ◀••• 1. Pay attention to new technologies and equipment: With the advancement of science and technology and the development of the construction industry, new leveling technologies and equipment are constantly emerging. Pay attention to the development of new technologies and new equipment, and timely introduce and apply advanced technologies and equipment that suit your own construction needs, which will help improve the leveling effect and quality. 2. Regularly update and upgrade equipment: As construction equipment, concrete laser levelings may experience performance degradation or technological backwardness as their usage time increases and technology advances. Therefore, regular updates and upgrades of equipment are necessary. By updating and upgrading equipment, the advancement and stability of the equipment can be maintained, and the leveling effect and quality can be improved. In summary, ensuring the working effect and quality of the concrete laser leveling machine during the leveling process requires preparation before operation, operation during the leveling process, quality control after leveling, personnel skills and training, and other construction We will start from various aspects such as coordination of links, technology updates and equipment upgrades. Through comprehensive policy implementation, precise management and continuous improvement, the leveling effect and quality can be effectively improved to meet construction requirements and user expectations.