Technical Knowledge
How to Control the Quality of Ultra-Large Laser-Leveled Wear-Resistant Concrete Floors
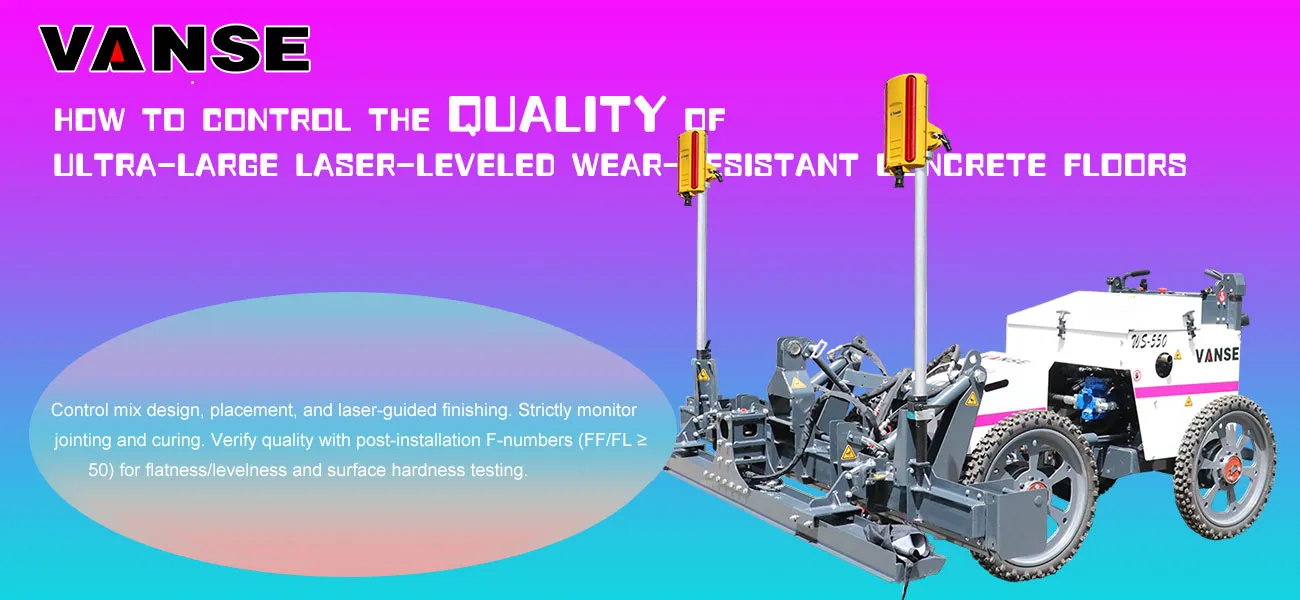
Quality control for ultra-large laser-leveled, wear-resistant concrete floors requires a comprehensive process encompassing "pre-construction prevention, in-construction control, and post-construction acceptance." Combining the technical characteristics (laser precision leveling and the synergistic effect of wear-resistant materials) with the challenges of ultra-large-scale construction (temperature cracking, flatness control, and interface bonding), a control system is established across five core dimensions: personnel, materials, equipment, process, and environment. This can be broken down into the following key steps:
Ⅰ. Pre-construction Control: Laying the Foundation for Quality (Pre-construction Preparation)
Pre-construction preparation for ultra-large flooring directly impacts subsequent quality stability, focusing on addressing three key issues: "unified technical standards, adequate resource allocation, and proactive risk mitigation."
1. Technology and Plan Control: Clarifying Quality Benchmarks
Drawing Refinement and Technical Briefing:
Based on the building's function (e.g., load and flatness requirements for factories and logistics warehouses must be clearly defined), floor compartment design should be refined (extra-large areas should be divided into 6m×6m or 8m×8m compartments to avoid thermal stress cracking). Key parameters should be clarified, including laser leveling accuracy (typically ±3mm/2m), wear-resistant material dosage (approximately 5-7kg/m2 for metallic aggregates, 3-5kg/m2 for non-metallic aggregates), and concrete strength grade (minimum C30, flexural strength ≥4.0MPa).
Technical briefings should be conducted for all employees, with a focus on training laser operators, concrete vibrators, and wear-resistant material spreaders to ensure that all positions understand the key technical aspects of flatness control, wear-resistant layer bonding, and crack prevention.
Risk Contingency Plan Development:
To address potential issues that may arise during large-scale construction (e.g., insufficient initial setting time for concrete resulting in inability to apply the wear-resistant layer, laser equipment failure resulting in uneven flatness, and cracking due to high summer temperatures), develop a contingency plan:
Confirm the initial setting time of concrete with the commercial concrete mixing plant in advance (adjusted to the temperature; ≥4 hours in summer, ≥6 hours in winter), and add a retarder if necessary.
Keep one or two spare sets of core concrete laser leveling components (such as laser transmitters and receivers) to prevent interruptions to construction due to equipment failure.
Prepare awnings and spray cooling equipment for summer construction, and thermal blankets and electric blankets for winter construction to maintain a temperature difference between the inside and outside of the concrete at ≤25°C.
2. Material Control: Ensuring Core Performance Meets Standards
Materials are the core of floor quality. Three key materials, concrete, wear-resistant materials, and surface treatment agents, require full-process inspection:
| Material Type | Key Control Points | Inspection Standards |
| Ready-mixed concrete | 1. Mix Ratio: Crushed stone particle size 5-20mm (avoid large particles that affect smoothness), sand content 35%-40%; | Slump test for each truck upon arrival. Compressive/flexural test blocks are retained according to specifications (one set per 100m³; less than 100m³ is counted as one set). |
| 2. Slump: 120 ± 20mm (slump too large will cause sanding, too small will make vibration difficult); | ||
| 3. Initial Setting Time: Adapt to the construction schedule (single-chamber construction requires leveling and wear-resistant layer application to be completed before initial setting). | ||
| Wear-resistant material | 1. Composition: Metallic aggregates (such as iron filings and corundum) must have a carbon content ≤ 0.2%, and non-metallic aggregates (such as quartz sand) must have a hardness ≥ Mohs 7; | Sampling is randomly sent for inspection upon arrival to test compressive strength (≥60MPa) and abrasion resistance (wear loss ≤0.3g/cm²). |
| 2. Moisture Content: ≤ 1% (avoid clumping that affects spreading uniformity); | ||
| 3. Adhesion: No risk of delamination at the concrete interface. | ||
| Interface treatment agent | Used at the interface between the concrete base and the wear-resistant layer (if separate-chamber construction requires treatment of the interface between new and old concrete), high adhesion and crack resistance are required. | Bond strength is also tested upon arrival (≥1.5MPa). Expired or clumped products are strictly prohibited. |
3. Equipment Control: Ensuring Construction Accuracy
The core equipment for laser-leveling wear-resistant flooring is the concrete laser leveling. Its accuracy directly determines the flatness of the floor, so key control measures are required:
Equipment Calibration: 24 hours before construction, calibrate the concrete laser leveling blade, vibrator, and laser receiver using a standard calibration ruler (2m straightedge) to ensure the laser transmitter's leveling error is ≤0.1mm/m and the screed blade's flatness error is ≤0.5mm.
Equipment Selection: For very large areas (single area ≥1000㎡), a "large concrete laser leveling" (working width ≥2.5m) should be used, combined with a small walk-behind concrete laser leveling for corners (within 300mm of the wall).
Equipment Maintenance: Before construction daily, check the equipment's fuel, hydraulic oil, and vibrator motor. After work, clean the screed blade and laser head to prevent concrete residue from affecting subsequent use.
II. In-Process Control: Identifying Key Construction Processes (Construction Process Control)
Large-scale floor construction requires a "divided-cell flow" approach. The connection between processes within each cell (concrete pouring → laser leveling → wear-resistant layer application → joint cutting and maintenance) is central to quality control, requiring on-site supervision of these five key processes.
1. Concrete Pouring and Vibration: Controlling Base Density
Separate compartment pouring: Strictly divide the construction area according to pre-designed compartment gaps, using the "skip compartment method" (with ≥48 hours between each compartment) to avoid temperature cracking caused by continuous pouring. The "slant layer method" is used during pouring, with each layer ≤300mm thick. The placement speed is matched to the laser leveling speed (approximately 10-15 m³/h).
Vibration Control: After concrete placement, first use an inserted vibrator (vibration interval ≤500mm, vibration time 15-20 seconds, until no bubbles escape) to achieve compaction. Then, use a laser leveler to perform a simultaneous "vibration + leveling" operation (vibration frequency 3000-5000 times/minute) to ensure concrete density (rebound strength must meet the standard) while avoiding excessive vibration that can cause aggregate sinking and surface sanding.
2. Laser Leveling: Ensure Standard Flatness
Benchmark Setting: The laser transmitter must be set up in a location away from the construction area and free from vibration interference (such as nearby fixed structures). Set the laser baseline according to the design elevation and recheck the baseline every two hours to prevent transmitter drift.
Working Path: The concrete laser leveling uses a staggered back-and-forth method (first pass horizontally, second pass vertically). The screed height must be fine-tuned based on the concrete slump (higher slumps, lower slumps). Ensure the finished concrete surface is ≤3mm/2m flat. (Use a 2m ruler for immediate inspection, and correct any unsatisfactory areas immediately.)
Corner Treatment: For areas beyond the concrete laser leveling's reach, such as walls and column bases, manual leveling is performed using a small handheld concrete laser leveling with an aluminum alloy screed to ensure consistent flatness across the entire surface.
3. Spreading and Finishing Wear-Resistant Material: Ensuring Wear-Resistant Layer Quality
The timing and uniformity of spreading wear-resistant material directly impacts its bond with concrete. Spreading should be done in two stages, with strict timing controls.
First Spreading: After the concrete is poured and leveled, wait until the surface moisture has evaporated to the point where no visible indentation is observed when pressed with a finger (approximately 1-2 hours before initial setting). Apply 60% of the total amount of material, evenly spreading using a "plum blossom" pattern (avoiding any accumulation). After spreading, use a grinder (with a circular disc) at low speed to embed the wear-resistant material into the concrete surface.
Second Spreading: 30-60 minutes after the first grinding, when the surface of the wear-resistant material has initially set, spread the remaining 40% of the wear-resistant material. Use a grinder (with a different blade) at high speed until the surface is smooth and scratch-free. Control the grinding pressure to avoid thinning the wear-resistant layer; the thickness should be ≥ 3mm.
4. Slitting and Crack Prevention: Controlling Shrinkage Cracks
Large-area floors are most susceptible to shrinkage cracks, requiring stress relief through slitting. Key control points:
Joint cutting time: Start 24-48 hours after concrete pouring (adjusted to the temperature, within 24 hours in summer and within 48 hours in winter), when the concrete strength reaches 25%-30% of the design strength (rebound value approximately 20 MPa). Avoid premature joint edge cracking and delayed joint cutting, which can cause random cracking.
Joint cutting parameters: Compartment joints should be "through joints" (depth ≥ 1/3 of the floor thickness; for example, for a 150mm thick floor, the joint depth should be ≥ 50mm). Longitudinal and transverse joint spacing should be designed based on the compartment design (6-8m), with a joint width of 5-8mm. Polyurethane sealant should be applied promptly after joint cutting to prevent rainwater from seeping into the base layer.
Temporary contraction joints: If the area of a single compartment is large (≥ 1000 m2), temporary contraction joints (one every 3-4m, 20-30mm deep) should be installed during pouring. These temporary contraction joints will be extended to through joints during subsequent joint cutting.
5. Curing: Ensuring Strength Growth
Inadequate curing can lead to sanding and insufficient strength on the concrete surface. Therefore, a "covering + watering" curing method is necessary.
Curing Time: Within 12 hours after finishing the wear-resistant layer, immediately cover with plastic film and geotextile (to prevent rapid evaporation). Curing period: ≥7 days (if using impermeable concrete, curing period: ≥14 days).
Curing Frequency: Water 3-4 times daily (increase to 5-6 times in summer) to ensure the geotextile is constantly moist to prevent the concrete surface from drying out and cracking. During winter curing, cover with a thermal blanket and maintain an ambient temperature of ≥5°C (if temperatures fall below 5°C, winter construction measures, such as adding antifreeze, are required).
III. Post-Construction Control: Strict Acceptance and Defect Correction (Post-Construction Inspection)
After completion of ultra-large floor construction, a comprehensive inspection is required in accordance with the "Concrete Structure Construction Quality Acceptance Code" (GB50204) and the "Technical Code for Wear-Resistant Concrete Floors" (JGJ/T 337), focusing on the three core indicators of flatness, wear resistance, and crack control.
1. Appearance and Crack Inspection
Appearance Inspection: A comprehensive inspection of the floor surface is required. The floor must be free of sanding, peeling, exposed surfaces, or scratches. The wear-resistant layer must be uniform in color with no significant color variations.
Crack Inspection: A crack width gauge is used to inspect for cracks. "Non-through surface cracks" (width ≤ 0.2mm) are permitted. "Through cracks" or cracks with a width greater than 0.2mm are strictly prohibited. If excessive cracks are found, the cracked area must be chiseled out (extending 100mm), and the concrete and wear-resistant layer must be re-poured. After rectification, re-inspection will be conducted.
2. Key performance testing
| Test Items | Testing Method | Qualification Criteria |
| Smoothness | Using a 2m straightedge and a feeler gauge, test at five points (evenly distributed) per 100 m2, recording the maximum deviation. | Deviation at any point ≤ 3mm/2m, and a pass rate ≥ 95% |
| Abrasion Resistance | Using the Taber Abrasion Test, sample a representative area (100 mm × 100 mm) and weigh it after 500 cycles of abrasion. | Abrasion loss ≤ 0.3g/cm² (metal aggregate wear layer), ≤ 0.5g/cm² (non-metal aggregate wear layer) |
| Compressive Strength | Concrete test blocks were collected according to specifications (one per 1000 m2) and tested after 28 days of standard curing. | Concrete compressive strength ≥ design value (e.g., C30 ≥ 30MPa), flexural strength ≥ 4.0MPa |
| Adhesive Strength | Using the Pull-Out Test, samples (50 mm diameter) were taken at the interface between the wear-resistant layer and concrete, and the pull-out strength was measured. | Bond strength ≥ 1.0MPa, with failure mode being "cohesive failure of concrete" (not interfacial debonding) |
3. Finished Product Protection
After acceptance, finished product protection measures must be implemented to prevent subsequent construction (such as equipment installation and pipeline laying) from damaging the floor:
Do not allow heavy equipment (such as forklifts or cranes) to directly roll over the floor (a steel plate is required).
Avoid sharp objects (such as rebar or steel pipes) from striking the floor surface.
If holes need to be drilled in the floor (e.g., to install a floor drain), use specialized drilling equipment. Manual chiseling is strictly prohibited to prevent cracking of the surrounding concrete.
IV. Special Scenarios: Managing Extreme Conditions
Large-scale floor construction is susceptible to extreme environmental impacts, such as high temperatures, low temperatures, and strong winds. Targeted adjustments to control measures are required:
During high-temperature construction (temperature ≥30°C):
Adjust the concrete pouring time to the morning and evening (avoid the high-temperature period of 10:00 AM to 4:00 PM);
Pour the concrete immediately after arrival to avoid prolonged standing (this shortens the initial setting time);
Immediately cover the wear-resistant layer after finishing to maintain moisture, and increase the watering frequency (once every hour).
Low-temperature construction (temperature ≤ 5°C):
Add antifreeze to the concrete (dosage according to the instructions, strictly prohibit exceeding the standard) to ensure the concrete enters the mold at a temperature ≥ 10°C.
After construction, cover with a thermal blanket and electric heating blanket to maintain an ambient temperature ≥ 5°C.
Extend the curing period (≥ 10 days) and remove the insulation only after the concrete strength reaches 70%.
In strong winds (wind speed ≥ 5m/s):
Suspend the application of the wear-resistant layer (to prevent the material from being blown away by the wind);
Immediately cover the concrete with plastic sheeting after pouring (to prevent rapid evaporation of surface moisture and resulting in sanding).
Through the above full-process and multi-dimensional quality control, the three core quality problems of "poor flatness, peeling of the wear-resistant layer, and shrinkage cracks" of ultra-large-area laser-leveled wear-resistant concrete floors can be effectively solved, and ultimately the floor's "high strength, high wear resistance, and high flatness" requirements can be achieved.
Note:
The parameters provided in this document are for reference only and are not mandatory. Due to differences in technical characteristics between different brands and models of laser levelers, please consult the manufacturer for a suitable solution before actual operation. This reference document assumes no responsibility for any issues arising from failure to follow the manufacturer's instructions.
Thanks to All the Friends Who Support and Trust Shandong Vanse Machinery Technology Co., Ltd.
If you want to know more about Shandong Vanse Machinery Technology Co., Ltd. or have any questions, please feel free to contact us:
Our Factory
Shandong Vanse Machinery Technology Co., Ltd.








Share this article

About the Author: Shandong Vanse Machinery Technology Co., Ltd.
Shandong Vanse Machinery Technology Co., Ltd. is a high-tech manufacturer specializing in concrete construction machinery, including laser screeds and related equipment. The company integrates R&D, production, and global sales, with products exported to over 60 countries and widely used in infrastructure projects worldwide.
Previous Post
Next Post
Related Articles
You Might Also Like
The maintenance and maintenance of the laser leveling machine that comes during the rainy season cannot be ignored
Recently lying storms throughout our country, the rainy season comes laser screed machine maintenance has become very important, the rainy season concrete ground outside can not be constructed, in the concrete laser flatflating machine idle, should be placed in a dry place, to avoid the air humidity and affect the engine start. In addition, the construction environment of the concrete laser flattening machine is not very good, after the rain will have a lot of potholes and puddles of mud accumulation, the first thing to pay attention to after the rainy season is the cleaning of the laser flatflater, of course, not only the rainy season, usually after the use of laser flatflating machine should also be cleaned in time, Failure to do so can lead to the laser leveling machine walking track under the gap in the accumulation of sludge, is a place where moisture is hidden, but also most likely to cause the track rust. The acidic composition in the rainhast water has a strong corrosive effect on the paint surface of the laser screed machine, and over time it will cause damage to the paint surface of the laser flattener, so in the season with more rain, it is best to give the laser leveling machine a paint finish. The simplest is waxing, the longer and more effective is to seal the glaze. No matter what method, All to the laser leveling machine put on a protective coat, to prevent the paint surface fade aging. The chassis of the laser screed is the closest to the ground, especially affected by road conditions, this part is most prone to rust spots, the wheel shell may even loosen perforation. Therefore, we must pay attention to the laser leveling machine chassis clean rust treatment. Rainy days, such as encountering indoor construction, laser screed machine engine is not easy to start the problem, sometimes even if forced to start up, but also has air power. The most likely is a leakage due to moisture in the ignition system, which loses its normal ignition function. Once found that because of the moisture of the ignition system caused bad ignition, engine performance, it is best to use dry paper towels or dry cloth to the inside and outside of the cable and wire drying, and then use a special desiccant spray can to spray the dryer in the split disk cap, battery connector, line connector, high-voltage line, etc. , and so on after a while can start the engineHow much can the density of concrete be improved by the high-frequency vibration concrete laser leveling compared with the ordinary model?
Compared with ordinary models, concrete laser levelings with high-frequency vibration can usually increase the density of concrete by more than 20%. Under some specific working conditions and construction circumstances, some high-performance high-frequency vibration laser leveling machines can even achieve a higher degree of improvement. The following is a detailed analysis: High-frequency vibration has a more thorough effect: The vibration frequency of a concrete laser leveling with high-frequency vibration can usually reach 3000-4000 times per minute, which is much higher than that of ordinary models. High-frequency vibration can enable the particles inside the concrete to move more fully, reduce the voids between the particles, and make the concrete structure more compact. For instance, the vibration frequency of ordinary models is relatively low, which may prevent them from fully vibrating the deeper particles inside the concrete, resulting in local pores. High-frequency vibration can more effectively transfer the vibration energy to all parts of the concrete. Especially for materials that are difficult to vibrate, such as low slump concrete and fiber-reinforced concrete, uniform compaction can still be achieved. Integrated construction reduces human error: High-frequency vibration laser leveling machines usually integrate functional components such as scrapers, vibrators and leveling plates, and can complete the processes of leveling, vibration and compaction in one go, avoiding problems such as untimely vibration and missed vibration that may occur in the step-by-step construction of ordinary models. Meanwhile, its laser system monitors the elevation of the leveling head in real time at a frequency of 10 times per second. Combined with closed-loop control technology, it ensures the uniformity of the surface elevation of the concrete during the vibration process, further enhancing the consistency of the overall density. The characteristics of concrete materials: The slump of concrete, aggregate gradation, fiber content, etc. will affect the effect of improving density. For instance, low slump concrete (with poor fluidity) experiences a more significant increase in density under high-frequency vibration, while high slump concrete (with good fluidity) may have a relatively smaller increase in density due to its already relatively good fluidity. Construction operation specifications: If the traveling speed of the high-frequency vibration laser leveling is too fast, the vibration time is insufficient, or the vibration point spacing of the ordinary model is too large during operation, it will cause the increase in density to deviate from the theoretical value. Under standardized operation, the advantages of high-frequency models can be fully exerted. Equipment performance differences: Among high-frequency vibration laser levelings of different brands and models, there are differences in the stability of vibration frequency and the uniformity of vibration force distribution, which can also lead to different effects in enhancing density. Note: The parameters provided in this document are for reference only and are not mandatory. Due to differences in technical characteristics between different brands and models of laser levelers, please consult the manufacturer for a suitable solution before actual operation. This reference document assumes no responsibility for any issues arising from failure to follow the manufacturer's instructions.Can a concrete laser leveling machine handle slopes? Which settings work best?
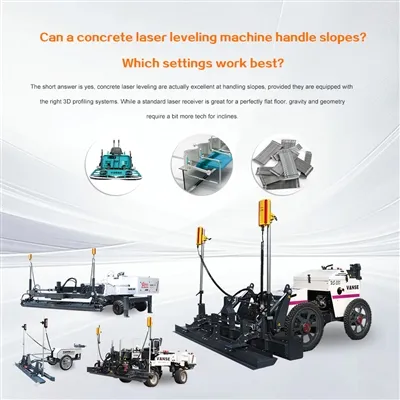
The short answer is yes, concrete laser leveling are actually excellent at handling slopes, provided they are equipped with the right 3D profiling systems. While a standard laser receiver is great for a perfectly flat floor, gravity and geometry require a bit more tech for inclines. Standard laser leveling uses a rotating laser transmitter on a tripod and receivers on the machine. This creates a flat "plane" of light. Single/Dual Slopes (2D): If you are doing a simple parking lot ramp or a consistent drainage slope, you can physically tilt the laser transmitter on its tripod to a specific percentage (e.g., a 1% grade). The machine will then follow that tilted plane.Complex Contours (3D): For complex curbs, valleys, or multi-directional slopes, the machine uses 3D Profiling Systems (often involving a Total Station or GPS). This allows the leveling to automatically adjust the head height based on its exact coordinate position on a digital map. To get the best finish on a slope, you can't just "set it and forget it." You need to account for the way wet concrete behaves under gravity. On a slope, concrete tends to "slump" or migrate downward. Setting: Keep the auger speed high enough to move excess material but not so fast that it creates a "wave" of concrete that pulls away from the high side. The vibrator is what settles the aggregate and brings the "cream" to the top. Setting: On steep slopes, lower the vibration frequency slightly. Over-vibrating on an incline can cause the concrete to fluidize too much, leading it to slide down the hill before it sets (slumping). Best Practice: Generally, you want to pull the machine up the slope or work across the fall. Pulling downhill can lead to "shingling," where the leveling head pushes too much material in front of it, resulting in an uneven thickness. If your machine has slope compensation software, ensure it is toggled on. This adjusts the hydraulic response time to ensure the leveling head reacts instantly to changes in elevation without "hunting" or bouncing, which happens more often on uneven grades. Factor Standard Flat Setting Slope Setting Laser Mode Horizontal / Level Grade / Manual Slope Vibration High / Normal Reduced (to prevent slump) Travel Speed Faster Slower & More Consistent Concrete Slump 4" – 5" 3" – 4" (Lower is better for slopes) Note: The parameters provided in this document are for reference only and are not mandatory. Due to differences in technical characteristics between different brands and models of laser levelers, please consult the manufacturer for a suitable solution before actual operation. This reference document assumes no responsibility for any issues arising from failure to follow the manufacturer's instructions.