Technical Knowledge
How to ensure the work efficiency and safety of concrete laser leveling machine during the leveling process?
During the leveling process, the concrete laser leveling machine needs to ensure working efficiency and safety to achieve efficient and reliable construction. Here are some suggestions and measures:
Ensure work efficiency:
1. Preliminary preparation:
Ensure that all work before construction is fully prepared, including inspection of the laser leveling machine, detection of concrete materials, and assessment of the construction environment
2. Proficient in operation:
Operators need to have professional skills and knowledge, and be familiar with the performance and operation of the laser leveling machine to complete the leveling work quickly and accurately.
3. Reasonable planning:
According to the construction area and requirements, reasonably plan the construction process to improve work efficiency. For example, leveling can be carried out in partitions or sections to reduce repetitive or cross-cutting operations.
4. Regular maintenance:
Regularly maintain and maintain the laser leveling machine to ensure its normal operation, extend its service life and improve work efficiency.
Use high-quality concrete materials: Choosing high-quality concrete materials can reduce the number of reworks and adjustments and improve work efficiency.
Guaranteed safety:
1. Safe operating procedures:
Develop and comply with safe operating procedures, and ensure that operators are familiar with safe operating procedures and strictly abide by them.
2. Wear protective equipment:
Operators and other on-site workers should wear appropriate protective equipment, such as hard hats, protective glasses, gloves, etc., to prevent accidental injuries
3. Equipment safety inspection:
Before and after construction, conduct safety inspections on the laser leveling machine to ensure that its structure is complete and its functions are normal.
4. Set up warning signs:
Set up obvious warning signs around the construction area to remind non-workers to stay away from the work area.
5. Training and education:
Provide regular safety training and education to operators to improve their safety awareness and ability to respond to emergencies.
6. Emergency plan:
Develop an emergency plan for possible safety accidents and conduct regular drills to ensure that staff are familiar with emergency procedures.
7. Environmental control:
The safety of the construction environment must also be controlled, such as maintaining appropriate ventilation, controlling the temperature and humidity of the stinging site, etc.
8. Regular maintenance:
Regular maintenance and upkeep can ensure the safe operation of the laser leveling machine and reduce failures and potential safety hazards.
9. Compliance inspection:
Ensure that all equipment and materials used comply with national and local regulations to avoid safety risks caused by non-compliance
To sum up, in order to ensure the working efficiency and safety of the concrete laser leveling machine during the smoothing process, it is necessary to start from many aspects, including preliminary preparation, operating skills, compliance with equipment maintenance safety regulations, and the formulation of emergency plans. By comprehensively considering these factors and taking appropriate measures, efficient and safe construction can be achieved.


Thanks to All the Friends Who Support and Trust Shandong Vanse Machinery Technology Co., Ltd.
If you want to know more about Shandong Vanse Machinery Technology Co., Ltd. or have any questions, please feel free to contact us:
Our Factory
Shandong Vanse Machinery Technology Co., Ltd.








Share this article

About the Author: Shandong Vanse Machinery Technology Co., Ltd.
Shandong Vanse Machinery Technology Co., Ltd. is a high-tech manufacturer specializing in concrete construction machinery, including laser screeds and related equipment. The company integrates R&D, production, and global sales, with products exported to over 60 countries and widely used in infrastructure projects worldwide.
Previous Post
Next Post
Related Articles
You Might Also Like
What details should be paid attention to during the debugging and calibration of the concrete laser leveling machine?
The commissioning and calibration of a concrete laser leveling machine is crucial for ensuring high-quality flooring (high flatness and levelness). This process requires meticulousness and patience. The following are key details to consider, divided into several key phases: Before beginning any commissioning, thorough preparation is the foundation for safety and success. Mechanical part: Check the leveler's structural parts, hydraulic cylinders, scrapers, and vibrators for damage, looseness, or oil leakage. Ensure that the tracks and tires are intact and free of damage. Hydraulic system: Check that the hydraulic oil level is within the standard range and that the oil is clean. After starting the engine, listen for any abnormal noises coming from the hydraulic pump and motor. Power system: Check whether the fuel, oil, and coolant are sufficient. Ensure that the battery is fully charged and the wiring connections are secure. Stability: Mount the laser transmitter on a solid, stable, vibration-free tripod. Avoid placing it on soft ground or in a location where it may be hit by people or equipment. Position and height: The installation position should cover the entire construction area and be as close to the center as possible to reduce the slight error caused by distance. The height should be raised so that the laser beam is higher than the working range of the receiver on the leveling machine. Leveling: This is the most critical step! Use the laser transmitter's built-in bubble or electronic level to accurately adjust it to a horizontal state (usually in 360° rotation scanning mode). Even a slight tilt will cause the entire working surface to have a slope error. Accuracy selection: Select the appropriate accuracy level according to the construction requirements (for example, ±10mm/@30m or ±3mm/@30m). The higher the accuracy, the higher the debugging requirements. Elevation benchmarks: Verify the on-site elevation benchmarks (usually provided by a surveyor) with the construction crew and double-check them at multiple locations using a handheld laser receiver. Base treatment: Ensure that the flatness and density of the base (usually crushed stone or compacted soil) basically meet the standards, without obvious bumps. This is the core link, the purpose of which is to enable the machine to accurately respond to laser signals. Securely mount the laser receiver on the mast of the leveling machine to prevent it from shaking. Check the receiver's battery level to ensure it is functioning properly. Verify that the indicator lights or display on the receiver are functioning properly. Drive the leveler to the area covered by the laser transmitter signal, preferably close to the transmitter and where the ground elevation is close to the design elevation. Manual mode: Operate the machine to raise or lower the scraper bottom until it is exactly at the designed elevation (which can be verified by measurement). Calibrating the Receiver: At this correct height, adjust the receiver up and down on the mast so that its center point (usually the green light or display "0") is aligned with the laser beam. Locking the reference: Execute "Set reference point", "Reset to zero" or similar operations on the control panel. The control system will remember this height as the "0" position of the laser signal (i.e. the designed elevation). Sensitivity: Sets the hydraulic system's response sensitivity. A setting that's too high will cause the scraper to frequently adjust up and down, creating a "chasing wave" phenomenon that affects smoothness. A setting that's too low will result in a sluggish response and poor accuracy. Usually, start with a mid-range value. Deadband: Set a small allowable error range (such as ±1-2mm). Within this range, the system will not operate to avoid excessive fine-tuning of the hydraulic system and improve construction fluency. After setting the benchmark, do not start pouring immediately. Instead, drive the machine forward, backward, left, and right within the signal range while observing the height display on the control panel. Observe whether the scraper can rise and fall smoothly and accurately according to the instructions. Stop the machine at different points with known elevations, use a ruler or level to actually measure the height of the scraper bottom, and compare it with the designed elevation to verify the height accuracy of the control system. Commissioning and calibration are not a one-time thing and require continuous monitoring during construction. Every 1-2 hours, or when a collision is suspected, the laser transmitter must be rechecked to ensure it is still in an absolutely horizontal state. Vibrations, wind or accidental contact can cause it to deviate. Regularly use a ruler to spot-check the surface elevation of leveled but not initially set concrete, and cross-verify it with the machine display value. The slump (dryness or thinness) of concrete significantly impacts leveling results. If the material is too dry, the machine will experience significant resistance and may "climb a slope"; if the material is too thin, the machine will easily "get stuck." Maintaining consistent concrete supply quality is crucial. Plan the movement path of the leveler to ensure it is always within the effective coverage of the laser signal and avoid signal blind spots. Lost signal: Once the receiver alarm indicates that the laser signal is lost, construction should be stopped immediately, the cause should be found out (blocked, transmitter power off, out of range, etc.), and the signal should be restored and recalibrated before continuing. Accuracy deviation: If a systematic deviation (overall high or low) is found during spot checks, the machine should be stopped immediately and the laser transmitter level and the leveling machine's reference settings should be rechecked. Personnel safety: When debugging and running the machine, make sure there is no one around, especially pay attention to the height of the laser beam to avoid direct exposure to human eyes. Equipment safety: When moving the leveler, be careful to avoid obstacles such as steel mesh and elevation piles to prevent damage to the tracks and hydraulic cylinders. Stage Core details Purpose Prepare Laser transmitter is installed absolutely horizontally Establishing an accurate horizontal reference plane Check site elevation benchmarks Ensure consistency between design and site Calibration Benchmark the machine at a known correct elevation Let the machine "learn" what the design elevation is Trial operation and actual test verification Cross-check to ensure system accuracy Construction Regularly review laser leveling and machine accuracy Prevent errors caused by vibration and collision Monitor concrete material properties and signal status Ensure a stable and reliable construction process Only by following the above details, strictly following the equipment manual, and working closely with on-site surveyors can the technical advantages of the laser leveling machine be fully utilized to cast ultra-high-precision high-quality floors.Safety tips for ride-on power trowels in tight indoor spaces
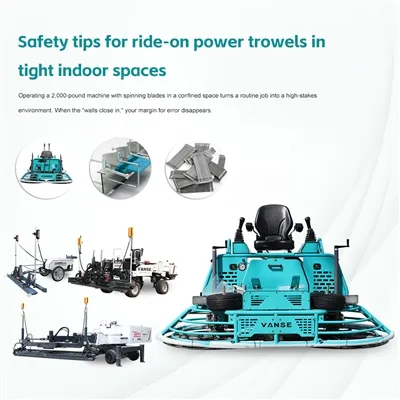
Operating a 2,000-pound machine with spinning blades in a confined space turns a routine job into a high-stakes environment. When the "walls close in," your margin for error disappears. Here is the safety protocol for maneuvering ride-on trowels in tight indoor quarters. This is the #1 danger for indoor ride-on use. Standard gas or diesel engines produce Carbon Monoxide (CO), which can reach lethal levels in minutes in a closed room. Active Ventilation: Do not rely on "open doors." You need high-volume axial fans (blowers) to create a "push-pull" airflow system. CO Monitors: The operator must wear a personal CO monitor clip. If it beeps, the site is evacuated immediately. Catalytic Converters: Ensure your machine is fitted with a "scrubber" (catalytic muffler) to reduce emissions, or better yet, use Propane-powered or Electric trowels for indoor work. In tight spaces, the machine's "tail swing" is your biggest enemy. No-Go Zones: Establish a rule that no ground crew (manual finishers) can be within 10 feet of the machine when it is near a wall or pillar. Pillar Strategy: When circling columns, always keep the machine moving in a direction where the operator has a clear line of sight to the gap between the machine and the obstruction. Avoid "Backing Into" Corners: Always try to nose into tight corners so you have the best visibility to back out into the open. If a spinning blade hits a protruding pipe, drain, or a structural steel column, the machine can jerk or spin violently. Mark Obstructions: Use bright spray paint or "flags" on any floor penetrations (pipes/conduit) that are shorter than the operator's seated eye level. Low Speed Near Edges: Reduce RPM when working within 2 feet of a wall. This gives you more reaction time if the machine "catches" an edge. Indoor spaces often have poor airflow for flammable vapors. Cool Down Before Fueling: Never refuel a hot engine inside. The "flash point" of spilled gas on a hot manifold in a room with no wind is a recipe for a fireball. Spill Kits: Keep a spill kit nearby. A hydraulic hose burst on fresh concrete is a slip hazard and a nightmare to clean. Danger Preventive Action CO Poisoning Use CO monitors + High-velocity fans Wall Impact Maintain "Slow-Zone" within 3ft of walls Tip-Over Watch for floor "drop-offs" or open elevator shafts Communication Use hand signals (it's too loud for shouting) Lighting Ensure 2,000+ lumens of temporary work lighting Before starting, test the kill switch. In a tight space, if you lose control or the throttle sticks, you have a fraction of a second to shut down before hitting a structural wall. If the seat-activated safety switch is bypassed or broken, do not operate the machine. Would you like me to look up the OSHA (or local) requirements for CFM airflow based on the square footage of your indoor project? Contact us NOW Note: The parameters provided in this document are for reference only and are not mandatory. Due to differences in technical characteristics between different brands and models of laser levelers, please consult the manufacturer for a suitable solution before actual operation. This reference document assumes no responsibility for any issues arising from failure to follow the manufacturer's instructions.How to construct concrete laser leveling machine in complex environment
Concrete laser leveling operate in complex environments, requiring specialized plans tailored to specific environmental characteristics (such as confined spaces, areas with varying heights, inclement weather, and numerous obstacles), ensuring a balanced balance of efficiency, precision, and safety. The following details construction strategies and key technical points based on common complex environments: The core challenges of confined spaces are limited equipment maneuverability and the susceptibility of laser signals to obstruction. These limitations must be overcome through equipment selection and operational optimization. Select a compact machine: Prefer a small laser leveling (such as a walk-behind or mini-ride model) with a wheelbase ≤ 2.5m and a width ≤ 1.2m. Keep the minimum turning radius within 1.5m to allow for operation in narrow passages (widths ≥ 1.5m). Laser System Adaptation: Utilize multi-transmitter networking technology, placing 2-3 laser transmitters at different locations within the space (e.g., corners, near pillars) to prevent a single transmitter from being blocked by walls or pillars. Use anti-interference laser receivers (operating at 635nm red light or 532nm green light) to reduce signal interference from obstacles. Zoned and Miniaturized Operations: Divide a narrow space into multiple micro-blocks, such as 3m x 3m units, based on the equipment's operating radius (usually 2-3m). Work progresses zone by zone, avoiding frequent equipment maneuvers. Manually Assisted Spreading and Finishing: Due to space constraints, large-scale spreading equipment cannot be used. Manually spread the concrete in advance to a height 3-5cm above the design elevation (to reduce the burden on the equipment). Corners that cannot be reached by the equipment (e.g., walls and pillar bases) are manually leveled using aluminum alloy scrapers and vibrators to ensure a smooth transition with the machine work area. Real-time Signal Monitoring: Assign a dedicated person to monitor the laser receiver indicator light (green indicates normal operation, red indicates signal loss). Immediately stop the machine and adjust the transmitter position if a signal interruption is detected to avoid elevation errors caused by signal deviation. Precise control of elevation gradients is required in areas with complex level differences to avoid step-like errors. The key lies in the flexible adaptability and reference setting of the laser system. Slope Construction: Slope Sensor Interaction: Install a slope sensor (accuracy ±0.1%) on the leveling machine. Interact with the laser system to preset the laser plane inclination angle based on the designed slope (e.g., 2% or 5%). During operation, the machine automatically adjusts the scraper blade height according to the slope, ensuring that the elevation difference per meter meets the designed value (e.g., a 2% slope means a 2cm elevation difference per meter). Step/Platform Construction: Layered Reference Stakes: Set layered reference stakes (spacing ≤3m) at the intersection of height differences. Use a total station to calibrate the top elevation of the stakes. Mount the laser transmitter on the stakes to create a "stepped laser plane." Complete the lower elevation area first, then adjust the laser system parameters to accommodate the higher elevation area. Overlap the work at the intersection by 5-10cm. Preventing Segregation on Slopes: Control the concrete slump to 80-100mm (slightly lower than when working on flat ground) to prevent aggregate sinking due to the slope. Lay the concrete from the bottom of the slope toward the top, with each layer ≤20cm thick to prevent concrete from sliding down. Edge Height Adjustment: Set temporary barriers (height equal to the designed height difference) at the edge of the height difference (e.g., where the platform meets the ramp). After the equipment is in place, manually remove the barriers and trim the edges to ensure a height difference error of ≤3mm. Obstacles (e.g., rebar, pipelines, embedded components, walls) can hinder equipment movement and laser signals, requiring path planning and protective measures. Locate obstacles using 3D modeling: Utilize BIM technology or on-site surveying to mark the location, height, and spacing of obstacles (e.g., pipeline depth, rebar mesh elevation). Generate a feasible equipment route map, avoiding areas with dense obstacles (manual handling is preferred for areas with spacing ≤1m). "Obstacle Avoidance + Compensation" Combined Process: The equipment operates by circumventing obstacles 10-15cm from the edge. Pre-defined obstruction areas are manually compensated using a small vibrator (≤1m in length). After compensation, a 2m ruler is used to level the area with the machine work area to ensure a smooth connection. Signal Blind Spot Solutions: For areas blocked by walls or large structures, use wired references (e.g., installing aluminum alloy guide beams next to the obstacles, attaching the laser receiver to the guide beams, and using the guide beams to transmit the elevation reference). Alternatively, use a handheld laser leveler for real-time calibration of manually adjusted areas. Equipment Collision Protection: Install rubber anti-collision strips on the front of the equipment and wear-resistant alloy plates on the bottom of the scraper to prevent scratching rebar. During operation, a supervisor should be assigned to provide real-time distance between the equipment and obstacles, ensuring a safe distance of ≥5cm. Weather factors can affect concrete performance and equipment stability, requiring targeted adjustments to construction parameters and schedules. Concrete Temperature and Initial Setting Control: Use cooling aggregates (such as ice water mixing) to keep the concrete temperature at ≤ 30°C upon entering the mold. Add a retarding water reducer to extend the initial setting time (from 2-3 hours to 4-5 hours) to prevent initial setting before the equipment is fully operational. Protecting the Laser System from Sun Exposure: Install a sunshade for the laser transmitter to prevent direct sunlight from overheating and freezing the device. Regularly water the receiver to cool it down (keep the surface clean to prevent high temperatures from affecting signal reception sensitivity). Staggered Operation: Choose construction hours between 6:00 AM and 4:00 PM to avoid the midday heat, and shorten the interval between work steps (complete finishing within 30 minutes after leveling). Concrete Insulation and Freeze Protection: Use hot water mixing or add antifreeze to ensure the concrete temperature at ≥ 10°C upon entering the mold. Immediately cover the unused area with a blanket after paving to prevent low temperatures from reducing fluidity. Equipment Preheating and Lubrication: Preheat the engine for 10-15 minutes before starting. Run the hydraulic system at no load for 3-5 minutes until the oil temperature reaches ≥15°C to prevent component wear caused by low temperatures. Install the laser transmitter away from drafts and, if necessary, wrap it in an insulation cover to prevent frost. In high winds (wind speed ≥ Level 5): The laser transmitter must be mounted on a weighted base (weighing ≥50kg) or a windproof transmitter (wind resistance rating ≥ Level 8) must be used. During operation, reduce the laser reception range (adjust the receiver sensitivity to "high") to minimize wind-induced signal fluctuations. In Rain and Snow: In light rain, a temporary awning can be constructed (e.g., covering the work area with tarpaulin). Waterproofing can be added to the concrete. In moderate rain or snow, work should be suspended immediately. Cover the paved concrete with tarpaulin and drain the water. Before resuming work, check the moisture content of the base layer (≤10%). Unstable terrain can cause base settlement or equipment tilt, requiring enhanced base treatment and equipment support. Soft Base Treatment: Use a replacement method (replace with 30-50cm of graded sand and gravel) or reinforce with cement-soil mixing piles to ensure a base bearing capacity ≥150kPa to prevent equipment sinking during operation (settlement ≤2mm/h). Leveling Mountainous Terrain: First, use a bulldozer to roughly level the terrain (slope ≤10%). Then, lay a 10-15cm thick crushed stone cushion and compact it. This serves as the base for the laser leveling machine, reducing the need for frequent adjustments to the equipment due to uneven terrain. Track/Tire Grounding Treatment: Lay steel plates (thickness ≥ 10mm) or roadbed boxes on soft subgrade to increase the equipment's ground contact area (ground pressure ≤ 50kPa) and prevent the equipment from sinking. Tracked equipment can be tightened to improve its climbing ability (maximum climbing angle ≤ 15°). Real-Time Tilt Monitoring: The equipment is equipped with a horizontal tilt sensor that automatically alarms when the tilt angle exceeds 3°, prompting the operator to immediately adjust the equipment's position to avoid leveling errors caused by machine tilt. Emergency Plan Preparation: Develop contingency plans for equipment failure, signal interruption, and abnormal concrete supply, including backup laser transmitters, small generators (for power outages), and manual leveling tool kits (vibrator, scraper, trowel), etc. Real-Time Quality Inspection: After completing every 50 square meters, use a laser leveler (accuracy ±0.5mm) to check levelness. Areas with errors exceeding 5mm require immediate re-leveling to avoid further losses from rework. Specialized team training: Operators undergo complex environment simulation training, focusing on skills such as obstacle avoidance, signal calibration, and emergency shutdown, ensuring that each operator masters at least two emergency response methods. Through these strategies, the concrete laser leveling machine can achieve the goal of "maintaining accuracy and minimizing efficiency loss" in complex environments. The flatness pass rate remains above 90%, and operating efficiency only decreases by 10%-20% compared to conventional environments (400-500 square meters/day in conventional environments, 300-400 square meters/day in complex environments). The core principles are: proactively adapting to the environment, flexibly adjusting parameters, strengthening human-machine collaboration, and strictly controlling quality milestones. ARMOUR JOINT CONCRETE LASER LEVELING MACHINE POWER TROWEL TOPPING SPREADER