Technical Knowledge
Concrete laser leveling machine maintenance process
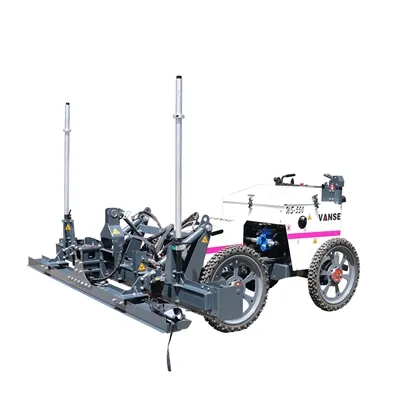
The concrete laser leveling is a piece of equipment widely used in concrete construction. Its efficient flatness and precise elevation control have won the favor of the majority of constructors. In order to maintain its good working condition and extend its service life, regular maintenance and repairs are essential. The following is the maintenance process of concrete laser leveling machine.
Daily maintenance: After each day's work, the following maintenance work should be performed.
Clean the machine surface: Wipe the machine surface with a damp cloth to remove dust and debris.
Check the oil level: Check the oil level of the engine and hydraulic system to make sure it is within the normal range.
Check the coolant: Check the coolant (antifreeze) level. If the level is too low, add an appropriate amount of coolant.
Weekly maintenance: The following maintenance work should be performed every week.
Check tire pressure: Check the pressure of the machine's tires to make sure it is within the normal range.
Check the hydraulic pipeline: Check whether there is oil leakage at the joint of the hydraulic pipeline. If oil leakage is found, deal with it immediately.
Check the laser receiver: Check whether the laser receiver is clean. If dust or debris is found, clean it.
Monthly maintenance: The following maintenance work should be performed every month.
Check the engine: Check the operation of the engine and make sure the engine sound and vibration are normal.
Check the hydraulic pump: Check the working condition of the hydraulic pump to ensure that the hydraulic pump is operating normally.
Check the laser transmitter: Check the condition of the laser transmitter and make sure the lens of the laser transmitter is clean and intact.
Annual maintenance: Comprehensive maintenance should be carried out every year, including the following work.
Change engine oil and filter: Replace your engine's oil and air filter to ensure smooth engine operation.
Check the electrical system: Check the wiring and components of the electrical system to ensure the safety of the electrical system.
Check the hydraulic system: Check the components and pipelines of the hydraulic system to ensure the normal operation of the hydraulic system.
The above is the maintenance process of the concrete laser leveling machine. Through regular maintenance work, you can ensure that the machine is always in good working condition, improve work efficiency, and also extend the service life of the machine. During use, if any abnormality occurs, stop the machine immediately for inspection and contact professionals for repair.
Thanks to All the Friends Who Support and Trust Shandong Vanse Machinery Technology Co., Ltd.
If you want to know more about Shandong Vanse Machinery Technology Co., Ltd. or have any questions, please feel free to contact us:
Our Factory
Shandong Vanse Machinery Technology Co., Ltd.








Share this article

About the Author: Shandong Vanse Machinery Technology Co., Ltd.
Shandong Vanse Machinery Technology Co., Ltd. is a high-tech manufacturer specializing in concrete construction machinery, including laser screeds and related equipment. The company integrates R&D, production, and global sales, with products exported to over 60 countries and widely used in infrastructure projects worldwide.
Previous Post
Next Post
Related Articles
You Might Also Like
What is the working efficiency of the concrete laser leveling machine in construction?
The working efficiency of the concrete laser leveler is affected by many factors such as equipment model, construction conditions, concrete properties, etc., and varies greatly in different scenarios. The following is an explanation from three aspects: core influencing factors, typical efficiency data and improvement strategies: Leveling width: The leveling width of common models is 2.5-6 meters. Wide-width equipment (such as 6 meters) covers a larger area in a single operation, and the efficiency is increased by about 30%. Travel speed: The conventional construction speed is 1-3 meters/minute, and the high-frequency vibrating model (such as 100 times/minute) can appropriately increase the speed to 2-4 meters/minute. Automation degree: The fully automatic hydraulic drive model is 20%-50% more efficient than the semi-automatic model, and no frequent manual adjustment is required. Site scale: When a large area is continuously constructed (such as more than 5000㎡), the equipment does not need to be frequently transferred, and the efficiency can reach 1.5-2 times that of a small area (<1000㎡). Terrain complexity: Complex terrain with high flatness requirements (such as slopes and arc angles) requires multiple round trips, and the efficiency is 30%-40% lower than that of a flat site. Slump: Concrete with a slump of 180-220mm has good fluidity and its leveling efficiency is about 25% higher than that of concrete with a low slump (<150mm). Initial setting time: Concrete with an initial setting time of 4-6 hours can be constructed continuously. If the initial setting is too fast (<3 hours), it needs to be worked in blocks, and the efficiency drops by about 40%. Indicators Laser leveling machine Traditional manual labor + ordinary machinery Efficiency improvement ratio Daily operation area 1500-3500㎡ 500-800㎡ 3-4.5 times Staffing 3-5 people (including operation and assistance) 8-12 people 50%-60% manpower saving Smoothness error ±3-5mm/2m ±8-15mm/2m Precision improvement of more than 50% Construction period 10,000㎡ site about 5-7 days 10-15 days Shortening of construction period by 50% Choose the machine model according to the size of the site: choose a wide model (5-6 meters) for more than 5000㎡, and a narrow model (2.5-3 meters) for narrow areas. Maintain equipment regularly: keep the hydraulic system pressure stable (standard pressure 16-20MPa), replace worn scrapers (when the wear amount is >2mm), and avoid downtime due to equipment failure. Block construction planning: divide the construction blocks according to the principle of "from inside to outside, zone flow", and control the area of each block to 1000-1500㎡ to reduce the transfer time. Multi-machine collaborative operation: Large-scale projects can use the combination of "1 laser leveling machine + 1 concrete pump truck + 2 concrete placing machines" to improve the efficiency of placing and leveling. Strictly control the slump: the slump of pumped concrete should be 180-220mm, and the slump of non-pumped concrete should be 150-180mm, to avoid the leveling speed being affected by over-dry or over-thin concrete. Reasonably arrange the pouring time: avoid high temperature (>35℃) or low temperature (<5℃) periods. When the temperature is high, a retarder can be added to extend the initial setting time to 6-8 hours. Operators need to master the "rough leveling first and then fine leveling" process: the rough leveling speed is 3-4 meters/minute, and the fine leveling speed is 1-2 meters/minute to avoid excessive vibration at one time. Assistants need to handle the corner areas in time: Edges that cannot be covered by the laser leveling machine (such as corners and column roots) need to be leveled by a dedicated person with a small vibrator to avoid secondary rework. Attenuation scenarios Efficiency reduction ratio Countermeasures Construction in rainy season (flooding on the ground) 30%-50% Drain water in advance and lay steel roadbed to reduce the risk of equipment getting stuck Construction at night (lack of lighting) 20%-30% Install high-brightness LED light sets, and operators wear night vision assistance equipment Multi-task cross-operation 25%-40% Define construction restricted areas and coordinate process connections (e.g., prohibit people from entering within 4 hours after leveling) Concrete supply interruption Calculated by interruption time Put aside 2 concrete mixer trucks to ensure supply continuity The average working efficiency of the concrete laser leveling machine is about 1500-3500㎡/day (single machine), which is 3-4.5 times that of traditional manual leveling. Its efficiency depends on the coordination of equipment selection and construction management. By optimizing machine configuration, controlling concrete performance and standardizing construction processes, the equipment efficiency can be maximized to achieve dual optimization of construction period and cost. In actual application, it is necessary to flexibly adjust the strategy according to the characteristics of the project to achieve the best construction efficiency.What are the main components of a concrete trowel?
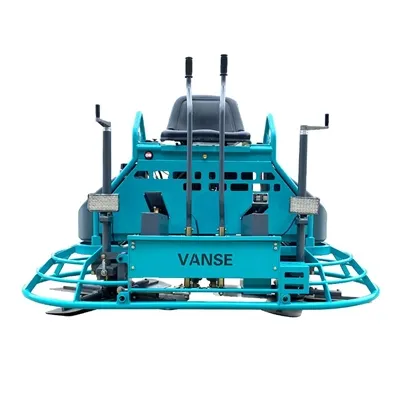
– This is the power source of the trowel. There are two common types: electric and fuel-powered. Electric trowels are powered by electric motors. Their advantages are quiet operation, no pollution, and easy operation. They only need to be connected to the power supply. For example, the power of electric trowels used in small indoor construction sites is generally around 1-2 kilowatts. Fuel-powered trowels are powered by gasoline or diesel engines. This power unit is powerful and suitable for large outdoor concrete construction sites, especially when there is no power supply. Its engine power can reach 3-5 kilowatts, which can meet the needs of large-scale, high-intensity troweling operations. – Mainly include belts, chains and gears. The function of the transmission components is to transmit the power generated by the power unit to the trowel working parts. For example, the belt drive is relatively stable and can effectively reduce vibration. It is widely used in some trowel machines with high precision requirements; chain drive has high transmission efficiency, can withstand large loads, and is suitable for trowel machines with high power; gear drive can accurately control the speed ratio, so that the trowel working parts can obtain a stable speed. – The trowel disc is the part that directly contacts the concrete surface. It is generally a round metal disc, and its material requires high strength and wear resistance. The trowel blade is installed on the trowel disc, which is usually a blade made of wear-resistant alloy steel or special plastic. The number and shape of the trowel blades will vary depending on the model and purpose of the trowel machine. For example, in the rough trowel stage, thicker and larger angle trowel blades are used to quickly level the concrete surface; in the fine trowel stage, thinner and smaller angle trowel blades are used to make the concrete surface smoother. – The operating handle is convenient for the operator to hold and control the movement direction of the trowel machine. Its design conforms to the principles of ergonomics, allowing the operator to operate comfortably for a long time. The control device is usually installed near the operating handle, including the start and stop buttons, and the speed adjustment knob. The operator can easily turn on or off the trowel through the control device, and adjust the working speed of the trowel according to the state of the concrete and the construction requirements. – The body is the main frame of the entire trowel, which supports and connects other parts. It is usually made of solid metal materials such as steel or aluminum alloy to ensure the overall stability of the trowel. The chassis is located at the bottom of the trowel and is used to install the trowel working parts and power devices, etc. The design of the chassis also takes into account the balance and stability of the machine to prevent the trowel from shaking or tipping over during operation.Detailed explanation of concrete laser leveling machine pouring leveling construction and leveling control matters
Detailed explanation of concrete laser leveling machine pouring leveling construction and leveling control matters 1. Preparation 1.1 After the base layer is processed, the equipment of the laser paver is debugged, and the fixed reference level point is drawn according to the original level point; the non-woven fabric is laid, the side formwork is supported, the laser transmitter is erected, and the ground level is introduced according to the original level point. Laser leveling machine. 1.2 Conveying concrete Commercial concrete is used, and the commercial concrete is transported to the entrance and exit of the garage by tank truck, and then transported to the construction site by a three-wheel dump truck. 1.3 Standard calibration Use a hand-held laser receiver to check the elevation of the floor, introduce the elevation into the laser paver, and adjust the reference point (±0.00) on the leveling machine. 2. Concrete paving Pouring steps: (1) After the formwork is supported, the warehouse should be cleaned one day in advance before pouring concrete, rinsed and soaked with water. When pouring is approaching, drain the open water and sweep the cement slurry or interface agent. At this time, no obvious water accumulation is strictly prohibited. If there is, it must be resolutely removed before paving concrete. (2) After the concrete is put down, it should be preliminarily leveled, and the leveling height should be 3 cm thicker than the elevation. Then level it with a laser paver. The corners that cannot be leveled can be leveled with a gasoline leveler or manually. (3) When the warehouse near the wall is being poured, after the leveling machine walks over, it must be scraped with a scraper in time. and so on. (4) For areas where concrete mixer trucks cannot be driven to the site, tractors should be used to transfer concrete. After the pouring is completed, the floor finishing construction begins when the concrete is initially set. (5) When the warehouse near the wall is being poured, it must be leveled with a scraper in time after the leveling machine has passed by. and so on. (6) For areas where concrete mixer trucks cannot be driven to the site, tractors should be used to transfer concrete. After the pouring is completed, the floor finishing construction begins when the concrete is initially set. 3. During construction, the laser signal received by the receiver of the laser paver (frequency of 10 times per second) automatically adjusts the elevation in real time to ensure that the construction elevation is always at the set standard. Because the laser transmitter is fixed after being set up, it can ensure that the construction of a large area of ground does not produce cumulative errors. 4. During the construction, the operator uses a hand-held laser receiver to detect the ground after the machine is constructed, and again ensures that the flatness error is within the controllable range. If there is anything you don't understand, you can consult us, and we will continue to answer for you.