Precision Control Principle of Laser Leveling Machine in Superflat Floor Construction
April 29, 2026
Precision Control Principle of Laser Leveling Machine in Superflat Floor Construction 2
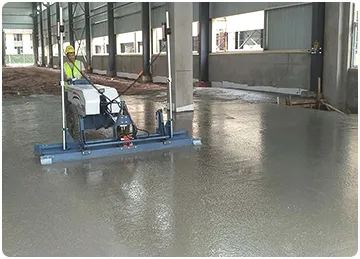
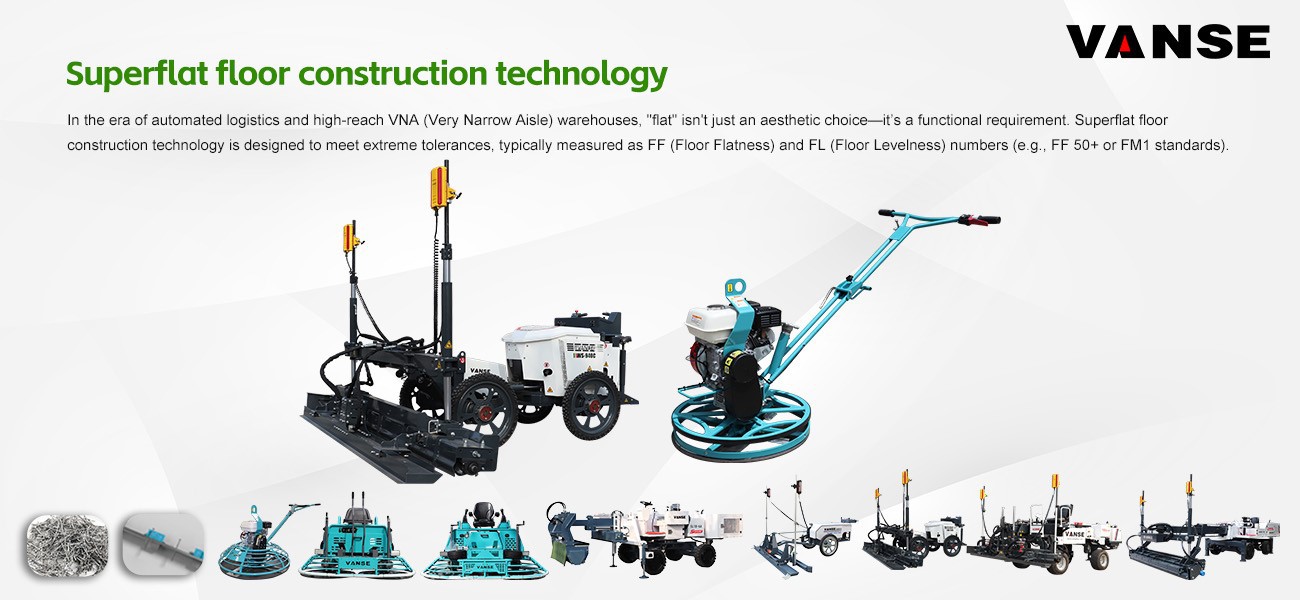
Achieving a Superflat floor (FM1/FM2 or FF 50+) isn't just about having a steady hand; it’s about high-speed physics and real-time data. If you’re a contractor looking to bid on high-spec logistics hubs or robotic warehouses, you need to understand the Precision Control Principle that makes a Concrete Laser Leveling Machine the undisputed king of the job site.
Here is the "under-the-hood" breakdown of how this technology works, and how the Vanse professional fleet turns these principles into flawless results.
1. The "Benchmark": Constant Laser Reference
The heart of the system is the Laser Transmitter. It sends out a 360-degree rotating beam that creates a perfectly horizontal (or sloped) reference plane over the entire work area.
The Vanse Advantage: Most Vanse machines, are designed to work with world-class laser systems (Leica/Trimble). This transmitter stays stationary, ensuring that the "zero point" never shifts, regardless of the terrain or machine movement.
2. The "Eyes": High-Frequency Receivers
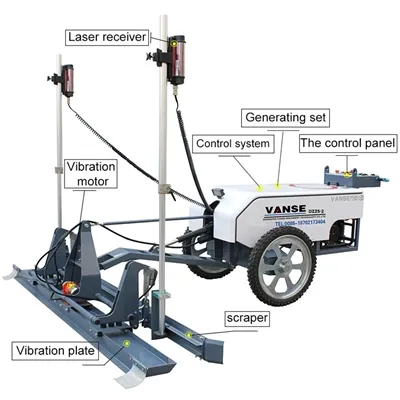
Mounted on both sides of the machine's leveling head are the Laser Receivers.
The Principle: These receivers detect the laser beam and send height data to the on-board computer 10 times every second. This is far faster and more accurate than any human eye could ever hope to be.
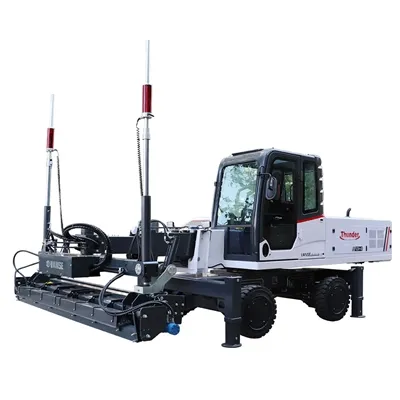
The Vanse Workflow: Because the Vanse YZ30-4E Telescopic Boomed Laser leveling has such a long reach (6 meters), the receivers can maintain a "clean" signal without the interference of moving wheels on wet concrete, which is a major factor in hitting those ultra-high FL (Levelness) numbers.
3. The "Muscle": Instant Hydraulic Feedback
This is where the magic happens. The computer compares the data from the receivers to the benchmark. If the head is even 1mm too high or low, it sends an immediate command to the Hydraulic System.
The Principle: The hydraulic actuators make micro-adjustments to the leveling head's elevation in real-time. This ensures that the auger (which removes excess concrete) and the vibrator (which consolidates the slab) are always at the exact elevation required. Vanse Integration: To make this process smoother, it helps if the concrete is placed evenly first. Using a Vanse Concrete Distributor or a Mini Dumper to place the mix prevents the laser leveling from "fighting" massive piles of concrete, allowing the hydraulic system to focus on precision rather than heavy lifting.
4. Consolidated Finishing: Preserving the Level
The precision control doesn't stop once the leveling passes. The surface must be finished without losing that laser-perfect flatness.
The Principle: You need to densify the slab without creating new "waves." The Vanse Workflow: Use a Vanse Automatic Topping Spreader to apply hardener uniformly. Manual throwing creates "hills" that ruin FF scores. Follow up with a Vanse Ride-on Power Trowel. With its high-torque engine and precision pitch control, it burnishes the floor to a mirror finish while maintaining the flatness established by the laser leveling. Finally, use a Vanse Concrete Cutting Machine (Floor Saw) for crisp contraction joints that won't spall or lift, preserving the floor's long-term FF/FL integrity.
Why "The Vanse System" Wins the FF/FL Game
Foreign buyers and engineers don't just look for a "smoothing tool"; they look for a System of Precision. Here is the ROI for your business:
Control Element
Traditional Manual Result
Vanse Laser Control Result
Reaction Speed
Slow (Human observation)
Instant (10x per second)
Leveling Accuracy
±5-10mm over 3m
±1mm over 3m (Superflat)
Surface Density
Uneven (Manual vibration)
Uniform (High-frequency vibration)
Joint Quality
Ragged (Hand-tooling)
Clean & Straight (Floor Saw)
Labor Cost
High (12+ man crew)
Low (4-6 man crew)
Final Thought
Precision control isn't a "feature"-it’s a requirement. If you are bidding on modern industrial projects, you aren't just competing on price; you are competing on accuracy. By utilizing a complete fleet from Vanse Machinery (www.vansemac.com), you are guaranteeing that every square meter of your floor meets the highest international standards.
Ready to hit those FM1 numbers? Explore the full technical breakdown at Vanse and see how our laser leveling technology can revolutionize your business.
Note:The parameters provided in this document are for reference only and are not mandatory. Due to differences in technical characteristics between different brands and models of laser levelers, please consult the manufacturer for a suitable solution before actual operation. This reference document assumes no responsibility for any issues arising from failure to follow the manufacturer's instructions.
About the Author: Shandong Vanse Machinery Technology Co., Ltd.


Shandong Vanse Machinery Technology Co., Ltd. is a high-tech manufacturer specializing in concrete construction machinery, including laser screeds and related equipment. The company integrates R&D, production, and global sales, with products exported to over 60 countries and widely used in infrastructure projects worldwide.

How to Control the Quality of Ultra-Large Laser-Leveled Wear-Resistant Concrete Floors
Quality control for ultra-large laser-leveled, wear-resistant concrete floors requires a comprehensive process encompassing "pre-construction prevention, in-construction control, and post-construction acceptance." Combining the technical characteristics (laser precision leveling and the synergistic effect of wear-resistant materials) with the challenges of ultra-large-scale construction (temperature cracking, flatness control, and interface bonding), a control system is established across five core dimensions: personnel, materials, equipment, process, and environment. This can be broken down into the following key steps: Pre-construction preparation for ultra-large flooring directly impacts subsequent quality stability, focusing on addressing three key issues: "unified technical standards, adequate resource allocation, and proactive risk mitigation." Drawing Refinement and Technical Briefing: Based on the building's function (e.g., load and flatness requirements for factories and logistics warehouses must be clearly defined), floor compartment design should be refined (extra-large areas should be divided into 6m×6m or 8m×8m compartments to avoid thermal stress cracking). Key parameters should be clarified, including laser leveling accuracy (typically ±3mm/2m), wear-resistant material dosage (approximately 5-7kg/m2 for metallic aggregates, 3-5kg/m2 for non-metallic aggregates), and concrete strength grade (minimum C30, flexural strength ≥4.0MPa). Technical briefings should be conducted for all employees, with a focus on training laser operators, concrete vibrators, and wear-resistant material spreaders to ensure that all positions understand the key technical aspects of flatness control, wear-resistant layer bonding, and crack prevention. Risk Contingency Plan Development: To address potential issues that may arise during large-scale construction (e.g., insufficient initial setting time for concrete resulting in inability to apply the wear-resistant layer, laser equipment failure resulting in uneven flatness, and cracking due to high summer temperatures), develop a contingency plan: Confirm the initial setting time of concrete with the commercial concrete mixing plant in advance (adjusted to the temperature; ≥4 hours in summer, ≥6 hours in winter), and add a retarder if necessary. Keep one or two spare sets of core concrete laser leveling components (such as laser transmitters and receivers) to prevent interruptions to construction due to equipment failure. Prepare awnings and spray cooling equipment for summer construction, and thermal blankets and electric blankets for winter construction to maintain a temperature difference between the inside and outside of the concrete at ≤25°C. Materials are the core of floor quality. Three key materials, concrete, wear-resistant materials, and surface treatment agents, require full-process inspection: Material Type Key Control Points Inspection Standards Ready-mixed concrete 1. Mix Ratio: Crushed stone particle size 5-20mm (avoid large particles that affect smoothness), sand content 35%-40%; Slump test for each truck upon arrival. Compressive/flexural test blocks are retained according to specifications (one set per 100m³; less than 100m³ is counted as one set). 2. Slump: 120 ± 20mm (slump too large will cause sanding, too small will make vibration difficult); 3. Initial Setting Time: Adapt to the construction schedule (single-chamber construction requires leveling and wear-resistant layer application to be completed before initial setting). Wear-resistant material 1. Composition: Metallic aggregates (such as iron filings and corundum) must have a carbon content ≤ 0.2%, and non-metallic aggregates (such as quartz sand) must have a hardness ≥ Mohs 7; Sampling is randomly sent for inspection upon arrival to test compressive strength (≥60MPa) and abrasion resistance (wear loss ≤0.3g/cm²). 2. Moisture Content: ≤ 1% (avoid clumping that affects spreading uniformity); 3. Adhesion: No risk of delamination at the concrete interface. Interface treatment agent Used at the interface between the concrete base and the wear-resistant layer (if separate-chamber construction requires treatment of the interface between new and old concrete), high adhesion and crack resistance are required. Bond strength is also tested upon arrival (≥1.5MPa). Expired or clumped products are strictly prohibited. The core equipment for laser-leveling wear-resistant flooring is the concrete laser leveling. Its accuracy directly determines the flatness of the floor, so key control measures are required: Equipment Calibration: 24 hours before construction, calibrate the concrete laser leveling blade, vibrator, and laser receiver using a standard calibration ruler (2m straightedge) to ensure the laser transmitter's leveling error is ≤0.1mm/m and the screed blade's flatness error is ≤0.5mm. Equipment Selection: For very large areas (single area ≥1000㎡), a "large concrete laser leveling" (working width ≥2.5m) should be used, combined with a small walk-behind concrete laser leveling for corners (within 300mm of the wall). Equipment Maintenance: Before construction daily, check the equipment's fuel, hydraulic oil, and vibrator motor. After work, clean the screed blade and laser head to prevent concrete residue from affecting subsequent use. Large-scale floor construction requires a "divided-cell flow" approach. The connection between processes within each cell (concrete pouring → laser leveling → wear-resistant layer application → joint cutting and maintenance) is central to quality control, requiring on-site supervision of these five key processes. Separate compartment pouring: Strictly divide the construction area according to pre-designed compartment gaps, using the "skip compartment method" (with ≥48 hours between each compartment) to avoid temperature cracking caused by continuous pouring. The "slant layer method" is used during pouring, with each layer ≤300mm thick. The placement speed is matched to the laser leveling speed (approximately 10-15 m³/h). Vibration Control: After concrete placement, first use an inserted vibrator (vibration interval ≤500mm, vibration time 15-20 seconds, until no bubbles escape) to achieve compaction. Then, use a laser leveler to perform a simultaneous "vibration + leveling" operation (vibration frequency 3000-5000 times/minute) to ensure concrete density (rebound strength must meet the standard) while avoiding excessive vibration that can cause aggregate sinking and surface sanding. Benchmark Setting: The laser transmitter must be set up in a location away from the construction area and free from vibration interference (such as nearby fixed structures). Set the laser baseline according to the design elevation and recheck the baseline every two hours to prevent transmitter drift. Working Path: The concrete laser leveling uses a staggered back-and-forth method (first pass horizontally, second pass vertically). The screed height must be fine-tuned based on the concrete slump (higher slumps, lower slumps). Ensure the finished concrete surface is ≤3mm/2m flat. (Use a 2m ruler for immediate inspection, and correct any unsatisfactory areas immediately.) Corner Treatment: For areas beyond the concrete laser leveling's reach, such as walls and column bases, manual leveling is performed using a small handheld concrete laser leveling with an aluminum alloy screed to ensure consistent flatness across the entire surface. The timing and uniformity of spreading wear-resistant material directly impacts its bond with concrete. Spreading should be done in two stages, with strict timing controls. First Spreading: After the concrete is poured and leveled, wait until the surface moisture has evaporated to the point where no visible indentation is observed when pressed with a finger (approximately 1-2 hours before initial setting). Apply 60% of the total amount of material, evenly spreading using a "plum blossom" pattern (avoiding any accumulation). After spreading, use a grinder (with a circular disc) at low speed to embed the wear-resistant material into the concrete surface. Second Spreading: 30-60 minutes after the first grinding, when the surface of the wear-resistant material has initially set, spread the remaining 40% of the wear-resistant material. Use a grinder (with a different blade) at high speed until the surface is smooth and scratch-free. Control the grinding pressure to avoid thinning the wear-resistant layer; the thickness should be ≥ 3mm. Large-area floors are most susceptible to shrinkage cracks, requiring stress relief through slitting. Key control points: Joint cutting time: Start 24-48 hours after concrete pouring (adjusted to the temperature, within 24 hours in summer and within 48 hours in winter), when the concrete strength reaches 25%-30% of the design strength (rebound value approximately 20 MPa). Avoid premature joint edge cracking and delayed joint cutting, which can cause random cracking. Joint cutting parameters: Compartment joints should be "through joints" (depth ≥ 1/3 of the floor thickness; for example, for a 150mm thick floor, the joint depth should be ≥ 50mm). Longitudinal and transverse joint spacing should be designed based on the compartment design (6-8m), with a joint width of 5-8mm. Polyurethane sealant should be applied promptly after joint cutting to prevent rainwater from seeping into the base layer. Temporary contraction joints: If the area of a single compartment is large (≥ 1000 m2), temporary contraction joints (one every 3-4m, 20-30mm deep) should be installed during pouring. These temporary contraction joints will be extended to through joints during subsequent joint cutting. Inadequate curing can lead to sanding and insufficient strength on the concrete surface. Therefore, a "covering + watering" curing method is necessary. Curing Time: Within 12 hours after finishing the wear-resistant layer, immediately cover with plastic film and geotextile (to prevent rapid evaporation). Curing period: ≥7 days (if using impermeable concrete, curing period: ≥14 days). Curing Frequency: Water 3-4 times daily (increase to 5-6 times in summer) to ensure the geotextile is constantly moist to prevent the concrete surface from drying out and cracking. During winter curing, cover with a thermal blanket and maintain an ambient temperature of ≥5°C (if temperatures fall below 5°C, winter construction measures, such as adding antifreeze, are required). After completion of ultra-large floor construction, a comprehensive inspection is required in accordance with the "Concrete Structure Construction Quality Acceptance Code" (GB50204) and the "Technical Code for Wear-Resistant Concrete Floors" (JGJ/T 337), focusing on the three core indicators of flatness, wear resistance, and crack control. Appearance Inspection: A comprehensive inspection of the floor surface is required. The floor must be free of sanding, peeling, exposed surfaces, or scratches. The wear-resistant layer must be uniform in color with no significant color variations. Crack Inspection: A crack width gauge is used to inspect for cracks. "Non-through surface cracks" (width ≤ 0.2mm) are permitted. "Through cracks" or cracks with a width greater than 0.2mm are strictly prohibited. If excessive cracks are found, the cracked area must be chiseled out (extending 100mm), and the concrete and wear-resistant layer must be re-poured. After rectification, re-inspection will be conducted. Test Items Testing Method Qualification Criteria Smoothness Using a 2m straightedge and a feeler gauge, test at five points (evenly distributed) per 100 m2, recording the maximum deviation. Deviation at any point ≤ 3mm/2m, and a pass rate ≥ 95% Abrasion Resistance Using the Taber Abrasion Test, sample a representative area (100 mm × 100 mm) and weigh it after 500 cycles of abrasion. Abrasion loss ≤ 0.3g/cm² (metal aggregate wear layer), ≤ 0.5g/cm² (non-metal aggregate wear layer) Compressive Strength Concrete test blocks were collected according to specifications (one per 1000 m2) and tested after 28 days of standard curing. Concrete compressive strength ≥ design value (e.g., C30 ≥ 30MPa), flexural strength ≥ 4.0MPa Adhesive Strength Using the Pull-Out Test, samples (50 mm diameter) were taken at the interface between the wear-resistant layer and concrete, and the pull-out strength was measured. Bond strength ≥ 1.0MPa, with failure mode being "cohesive failure of concrete" (not interfacial debonding) After acceptance, finished product protection measures must be implemented to prevent subsequent construction (such as equipment installation and pipeline laying) from damaging the floor: Do not allow heavy equipment (such as forklifts or cranes) to directly roll over the floor (a steel plate is required). Avoid sharp objects (such as rebar or steel pipes) from striking the floor surface. If holes need to be drilled in the floor (e.g., to install a floor drain), use specialized drilling equipment. Manual chiseling is strictly prohibited to prevent cracking of the surrounding concrete. Large-scale floor construction is susceptible to extreme environmental impacts, such as high temperatures, low temperatures, and strong winds. Targeted adjustments to control measures are required: During high-temperature construction (temperature ≥30°C): Adjust the concrete pouring time to the morning and evening (avoid the high-temperature period of 10:00 AM to 4:00 PM); Pour the concrete immediately after arrival to avoid prolonged standing (this shortens the initial setting time); Immediately cover the wear-resistant layer after finishing to maintain moisture, and increase the watering frequency (once every hour). Low-temperature construction (temperature ≤ 5°C): Add antifreeze to the concrete (dosage according to the instructions, strictly prohibit exceeding the standard) to ensure the concrete enters the mold at a temperature ≥ 10°C. After construction, cover with a thermal blanket and electric heating blanket to maintain an ambient temperature ≥ 5°C. Extend the curing period (≥ 10 days) and remove the insulation only after the concrete strength reaches 70%. In strong winds (wind speed ≥ 5m/s): Suspend the application of the wear-resistant layer (to prevent the material from being blown away by the wind); Immediately cover the concrete with plastic sheeting after pouring (to prevent rapid evaporation of surface moisture and resulting in sanding). Through the above full-process and multi-dimensional quality control, the three core quality problems of "poor flatness, peeling of the wear-resistant layer, and shrinkage cracks" of ultra-large-area laser-leveled wear-resistant concrete floors can be effectively solved, and ultimately the floor's "high strength, high wear resistance, and high flatness" requirements can be achieved. Note: The parameters provided in this document are for reference only and are not mandatory. Due to differences in technical characteristics between different brands and models of laser levelers, please consult the manufacturer for a suitable solution before actual operation. This reference document assumes no responsibility for any issues arising from failure to follow the manufacturer's instructions.
Read More
December 27, 2024
What are the common specifications and sizes of concrete power trowels?
1. Working width: The working width of a trowel is usually between 60cm and 1.2m. Wider machines are suitable for large areas, while narrower machines are suitable for small or confined areas. 2. Blade diameter: The blade diameter of a trowel is generally between 600mm and 1200mm, which is used to ensure the flatness of the ground. 3. Machine length: The length of a trowel is usually between 1.5m and 2.5m, which affects the machine's operational flexibility and ease of transportation. 4. Machine height: The height of a trowel is usually adjustable, with an adjustment range of approximately 70cm to 110cm to suit different construction needs. 5. Weight: The weight of a trowel can range from 100kg to 300kg, with heavier machines generally providing better compaction. 6. Engine power: The engine power of the trowel can range from 5 horsepower to 20 horsepower or more, depending on the size of the machine and the construction requirements. 7. Fuel tank capacity: The fuel tank capacity is usually between 20 liters and 40 liters, which determines the working time of the machine between refueling. 8. Water tank capacity: For trowels with a water cooling system, the water tank capacity may be between 20 liters and 60 liters. 9. Operating handle length: The length of the operating handle is usually between 1.2 meters and 1.8 meters to provide a comfortable operating experience. 10. Number of blades: Some trowels may be equipped with multiple blades to improve work efficiency. Please note that these specifications are for reference only, and the specific size should be determined according to the actual construction needs and the model provided by the manufacturer. When choosing a trowel, factors such as the construction environment, construction area, ground type, and required flatness should be considered.
Read More
May 17, 2024
Construction Technology And Construction Process Of Concrete Laser Leveling Machine
Construction technology and construction process of concrete laser leveling machine ★Introduction to laser leveling machine☆ The concrete laser leveling machine is an advanced ground leveling equipment that uses a laser control system to accurately level the concrete surface. Laser leveling machine combines modern laser technology, mechanical technology and electronic control technology, which can greatly improve the flatness of concrete floors, reduce construction time, and ensure construction quality. ★Preparation work before construction☆ 1. On-site survey: Before construction, a detailed survey of the construction site should be conducted to understand the ground foundation conditions, drainage facilities, surrounding environment, etc., to ensure that the laser leveler can operate smoothly. 2. Material preparation: Prepare sufficient concrete materials and select appropriate concrete proportions according to design requirements. 3. Equipment inspection: Ensure that the laser leveler and other auxiliary equipment (such as concrete pumps, mixer trucks, etc.) are in good condition, and have necessary wearing parts and maintenance tools. 4. Safety protection: Set up construction areas and set up warning signs to ensure the safety of the construction site. ★Key points for concrete laying☆ 1. Foundation treatment: Ensure that the foundation ground is solid, flat, free of oil and water, and lay an isolation layer or moisture-proof layer as needed 2. Concrete pouring: Concrete pouring should be continuous and even to avoid quality problems such as hollows and cracks. 3. Control the water-cement ratio: Strictly control the water-cement ratio of concrete according to design requirements to ensure the strength and durability of concrete. ★Laser leveling machine operation☆ 1. Laser transmitter setting: Set up the laser transmitter in the construction area, and adjust the position and height of the laser transmitter according to the design requirements 2. Equipment positioning: Position the laser leveler within the construction area, and ensure that the laser receiver of the laser leveler can accurately receive the signal from the laser transmitter. 3. Concrete leveling: Start the laser leveling machine and adjust the driving speed and leveling depth of the equipment to make the concrete surface achieve the flatness required by the design. 4. Corner treatment: For corner areas that cannot be covered by the laser leveling machine, hand tools should be used for supplementary leveling. ★Construction quality monitoring☆ 1. Flatness testing: During and after construction, professional flatness testing tools should be used to test the flatness of the concrete floor to ensure that the construction quality meets the design requirements. 2. Strength testing: After the construction is completed, the strength testing of the concrete floor should be carried out at specified intervals to ensure that the concrete reaches the design strength. 3. Quality control records: Keep detailed records of key parameters and quality control measures during the construction process to facilitate subsequent quality tracing and problem handling. ★Later maintenance and care☆ 1. Equipment cleaning: After the construction is completed, the laser leveling machine should be thoroughly cleaned to remove concrete residue and dust on the equipment. 2. Lubrication and maintenance: Regularly lubricate and maintain the key components of the laser leveling machine to ensure smooth operation of the equipment. 3. Equipment inspection: Conduct comprehensive inspections of the laser leveling machine regularly to discover and deal with potential problems in a timely manner. 4. Storage protection: During the storage period of the equipment, necessary protective measures should be taken to prevent the equipment from getting damp, rusty or other damage. ★Safe construction measures☆ 1. Personnel training: Ensure t hat operators have received professional training and have corresponding operating qualifications, and can operate the laser leveling machine skillfully and accurately. 2. Safety protection facilities: Set up necessary safety protection facilities at the construction site, such as guardrails, warning signs, etc., to ensure safety during the construction process 3. Emergency plan: Develop an emergency plan to clarify response measures and rescue procedures in the event of emergencies (such as equipment failure, casualties, etc.). 4. Safety inspection: Conduct regular safety inspections on the construction site to discover and deal with potential safety hazards in a timely manner ★Environmental protection and energy saving considerations☆ 1. Reduce noise pollution: Choose a low-noise laser leveling machine model, and reasonably arrange the operating time during the construction process to reduce the impact on surrounding residents. 2. Reduce waste production: Strictly control the amount of concrete used during the construction process to avoid excessive waste production. The waste materials generated should be classified and processed, and the recyclable materials should be recycled and the non-recyclable materials should be properly disposed of. 3. Energy-saving measures: Optimize the construction process, reasonably arrange operation time, and reduce unnecessary equipment idling and energy consumption. At the same time, the equipment is regularly maintained and maintained to ensure that the equipment is in optimal working condition and improve energy utilization efficiency. 4. Environmental awareness education: Strengthen the environmental awareness education of construction workers and improve their understanding and attention to environmental protection work. Through training and education, construction personnel can understand environmental protection regulations and policies, master environmental protection knowledge and skills, and actively participate in environmental protection work. To sum up, the construction technology and construction process of concrete laser leveling machine need to comprehensively consider many factors, including equipment performance, construction quality, safe construction, environmental protection and energy saving, etc. During the construction process, operations and management should be carried out in strict accordance with relevant standards and requirements to ensure construction quality and safety. At the same time, environmental protection and energy-saving measures should be actively adopted to promote green construction and sustainable development.
Read More
Online now. Replies personally on WhatsAppFionaCustomer specialist
Hi! I am here to help you find the right solution for your project.
You can share your product, capacity, or project needs. Our specialist will help you work out the next step.
Would you like a quick answer? Tap below to speak directly with our specialist on WhatsApp.