Technical Knowledge
Revealing the importance of relaxation angle during laser leveling machine construction
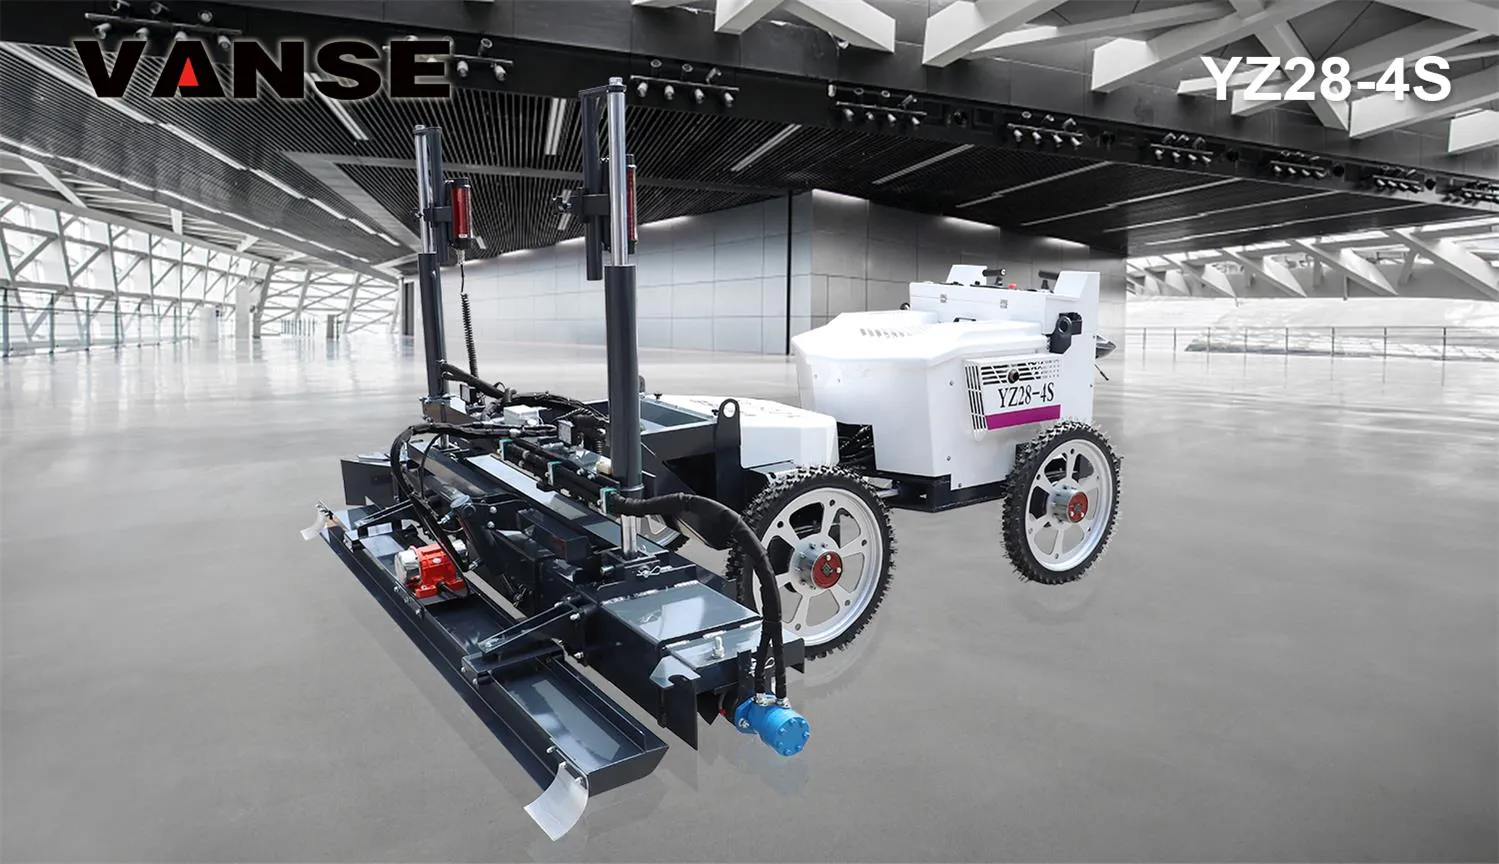
The laser leveling machine equipment produced by our manufacturer has good precision. It can perform leveling work efficiently and accurately under any conditions, saving a lot of manual maintenance operations and truly realizing the advantages of intelligent performance. If users want to truly play the role of the laser leveling machine, they can only better apply the equipment by understanding its operating points. So, what is the importance of adjusting the relaxation angle during the construction of the laser leveling machine?
The molds used in the field of precision stamping processing are equipped with guide pins to correct the length of the material fed into the mold each time to ensure the accuracy of the stamping production. If this correction is to be truly realized, the laser leveling machine must be equipped with a relaxation device to achieve it. After the tip of the mold guide pin enters the stamping material, the laser leveling machine clamp is in a relaxed state. At this time, the guide pin can correct the error in time, and this relaxation time is the relaxation angle of the laser leveling machine.
When professional technicians install laser levelers for customers to debug and test molds, they will adjust the leveling height, leveling angle and relaxation angle of the leveler according to the molds used by the customers for actual mold testing. After single punching and mold testing, continuous punching will be performed to ensure that the continuous punching reaches the predetermined accuracy. At the same time, they will provide detailed training to the operators of the punch laser leveler production line, teaching them how to use, debug, maintain and repair the laser leveler equipment on a daily basis. However, in actual use, many operators use laser levelers for the first time. After replacing the new mold for the punch, they often only remember to adjust the height of the laser leveler (because after changing the mold, the mold height is different, and the leveling height needs to change, which is very intuitive), but ignore the adjustment of the relaxation angle of the leveler. At this time, the leveling will be inaccurate. The operator is not familiar with the leveler and often can't think of the problem. At this time, the operator will complain that the leveler is not good and can only be used for one mold. In fact, this is because the relaxation angle of the laser leveler has not been adjusted correctly, resulting in inaccurate leveling.
The laser leveling machine manufacturer told us that the adjustment of the leveling angle of the laser leveling machine after changing the mold is an indispensable link. The adjustment standard is that when the mold guide pin enters the material hole and relaxes, the guide pin is not out of the material pinhole when the mold rises. The precision laser leveling machine clamps the material as the basic principle, so as to truly ensure the high-precision punching production. The equipment provided by the laser leveling machine manufacturer has a more advanced function, can perform leveling operations efficiently, and our price is reasonable and the product quality is good.
I don’t know if you have gained some new knowledge about the laser leveling machine through our detailed introduction above? If our sharing provides you with corresponding help, please continue to pay attention to our website. We will share more exciting news with you later. Thank you for your support.
Thanks to All the Friends Who Support and Trust Shandong Vanse Machinery Technology Co., Ltd.
If you want to know more about Shandong Vanse Machinery Technology Co., Ltd. or have any questions, please feel free to contact us:
Our Factory
Shandong Vanse Machinery Technology Co., Ltd.








Share this article

About the Author: Shandong Vanse Machinery Technology Co., Ltd.
Shandong Vanse Machinery Technology Co., Ltd. is a high-tech manufacturer specializing in concrete construction machinery, including laser screeds and related equipment. The company integrates R&D, production, and global sales, with products exported to over 60 countries and widely used in infrastructure projects worldwide.
Previous Post
Next Post
Related Articles
You Might Also Like
How does the concrete laser leveling machine ensure construction safety?
During the construction process, the safe operation of the concrete laser leveling is crucial to ensuring the life safety of the construction workers and the smooth progress of the construction. In order to ensure construction safety, a series of measures need to be taken to manage and maintain the concrete laser leveling. This article will introduce in detail how to ensure the construction safety of concrete laser leveling machines through operational training, safe operating procedures, regular equipment maintenance, wearing protective equipment, paying attention to the construction site environment, cyclic load limits, machine alarm systems and ensuring power supply safety. . 1. Operation training Operating a concrete laser leveling requires specialized skills and knowledge. Therefore, operators need to receive comprehensive operational training, understand the structure and working principles of the machine, and master correct operating methods and technical essentials. Through training, operators can become familiar with the performance characteristics of the machine, improve their operating skills and ability to respond to emergencies, thereby reducing safety risks during operation. 2. Safety operating procedures Developing and implementing safe operating procedures is an important measure to ensure the safety of concrete laser leveling construction. Safety operating procedures should include pre-start inspections, operating procedures, abnormal situation handling and shutdown to ensure that operators follow correct operating procedures and precautions during the construction process. In addition, operators should be regularly trained and assessed on safe operating procedures to ensure that they are proficient in and strictly abide by relevant regulations. 3. Regular maintenance of equipment The normal operation of the concrete laser leveling machine is inseparable from regular maintenance and upkeep. Through maintenance work such as regular inspection, cleaning, lubrication and adjustment, potential safety hazards can be discovered and solved in time to ensure that the machine is in good working condition. At the same time, worn parts should be replaced regularly to prevent equipment failures and accidents. It is recommended to develop a detailed maintenance plan and strictly implement it to ensure the reliability and safety of the equipment. 4. Wear protective equipment During the construction process of the concrete laser leveling machine, the operator should wear necessary protective equipment, such as safety helmets, gloves, goggles, etc. These protective equipment can effectively reduce the safety risks of operators during the construction process and reduce the degree of accidental injuries. At the same time, the integrity of protective equipment should be checked regularly, and damaged or worn protective equipment should be replaced in a timely manner to ensure its effectiveness. 5. Pay attention to the construction site environment The construction environment of the concrete laser leveling machine has an important impact on its safety. Operators should pay attention to the environmental conditions of the construction site, such as ground conditions, construction environment temperature and humidity, etc. Under adverse environmental conditions, such as slippery floors or excessively high temperatures, corresponding safety measures should be taken, such as suspending construction or strengthening equipment stability, to ensure construction safety. 6. Follow load limits The concrete laser leveling has a certain load limit. Exceeding the load limit will cause machine damage and safety accidents. Operators should strictly abide by the load limits of the machine and avoid overloading. At the same time, the working parameters and load of the machine should be reasonably configured according to the specific conditions and requirements of the construction site to ensure the normal operation of the machine and construction safety. 7. Machine alarm system The concrete laser leveling machine should be equipped with a complete alarm system to remind the operator of the machine's working status and abnormal conditions. When a machine malfunctions or is abnormal, the alarm system should issue an alarm in time to attract the operator's attention so that appropriate measures can be taken. In addition, the alarm system should also have remote communication capabilities so that relevant personnel can be notified in time for handling in case of emergency. 8. Ensure power supply safety The power supply safety of the concrete laser leveling machine is crucial to the normal operation of the equipment and construction safety. The stability and reliability of the power supply should be ensured to avoid unexpected shutdown or equipment damage caused by power failure. At the same time, measures such as grounding and leakage prevention should be taken to ensure the operator's personal safety. It is recommended to regularly check the power supply lines and equipment power consumption to promptly discover and solve potential safety hazards. Summary: Through the implementation and management of the above measures, the construction safety of the concrete laser leveling can be effectively ensured. During the construction process, safety issues should always be paid attention to, equipment maintenance and management should be strengthened, and operators' skills and awareness should be improved. Only in this way can we ensure the safe and smooth progress of construction, reduce safety risks and protect the safety of personnel and property.Common faults and solutions of the concrete laser leveling machine
Concrete laser levelers are prone to various malfunctions during long-term, high-intensity operations due to wear, improper operation, or inadequate maintenance. Promptly troubleshooting and resolving faults can prevent extended downtime, reduced construction efficiency, and even equipment damage. The following are common fault types, cause analysis, and solutions: The laser system is the core of leveling accuracy, and its failure directly impacts construction quality. Common problems include: Failure Symptoms: Frequent alarms and flickering indicators on the laser receiver, large deviations in leveling accuracy, and inability to automatically level properly. Common Causes: Laser transmitter battery is low, battery contact is poor, or the transmitter is faulty. Laser receiver lens is contaminated (dust, concrete debris), damaged, or has reduced sensitivity. Environmental interference (such as strong direct sunlight, interference from other nearby laser equipment, or obstacles blocking the signal). Laser transmitter is uncalibrated, resulting in leveling accuracy deviation; or the receiver is loosely mounted or misaligned. Solution: Check the laser transmitter battery level and replace with new batteries. Clean the battery contacts to ensure proper contact. If the transmitter is damaged, repair or replace it. Clean the receiver lens with a soft cloth to remove any stains. If the lens is damaged, replace the receiver lens or the entire assembly. Avoid working in bright sunlight, turn off any interfering equipment, and remove any obstructions (such as rebar or formwork) in the signal path. Recalibrate the laser transmitter's level (using a level). Tighten the receiver mounting bolts until they are properly positioned and secure. Symptom: The laser transmitter does not power on, the receiver indicator light is off, and the device cannot enter automatic leveling mode. Common causes: The laser transmitter power switch is damaged, the battery is exhausted, or the battery compartment is poorly connected. The receiver wiring harness is broken, the plug is loose, or the terminal block is oxidized. The laser module fuse in the control system is blown, or the control board is faulty. Solution: Check the transmitter power switch, replace the batteries, and clean the battery compartment. If the switch is damaged, repair or replace the transmitter. Check the receiver wiring harness for damage, reconnect the plug, and clean the terminals (you can wipe with alcohol). Replace any broken wiring harnesses. Check the corresponding fuse in the control box. If it is blown, replace it with a fuse of the same specification. If the fuse repeatedly blows, check for a short circuit and repair or replace the control board if necessary. The hydraulic system is responsible for driving travel, leveling mechanism lifting and lowering, and vibrating. Failure can lead to reduced equipment performance. Common problems are as follows: Failure symptoms: Slow travel speed, inability to raise or lower the leveling baseplate, and decreased vibration frequency. Common causes: The hydraulic oil tank oil level is too low, the hydraulic oil type is incorrect, or the oil is contaminated (air, moisture, or impurities are mixed in). Severe wear of the hydraulic pump, increasing internal leakage; or the hydraulic pump drive belt is slipping or broken. Clogged hydraulic lines and leaking joints lead to pressure loss; or the overflow valve or pressure reducing valve is faulty, causing pressure regulation failure. Aging or damage to the hydraulic cylinder seals can cause internal or external leakage. Solution: Refill with the same type of hydraulic oil to the standard level. If the oil is contaminated, completely replace the hydraulic oil and filter, and clean the oil tank. Check the tension of the hydraulic pump drive belt and replace any slipping or broken belts. If the hydraulic pump is worn, repair or replace it. Check the hydraulic lines, clear any blockages, and replace seals at leaking joints; calibrate or replace faulty relief and pressure-reducing valves. Disassemble the hydraulic cylinder and replace any aging seals. If the cylinder barrel or piston rod is scratched, repair or replace the cylinder. Symptom: The hydraulic oil temperature exceeds 60°C during operation (some equipment may trigger an alarm), accompanied by jerking movements and increased noise. Common Causes: Radiator surface blockage (dust, concrete debris), reducing heat dissipation efficiency; or cooling fan failure (motor damage, broken belt). Excessive hydraulic system pressure, resulting in prolonged overflow of the relief valve and heat generation; or inappropriate hydraulic oil viscosity (using low-viscosity oil in summer and high-viscosity oil in winter). Improper hydraulic piping layout, excessively long or with numerous bends, increasing fluid resistance; or severe internal leakage in hydraulic components, generating excessive heat. Solution: Use a high-pressure water jet to clean the radiator surface and remove any blockages. Inspect the cooling fan and replace any damaged motor or belt to ensure proper fan operation. Recalibrate the relief valve pressure to the standard value (refer to the equipment manual); replace the hydraulic oil with a viscosity appropriate for the ambient temperature. Inspect the hydraulic lines and replace any excessively bent or aged lines. Repair or replace any components, such as the hydraulic pump and cylinder, that are leaking severely. Symptoms: Oil leakage or dripping from hydraulic line joints; a high-frequency whine emanating from the hydraulic pump or lines. Common Causes: Deterioration or damage of joint seals, or loose, undertightened joints. Vibration and friction leading to damage or cracks in the lines; or loosening of the pipe securing clips, causing the lines to shake and collide. Air mixing with the hydraulic oil causes cavitation, leading to abnormal noise in the pump or lines. Solution: Tighten any loose joints and replace any aged seals (such as O-rings or combination gaskets). If the joint threads are damaged, replace the joint. Repair or replace any damaged lines and re-secure any loose pipe clips to prevent vibration and friction. Check the hydraulic oil tank level and add hydraulic oil to remove air. Loosen the hydraulic pump outlet pipe to vent air, or start the machine and run it at no load to vent air until the abnormal noise disappears. The engine is the power source of the machine. Failure can cause the machine to fail to start or interrupt operation. Common problems include: Failure Symptom: The starter motor operates normally, but the engine fails to start; or it stalls automatically within a few seconds after starting. Common Causes: Insufficient fuel supply: Low fuel tank level, clogged fuel filter, or leaking or clogged fuel lines. Intake System Failure: Severely clogged air filter, resulting in insufficient air intake; or air leak in the intake manifold. Ignition System Problem (Gasoline Engine): Carbon deposits on or damage to the spark plug, or a faulty ignition coil. Diesel Engine: Clogged fuel injectors, insufficient injection pressure, or a preheating system malfunction (in low temperatures). Solution: Add fuel and replace any clogged fuel filters. Check the fuel lines, eliminate leaks, and clear any clogged lines. Clean or replace the air filter element; check the intake manifold for tightness and repair leaks. Clean carbon deposits from the spark plugs and replace damaged spark plugs or ignition coils (for gasoline engines). Clean or replace the fuel injectors and calibrate the injection pressure; check the glow plugs or glow controller and repair the glow system (for diesel engines). Symptoms: Metallic knocking and unusual noises are heard during engine operation; insufficient power is present during operation and cannot meet the load requirements. Common Causes: Low oil level or deteriorating oil quality, resulting in poor lubrication and increased component wear (such as unusual noises on bearings and valve tappets). Poor fuel quality, leading to injector blockage, incomplete combustion, detonation, or black smoke. Insufficient cylinder compression pressure (worn piston rings, poor valve seals), or turbocharger malfunction (for supercharged engines). Cooling system malfunction, engine overheating, resulting in power loss. Solution: Replace the engine oil and oil filter, and refill the oil to the standard level. If components are severely worn, disassemble the engine for repair. Replace high-quality fuel, clean the injectors and fuel lines, and add fuel additives to improve combustion. Check cylinder compression pressure, replace worn piston rings, or repair valve seals; repair or replace the turbocharger. Clean the radiator, check the coolant level, and check the water pump to ensure proper operation of the cooling system. Mechanical structures are directly involved in concrete leveling operations, and failures can easily lead to reduced construction quality. Common problems include the following: Symptoms: Grinding or jerking noises during travel; the machine veers off course, or its speed fluctuates. Common Causes: Worn travel drive chain/gears, insufficient tension, or poor chain lubrication. Uneven wear of travel wheels/tracks, or improper track tension (for tracked equipment). Damaged drive shaft bearings or differential failure (for wheeled equipment). Solution: Adjust chain tension and add grease; replace severely worn chains or gears. Check wheel/track wear and replace worn parts; adjust track tension to standard. Replace damaged drive shaft bearings; repair or replace the differential. Symptoms: Vibrator inoperative or insufficient frequency; scraper deformation or lifting and jamming. Common causes: Vibrator motor failure, hydraulic motor failure, or vibrator shaft jam (concrete debris accumulation). Scraper mounting bolts loose, structural deformation, or lift hydraulic cylinder failure. Worn or insufficiently lubricated pins connecting the leveling mechanism to the machine body, causing lifting and jamming. Solution: Clean concrete debris from the vibrator, repair or replace the motor/hydraulic motor; inspect the vibrator shaft and replace worn parts. Tighten scraper bolts and correct deformation of the scraper; repair or replace the lift hydraulic cylinder. Lubricate the connecting pins and replace severely worn pins and bushings. The electrical system control equipment components work together, and malfunctions can easily lead to operational failures. Common problems are as follows: Symptom: No response when the button is pressed, and the indicator light is off, permanently on, or flashing abnormally. Common Causes: Oxidation or damage to the button contacts, or loose or poor contact in the wiring harness connector. Control panel power failure or damage to control panel components (such as burnt relays or capacitors). Corresponding actuator failure (such as solenoid valves or motors), resulting in abnormal control system feedback. Solution: Clean the button contacts and replace damaged buttons; reconnect the wiring harness connector and tighten the terminals. Check the control panel power supply voltage and replace any burned components. If the control panel is damaged, repair or replace it. Investigate the actuator components and replace the faulty solenoid valve or motor. Fault Symptom: After pressing the emergency stop button, the equipment does not shut down immediately, posing a safety hazard. Common Causes: Internal contacts of the emergency stop button are sticking or damaged, or wiring is loose or disconnected. A faulty relay in the emergency stop circuit prevents power from being cut off. Solution: Replace the damaged emergency stop button and reconnect any loose wiring. Inspect the emergency stop circuit relay and repair or replace the faulty relay to ensure proper circuit disconnection. Simple first, then complex: Prioritize easily observable and accessible areas (such as oil level, connectors, and cleanliness), then delve deeper into internal components. Electrical first, then mechanical: If a malfunction occurs, first check the electrical controls (buttons, wiring harness, sensors), then the mechanical and hydraulic components. Use the equipment manual: Refer to the fault code table in the equipment manual (if available) to quickly locate the source of the fault. Strictly adhere to the daily maintenance schedule and regularly clean, lubricate, and inspect key components to prevent minor issues from becoming major problems. Operators must adhere to standardized procedures to avoid overloading and rough handling, minimizing abnormal equipment wear. A fault log should be established to analyze the causes of frequent faults and optimize maintenance cycles or operating procedures. The above methods can quickly resolve common concrete laser leveling faults, ensuring continuous and stable operation and improving construction efficiency and quality. For complex faults (such as engine overhaul or hydraulic pump replacement), it is recommended to contact professional maintenance personnel or manufacturer technical support. ARMOUR JOINT CONCRETE LASER LEVELING MACHINE POWER TROWEL TOPPING SPREADERThe Purpose and Significance of Management and Maintenance of Concrete Laser Leveling Equipment
As core equipment for high-precision, high-efficiency floor leveling in modern construction, the management and maintenance of Concrete Laser Levelings not only impacts the stable performance of the equipment but also directly impacts project quality, construction costs, and enterprise competitiveness. The following analysis examines the purpose and significance of Concrete Laser Leveling management and maintenance: Laser Leveling machines achieve millimeter-level precision control through their laser transmitters and receivers. Issues such as calibration deviations, sensor failure, or mechanical wear can directly result in substandard floor flatness, leading to rework and quality disputes. Regular maintenance ensures that key components, such as the laser system, vibration motor, and travel mechanism, are in optimal condition, ensuring that construction accuracy meets design requirements. Concrete construction is a harsh environment, and equipment is susceptible to cement corrosion, mechanical vibration, and dust abrasion. Through scientific management (such as standardized operating procedures and maintenance records) and preventive maintenance (such as regular cleaning, lubrication, and replacement of wearing parts), unplanned downtime can be reduced, equipment degradation can be delayed, and repair costs and the frequency of replacements can be significantly reduced. Equipment failure or performance degradation can lead to construction interruptions and reduced efficiency. For example, loss of laser system signal may require recalibration, which is time-consuming and impacts progress. Routine inspections and rapid maintenance can minimize downtime, ensure continuous and efficient equipment operation, and contribute to on-time project delivery. Laser Leveling machines involve high-speed rotating parts, hydraulic systems, and overhead work (such as telescopic boom models). Improper maintenance can lead to mechanical failure, hydraulic leaks, or even casualties. Regularly inspecting safety devices (such as emergency stop buttons and protective covers), hydraulic lines, and electrical systems can eliminate potential safety hazards and protect both operators and equipment. Surface flatness is a core indicator of concrete construction quality, directly impacting subsequent floor laying, equipment installation, and building aesthetics. Precise maintenance of the laser transmitter, receiver, and screed head ensures surface flatness within ±2mm, meeting the requirements of high-standard industrial plants, logistics warehouses, and other scenarios, while avoiding customer complaints or claims due to quality issues. Reduce direct costs: Preventive maintenance costs are far lower than repair costs. For example, regularly changing hydraulic oil can prevent system downtime caused by oil line blockage, saving tens of thousands of yuan in repair costs. Improve equipment utilization: By optimizing maintenance plans, equipment idle time can be reduced, increasing output per unit time and indirectly increasing company revenue. Enhance market competitiveness: Stable and reliable equipment performance is key to earning customer trust, helping companies establish a professional image and expand into the high-end market. Standardized equipment management (such as establishing a maintenance database and applying IoT monitoring technology) can accumulate extensive operational data, providing a basis for optimized equipment design, fault prediction, and intelligent maintenance, driving the industry's development towards digitalization and refinement. Furthermore, a comprehensive maintenance system helps standardize construction standards and elevate the industry's overall technical capabilities. Extending equipment lifespan and reducing resource waste are key aspects of green construction. Reducing equipment scrap rates through scientific maintenance can reduce the consumption of raw materials such as metals and plastics, lower carbon emissions, and help the construction industry achieve its "dual carbon" goals. The management and maintenance of Concrete Laser Leveling machines is crucial for ensuring construction quality, controlling costs, improving efficiency, and ensuring safety. Companies should establish a full lifecycle management system that prioritizes prevention and prioritizes maintenance. Incorporating intelligent monitoring technologies, these systems enable real-time monitoring of equipment status and optimal allocation of maintenance resources. This will help companies gain an advantage in the fiercely competitive market and promote high-quality development in the industry. Note: The parameters provided in this document are for reference only and are not mandatory. Due to differences in technical characteristics between different brands and models of laser levelers, please consult the manufacturer for a suitable solution before actual operation. This reference document assumes no responsibility for any issues arising from failure to follow the manufacturer's instructions.