Technical Knowledge
How to correctly select and use a concrete trowel?

The selection and use of concrete trowel is an important link in concrete construction. Correct selection and use can improve construction efficiency and quality. Here’s how to properly select and use a concrete trowel.
◆1◆ Choose the right model
When choosing a concrete trowel, you need to choose the appropriate model based on construction needs and site conditions. Different models of trowel machines have different parameters such as power, speed, size, etc., and are suitable for different construction occasions and needs. Therefore, when choosing, you need to understand the characteristics and application range of various models in order to choose the trowel that best suits you.
◆2◆ Check equipment quality
When purchasing a concrete trowel, you need to check the quality of the equipment. It can be checked from the following aspects:
1. Appearance quality:
Observe whether the appearance of the trowel is smooth and smooth, and whether there are obvious defects and damage.
2. Manufacturing quality:
Check whether the manufacturing process of the equipment is fine, whether the parts are precise, and whether the installation is firm.
3. Electrical performance:
Check whether the electrical performance of the equipment is stable, such as whether the power cord is aged, whether the leakage protector is sensitive, etc.
4. Safety performance:
Check whether the safety performance of the equipment is reliable, such as whether the operating handle is firm and whether the braking system is effective, etc.
◆3◆ Understand the operating requirements
Before using a concrete trowel, you need to understand the operating requirements. Specifically including the following aspects
1. Pre-operation inspection:
Before use, you need to check whether the various functions of the equipment are normal, such as whether the power cord is firmly connected and whether the bearings are lubricated.
2. Operating posture:
Correct operating posture can ensure the efficiency and safety of stinging. You need to maintain your balance and avoid excessive bending or overstretching.
3. Operation sequence:
Carry out construction according to the correct operation sequence, such as adjusting the angle and depth of the trowel first, and then starting the equipment for construction.
4. Precautions:
Safety precautions need to be paid attention to during the construction process, such as avoiding excessive force and use in humid environments.
◆4◆ Care and maintenance
The care and maintenance of concrete trowels is of great significance to extending the service life of the equipment and improving construction efficiency. Here are some care and maintenance suggestions:
1. Regular cleaning:
Clean the spatula and body regularly to keep the equipment clean and tidy. This helps extend equipment life and improve construction efficiency.
2. Check the bearings:
Check the lubrication of the bearings regularly, add lubricating oil or replace the bearings in time. This helps ensure device stability and reliability.
3. Replace wearing parts:
Check and replace wearing parts regularly, such as spatulas and belts. This helps ensure proper operation and longevity of the equipment.
4. Maintain the electrical system:
Regularly check the circuits and components of the electrical system to ensure they are working properly. If there is damage or aging, it should be replaced or repaired in time.
◆5◆ Precautions for safe use
When using a concrete trowel, you need to pay attention to safety matters. Here are some suggestions:
1. Inspection before use:
Before use, check whether the equipment is intact, such as whether the spatula is sharp and whether the braking system is normal, etc. If there is any damage or problem, it should be repaired or replaced in time.
2. Wear protective equipment:
Appropriate protective equipment should be worn during the construction process, such as gloves, goggles, etc. This helps protect the body from injury.
3. Avoid excessive force:
Avoid excessive force during use to avoid equipment damage or personal injury. Force should be used rationally based on equipment performance and construction requirements.
4. Pay attention to environmental safety:
During use, you should pay attention to the safety of the surrounding environment and avoid using the equipment in unstable or dangerous environments. At the same time, you should pay attention to weather conditions and avoid using equipment in bad weather.
5. Regular maintenance:
Regular maintenance of equipment is an important measure to ensure the normal operation and service life of the equipment. During use, you should regularly check whether all functions of the equipment are normal, and repair or replace damaged parts in a timely manner.
Thanks to All the Friends Who Support and Trust Shandong Vanse Machinery Technology Co., Ltd.
If you want to know more about Shandong Vanse Machinery Technology Co., Ltd. or have any questions, please feel free to contact us:
Our Factory
Shandong Vanse Machinery Technology Co., Ltd.








Share this article

About the Author: Shandong Vanse Machinery Technology Co., Ltd.
Shandong Vanse Machinery Technology Co., Ltd. is a high-tech manufacturer specializing in concrete construction machinery, including laser screeds and related equipment. The company integrates R&D, production, and global sales, with products exported to over 60 countries and widely used in infrastructure projects worldwide.
Previous Post
Next Post
Related Articles
You Might Also Like
In a low-temperature winter environment, how should a concrete laser leveling machine be maintained to avoid difficulties in starting?
In a low-temperature winter environment (typically referring to an ambient temperature of ≤5℃), concrete laser leveling machines are prone to difficulties in starting due to issues such as increased oil viscosity, battery discharge, and fuel solidification (for diesel models). Maintenance should be carried out from four dimensions: "protection of the starting system, optimization of oil performance, anti-freezing of core components, and protection of idle storage". The specific measures are as follows: At low temperatures, the battery capacity will drop significantly (for every 10℃ drop in temperature, the capacity approximately decreases by 10% to 15%), and the load on the starting motor increases, which is the main reason for the difficulty in starting. Special protection is required: Check the battery status: Use a multimeter to measure the battery voltage. For a 12V battery, it should be ≥12.4V (fully charged state). If the voltage is lower than 12V, immediately use a dedicated low-temperature charger (to avoid the low charging efficiency of ordinary chargers) to recharge the battery. If the battery has been in use for more than two years, it is prone to "quick discharge" at low temperatures. It is recommended to replace the battery with a new one in advance (to avoid failure when starting temporarily). Prevent the battery from cracking due to freezing: The freezing point of the battery electrolyte varies with its concentration (if the concentration is too low, it may freeze and crack the casing). Check the electrolyte level (if it is below the scale line, add distilled water; do not add tap water or electrolyte). If necessary, test the density of the electrolyte (use a hydrometer, standard value 1.26-1.28g/cm³; if the density is low, adjust the concentration). Clean the battery connection: If there is white sulfide (which is prone to condensation at low temperatures) at the connection, rinse it with hot water, then sand it clean with sandpaper, and apply vaseline or battery protector (to prevent re-oxidation and ensure smooth current conduction). Check the terminal blocks of the starting motor: Ensure that the bolts are tightened (metal shrinks and is prone to loosening at low temperatures, resulting in poor contact). If the terminal blocks are oxidized, they need to be sanded with sandpaper. Manually rotate the starting motor gear to ensure there is no jamming (to avoid poor gear meshing at low temperatures). Additional inspection for diesel models: Check if the start preheater (if any) is functioning properly – after power-on, the preheater indicator light should be on. If it is not on, check the circuit or replace the preheater (the preheater can increase the temperature inside the cylinder, help diesel atomize, and avoid difficulties in cold starting). Low temperatures can cause a sharp increase in the viscosity of engine oil, hydraulic oil and diesel, resulting in slow flow and difficulty in oil suction by the pump body. It is necessary to ensure the fluidity of the oil through "oil change + preheating". Replace with low-grade diesel: Select the corresponding grade based on the ambient temperature (for example, -20 # diesel for -10 ℃ to -20℃ and -35 # diesel for -20℃ to -35 ℃), to prevent diesel from solidifying in the fuel tank or fuel line (solidification can cause fuel supply interruption and prevent starting). If high-grade diesel has been added, diesel pour point depressant should be added (add it in the proportion specified in the manual to lower the freezing point of the diesel). Fuel system preheating: Before starting, you can first turn on the ignition switch (without starting the engine), and let the fuel pump be powered on to work for 30 seconds (some models have a "fuel preheating" mode), allowing the diesel to preheat and flow in the fuel pipes. If the diesel in the fuel tank has slightly solidified, a small amount of low-grade diesel or kerosene (not exceeding 10%) can be added to the tank to help dilute and melt it. Do not add gasoline to avoid safety risks. Type of oil Maintenance measures Engine oil 1. Switch to winter-specific low-temperature engine oil (such as 5W-30, 10W-30, the smaller the number before the viscosity grade, the better the low-temperature fluidity) to prevent the original summer engine oil from having excessive viscosity at low temperatures, which could increase the engine's starting resistance. 2. Before starting, if the ambient temperature is ≤-10℃, you can first heat the engine oil through the engine preheater (external or built-in) for 30 to 60 minutes, or pour hot water over the oil pan (water temperature 50 to 60℃, do not use boiling water) to reduce the viscosity of the engine oil. Hydraulic oil 1. Replace it with low-temperature anti-wear hydraulic oil (such as L-HV46, L-HV32, which has better low-temperature fluidity than ordinary hydraulic oil) to prevent the hydraulic oil from getting stuck at low temperatures, which could lead to the failure of the leveling scraper and the walking action. After starting the equipment, let the hydraulic system run idle for 5 to 10 minutes (operate the handle to slowly extend and contract the cylinder). When the temperature of the hydraulic oil rises above 10℃, then carry out load operation to avoid damage to the hydraulic pump due to dry grinding at low temperatures. In winter, the air humidity is high, and moisture is likely to remain inside the equipment. Freezing at low temperatures can cause components to get stuck or break, so targeted protection is needed Laser transmitter/receiver: When not in use, it should be stored indoors (to avoid low temperature and moisture in the open air). Before use, check if there is any ice inside (if there is, it needs to be thawed naturally indoors. Do not use open flames to bake it to avoid damaging electronic components). Before powering on, wipe the casing and lens with a dry soft cloth to ensure there is no moisture residue. Control circuit: Check if there is any condensation water at the circuit joints (if so, dry it with a hair dryer using cold air). Wrap the joints with waterproof insulating tape to prevent water from seeping in and causing short circuits, which may affect the transmission of laser signals. Hydraulic oil tank: Check whether the seal of the oil tank cover is intact (to prevent rainwater or snow water from seeping in). If water is mixed into the hydraulic oil, it will freeze at low temperatures, blocking the oil pipes or damaging the hydraulic pump. It is necessary to regularly drain the accumulated water at the bottom of the oil tank (open the oil tank drain valve, release a small amount of oil, and observe whether there is any water sedimentation). If there is too much water, all the hydraulic oil needs to be replaced and the oil tank cleaned. Engine cooling system (diesel model) : Antifreeze must be used (tap water or ordinary water is not allowed). The antifreeze should be mixed in a ratio of "antifreeze + distilled water = 1:1" (the freezing point can be reduced to around -35 ℃). Check the antifreeze level (it should be between "MIN" and "MAX" in the expansion tank). If the level is insufficient, add the same type of antifreeze. Prevent the cooling system from freezing and cracking the water tank or cylinder block. Hydraulic oil tank: Check whether the seal of the oil tank cover is intact (to prevent rainwater or snow water from seeping in). If water is mixed into the hydraulic oil, it will freeze at low temperatures, blocking the oil pipes or damaging the hydraulic pump. It is necessary to regularly drain the accumulated water at the bottom of the oil tank (open the oil tank drain valve, release a small amount of oil, and observe whether there is any water sedimentation). If there is too much water, all the hydraulic oil needs to be replaced and the oil tank cleaned. Engine cooling system (diesel model) : Antifreeze must be used (tap water or ordinary water is not allowed). The antifreeze should be mixed in a ratio of "antifreeze + distilled water = 1:1" (the freezing point can be reduced to around -35 ℃). Check the antifreeze level (it should be between "MIN" and "MAX" in the expansion tank). If the level is insufficient, add the same type of antifreeze. Prevent the cooling system from freezing and cracking the water tank or cylinder block. First startup: If the ambient temperature is ≤-15℃, do not start directly. First, perform the "three-step preheating" : ① Connect the power supply and turn on the preheater (if available) for 30 seconds; Turn off the preheater, wait for 10 seconds, and repeat 2 to 3 times. ③ Gently press the accelerator (for diesel models), slowly turn the start key. If the start fails in one attempt, wait for 1-2 minutes and then try again (to avoid overheating and damage to the starting motor due to continuous operation). Do not start continuously more than three times. After starting: After the engine starts, it should idle for 10 to 15 minutes (do not accelerate immediately). Wait until the water temperature rises above 40℃ and the oil pressure is normal (the pointer is stable within the standard range), then operate the hydraulic system and traveling mechanism to gradually adapt the equipment to the low-temperature environment. If the battery is discharged and the device cannot be started: It can be started by jumper connection (use the battery of another device, connect the positive terminal to the positive terminal and the negative terminal to the negative terminal. After starting, keep the idle speed for 15 minutes to charge the discharged battery). Do not jumper for a long time to avoid damaging the electrical system. If the diesel solidifies and causes the fuel supply to be interrupted: The equipment should be moved indoors (temperature ≥5℃) to allow the diesel to melt naturally, or low-grade diesel can be added to the fuel tank for dilution. After the diesel flows normally, press the fuel pump to expel the air in the fuel pipe, and then try to start it. If the hydraulic system gets stuck: After starting, run the hydraulic system unloaded first. If it still gets stuck, check the temperature of the hydraulic oil (if it is below 0℃). You can heat the hydraulic oil by connecting an external heater (placed outside the hydraulic oil pipe). Wait until the temperature rises above 10℃ before operating. Through the above measures, the problem of difficult start-up in winter due to low temperatures can be solved from four aspects: "start-up source, oil, components, and operation". At the same time, it can reduce the hidden damage to the equipment caused by low temperatures and ensure the stability and accuracy of the laser leveling machine machine during winter construction. Note: The parameters provided in this document are for reference only and are not mandatory. Due to differences in technical characteristics between different brands and models of laser levelers, please consult the manufacturer for a suitable solution before actual operation. This reference document assumes no responsibility for any issues arising from failure to follow the manufacturer's instructions.How to avoid concrete surface delamination
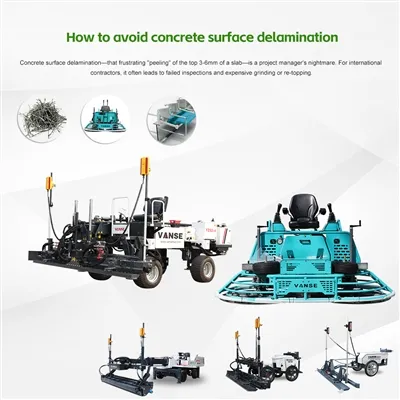
Concrete surface delamination-that frustrating "peeling" of the top 3-6mm of a slab-is a project manager's nightmare. For international contractors, it often leads to failed inspections and expensive grinding or re-topping. In the industry, we know the main culprit: trapped bleed water or air. If you seal the surface too early, you create a hollow "blister" that eventually snaps off. To avoid this, you need a workflow that prioritizes timing and uniform compaction. Here is how to eliminate delamination risks using a professional-grade fleet from Vanse Machinery. Delamination often starts with inconsistent concrete placement. If one part of the bay is thicker or wetter than the next, the bleed water will rise at different rates. The Vanse Workflow: Instead of dumping large, uneven piles that create "wet spots," use a Vanse Concrete Distributor to ensure an even ribbon of material. If the slab isn't consolidated from the bottom up, air pockets can migrate to the surface during finishing, leading to "blisters." The Vanse Workflow: A Vanse Concrete Laser Leveling Machine (like the YZ28-4S or the telescopic YZ30-4E) doesn't just "scrape" the top; it uses high-frequency vibration (up to 4000rpm) to liquefy and consolidate the entire depth of the slab in one pass. This forces out excess air and ensures the bleed water rises naturally and evenly across the entire floor. Many delamination issues occur because manual dry-shake hardener is applied unevenly, preventing a proper bond with the base slab. The Vanse Workflow: Use the Vanse Automatic Topping Spreader. By mechanically applying the hardener immediately after the laser leveling pass, you ensure the material integrates perfectly with the wet paste. This creates a monolithic bond that won't "peel" under heavy forklift traffic. The most common cause of delamination is premature troweling. If you start "burning" the floor while bleed water is still rising, you are guaranteed to have peeling issues. The Vanse Workflow: When you use a high-performance Vanse VS1046 Ride-on Power Trowel, you have the torque and weight to wait for the "Goldilocks" window. Because Vanse machines are so efficient, you don't have to rush the first pass. You can wait for the bleed water to fully evaporate, then use the precision pitch control to densify the surface without trapping moisture underneath. Sometimes "peeling" happens near the edges of joints due to localized stress or "spalling." The Vanse Workflow: As soon as the floor is hard enough to walk on, use a Vanse Concrete Cutting Machine (Floor Saw). A clean, straight cut ensures that the slab can "breathe" and move during the curing process, preventing the edges from lifting or delaminating during the critical first 48 hours. Technical Cause of Peeling Prevention Strategy Vanse Advantage Inconsistent Placement Controlled, even distribution. Concrete Distributor & Mini Dumper Trapped Air/Water Bottom-up consolidation. High-Frequency Laser Leveling Machine Poor Hardener Bond Mechanical, even application. Automatic Topping Spreader Premature Sealing High-torque finishing at the right time. VS836 / VS1046 Power Trowel Edge Stress Early, clean joint execution. Stable Concrete Cutting Machine Avoiding delamination is all about respecting the concrete's timeline. You can't force the water to stop rising, but you can use equipment that works with the material. By combining the placement precision of the Mini Dumper, the leveling power of the Laser leveling, and the finishing torque of the Power Trowel, you ensure a floor that is as durable as it is flat. Don't risk your reputation on a "peeling" floor. Explore the full professional lineup at www.vansemac.com and build it right the first time. Note: The parameters provided in this document are for reference only and are not mandatory. Due to differences in technical characteristics between different brands and models of laser levelers, please consult the manufacturer for a suitable solution before actual operation. This reference document assumes no responsibility for any issues arising from failure to follow the manufacturer's instructions.Vanse The advantages of the world laser leveling machine
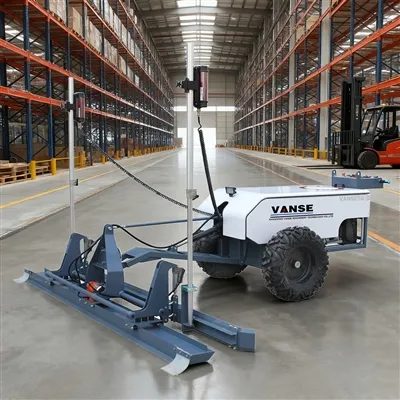
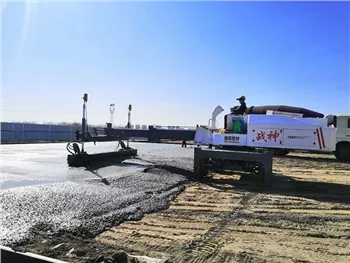
YZ40-4 large-scale telescopic boom laser leveling machine is equipped with laser system and full hydraulic control system, which makes the concrete construction ground level more accurate, and at the same time of high-efficiency construction, it can meet high-standard construction requirements. YZ40-4 large-scale telescopic arm laser leveling machine controls the leveling head in real time through the laser receiver on the laser leveling machine, so as to realize the equipment for high-precision and fast leveling of concrete. 1. High construction quality: The ground construction of laser leveling machine can significantly improve the flatness of the ground, the average flatness can reach 2mm, and the flatness quality is more than 3 times higher than the traditional method. It can also realize large area construction, reduce a large number of construction gaps, the required concrete collapse can be reduced, the concrete strength is guaranteed, so that the ground integrity is good, not easy to crack. 2. Fast construction speed: more than 3 times the work efficiency than the traditional beam vibrator, scraper, manual paving and so on, the average daily can complete 3,000 square meters of ground pouring, especially suitable for the simple shape, large working surface of the floor layer construction. 3. Reduce the amount of template support: with 20000 square meters of concrete pavement statistics, the traditional method needs to support 6300m side of the template, and the use of laser leveling machine construction, support only 2400m, template consumption is only 38%. 4. High degree of automation, small labor intensity: the heavy manual labor into mechanical spreading, vibrating, leveling, pulping, so that the operator reduces 30%, while reducing labor intensity. 5. High economic benefits: compared with the traditional process, the cost per square meter is reduced by 30%, and the ground maintenance cost is reduced in the later stage, thus significantly improving the economic benefits.