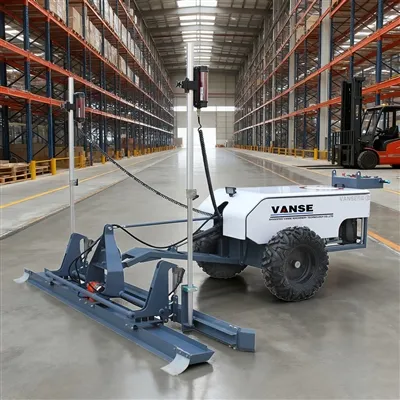
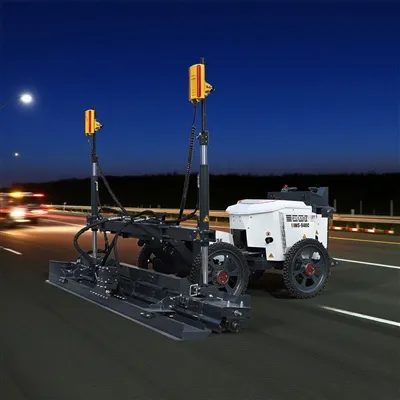
Technical Knowledge
How does the concrete laser leveling machine deal with complex terrain and irregular ground?
When dealing with complex terrain and irregular ground, the concrete laser leveling can take the following measures:
1. Flexible reference plane setting:
When the laser leveling machine performs automatic leveling, it can set an accurate reference plane (line) according to actual needs. For complex terrain and irregular ground, you can choose an appropriate datum setting method according to the characteristics of the terrain. For example, when the main focus is to control the height, the tightrope method can be used; when the main focus is to control the thickness, the floating datum beam method can be used. In this way, the leveling machine can adapt to changes in terrain according to the adjustment of the datum.
2. Precise laser positioning:
The laser leveling machine achieves precise positioning and control through the laser measurement and control system. On complex terrain and irregular ground, the laser measurement and control system can sense changes in the ground in real time and adjust the operation of the leveling machine through the control system to ensure the flatness of the ground.
3. Intelligent control system:
Modern concrete laser leveling machines are usually equipped with intelligent control systems that can automatically adjust the operating parameters and working methods of the leveling machine according to changes in terrain and ground. This intelligent control system can monitor the flatness of the ground in real time and automatically adjust parameters such as the speed and power of the leveling machine to achieve the best leveling effect.
4. Experienced operators:
For complex terrain and irregular ground, the experience and skills of the operator are also very important. Experienced operators can flexibly adjust the operating methods and parameters of the leveling machine according to changes in terrain and ground, ensuring that the leveling machine can achieve ideal leveling effects in complex environments.
To sum up, the concrete laser leveling machine can handle complex terrain and irregular ground well through flexible datum setting, precise laser positioning, intelligent control system and experienced operators to ensure the leveling work. progressed smoothly.


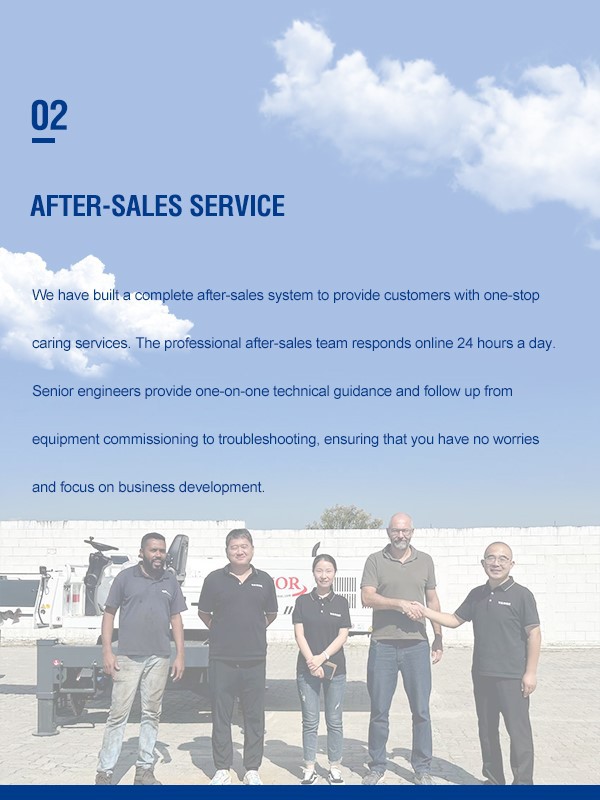
Thanks to All the Friends Who Support and Trust Shandong Vanse Machinery Technology Co., Ltd.
If you want to know more about Shandong Vanse Machinery Technology Co., Ltd. or have any questions, please feel free to contact us:
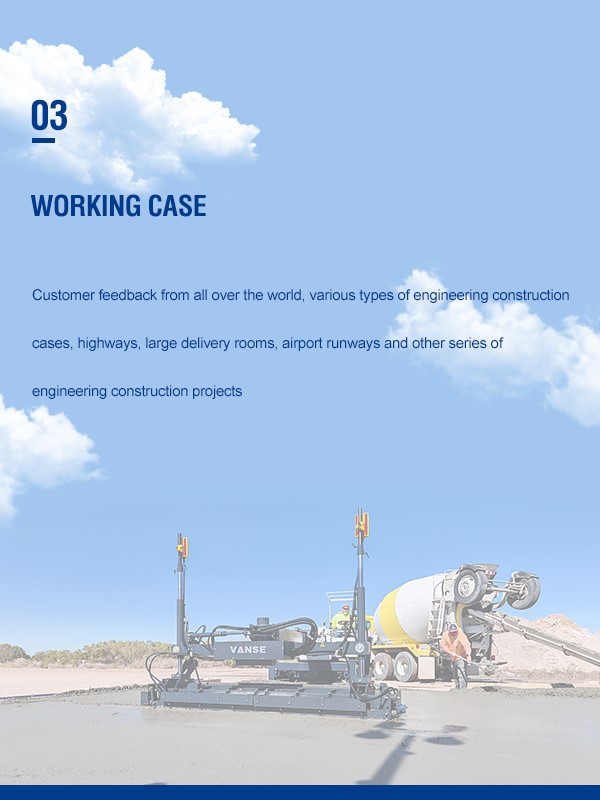
Our Factory
Shandong Vanse Machinery Technology Co., Ltd.

Share this article

About the Author: Shandong Vanse Machinery Technology Co., Ltd.
Shandong Vanse Machinery Technology Co., Ltd. is a high-tech manufacturer specializing in concrete construction machinery, including laser screeds and related equipment. The company integrates R&D, production, and global sales, with products exported to over 60 countries and widely used in infrastructure projects worldwide.
Previous Post
Next Post
Related Articles
You Might Also Like
Small mistakes, big risks! A collection of common mistakes made by laser leveler maintenance novices
Compared with ordinary leveling machines, laser leveling machines undoubtedly have a series of operational advantages, but as the service life of leveling machines continues to increase, it is inevitable that one or another fault problem will occur. In order to ensure the normal use of laser leveling machines, it is particularly important to master the machine fault repair skills in time. In order to further improve the fault repair rate of laser leveling machines and avoid unnecessary economic losses, this article simply lists several small mistakes that are easy to make when repairing leveling equipment. The clearance between the diesel engine piston and the cylinder liner, the "three gaps" of the piston ring, the clearance between the valve stem and the valve guide, etc., all types of laser leveling machines have strict requirements. When repairing the laser leveling machine, measurements should be taken, and parts that do not meet the clearance requirements should be adjusted or replaced. Most of the fixing or connecting bolts of various parts of the laser leveling machine have tightening torque requirements, such as injector fixing bolts, cylinder head bolts, connecting rod bolts, flywheel bolts, etc. Some specify tightening torque, some specify tightening angle, and also specify tightening sequence. Some maintenance personnel use the force rod at will and tighten by feeling, resulting in a large difference in tightening torque. Therefore, when repairing the laser leveling machine, the bolts must be tightened according to the specified torque and sequence to prevent mechanical failure due to excessive, too small or improper tightening torque of the bolts. When repairing the laser leveling machine, the phenomenon of misusing bolts is still more prominent. Because the performance and quality of the bolts do not meet the technical requirements, mechanical failures occur frequently after maintenance. However, in actual maintenance, most of them use ordinary nuts, which are very difficult to disassemble after a long time. Some technical requirements stipulate that they should be replaced after several disassembly and assembly. Because maintenance personnel do not understand these situations, repeated use of unqualified bolts can easily lead to mechanical failures or accidents. Therefore, when repairing laser leveling machines, when bolts are damaged or lost, they should be replaced in time with bolts that meet the requirements, and bolts should not be used indiscriminately. In short, in order to quickly restore the normal operation of the laser leveling machine, ensure the normal progress of the project construction, and avoid unnecessary construction costs and troubles, it is also hoped that relevant maintenance personnel must avoid the above-mentioned wrong behaviors in time and strengthen the management and maintenance of the machine after maintenance.In a low-temperature winter environment, how should a concrete laser leveling machine be maintained to avoid difficulties in starting?
In a low-temperature winter environment (typically referring to an ambient temperature of ≤5℃), concrete laser leveling machines are prone to difficulties in starting due to issues such as increased oil viscosity, battery discharge, and fuel solidification (for diesel models). Maintenance should be carried out from four dimensions: "protection of the starting system, optimization of oil performance, anti-freezing of core components, and protection of idle storage". The specific measures are as follows: At low temperatures, the battery capacity will drop significantly (for every 10℃ drop in temperature, the capacity approximately decreases by 10% to 15%), and the load on the starting motor increases, which is the main reason for the difficulty in starting. Special protection is required: Check the battery status: Use a multimeter to measure the battery voltage. For a 12V battery, it should be ≥12.4V (fully charged state). If the voltage is lower than 12V, immediately use a dedicated low-temperature charger (to avoid the low charging efficiency of ordinary chargers) to recharge the battery. If the battery has been in use for more than two years, it is prone to "quick discharge" at low temperatures. It is recommended to replace the battery with a new one in advance (to avoid failure when starting temporarily). Prevent the battery from cracking due to freezing: The freezing point of the battery electrolyte varies with its concentration (if the concentration is too low, it may freeze and crack the casing). Check the electrolyte level (if it is below the scale line, add distilled water; do not add tap water or electrolyte). If necessary, test the density of the electrolyte (use a hydrometer, standard value 1.26-1.28g/cm³; if the density is low, adjust the concentration). Clean the battery connection: If there is white sulfide (which is prone to condensation at low temperatures) at the connection, rinse it with hot water, then sand it clean with sandpaper, and apply vaseline or battery protector (to prevent re-oxidation and ensure smooth current conduction). Check the terminal blocks of the starting motor: Ensure that the bolts are tightened (metal shrinks and is prone to loosening at low temperatures, resulting in poor contact). If the terminal blocks are oxidized, they need to be sanded with sandpaper. Manually rotate the starting motor gear to ensure there is no jamming (to avoid poor gear meshing at low temperatures). Additional inspection for diesel models: Check if the start preheater (if any) is functioning properly – after power-on, the preheater indicator light should be on. If it is not on, check the circuit or replace the preheater (the preheater can increase the temperature inside the cylinder, help diesel atomize, and avoid difficulties in cold starting). Low temperatures can cause a sharp increase in the viscosity of engine oil, hydraulic oil and diesel, resulting in slow flow and difficulty in oil suction by the pump body. It is necessary to ensure the fluidity of the oil through "oil change + preheating". Replace with low-grade diesel: Select the corresponding grade based on the ambient temperature (for example, -20 # diesel for -10 ℃ to -20℃ and -35 # diesel for -20℃ to -35 ℃), to prevent diesel from solidifying in the fuel tank or fuel line (solidification can cause fuel supply interruption and prevent starting). If high-grade diesel has been added, diesel pour point depressant should be added (add it in the proportion specified in the manual to lower the freezing point of the diesel). Fuel system preheating: Before starting, you can first turn on the ignition switch (without starting the engine), and let the fuel pump be powered on to work for 30 seconds (some models have a "fuel preheating" mode), allowing the diesel to preheat and flow in the fuel pipes. If the diesel in the fuel tank has slightly solidified, a small amount of low-grade diesel or kerosene (not exceeding 10%) can be added to the tank to help dilute and melt it. Do not add gasoline to avoid safety risks. Type of oil Maintenance measures Engine oil 1. Switch to winter-specific low-temperature engine oil (such as 5W-30, 10W-30, the smaller the number before the viscosity grade, the better the low-temperature fluidity) to prevent the original summer engine oil from having excessive viscosity at low temperatures, which could increase the engine's starting resistance. 2. Before starting, if the ambient temperature is ≤-10℃, you can first heat the engine oil through the engine preheater (external or built-in) for 30 to 60 minutes, or pour hot water over the oil pan (water temperature 50 to 60℃, do not use boiling water) to reduce the viscosity of the engine oil. Hydraulic oil 1. Replace it with low-temperature anti-wear hydraulic oil (such as L-HV46, L-HV32, which has better low-temperature fluidity than ordinary hydraulic oil) to prevent the hydraulic oil from getting stuck at low temperatures, which could lead to the failure of the leveling scraper and the walking action. After starting the equipment, let the hydraulic system run idle for 5 to 10 minutes (operate the handle to slowly extend and contract the cylinder). When the temperature of the hydraulic oil rises above 10℃, then carry out load operation to avoid damage to the hydraulic pump due to dry grinding at low temperatures. In winter, the air humidity is high, and moisture is likely to remain inside the equipment. Freezing at low temperatures can cause components to get stuck or break, so targeted protection is needed Laser transmitter/receiver: When not in use, it should be stored indoors (to avoid low temperature and moisture in the open air). Before use, check if there is any ice inside (if there is, it needs to be thawed naturally indoors. Do not use open flames to bake it to avoid damaging electronic components). Before powering on, wipe the casing and lens with a dry soft cloth to ensure there is no moisture residue. Control circuit: Check if there is any condensation water at the circuit joints (if so, dry it with a hair dryer using cold air). Wrap the joints with waterproof insulating tape to prevent water from seeping in and causing short circuits, which may affect the transmission of laser signals. Hydraulic oil tank: Check whether the seal of the oil tank cover is intact (to prevent rainwater or snow water from seeping in). If water is mixed into the hydraulic oil, it will freeze at low temperatures, blocking the oil pipes or damaging the hydraulic pump. It is necessary to regularly drain the accumulated water at the bottom of the oil tank (open the oil tank drain valve, release a small amount of oil, and observe whether there is any water sedimentation). If there is too much water, all the hydraulic oil needs to be replaced and the oil tank cleaned. Engine cooling system (diesel model) : Antifreeze must be used (tap water or ordinary water is not allowed). The antifreeze should be mixed in a ratio of "antifreeze + distilled water = 1:1" (the freezing point can be reduced to around -35 ℃). Check the antifreeze level (it should be between "MIN" and "MAX" in the expansion tank). If the level is insufficient, add the same type of antifreeze. Prevent the cooling system from freezing and cracking the water tank or cylinder block. Hydraulic oil tank: Check whether the seal of the oil tank cover is intact (to prevent rainwater or snow water from seeping in). If water is mixed into the hydraulic oil, it will freeze at low temperatures, blocking the oil pipes or damaging the hydraulic pump. It is necessary to regularly drain the accumulated water at the bottom of the oil tank (open the oil tank drain valve, release a small amount of oil, and observe whether there is any water sedimentation). If there is too much water, all the hydraulic oil needs to be replaced and the oil tank cleaned. Engine cooling system (diesel model) : Antifreeze must be used (tap water or ordinary water is not allowed). The antifreeze should be mixed in a ratio of "antifreeze + distilled water = 1:1" (the freezing point can be reduced to around -35 ℃). Check the antifreeze level (it should be between "MIN" and "MAX" in the expansion tank). If the level is insufficient, add the same type of antifreeze. Prevent the cooling system from freezing and cracking the water tank or cylinder block. First startup: If the ambient temperature is ≤-15℃, do not start directly. First, perform the "three-step preheating" : ① Connect the power supply and turn on the preheater (if available) for 30 seconds; Turn off the preheater, wait for 10 seconds, and repeat 2 to 3 times. ③ Gently press the accelerator (for diesel models), slowly turn the start key. If the start fails in one attempt, wait for 1-2 minutes and then try again (to avoid overheating and damage to the starting motor due to continuous operation). Do not start continuously more than three times. After starting: After the engine starts, it should idle for 10 to 15 minutes (do not accelerate immediately). Wait until the water temperature rises above 40℃ and the oil pressure is normal (the pointer is stable within the standard range), then operate the hydraulic system and traveling mechanism to gradually adapt the equipment to the low-temperature environment. If the battery is discharged and the device cannot be started: It can be started by jumper connection (use the battery of another device, connect the positive terminal to the positive terminal and the negative terminal to the negative terminal. After starting, keep the idle speed for 15 minutes to charge the discharged battery). Do not jumper for a long time to avoid damaging the electrical system. If the diesel solidifies and causes the fuel supply to be interrupted: The equipment should be moved indoors (temperature ≥5℃) to allow the diesel to melt naturally, or low-grade diesel can be added to the fuel tank for dilution. After the diesel flows normally, press the fuel pump to expel the air in the fuel pipe, and then try to start it. If the hydraulic system gets stuck: After starting, run the hydraulic system unloaded first. If it still gets stuck, check the temperature of the hydraulic oil (if it is below 0℃). You can heat the hydraulic oil by connecting an external heater (placed outside the hydraulic oil pipe). Wait until the temperature rises above 10℃ before operating. Through the above measures, the problem of difficult start-up in winter due to low temperatures can be solved from four aspects: "start-up source, oil, components, and operation". At the same time, it can reduce the hidden damage to the equipment caused by low temperatures and ensure the stability and accuracy of the laser leveling machine machine during winter construction. Note: The parameters provided in this document are for reference only and are not mandatory. Due to differences in technical characteristics between different brands and models of laser levelers, please consult the manufacturer for a suitable solution before actual operation. This reference document assumes no responsibility for any issues arising from failure to follow the manufacturer's instructions.Key points for routine inspection, fault early warning and maintenance of the hydraulic system of concrete laser leveling
The routine inspection, fault early warning and maintenance points of the hydraulic system of the concrete laser leveling are a crucial topic, as the health condition of the hydraulic system directly determines the construction efficiency, leveling accuracy and equipment service life of the leveling. The following is a detailed and systematic guide. Objective: To prevent problems before they occur and promptly identify potential issues through daily observation. Oil level check: When the equipment is parked on a level ground and the hydraulic system is not started (or the cylinder has been retracted), check the oil level gauge in the hydraulic oil tank. The oil level should be between the marked upper and lower scale lines. Low oil level can cause the pump to run dry, the system to overheat and get damaged. If the oil level is too high, it may cause excessive pressure or oil leakage from the breather valve when the oil temperature rises. Leak inspection: Carefully inspect the entire hydraulic system, including: Pipe joints: Check for oil stains or dripping oil. Cylinder piston rod: Check for any scratches, bends or continuous leakage. Hydraulic pump, valve block, motor: Check if there is any leakage at the mating surface. Fuel tank surface: Whether it is clean and free of oil stains. Oil color: Observe the color of the hydraulic oil through the oil level gauge. New hydraulic oil is usually transparent amber in color. If it is found to be turbid and opaque (possibly water ingress), darker and blackened in color (possibly oxidation and deterioration), or milky white (definitely water ingress and emulsification), further treatment is required. Abnormal noise: Start the engine and operate various hydraulic actions (lifting, walking, vibration, etc.). Listen carefully for any sharp "click-click" sounds (cavitation sounds) or continuous dull abnormal noises from the hydraulic pump (possibly due to internal wear of the pump or motor). Vibration and Pulse: Touch the hydraulic pipeline with your hand to feel if there is any abnormally intense vibration or pulse sensation. This may be a sign of oil circuit blockage or pump/motor failure. Temperature: After working for a period of time, touch the outer shell of the hydraulic oil tank with your hand. If it feels hot to the touch (the temperature may exceed 60-70°C), it indicates that the system is overheated and needs to be shut down for inspection. Slow movement: Test the movement of all cylinders and motors to see if there is any slowdown in speed, weakness or jamming. Pressure maintenance: For the lifting cylinder, observe whether there is obvious "sinking" (i.e., internal leakage) after it is lifted. Objective: Identify early symptoms of faults to prevent minor issues from evolving into major ones. Warning signal Analysis of Possible causes Potential risk Slow and weak movements 1. Insufficient hydraulic oil or incorrect viscosity of the oil. The leveling accuracy has declined, making it impossible to work normally and resulting in low efficiency. 2. The main pump is worn out and internal leakage occurs, resulting in insufficient pressure/flow. 3. The set pressure of the relief valve (safety valve) is too low or the valve core is stuck. 4. Severe internal leakage of the actuator (cylinder/motor). Abnormal noise from the system (pump 1. The oil suction pipeline is clogged or the filter element is dirty. The hydraulic pump will be severely damaged in the short term and must be shut down immediately. 2. When the oil level is too low, the pump sucks air, causing cavitation. 3. Air mixed into the hydraulic oil (due to poor sealing of the pipelines). 4. The bearings or internal components of the pump itself are damaged. The system is severely overheating. 1. The hydraulic oil cooler is clogged (air-cooled or water-cooled). Accelerate the oxidation and deterioration of the oil, the aging of seals, and the wear of all hydraulic components. 2. The relief valve is frequently opened or the set pressure is too high. 3. Improper viscosity or deterioration of the hydraulic oil. 4. Severe leakage inside the pump or valve causes energy loss, which is converted into heat energy. The cylinder is crawling and shaking 1. There is air in the cylinder. It affects the stability of the leveling operation, causing waves to appear on the ground. 2. The wear of the piston seal in the oil cylinder leads to unstable pressure. 3. Oil contamination leads to the valve core of the control valve getting stuck and discontinuous movement. The hydraulic oil deteriorates rapidly 1. The oil temperature has been too high for a long time, leading to oxidation. Cause abrasive wear and corrosion of all hydraulic components. 2. Water enters the oil (such as leakage from the water cooler). 3. Contaminants (dust, metal shavings) invade the system. External leakage Aging of seals, damage to oil seals, loose joints, and wear and rupture of pipelines. Waste of oil, environmental pollution, insufficient system pressure, and even fire. Objective: Establish a scientific maintenance system to maximize the system's lifespan. Regularly change the hydraulic oil and filter elements: Strictly follow the oil change cycle specified by the equipment manufacturer (usually 500-1000 working hours). In harsh and dusty environments, the cycle should be shortened. When changing the oil, all hydraulic filter elements (suction oil filter, return oil filter, pressure oil filter) must be replaced simultaneously. Refueling must be filtered: When adding or replacing new oil, it is essential to use a dedicated fuel pump and filtering device. It is strictly forbidden to directly pour the oil drum into the fuel tank. Keep the fuel tank clean: Clean the area around the fuel tank cap before refueling to prevent debris from falling in. Regularly clean the magnetic plugs inside the fuel tank. Regularly clean the fins of the hydraulic oil radiator to ensure good ventilation and no blockage from concrete, dust, etc. Avoid the equipment operating under extremely high load for a long time. If the ambient temperature is high, an auxiliary cooler can be considered for installation. Ensure the sealing of all suction pipelines to prevent the pump from being sucked empty. Regularly check whether the fuel tank breathing valve is unobstructed. After the machine stops, regularly check the water outlet at the bottom of the fuel tank for any water. For key equipment, samples can be taken regularly and sent to professional laboratories for testing. The analysis report can inform you of the contamination degree of the oil, the composition of worn metals, water content and physical and chemical indicators, thereby accurately predicting faults, achieving oil replacement based on quality and saving costs. Avoid operating the hydraulic cylinder piston rod only when it reaches the end of its stroke. Instead, release the operating rod before approaching the end to take advantage of inertia to reach the position and reduce the impact. When starting up in winter, it should first run at low speed without load for a period of time to allow the oil temperature to rise and the viscosity to decrease before commencing operations. Maintain the project Daily/ Per shift Weekly/ 50 hours Month/ 250 hours Every six months / 1,000 hours Check the hydraulic oil level ✓ Check for leakage, abnormal noise and temperature ✓ Clean the surface of the fuel tank and radiator ✓ ✓ Check the tightness of the pipelines and joints ✓ Replace the hydraulic return oil filter element ✓ Take oil samples for testing (suggested) ✓ Completely replace the hydraulic oil and all filter elements ✓ (As per the manufacturer's regulations When it comes to the hydraulic system of the concrete laser leveling, the principle that "cleanliness is fundamental and prevention is key" must be adhered to. Only by conducting rigorous daily inspections to identify early warning signals and combining them with regular systematic maintenance can the stability and reliability of the equipment during the construction period be ensured, ultimately achieving high-precision and high-efficiency floor construction and significantly reducing the operating costs throughout the entire life cycle. Note: The parameters provided in this document are for reference only and are not mandatory. Due to differences in technical characteristics between different brands and models of laser levelers, please consult the manufacturer for a suitable solution before actual operation. This reference document assumes no responsibility for any issues arising from failure to follow the manufacturer's instructions.