Technical Knowledge
Four reasons for you to choose laser self-leveling machine!
Four reasons for you to choose laser leveling machine!
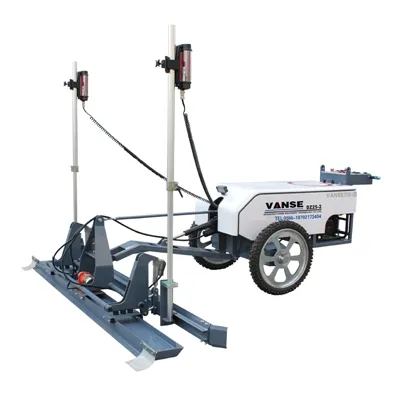
We choose the laser leveling machine in addition to the fast leveling of the equipment and the high degree of automation. After manual adjustment of the height, the equipment can operate by itself, integrating leveling, leveling, tamping, and compaction. All the work can be done. It can be completed at one time, which is very suitable for the leveling needs of large sites.
(1) The leveling principle of the laser leveling machine is realized under the automatic control of the computer by using precision laser technology, closed-loop control technology and highly precise hydraulic system. This is the most prominent difference between it and other floor construction processes. specialty.
(2) The leveling principle of the laser leveling machine is to rely on the leveling head driven by hydraulic power, cooperate with the laser system and the computer control system to complete the leveling work while automatically leveling. The leveling head is equipped with an integrated scraper, vibrator and leveling plate, which integrates all leveling, leveling, vibration and compaction work, and completes it at one time. The computer control system automatically adjusts the elevation 10 times per second in real time, and the vibration frequency of the vibrator with a balanced design reaches 3000 times per minute.
(3) The laser transmitter used to control the ground level is arranged independently, so that the level of the ground is not controlled by the template, and no cumulative error will occur.
(4) The laser leveling machine can also automatically control the longitudinal and transverse slopes, which is also completed by the laser system, computer system, hydraulic system, and mechanical system. For complex-shaped ground with high requirements such as drainage, a three-dimensional special-shaped ground treatment system can also be selected to achieve it.
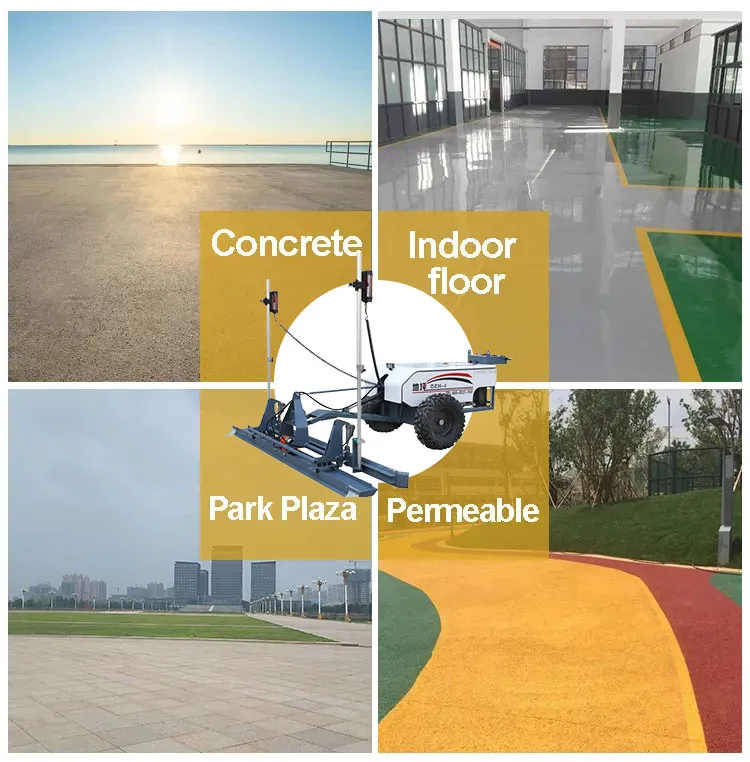
The laser leveling machine is developed according to the increasing demand for ground quality such as strength, flatness, levelness, etc. of modern industrial plants, large shopping malls, warehouses and other large-area cement concrete floors. Using Shenlong laser leveling machine to pave and level the cement concrete floor is much better than the ground paved by conventional methods-the ground flatness and levelness are increased by more than 3 times, and the compactness and strength are increased by more than 20%. At the same time, it can also improve work efficiency by more than 50%, and save about 35% of labor. In addition, it can easily place high-strength concrete, low-slump concrete and fiber cement. Its laser system is equipped with a variety of automatic control components to monitor the elevation of the leveling head in real time at a frequency of 10 times per second to ensure that the levelness and levelness of the ground being paved are effectively controlled. At the same time, the vibrating frequency of its powerful vibrator reaches 3000 times/min, which ensures that the concrete is vibrated and compacted, so that the entire paved concrete matrix is homogeneous and dense.
Thanks to All the Friends Who Support and Trust Shandong Vanse Machinery Technology Co., Ltd.
If you want to know more about Shandong Vanse Machinery Technology Co., Ltd. or have any questions, please feel free to contact us:
Our Factory
Shandong Vanse Machinery Technology Co., Ltd.








Share this article

About the Author: Shandong Vanse Machinery Technology Co., Ltd.
Shandong Vanse Machinery Technology Co., Ltd. is a high-tech manufacturer specializing in concrete construction machinery, including laser screeds and related equipment. The company integrates R&D, production, and global sales, with products exported to over 60 countries and widely used in infrastructure projects worldwide.
Previous Post
Next Post
Related Articles
You Might Also Like
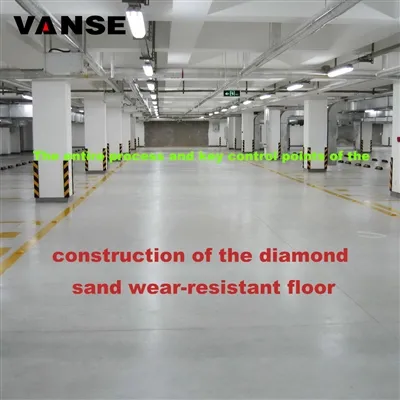
The entire process and key control points of the construction of the diamond sand wear-resistant floor
There are various methods for basement floor construction. Among them, the construction of diamond sand floor and diamond sand floor with curing agent is favored by many real estate projects due to its economic, wear-resistant, pressure-resistant, anti-pollution and easy-to-clean features. However, improper manufacturing processes can also lead to quality issues and potential risks. This article will respectively introduce the diamond sand wear-resistant floor from the perspective of technology and the prevention and control of common problems. 1. Diamond sand floor Compared with ordinary concrete floors, diamond sand floors have better wear resistance, compressive strength and impact resistance, and have a longer service life. However, from the perspective of microstructure, the surface of the diamond sand floor is relatively rough, and the capillary structure of concrete has a low resistance to the penetration, pollution and corrosion of substances such as acids, alkalis and oils. 2. Corundum + cured floor The construction of adding curing agent to the diamond sand floor. When the diamond sand floor is applied with a curing agent, it better makes up for the above deficiencies. Moreover, as the curing agent penetrates and forms a film, it enhances the integrity of the original surface, significantly improving its surface strength and wear resistance. After long-term use, it is obviously superior to the ordinary diamond sand floor in terms of cracking, powdering, and dusting, and is also easier to clean. It has extremely strong wear resistance, pressure resistance and impact resistance The diamond sand floor itself has excellent wear resistance. After adding a curing agent, the strength and hardness of the floor are further enhanced, and its wear resistance, pressure resistance and impact resistance are also significantly improved, and the durability of the floor is greatly enhanced. 2) Prevent sanding and dusting The main advantage of the diamond sand reinforced floor is its ability to prevent sanding and dusting. After the application of the curing agent, the surface hardness (indicated by the diameter of the indentation) and wear resistance (indicated by the length of the grinding pit) can be effectively enhanced. The surface becomes denser and has better integrity, which can effectively prevent sanding and dusting. 3) Waterproof, oil-proof and anti-corrosion The surface of a common diamond sand floor has pores that are hard to see with the naked eye. Water, oil and other corrosive liquids can seep into the interior of the floor through these holes and gaps. The most notable feature of the curing agent is its excellent sealing property, just like coating the floor with a film to prevent erosion. 1. The surface of the floor is firmly combined with the base layer, without any hollowing or sanding phenomena. 2. Surface layer quality: Uniform color, no obvious color difference, no scratches, no slag inclusions. The surface must not have cracks and hollowing is not allowed. 3. Gloss requirements: Achieve medium to high brightness, and the lamp should have a reflective effect when illuminated. 4. Joint: Uniform width, and the inside of the joint should be thoroughly cleaned. 5. The hardness of the floor should reach above 6.5 on the Mohs scale (tested by a hardness tester). 6. The trachoma rate shall not exceed 3 per square meter. 1. The strength of the concrete shall not be lower than C25. 2. The smallest possible water-cement ratio. A water-cement ratio that is too high can cause bleeding on the concrete surface and reduce the compressive strength of the concrete surface. Therefore, the water-cement ratio should be as small as possible, generally controlled below 0.5. 3. Commercial concrete should be used as much as possible. If on-site mixed concrete is used, its slump should be controlled at 1 to 3cm. The slump of commercial concrete is between 12 and 14cm. The diameter of the larger crushed stones shall not exceed 30mm. 4. When the concrete thickness is greater than 8cm, ordinary concrete should be used for pouring; when the concrete thickness is less than 8cm, fine aggregate concrete should be used for pouring. 5. Concrete should be leveled immediately after pouring, with a flatness of no more than 2mm within a 2-meter range. 6. Before the surface layer construction, the base concrete and vibration slurry should be sufficient (not less than 5mm). 7. The mud content of sand and gravel in concrete shall not exceed 2%. 8. After vibration grouting, the bleeding of the concrete should be uniform. If there are water pits, they must be removed and the surface leveled again; otherwise, the flatness of the diamond sand floor construction cannot be guaranteed. 1. Construction of diamond sand floor 1) The ground concrete is poured in sections and leveled immediately after pouring. When multiple locations are being poured simultaneously, pay attention to the construction sequence being carried out in one direction and consider the consistency of the mating surfaces. ② Concrete should be leveled with a long roller or a long straightedge after being pushed flat. Three to five hours after the concrete is poured, it should be observed that there is no bleeding on the surface and it has reached the initial setting state. 2) Use a mechanical trowel to tap the slurry in a round motion. For fine areas, use a wooden trowel to trim the edges. The main purpose is to smooth the concrete surface and reduce the floating slurry. Pay attention to troweling in the same direction as pouring. 3) Sprinkle the wear-resistant aggregate in two batches. In the first batch, evenly spread two-thirds of the wear-resistant material on the already troweled cement floor. 4) For the second time, evenly spread the remaining 1/3 of the wear-resistant material on the surface of the concrete, and use a mechanical trowel with a disc installed to work crisscross and cross at least twice. 5) Use a mechanical trowel (metal disc) to smooth it out multiple times back and forth. For the fine corners and edges, use a manual trowel in coordination with the construction. The time for the next process should be determined based on the temperature and humidity. 6) When the surface of the floor begins to harden, use a mechanical trowel with a metal blade to grind and smooth it, and repeat this operation 3 to 4 times. (Construction workers must wear soft flat shoes to avoid damaging the surface. The fine corners and edges should be polished by hand.) 7) Water curing should be carried out on the polished wear-resistant floor (mainly to prevent the evaporation of surface moisture and ensure the stable growth of the wear-resistant material's strength). The curing period is 7 days. 8) After the surface has cured for a certain period of time (5 to 6 hours after the completion of the wear-resistant material floor), use a mechanical trowel equipped with a metal blade for the final polishing and leveling. 9) Mold and compartment cutting (this can be done according to the actual situation on site and the owner's needs). Mold removal can be carried out the day after the completion of the diamond sand floor. During the operation, be careful not to damage the edge of the floor. The size of the compartments shall be determined by Party A on the third day after the completion of the diamond sand floor. 2. Application of penetrating liquid hardener (commonly known as curing agent) The original color of the diamond sand floor should be cured for more than 14 days, while the colored diamond sand floor usually needs to be cured for 28 days. Only after the color has matured can the penetrating liquid hardener be applied. The specific measures are as follows: Before construction, clean and remove debris, oil stains, paints, curing agents, etc. from the ground. If there are any pits or cracks, they should be repaired in advance with cement-based jointing mortar and maintained for 3 days. If no repair is needed, proceed with the construction directly. 2) Sprinkle water on the base layer until it is fully moistened. Do not sprinkle too much. 3) Use a 50-mesh resin grinding disc to grind the base layer, removing the floating slurry and stains on the base layer to make it free of roughness and gradually smooth. 4) After the 50-mesh grinding is completed, use a 150-mesh resin grinding disc for grinding. After grinding, use a high-power vacuum cleaner to suck up the mud and sewage on the surface of the base layer. 5) Sprinkle water on the surface of the base layer and grind it with a 300-mesh resin grinding disc (the ground should be ground evenly in a grid pattern, and the machine's pushing speed should be one step per second to grind off the remaining materials and fine scratches on the ground). After grinding, grind it with a 500-mesh grinding disc. Then, use a vacuum cleaner to suck up the wastewater and ventilate to dry the base layer. 6) After the base layer is dry, if the surface turns slightly white, apply the concrete sealant and hardener. Sprinkle the material evenly and spread it evenly with a mop. Keep the base layer surface moist for 30 minutes. If there is rapid penetration in some areas and it has dried, sprinkle the material again and use a mop to evenly moisten the base layer. 7) After 30 minutes, the surface of the concrete sealant and hardener begins to thicken. Water should be sprinkled on its surface and pushed back and forth with a long-bristled brush or floor scrubber to dilute the excess hardener and better penetrate into the base layer. After one hour, the excess material and water should be sucked dry with a vacuum cleaner to ensure that the base layer is dry for more than 12 hours. 8) After 12 hours, sprinkle water on the base surface of the completed construction material, and grind it with a 500-mesh resin grinding disc to remove the excess material. Then, grind it with a 1000-mesh grinding process. After grinding, use a vacuum cleaner to suck up the wastewater. 9) After 12 hours, the base layer has basically dried. Then, it is ground and polished with a 2000-mesh resin grinding disc to gradually give its surface a lustrous appearance. 10) For each mesh size, the grinding discs should be cross-ground 3 to 5 times in both the longitudinal and transverse directions. 11) Special treatment ① Corner and edge treatment: Large machinery can only be used for large-scale grinding. For corner and edge positions, a portable Angle grinder should be used for grinding and polishing, following the same method as for large-scale construction. When the base layer has poor strength and severe sanding, it is necessary to reinforce the base layer first, and then proceed with the normal construction process. First, use a 300-mesh resin grinding disc to remove the floating slurry on the surface of the base layer. Then, evenly sprinkle the concrete sealant and hardener to ensure it fully wets and penetrates into the base layer. After 12 hours, when the concrete sealant and hardener has cured and the strength of the base layer has improved, follow the normal process: 50-mesh grinding (water grinding) → 150-mesh grinding (water grinding) → 300-mesh grinding (water grinding) → construction materials → 12-hour drying and curing → 500-mesh grinding (water grinding) → 1000-mesh grinding (water grinding) → 2000-mesh grinding (dry grinding). The aesthetic effect of the floor cannot be achieved without meticulous control during the construction process. Besides strictly adhering to the corresponding techniques and methods, the prevention of common quality problems also requires attention. If the construction is not done properly, many problems will occur during later use. Now let's talk about the common quality problems of the diamond sand wear-resistant floor and how to prevent them. There are mainly three reasons for the color difference of corundum: 1) Material selection issues; 2) The materials were not spread in several portions, the amount of materials used was insufficient, and the thickness was uneven. 3) Maintenance issues: The use of covering with plastic film for maintenance led to uneven evaporation of ground moisture. The area where the film comes into contact with the floor is whitish, while the area where it does not touch the floor is normal in color. Preventive measures Choose a manufacturer with stable and reliable product quality and a good reputation. 2) The spreading of materials should be carried out strictly in accordance with the requirements of the briefing in several portions, with a usage of no less than 5kg/m². 3) Plastic film curing is strictly prohibited. During summer construction, water spraying curing can be adopted in several batches (with an interval of 2 to 3 hours). The allowable deviation of ground flatness is ≤2.5mm/2m in both longitudinal and transverse directions. The reasons for the deviation during construction are: 1) The template setup is out of tolerance; 2) The concrete part was not leveled in accordance with the standard. 3) The wear-resistant material is not evenly spread. Preventive measures 1) Strictly calibrate the elevation lines. Set up steel rods every 2 meters or so. The elevation of the steel rods should be the same as that on the longitudinal seam formwork. Check with a level. 2) The joints should be roughened and leveled in advance. When pouring new concrete, the levelness should be consistent with that of the already poured ground. Any low-lying areas should be replenished and filled in a timely manner. 3) Wear-resistant aggregates should be spread in two portions. The first dosage should be two-thirds of the total dosage. Ensure that the mixture falls evenly. Do not throw it forcefully to avoid the separation of aggregates and cement. After the wear-resistant material has absorbed a certain amount of moisture, it is ground and dispersed with a grinding machine and then combined with the base concrete slurry. For the second spreading, apply the remaining one-third in a direction perpendicular to that of the first spreading. When spreading, first use a straightedge or a straight scraper to measure the levelness, and adjust the uneven areas of the first spreading. After spreading, immediately smooth and polish it, and repeat the grinding machine operation at least twice. When the grinding machine is in operation, it should be carried out alternately in the longitudinal and transverse directions, evenly and orderly, to prevent material accumulation. The third time mainly involves repair treatment. For low-lying areas, materials are replenished and leveled. For corners and edges that cannot be covered by the grinding machine, manual flattening and smoothing are adopted. There are the following situations regarding ground cracks: If the initial setting time of concrete is not well controlled and the diamond sand wear-resistant aggregate is scattered when the moisture content of the concrete is relatively low, it is easy to cause cracks after the construction is completed. 2) Improper construction methods, insufficient thickness of the wear-resistant layer (corundum layer), rapid water loss (such as excessive construction environment atmosphere, etc.), resulting in volume shrinkage and linear shrinkage, causing cracks or hollowing. 3) Improper maintenance: After the completion of construction, the ground was not maintained within the prescribed time or was not adequately watered for maintenance. When the concrete temperature is relatively high, pouring cold water for curing can also cause cracks. Note: When using only the diamond sand floor, it is recommended to use a maintenance agent (oily and film-forming effect) to maintain the floor. If the corundum is reinforced (or epoxy), water curing can be directly adopted. 4) The contraction joint was cut late, and cracks appeared due to thermal expansion and contraction. Under normal circumstances, it is advisable to cut the expansion joints 24 to 48 hours after the completion of the construction of the corundum floor. If it is too late, as the hardness of the floor gradually increases, the floor is prone to "cracking" and developing cracks during the cutting process. 5) If the spacing of the division joints is too large, cracks may also occur. Preventive measures 1) Strictly control the time of the first sprinkling of materials; 2) The concrete layer and the wear-resistant layer (corundum) are constructed simultaneously. 3) The curing time shall be no less than 14 days; 4) Reasonably control the cutting time; The spacing of the division joints should generally not exceed 6m*6m. Cause of formation 1) The roughening and polishing processes are rough. 2) Inadequate maintenance and insufficient maintenance time; 3) The spreading time of wear-resistant aggregates is not well controlled. Preventive measures 1) Use a grinding machine to thoroughly smooth, compact and roughen the ground for no less than three times, and use a floor trowel to thoroughly smooth and level the ground for no less than three times. 2) The curing time shall be no less than 14 days; 3) Strictly control the spreading time of wear-resistant materials. The timing of spreading wear-resistant materials varies as needed, depending on factors such as climate, temperature, and concrete mix ratio. Spreading too early will cause the wear-resistant material to sink into the concrete and lose its effect. If it is spread too late, the concrete will gradually lose its adhesive force due to solidification, preventing the wear-resistant material from fully bonding with it. The most convenient way to determine the time for spreading wear-resistant materials is to let your feet sink about 5mm when stepping on the ground, and then you can start the first spreading work. The moisture at the edges of walls, columns, doors and formwork disappears more quickly. It is advisable to prioritize the application of water to prevent the effect from being reduced due to water loss. 1. Local damage: Clean the damaged area thoroughly, soak it in water to moisten it, then repair it with a putty made of styrene-butadiene latex mixed with water and a hardener material that has screened out the aggregates. Finally, apply the styrene-butadiene latex mixed with water emulsion. 2. Large-scale damage: According to actual needs, lines can be drawn and sawn on the damaged area, the surface layer and part of the base layer can be chiseled off, then the area can be cleaned and moistened, the plain cement slurry can be swept, concrete can be poured, and finally the surface layer of the diamond sand hardener can be applied. 3. Floor peeling: The surface of the wear-resistant diamond sand floor curls and peels. Remedial measures: Cut and chisel off the peeling area (chiseling it into a pitted surface), spray water on the pitted area to moisten it, then apply repair mortar of the same grade as the concrete and press it down to level the ground. Finally, apply a curing agent. 4. Remedial measures for cracks in diamond sand floor: 1) Cracks in areas with requirements for anti-seepage, impact resistance and wear resistance on the surface should undergo surface treatment. 2) For cracks that can affect the integrity, strength, impermeability and steel bar corrosion of the structure, grouting treatment should be carried out. 3) For cracks that endanger the safe operation of buildings, in addition to grouting treatment, other reinforcement measures should also be taken when necessary. 4) Cracks that are sensitive to temperature should be treated when the crack opening is relatively large in the later stage of the low-temperature season. 5) Flexible materials must be used to treat active cracks. Note: The parameters provided in this document are for reference only and are not mandatory. Due to differences in technical characteristics between different brands and models of laser levelers, please consult the manufacturer for a suitable solution before actual operation. This reference document assumes no responsibility for any issues arising from failure to follow the manufacturer's instructions.Concrete-pressure-strength-detection-method
Concrete pressure strength detection method 1. Rebounder or Schmitt Hammer (ASTM C805) Method: The hammer is activated by a spring release mechanism, which presses the plunger and presses it into the concrete surface. The rebound distance from the hammer to the concrete surface is in the range of 10 to 100. The measurement results are then associated with the strength of the concrete. Pros: Relatively easy to use and can be done directly in the field. Cons: To ensure accurate measurementresults, pre-calibrated concrete samples are required. Different states of the surface and the presence of rebar under large aggregates or test sites can affect the test results. 2. Penetration test (ASTM C803) Methods: When carrying out a penetration test, a pin or probe is drilled into the concrete surface with a special device. The strength and depth of drilling required to drill into a concrete surface are related to the strength of the poured concrete. Pros: Relatively easy to use and can be done directly in the field. Cons : The data are greatly influenced by conditions such as surface state, template type, and aggregate used. Accurate strength measurements require multiple sampling of concrete samples for early calibration. 3. Ultrasonic pulsation detection (ASTM C597) Method: This method is used to judge the velocity of the vibration energy pulsation in the ground floor. The ease with which this energy penetrates the floor plate reflects the results of the concrete's ability to elastic, resist deformation or stress, and density. The data is then associated with the strength of the concrete slab. Pros: This is a non-destructive testing method and can also be used to detect defects such as cracking or honeycomb holes inside concrete. Cons: The method is seriously affected by the enhancement method, the moisture in the aggregate and the concrete material. Multiple samples and calibrations are also required to obtain accurate test results. 4. Pull-up test (ASTM C900) Method: The main principle of this method is to pull the metal rod, which is poured inside or installed afterwards, out of the concrete. The cone after pulling out and the amount of force required to pull out from the concrete are related to the strength of the pressure. Pros: Easy to use, can be done in both old and new building structures. Cons: This detection can cause the concrete to break or damage. To obtain accurate test results, a large number of test samples need to be selected at different locations on the floor plate. 5. Drill core method (ASTM C42) Method: The drill core method is used to extract solidified concrete sample blocks from the floor plate. These samples are then compressed in the machine to monitor the strength of their concrete. Pros: These samples are more accurate than field solidification samples because the concrete of strength is tested by actual heat and solidified on site. Cons: This is a destructive detection method that requires the destruction of the structural integrity of the concrete slab. The position of the core needs to be patched after the fact. The strength data must be obtained by the lab. 6. Poured concrete cylinder detection method (ASTM C873) Method: The cylindrical mold is placed in the position of the pouring area. Fresh concrete is discharged directly into these molds, which are retained in the floor board. After the floor plate solidifies, remove the specimens and pressurize them to detect their strength. Pros: This method is considered to be more accurate than on-site cured specimens because the concrete undergoes the same solidification process and conditions as the site floor plate; Cons: This is a destructive detection method that requires the destruction of the structural integrity of the concrete slab. The hole position left after the specimen is removed needs to be repaired afterwards. The strength data must be obtained by the lab. 7. Wireless Maturity Sensor (ASTM C1074) Methods: The principle of this method is based on the direct relation of concrete strength and its hydration temperature history. Before starting pouring, the wireless sensor is placed in a concrete template and secured on the rebar. The sensor receives temperature data and uploads it to any smart device APP with a wireless connection. According to the maturity calculation formula of the setting number in the APP, the collected information is used to calculate the pressure strength of the concrete element at the current position. Pros: Anti-pressure strength data is fed back in real time and updated every 15 minutes. At the same time, because the sensor is embedded inside the template, the data accuracy and reliability are also ideal, i.e. the curing data collected is consistent with the in situ concrete element. This also means that you don't have to spend time waiting for a third-party lab to provide the test results. Cons: Each batch of mating concrete needs to create a maturity curve using a test method of a collapse dwelling barrel and complete a one-time calibration.Cooperate with laser leveling machine to ensure the quality of concrete floor engineering
In order to ensure the construction quality of concrete floor, more and more construction units now choose to use precision laser leveling machines to lay concrete floor. However, in the actual construction process, due to the inadequate cooperation of some enterprises in construction, or not strictly following the regulations to operate correctly, the quality of concrete floor construction is sometimes poor. In order to avoid such a situation from happening again, our company has made a detailed description of some matters related to the construction cooperation during the construction of the laser leveling machine. We hope that the relevant construction personnel will keep it in mind. ❖Wall line laying and leveling: Since the laser leveling machine cannot touch the wall, manual leveling is required within 200mm from the wall, so it is necessary to lay out the line as a reference for manual leveling. At the same time, set 2 to 3 leveling base points (ground design elevation, i.e. ±0.0) that are not disturbed during the construction period for the laser leveling machine to use at one time, and require good mutual visibility. Leveling point accuracy ±1mm. ❖Set templates (steel templates, the position is determined according to design requirements) around the columns to form separation seams. The elevation of the top surface of the template should be controlled within +0mm and -2mm to avoid affecting the flatness of the joints. ❖Installing construction joint formwork: Install the construction joint template along the range to be poured on the day (steel template is recommended), and the template should reserve holes with a spacing of 300mm for the insertion of the force transmission rod. The elevation of the top surface of the template should be controlled within +0mm and -2mm to avoid large deviations in the flatness of the joints of different bins. ❖Laser transmitter installation: It is planned to be installed on the column. The specific location should be set at a better location according to the amount of paving on the day. If it cannot be installed on the column, it should be installed on a special tripod. ❖In order to ensure the quality of concrete floor paving, each group needs to arrange 10 to 12 workers to cooperate to flatten the surface of the concrete spread on the ground so that the pile is slightly higher than the design elevation (about 20 to 30mm). At the same time, for the parts near the wall, exposed pipelines and the surrounding of the formwork, two workers are arranged to manually smooth the concrete material about 20~30cm away from the wall (formwork) (using a 2m scraper with an iron trowel). The workers responsible for smoothing the edges must be trained and skilled plasterers. These workers must obey the command and follow the arrangement to ensure the quality of construction. ❖ Since the thickness of the concrete reaches 200mm, and because of the installation of steel mesh, in order to ensure the compaction of the concrete, this project needs to arrange a vibrating rod to cooperate with the vibration. At the same time, in order to ensure that the protective layer of the steel mesh reaches the design requirement of thickness (70mm), it is necessary to arrange for manual lifting of the steel mesh and pad the support block in the range to be paved in advance. ❖ The width of the concrete material paved on the platform each time is required to be no more than 5m, and the length is based on the formwork boundary. The construction direction is from left to right (along the short side direction) and from front to back (along the long side direction). The recommended daily paving volume is 1200~1500㎡. Calculated based on 12 hours of working time per day, the feed rate is required to be 30 to 40m³. ❖Others: To ensure the flatness of the ground, special attention should be paid during the construction of the laser leveling machine: the slump of the concrete delivered to the platform each time must be consistent; the concrete feed rate must reach 40m. per hour or more, and the initial setting time of each batch of concrete must be consistent; the template elevation must be accurate and cannot be disturbed during construction; environmental coordination. The newly constructed concrete floor cannot be exposed to sunlight, wind, rain and other environments that are unfavorable to the curing of concrete. Special reminder: In order to make the laser leveling machine give full play to its inherent functions and ensure the construction quality and efficiency of the concrete floor, in addition to mastering the above-mentioned construction coordination precautions, there are many details that need to be paid attention to. Please look forward to the subsequent updates and sharing of this site.