Technical Knowledge
On-site Remediation Plan for Color Difference or Strength Variation Caused by Uneven Broadcasting
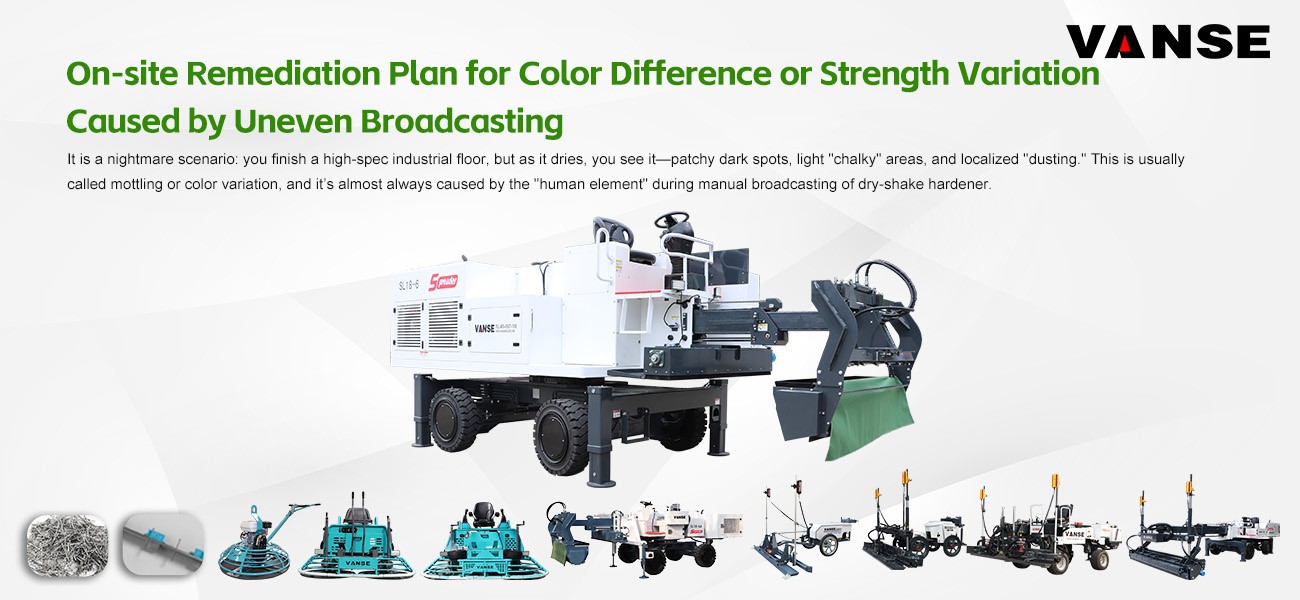
It is a nightmare scenario: you finish a high-spec industrial floor, but as it dries, you see it-patchy dark spots, light "chalky" areas, and localized "dusting." This is usually called mottling or color variation, and it’s almost always caused by the "human element" during manual broadcasting of dry-shake hardener.
If you are facing a "leopard-print" floor or inconsistent surface strength, here is the professional On-site Remediation Plan, along with the Vanse technical workflow to ensure it never happens again.
Step 1: The Diagnosis (Why did it happen?)
Before you fix it, you need to know why it failed.
Uneven Broadcasting: Manual throwing from a bucket creates "thick" and "thin" zones.
Timing Issues: Some areas were "over-troweled" while still wet, while others were finished too late.
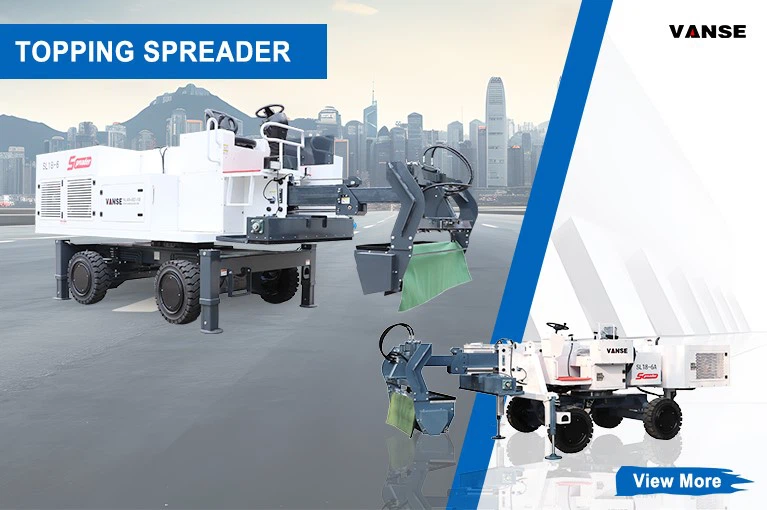
The Vanse Prevention Tip: The best remediation is prevention. Using the Vanse Automatic Topping Spreader instead of manual labor ensures a 100% uniform grams-per-square-meter application. By linking the spreader's output to the machine's speed, you eliminate the "human error" that causes color shifts and weak spots.
Step 2: The Remediation Plan (The "Cure")
1. Mechanical Leveling & Grinding
If the strength variation is severe (the surface is "powdering"), you have to remove the weak layer.
The Process: Use a planetary floor grinder with 30/40 grit metal-bond diamonds to strip away the inconsistent "skin."
The Vanse Tool for the Job: In cases where deep remediation is needed, use a Vanse Concrete Cutting Machine (Floor Saw) to create clean, straight boundaries around the affected area if a partial re-pour is required. This ensures the "patch" doesn't spall or crack at the edges.
2. Chemical Densification
Once the surface is opened up, you need to fix the strength variation.
The Process: Apply a high-quality Lithium or Sodium Silicate Densifier. This penetrates the concrete, reacts with the free lime, and creates a uniform, hard-shell finish across both the "weak" and "strong" zones.
Blending the Color: Use a tinted sealer or a "color-matched" penetrant during the densification process to mask the mottling and create a visually consistent finish.
3. Re-Burnishing for a Mirror Finish
After densifying, you need to "seal" the surface mechanically.
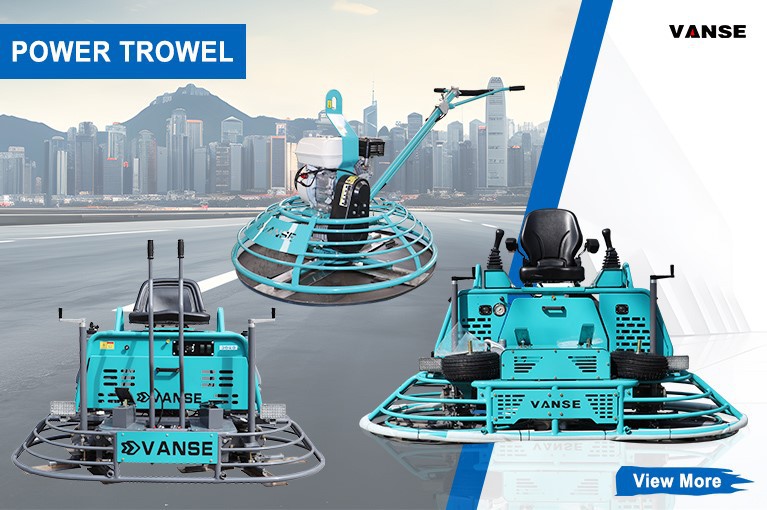
The Process: Transition to a Vanse Ride-on Power Trowel. With its high-torque engine and precision pitch control, you can "burnish" the densified surface. The heavy compaction of the Vanse rotors helps to blend the color and close the pores, resulting in a dense, dust-free, and uniform finish.
Step 3: Proactive Prevention (The Vanse Workflow)
Global buyers are moving away from manual methods because the cost of remediation is 3x higher than the cost of doing it right the first time. Here is the Vanse "Gold Standard" Workflow to avoid color and strength issues:
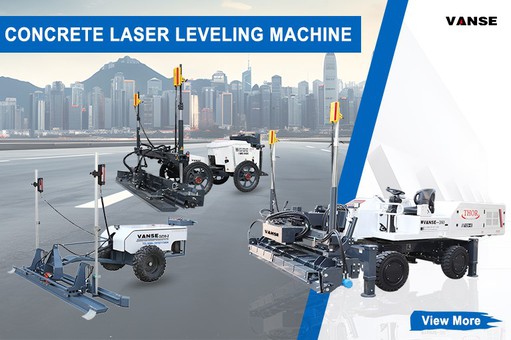
Uniform Placement: Use a Vanse Concrete Distributor or a Mini Dumper to place the base slab. This ensures the water-cement ratio is consistent across the entire bay, preventing "wet spots" that cause color variation.Consolidated Leveling: Use a Vanse Concrete Laser Leveling Machine . Its high-frequency vibration consolidates the slab from the bottom up, ensuring a uniform "paste" is available to bond with the hardener.
Mechanical Spreading: The Vanse Automatic Topping Spreader is your insurance policy. It applies the hardener in a single, even pass immediately behind the laser leveling, guaranteeing uniform strength and color.
Precision Finishing: The Vanse Power Trowel provides the final compaction, "locking in" the color and density.
Final Thought
Look, we’ve all been there-trying to "save money" by using manual labor for broadcasting, only to spend three times that amount on grinding and densifiers later. If you want to bid on FM1/FM2 high-spec projects, you need the precision of a Vanse fleet (www.vansemac.com).
Stop fixing floors and start finishing them. Visit Vanse Machinery today to see how our Topping Spreaders and Laser leveling can guarantee your color and strength consistency on every pour.
Note: The parameters provided in this document are for reference only and are not mandatory. Due to differences in technical characteristics between different brands and models of laser levelers, please consult the manufacturer for a suitable solution before actual operation. This reference document assumes no responsibility for any issues arising from failure to follow the manufacturer's instructions.
Thanks to All the Friends Who Support and Trust Shandong Vanse Machinery Technology Co., Ltd.
If you want to know more about Shandong Vanse Machinery Technology Co., Ltd. or have any questions, please feel free to contact us:
Our Factory
Shandong Vanse Machinery Technology Co., Ltd.
Share this article

About the Author: Shandong Vanse Machinery Technology Co., Ltd.
Shandong Vanse Machinery Technology Co., Ltd. is a high-tech manufacturer specializing in concrete construction machinery, including laser screeds and related equipment. The company integrates R&D, production, and global sales, with products exported to over 60 countries and widely used in infrastructure projects worldwide.
Previous Post
Next Post
Related Articles
You Might Also Like
How to Control the Quality of Ultra-Large Laser-Leveled Wear-Resistant Concrete Floors
Quality control for ultra-large laser-leveled, wear-resistant concrete floors requires a comprehensive process encompassing "pre-construction prevention, in-construction control, and post-construction acceptance." Combining the technical characteristics (laser precision leveling and the synergistic effect of wear-resistant materials) with the challenges of ultra-large-scale construction (temperature cracking, flatness control, and interface bonding), a control system is established across five core dimensions: personnel, materials, equipment, process, and environment. This can be broken down into the following key steps: Pre-construction preparation for ultra-large flooring directly impacts subsequent quality stability, focusing on addressing three key issues: "unified technical standards, adequate resource allocation, and proactive risk mitigation." Drawing Refinement and Technical Briefing: Based on the building's function (e.g., load and flatness requirements for factories and logistics warehouses must be clearly defined), floor compartment design should be refined (extra-large areas should be divided into 6m×6m or 8m×8m compartments to avoid thermal stress cracking). Key parameters should be clarified, including laser leveling accuracy (typically ±3mm/2m), wear-resistant material dosage (approximately 5-7kg/m2 for metallic aggregates, 3-5kg/m2 for non-metallic aggregates), and concrete strength grade (minimum C30, flexural strength ≥4.0MPa). Technical briefings should be conducted for all employees, with a focus on training laser operators, concrete vibrators, and wear-resistant material spreaders to ensure that all positions understand the key technical aspects of flatness control, wear-resistant layer bonding, and crack prevention. Risk Contingency Plan Development: To address potential issues that may arise during large-scale construction (e.g., insufficient initial setting time for concrete resulting in inability to apply the wear-resistant layer, laser equipment failure resulting in uneven flatness, and cracking due to high summer temperatures), develop a contingency plan: Confirm the initial setting time of concrete with the commercial concrete mixing plant in advance (adjusted to the temperature; ≥4 hours in summer, ≥6 hours in winter), and add a retarder if necessary. Keep one or two spare sets of core concrete laser leveling components (such as laser transmitters and receivers) to prevent interruptions to construction due to equipment failure. Prepare awnings and spray cooling equipment for summer construction, and thermal blankets and electric blankets for winter construction to maintain a temperature difference between the inside and outside of the concrete at ≤25°C. Materials are the core of floor quality. Three key materials, concrete, wear-resistant materials, and surface treatment agents, require full-process inspection: Material Type Key Control Points Inspection Standards Ready-mixed concrete 1. Mix Ratio: Crushed stone particle size 5-20mm (avoid large particles that affect smoothness), sand content 35%-40%; Slump test for each truck upon arrival. Compressive/flexural test blocks are retained according to specifications (one set per 100m³; less than 100m³ is counted as one set). 2. Slump: 120 ± 20mm (slump too large will cause sanding, too small will make vibration difficult); 3. Initial Setting Time: Adapt to the construction schedule (single-chamber construction requires leveling and wear-resistant layer application to be completed before initial setting). Wear-resistant material 1. Composition: Metallic aggregates (such as iron filings and corundum) must have a carbon content ≤ 0.2%, and non-metallic aggregates (such as quartz sand) must have a hardness ≥ Mohs 7; Sampling is randomly sent for inspection upon arrival to test compressive strength (≥60MPa) and abrasion resistance (wear loss ≤0.3g/cm²). 2. Moisture Content: ≤ 1% (avoid clumping that affects spreading uniformity); 3. Adhesion: No risk of delamination at the concrete interface. Interface treatment agent Used at the interface between the concrete base and the wear-resistant layer (if separate-chamber construction requires treatment of the interface between new and old concrete), high adhesion and crack resistance are required. Bond strength is also tested upon arrival (≥1.5MPa). Expired or clumped products are strictly prohibited. The core equipment for laser-leveling wear-resistant flooring is the concrete laser leveling. Its accuracy directly determines the flatness of the floor, so key control measures are required: Equipment Calibration: 24 hours before construction, calibrate the concrete laser leveling blade, vibrator, and laser receiver using a standard calibration ruler (2m straightedge) to ensure the laser transmitter's leveling error is ≤0.1mm/m and the screed blade's flatness error is ≤0.5mm. Equipment Selection: For very large areas (single area ≥1000㎡), a "large concrete laser leveling" (working width ≥2.5m) should be used, combined with a small walk-behind concrete laser leveling for corners (within 300mm of the wall). Equipment Maintenance: Before construction daily, check the equipment's fuel, hydraulic oil, and vibrator motor. After work, clean the screed blade and laser head to prevent concrete residue from affecting subsequent use. Large-scale floor construction requires a "divided-cell flow" approach. The connection between processes within each cell (concrete pouring → laser leveling → wear-resistant layer application → joint cutting and maintenance) is central to quality control, requiring on-site supervision of these five key processes. Separate compartment pouring: Strictly divide the construction area according to pre-designed compartment gaps, using the "skip compartment method" (with ≥48 hours between each compartment) to avoid temperature cracking caused by continuous pouring. The "slant layer method" is used during pouring, with each layer ≤300mm thick. The placement speed is matched to the laser leveling speed (approximately 10-15 m³/h). Vibration Control: After concrete placement, first use an inserted vibrator (vibration interval ≤500mm, vibration time 15-20 seconds, until no bubbles escape) to achieve compaction. Then, use a laser leveler to perform a simultaneous "vibration + leveling" operation (vibration frequency 3000-5000 times/minute) to ensure concrete density (rebound strength must meet the standard) while avoiding excessive vibration that can cause aggregate sinking and surface sanding. Benchmark Setting: The laser transmitter must be set up in a location away from the construction area and free from vibration interference (such as nearby fixed structures). Set the laser baseline according to the design elevation and recheck the baseline every two hours to prevent transmitter drift. Working Path: The concrete laser leveling uses a staggered back-and-forth method (first pass horizontally, second pass vertically). The screed height must be fine-tuned based on the concrete slump (higher slumps, lower slumps). Ensure the finished concrete surface is ≤3mm/2m flat. (Use a 2m ruler for immediate inspection, and correct any unsatisfactory areas immediately.) Corner Treatment: For areas beyond the concrete laser leveling's reach, such as walls and column bases, manual leveling is performed using a small handheld concrete laser leveling with an aluminum alloy screed to ensure consistent flatness across the entire surface. The timing and uniformity of spreading wear-resistant material directly impacts its bond with concrete. Spreading should be done in two stages, with strict timing controls. First Spreading: After the concrete is poured and leveled, wait until the surface moisture has evaporated to the point where no visible indentation is observed when pressed with a finger (approximately 1-2 hours before initial setting). Apply 60% of the total amount of material, evenly spreading using a "plum blossom" pattern (avoiding any accumulation). After spreading, use a grinder (with a circular disc) at low speed to embed the wear-resistant material into the concrete surface. Second Spreading: 30-60 minutes after the first grinding, when the surface of the wear-resistant material has initially set, spread the remaining 40% of the wear-resistant material. Use a grinder (with a different blade) at high speed until the surface is smooth and scratch-free. Control the grinding pressure to avoid thinning the wear-resistant layer; the thickness should be ≥ 3mm. Large-area floors are most susceptible to shrinkage cracks, requiring stress relief through slitting. Key control points: Joint cutting time: Start 24-48 hours after concrete pouring (adjusted to the temperature, within 24 hours in summer and within 48 hours in winter), when the concrete strength reaches 25%-30% of the design strength (rebound value approximately 20 MPa). Avoid premature joint edge cracking and delayed joint cutting, which can cause random cracking. Joint cutting parameters: Compartment joints should be "through joints" (depth ≥ 1/3 of the floor thickness; for example, for a 150mm thick floor, the joint depth should be ≥ 50mm). Longitudinal and transverse joint spacing should be designed based on the compartment design (6-8m), with a joint width of 5-8mm. Polyurethane sealant should be applied promptly after joint cutting to prevent rainwater from seeping into the base layer. Temporary contraction joints: If the area of a single compartment is large (≥ 1000 m2), temporary contraction joints (one every 3-4m, 20-30mm deep) should be installed during pouring. These temporary contraction joints will be extended to through joints during subsequent joint cutting. Inadequate curing can lead to sanding and insufficient strength on the concrete surface. Therefore, a "covering + watering" curing method is necessary. Curing Time: Within 12 hours after finishing the wear-resistant layer, immediately cover with plastic film and geotextile (to prevent rapid evaporation). Curing period: ≥7 days (if using impermeable concrete, curing period: ≥14 days). Curing Frequency: Water 3-4 times daily (increase to 5-6 times in summer) to ensure the geotextile is constantly moist to prevent the concrete surface from drying out and cracking. During winter curing, cover with a thermal blanket and maintain an ambient temperature of ≥5°C (if temperatures fall below 5°C, winter construction measures, such as adding antifreeze, are required). After completion of ultra-large floor construction, a comprehensive inspection is required in accordance with the "Concrete Structure Construction Quality Acceptance Code" (GB50204) and the "Technical Code for Wear-Resistant Concrete Floors" (JGJ/T 337), focusing on the three core indicators of flatness, wear resistance, and crack control. Appearance Inspection: A comprehensive inspection of the floor surface is required. The floor must be free of sanding, peeling, exposed surfaces, or scratches. The wear-resistant layer must be uniform in color with no significant color variations. Crack Inspection: A crack width gauge is used to inspect for cracks. "Non-through surface cracks" (width ≤ 0.2mm) are permitted. "Through cracks" or cracks with a width greater than 0.2mm are strictly prohibited. If excessive cracks are found, the cracked area must be chiseled out (extending 100mm), and the concrete and wear-resistant layer must be re-poured. After rectification, re-inspection will be conducted. Test Items Testing Method Qualification Criteria Smoothness Using a 2m straightedge and a feeler gauge, test at five points (evenly distributed) per 100 m2, recording the maximum deviation. Deviation at any point ≤ 3mm/2m, and a pass rate ≥ 95% Abrasion Resistance Using the Taber Abrasion Test, sample a representative area (100 mm × 100 mm) and weigh it after 500 cycles of abrasion. Abrasion loss ≤ 0.3g/cm² (metal aggregate wear layer), ≤ 0.5g/cm² (non-metal aggregate wear layer) Compressive Strength Concrete test blocks were collected according to specifications (one per 1000 m2) and tested after 28 days of standard curing. Concrete compressive strength ≥ design value (e.g., C30 ≥ 30MPa), flexural strength ≥ 4.0MPa Adhesive Strength Using the Pull-Out Test, samples (50 mm diameter) were taken at the interface between the wear-resistant layer and concrete, and the pull-out strength was measured. Bond strength ≥ 1.0MPa, with failure mode being "cohesive failure of concrete" (not interfacial debonding) After acceptance, finished product protection measures must be implemented to prevent subsequent construction (such as equipment installation and pipeline laying) from damaging the floor: Do not allow heavy equipment (such as forklifts or cranes) to directly roll over the floor (a steel plate is required). Avoid sharp objects (such as rebar or steel pipes) from striking the floor surface. If holes need to be drilled in the floor (e.g., to install a floor drain), use specialized drilling equipment. Manual chiseling is strictly prohibited to prevent cracking of the surrounding concrete. Large-scale floor construction is susceptible to extreme environmental impacts, such as high temperatures, low temperatures, and strong winds. Targeted adjustments to control measures are required: During high-temperature construction (temperature ≥30°C): Adjust the concrete pouring time to the morning and evening (avoid the high-temperature period of 10:00 AM to 4:00 PM); Pour the concrete immediately after arrival to avoid prolonged standing (this shortens the initial setting time); Immediately cover the wear-resistant layer after finishing to maintain moisture, and increase the watering frequency (once every hour). Low-temperature construction (temperature ≤ 5°C): Add antifreeze to the concrete (dosage according to the instructions, strictly prohibit exceeding the standard) to ensure the concrete enters the mold at a temperature ≥ 10°C. After construction, cover with a thermal blanket and electric heating blanket to maintain an ambient temperature ≥ 5°C. Extend the curing period (≥ 10 days) and remove the insulation only after the concrete strength reaches 70%. In strong winds (wind speed ≥ 5m/s): Suspend the application of the wear-resistant layer (to prevent the material from being blown away by the wind); Immediately cover the concrete with plastic sheeting after pouring (to prevent rapid evaporation of surface moisture and resulting in sanding). Through the above full-process and multi-dimensional quality control, the three core quality problems of "poor flatness, peeling of the wear-resistant layer, and shrinkage cracks" of ultra-large-area laser-leveled wear-resistant concrete floors can be effectively solved, and ultimately the floor's "high strength, high wear resistance, and high flatness" requirements can be achieved. Note: The parameters provided in this document are for reference only and are not mandatory. Due to differences in technical characteristics between different brands and models of laser levelers, please consult the manufacturer for a suitable solution before actual operation. This reference document assumes no responsibility for any issues arising from failure to follow the manufacturer's instructions.How maintainable is a concrete laser leveling machine?
Concrete laser leveling machine maintainability With the rapid development of the construction industry, concrete laser leveling machines, as an efficient and accurate concrete construction equipment, are widely used in various construction projects. However, in order to ensure the long-term stable operation of the equipment, reduce the failure rate, and improve production efficiency, research on the maintainability of concrete laser leveling machines is crucial. This article will take an in-depth look at concrete laser leveling serviceability and its impact on equipment performance. ◆Working principle and composition of concrete laser leveling machine Concrete laser leveling machines mainly work based on a combination of laser technology and scraping machinery. It generates a laser beam through a laser transmitter and receives and calibrates it through a receiver. The leveling head is responsible for reflecting the laser beam onto the work surface and smoothing the concrete surface. In addition, the equipment is equipped with support wheels and steering wheels to ensure operational stability and flexibility. ◆The importance of maintainability Maintainability refers to the nature of equipment that can be easily repaired and maintained during operation. Good maintainability can improve the operating efficiency of equipment, reduce failure rates, and reduce downtime, thereby saving costs for enterprises and improving production efficiency. In addition, for equipment that operates continuously for a long time, such as concrete laser levelings, good maintainability is the key to ensuring stable operation of the equipment. ◆Maintainability design of concrete laser leveling machine In order to improve the maintainability of concrete laser leveling machines, designers need to consider the following aspects: ★Modular design: The main components of the equipment are designed into modules, which can be easily replaced and repaired. For example, components such as the leveling head, support wheels and steering wheels can be designed as modules and can be quickly replaced in the event of failure. ★Easy disassembly design: Designers should consider the ease of disassembly and assembly of the equipment. For example, standardized connection methods should be used at the connections between the main components of the equipment to facilitate disassembly and assembly. ★Lubrication and maintenance design: The moving parts of the equipment should be lubricated and maintained regularly to reduce wear and tear. Designers should consider the lubrication and maintenance cycles of the equipment, as well as the methods and tools for lubrication and maintenance. ★Dust-proof and waterproof design: Concrete laser levelingers often face dust and water environments when working on construction sites. Designers should consider dustproof and waterproof designs for equipment to extend the service life of the equipment. ★Fault prompt design: The equipment should have a fault prompt function. When the equipment fails, the operator can detect it in time and take corresponding measures. ◆M aintenance practices and recommendations for concrete laser leveling machines In actual use, in order to improve the maintainability of the concrete laser leveling, operators need to comply with the following recommendations: ★Regular inspection: Operators should regularly check the wear and tear of various parts of the equipment, especially the moving parts. If parts are found to be severely worn or damaged, they should be replaced in time. ★Keep it clean: The concrete laser leveling machine should be kept clean to prevent dust and debris from entering the inside of the equipment. During operation, avoid dropping debris into the equipment. ★Regular lubrication: The moving parts of the equipment should be lubricated and maintained regularly. Operators should regularly add lubricating oil or grease to the equipment according to the equipment's lubrication and maintenance requirements. ★Moisture-proof and rust-proof: The concrete laser leveling machine should be placed in a dry environment to avoid moisture and rust. After working in a humid environment, water stains and rust on the surface of the equipment should be cleaned in time. ★Back up wearing parts: For some wearing parts, such as scrapers, bearings, etc., some spare parts should be backed up so that they can be replaced in time w hen needed. ★Train operators: Operators should undergo professional training and be familiar with the structure, performance and working principles of the equipment. During the operation, the operating procedures should be strictly followed to avoid damage to the equipment caused by misoperation. ★Establish maintenance files: For each concrete laser leveling machine, a complete maintenance file should be established to record equipment repair records, maintenance records and replacement parts records, etc. Through the establishment of maintenance files, we can better understand the operating status and maintenance status of the equipment, and provide a basis for equipment repair and maintenance. ★Introducing condition monitoring technology: By introducing condition monitoring technology such as vibration monitoring, temperature monitoring, etc., the operating status of the concrete laser leveling can be monitored in real time to detect abnormal situations in a timely manner and take corresponding measures to avoid the expansion of faults, thereby reducing maintenance costs and improving production efficiency. ★Reasonably arrange maintenance plans: Reasonably arrange maintenance plans based on the operating status and maintenance experience of the equipment to avoid excessive maintenance or insufficient maintenance, reduce equipment failure rates and repair costs, and improve equipment maintainability. ★Establish an expert support system: By establishing an expert support system, we provide technical support to operators and maintenance personnel to solve the problems they encounter at work, improve the efficiency and accuracy of problem solving, and thereby improve the maintainability of the equipment. In short, good maintainability is one of the key factors to ensure the long-term stable operation of the concrete laser leveling. Through reasonable design and scientific management, the maintainability of the equipment can be improved, maintenance costs can be reduced, production efficiency can be improved, and more value can be created for the enterprise.How to evaluate and improve the effect of concrete pavement leveling through quality inspection?
Evaluating and improving the smoothing effect of concrete pavement through quality inspection is a systematic work involving multiple links. The following will elaborate on how to evaluate and improve the smoothing effect of concrete pavement through quality inspection. •◆•1•◆◆ Assessment 1. Smoothness test: Smoothness is an important indicator for evaluating the quality of concrete pavement. By using a flatness detector to continuously measure the surface of the concrete pavement, record the unevenness at different locations and generate a pavement flatness index. According to the distribution and value range of the flatness index, the quality of road surface smoothness can be judged. The smaller the value, the better the smoothness. 2. Compaction degree test: Compaction degree is an important parameter to test the strength of concrete pavement. Detecting the compaction of the road surface by coring method or radar wave method can reflect the density of the concrete road surface. The higher the degree of compaction, the denser and more durable the pavement material is. 3. Anti-skid performance test: Anti-skid performance is an important indicator of the safety of concrete pavement. Use a pendulum friction meter to measure the friction coefficient of the road surface to understand the anti-skid ability of the road surface. The larger the friction coefficient, the better the anti-skid performance. 4. Damage detection: Regularly conduct damage surveys on concrete pavement, record various cracks, pits, looseness and other damage conditions, analyze the causes of damage, and provide basis for pavement repair and maintenance. •◆•2•◆◆ Improvement 1. Material control: Strengthen the quality testing of raw materials to ensure that the quality of cement, aggregate and other materials meets the requirements. The use of high-quality raw materials can improve the strength and durability of concrete, thereby improving the smoothness of the road surface. 2. Mix ratio design: Optimize concrete mix ratio design and select appropriate water-cement ratio, sand rate and aggregate gradation. Determine the best mix ratio through experiments to improve the working performance and compactness of the concrete. 3. Construction process optimization: Strengthen quality control during the construction process to ensure adequate concrete mixing, transportation, paving and vibration. The use of advanced construction techniques and technologies, such as slip form paving, three-roller unit paving, etc., can improve the smoothness and compaction of the road surface. 4. Health care and maintenance: Strengthen the early health care and maintenance of concrete pavement, take appropriate moisturizing and health care measures, control traffic load, and repair damaged parts in a timely manner. Health care and maintenance can reduce the occurrence of quality problems such as cracks and potholes, and improve the service life and smoothness of the road surface. 5. Quality inspection standardization: Develop detailed quality inspection standards and operating procedures to ensure the accuracy and reliability of inspection work. Discover existing problems and deficiencies through statistical analysis of quality inspection data, and continuously improve construction technology and quality management systems. 6. Training and awareness improvement: Strengthen training and technical exchanges for construction personnel to improve their understanding of the importance of quality inspection and operational skills. Through training and awareness raising, construction personnel's sense of responsibility and quality awareness can be enhanced to promote continuous quality improvement. 7. Introduce advanced technology: Pay attention to and introduce advanced construction technology and quality inspection instruments to improve construction efficiency and quality inspection levels. For example, a high-precision GPS positioning system is used for measurement and setting out, and an automated flatness detector is used for continuous measurement. The application of these advanced technologies can improve the accuracy of data collection and processing efficiency, providing strong support for quality assessment and improvement. In summary, evaluating and improving the effectiveness of concrete pavement leveling through quality testing is a comprehensive process. In actual work, multiple methods should be adopted for evaluation and improvement based on specific conditions to ensure that the flatness and durability of the concrete pavement meet the expected requirements. At the same time, we will strengthen the construction of quality management systems and technological innovation to continuously improve the quality level of concrete pavement construction.