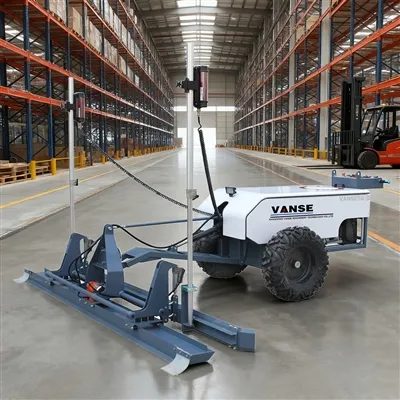
Technical Knowledge
What should you pay attention to renting a concrete laser leveling machine?

When renting a concrete laser leveling, you need to pay attention to the following points:
1. Choose the right leasing method
There are many ways to rent concrete laser leveling machines, including long-term rental, short-term rental, hourly rental, etc. Different leasing methods correspond to different needs and budgets, and you need to choose according to the actual situation. Long-term leasing usually requires higher rent, but can be used for a longer period of time, which is suitable for construction companies that need to use the leveling machine for a long time; short-term leasing and hourly leasing are suitable for situations that require short-term use of the leveling machine, such as a certain specific engineering projects.
2. Choose a regular lessor
When choosing a lessor, you need to choose a formal and qualified lessor to ensure that the leased concrete laser leveling machine has reliable quality and guaranteed service. You can find regular leasing companies through online searches, friend recommendations, etc.
3. Understand the rental fees and deposit status
Before signing a rental contract, you need to understand the specific rental fees and deposits. Rental costs include rental and transportation costs, etc. The specific price needs to be negotiated based on the actual situation. The deposit is to protect the rights and interests of both parties to the lease. After the contract expires, if the leveler is not damaged or causes no other losses, the lessor needs to return the deposit to the lessee.
4. Check the quality of the leveling machine
Before taking delivery of a rental concrete laser leveling, the quality of the leveling needs to be inspected. The inspection content includes the appearance of the leveler, whether the spare parts are complete, and whether the performance is normal, etc. If there are any problems, you need to contact the lessor promptly and request replacement or repair.
5. Sign a lease contract
When signing a lease contract, you need to read the terms of the contract carefully to clarify the rights and obligations of both parties. The contract content should include the lease term, rent and payment method, deposit and return method, equipment maintenance and repair responsibilities, etc. In addition, you also need to understand important terms such as liability for breach of contract and methods of resolving disputes.
6. Precautions during use
During the rental period, you need to pay attention to the following points when using the concrete laser leveling:
Comply with the operating specifications and precautions in the instruction manual, and use and maintain the leveling machine correctly;
Avoid the leveler working in harsh environments, such as high temperature, low temperature, humidity, etc.;
If any problems or malfunctions are found during use, stop the machine immediately and contact the lessor;
Comply with safety regulations at the construction site to ensure the safety of construction workers;
After use, the surface of the leveler should be cleaned in time to avoid affecting the next use.
7. Pay rent and maintenance fees on time
In the process of using a concrete laser leveling machine, rent and maintenance fees need to be paid on time. The rent is the cost of leasing the leveling machine and needs to be paid according to the time and method agreed in the contract; the maintenance fee is to ensure the normal use and maintenance of the leveling machine and needs to be maintained and maintained in accordance with the requirements in the instruction manual.
8. Pay attention to the return of equipment
At the end of the lease period, the concrete laser leveling needs to be returned to the lessor. Please note the following points when returning:
Make sure the surface of the leveler is clean and tidy with no obvious damage;
Make sure the spare parts of the leveling machine are intact;
Make sure the leveler is functioning properly;
Contact the lessor promptly and go through the return procedures.
To sum up, when renting a concrete laser leveling, you need to pay attention to choosing the appropriate rental method, choosing a regular lessor, understanding the rental fees and deposits, checking the quality of the leveling, signing a rental contract, and paying attention to the precautions during use. Pay rent and maintenance fees on time and pay attention to the return of equipment. Only by carefully understanding and complying with the above precautions can we better use the concrete laser leveler and improve construction efficiency and quality.
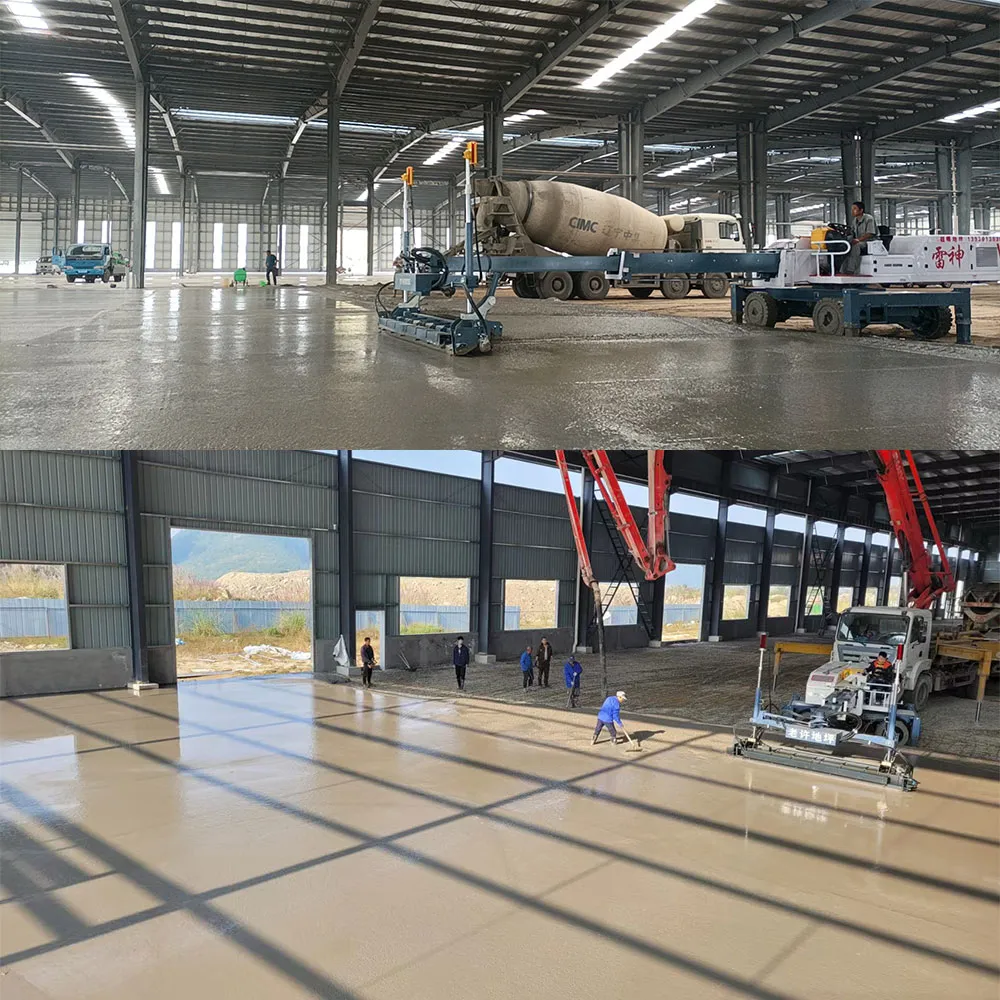
Thanks to All the Friends Who Support and Trust Shandong Vanse Machinery Technology Co., Ltd.
If you want to know more about Shandong Vanse Machinery Technology Co., Ltd. or have any questions, please feel free to contact us:
Our Factory
Shandong Vanse Machinery Technology Co., Ltd.








Share this article

About the Author: Shandong Vanse Machinery Technology Co., Ltd.
Shandong Vanse Machinery Technology Co., Ltd. is a high-tech manufacturer specializing in concrete construction machinery, including laser screeds and related equipment. The company integrates R&D, production, and global sales, with products exported to over 60 countries and widely used in infrastructure projects worldwide.
Previous Post
Next Post
Related Articles
You Might Also Like
In a low-temperature winter environment, how should a concrete laser leveling machine be maintained to avoid difficulties in starting?
In a low-temperature winter environment (typically referring to an ambient temperature of ≤5℃), concrete laser leveling machines are prone to difficulties in starting due to issues such as increased oil viscosity, battery discharge, and fuel solidification (for diesel models). Maintenance should be carried out from four dimensions: "protection of the starting system, optimization of oil performance, anti-freezing of core components, and protection of idle storage". The specific measures are as follows: At low temperatures, the battery capacity will drop significantly (for every 10℃ drop in temperature, the capacity approximately decreases by 10% to 15%), and the load on the starting motor increases, which is the main reason for the difficulty in starting. Special protection is required: Check the battery status: Use a multimeter to measure the battery voltage. For a 12V battery, it should be ≥12.4V (fully charged state). If the voltage is lower than 12V, immediately use a dedicated low-temperature charger (to avoid the low charging efficiency of ordinary chargers) to recharge the battery. If the battery has been in use for more than two years, it is prone to "quick discharge" at low temperatures. It is recommended to replace the battery with a new one in advance (to avoid failure when starting temporarily). Prevent the battery from cracking due to freezing: The freezing point of the battery electrolyte varies with its concentration (if the concentration is too low, it may freeze and crack the casing). Check the electrolyte level (if it is below the scale line, add distilled water; do not add tap water or electrolyte). If necessary, test the density of the electrolyte (use a hydrometer, standard value 1.26-1.28g/cm³; if the density is low, adjust the concentration). Clean the battery connection: If there is white sulfide (which is prone to condensation at low temperatures) at the connection, rinse it with hot water, then sand it clean with sandpaper, and apply vaseline or battery protector (to prevent re-oxidation and ensure smooth current conduction). Check the terminal blocks of the starting motor: Ensure that the bolts are tightened (metal shrinks and is prone to loosening at low temperatures, resulting in poor contact). If the terminal blocks are oxidized, they need to be sanded with sandpaper. Manually rotate the starting motor gear to ensure there is no jamming (to avoid poor gear meshing at low temperatures). Additional inspection for diesel models: Check if the start preheater (if any) is functioning properly – after power-on, the preheater indicator light should be on. If it is not on, check the circuit or replace the preheater (the preheater can increase the temperature inside the cylinder, help diesel atomize, and avoid difficulties in cold starting). Low temperatures can cause a sharp increase in the viscosity of engine oil, hydraulic oil and diesel, resulting in slow flow and difficulty in oil suction by the pump body. It is necessary to ensure the fluidity of the oil through "oil change + preheating". Replace with low-grade diesel: Select the corresponding grade based on the ambient temperature (for example, -20 # diesel for -10 ℃ to -20℃ and -35 # diesel for -20℃ to -35 ℃), to prevent diesel from solidifying in the fuel tank or fuel line (solidification can cause fuel supply interruption and prevent starting). If high-grade diesel has been added, diesel pour point depressant should be added (add it in the proportion specified in the manual to lower the freezing point of the diesel). Fuel system preheating: Before starting, you can first turn on the ignition switch (without starting the engine), and let the fuel pump be powered on to work for 30 seconds (some models have a "fuel preheating" mode), allowing the diesel to preheat and flow in the fuel pipes. If the diesel in the fuel tank has slightly solidified, a small amount of low-grade diesel or kerosene (not exceeding 10%) can be added to the tank to help dilute and melt it. Do not add gasoline to avoid safety risks. Type of oil Maintenance measures Engine oil 1. Switch to winter-specific low-temperature engine oil (such as 5W-30, 10W-30, the smaller the number before the viscosity grade, the better the low-temperature fluidity) to prevent the original summer engine oil from having excessive viscosity at low temperatures, which could increase the engine's starting resistance. 2. Before starting, if the ambient temperature is ≤-10℃, you can first heat the engine oil through the engine preheater (external or built-in) for 30 to 60 minutes, or pour hot water over the oil pan (water temperature 50 to 60℃, do not use boiling water) to reduce the viscosity of the engine oil. Hydraulic oil 1. Replace it with low-temperature anti-wear hydraulic oil (such as L-HV46, L-HV32, which has better low-temperature fluidity than ordinary hydraulic oil) to prevent the hydraulic oil from getting stuck at low temperatures, which could lead to the failure of the leveling scraper and the walking action. After starting the equipment, let the hydraulic system run idle for 5 to 10 minutes (operate the handle to slowly extend and contract the cylinder). When the temperature of the hydraulic oil rises above 10℃, then carry out load operation to avoid damage to the hydraulic pump due to dry grinding at low temperatures. In winter, the air humidity is high, and moisture is likely to remain inside the equipment. Freezing at low temperatures can cause components to get stuck or break, so targeted protection is needed Laser transmitter/receiver: When not in use, it should be stored indoors (to avoid low temperature and moisture in the open air). Before use, check if there is any ice inside (if there is, it needs to be thawed naturally indoors. Do not use open flames to bake it to avoid damaging electronic components). Before powering on, wipe the casing and lens with a dry soft cloth to ensure there is no moisture residue. Control circuit: Check if there is any condensation water at the circuit joints (if so, dry it with a hair dryer using cold air). Wrap the joints with waterproof insulating tape to prevent water from seeping in and causing short circuits, which may affect the transmission of laser signals. Hydraulic oil tank: Check whether the seal of the oil tank cover is intact (to prevent rainwater or snow water from seeping in). If water is mixed into the hydraulic oil, it will freeze at low temperatures, blocking the oil pipes or damaging the hydraulic pump. It is necessary to regularly drain the accumulated water at the bottom of the oil tank (open the oil tank drain valve, release a small amount of oil, and observe whether there is any water sedimentation). If there is too much water, all the hydraulic oil needs to be replaced and the oil tank cleaned. Engine cooling system (diesel model) : Antifreeze must be used (tap water or ordinary water is not allowed). The antifreeze should be mixed in a ratio of "antifreeze + distilled water = 1:1" (the freezing point can be reduced to around -35 ℃). Check the antifreeze level (it should be between "MIN" and "MAX" in the expansion tank). If the level is insufficient, add the same type of antifreeze. Prevent the cooling system from freezing and cracking the water tank or cylinder block. Hydraulic oil tank: Check whether the seal of the oil tank cover is intact (to prevent rainwater or snow water from seeping in). If water is mixed into the hydraulic oil, it will freeze at low temperatures, blocking the oil pipes or damaging the hydraulic pump. It is necessary to regularly drain the accumulated water at the bottom of the oil tank (open the oil tank drain valve, release a small amount of oil, and observe whether there is any water sedimentation). If there is too much water, all the hydraulic oil needs to be replaced and the oil tank cleaned. Engine cooling system (diesel model) : Antifreeze must be used (tap water or ordinary water is not allowed). The antifreeze should be mixed in a ratio of "antifreeze + distilled water = 1:1" (the freezing point can be reduced to around -35 ℃). Check the antifreeze level (it should be between "MIN" and "MAX" in the expansion tank). If the level is insufficient, add the same type of antifreeze. Prevent the cooling system from freezing and cracking the water tank or cylinder block. First startup: If the ambient temperature is ≤-15℃, do not start directly. First, perform the "three-step preheating" : ① Connect the power supply and turn on the preheater (if available) for 30 seconds; Turn off the preheater, wait for 10 seconds, and repeat 2 to 3 times. ③ Gently press the accelerator (for diesel models), slowly turn the start key. If the start fails in one attempt, wait for 1-2 minutes and then try again (to avoid overheating and damage to the starting motor due to continuous operation). Do not start continuously more than three times. After starting: After the engine starts, it should idle for 10 to 15 minutes (do not accelerate immediately). Wait until the water temperature rises above 40℃ and the oil pressure is normal (the pointer is stable within the standard range), then operate the hydraulic system and traveling mechanism to gradually adapt the equipment to the low-temperature environment. If the battery is discharged and the device cannot be started: It can be started by jumper connection (use the battery of another device, connect the positive terminal to the positive terminal and the negative terminal to the negative terminal. After starting, keep the idle speed for 15 minutes to charge the discharged battery). Do not jumper for a long time to avoid damaging the electrical system. If the diesel solidifies and causes the fuel supply to be interrupted: The equipment should be moved indoors (temperature ≥5℃) to allow the diesel to melt naturally, or low-grade diesel can be added to the fuel tank for dilution. After the diesel flows normally, press the fuel pump to expel the air in the fuel pipe, and then try to start it. If the hydraulic system gets stuck: After starting, run the hydraulic system unloaded first. If it still gets stuck, check the temperature of the hydraulic oil (if it is below 0℃). You can heat the hydraulic oil by connecting an external heater (placed outside the hydraulic oil pipe). Wait until the temperature rises above 10℃ before operating. Through the above measures, the problem of difficult start-up in winter due to low temperatures can be solved from four aspects: "start-up source, oil, components, and operation". At the same time, it can reduce the hidden damage to the equipment caused by low temperatures and ensure the stability and accuracy of the laser leveling machine machine during winter construction. Note: The parameters provided in this document are for reference only and are not mandatory. Due to differences in technical characteristics between different brands and models of laser levelers, please consult the manufacturer for a suitable solution before actual operation. This reference document assumes no responsibility for any issues arising from failure to follow the manufacturer's instructions.On-site Remediation Plan for Color Difference or Strength Variation Caused by Uneven Broadcasting
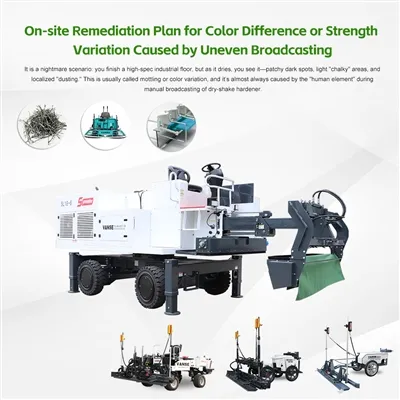
It is a nightmare scenario: you finish a high-spec industrial floor, but as it dries, you see it-patchy dark spots, light "chalky" areas, and localized "dusting." This is usually called mottling or color variation, and it's almost always caused by the "human element" during manual broadcasting of dry-shake hardener. If you are facing a "leopard-print" floor or inconsistent surface strength, here is the professional On-site Remediation Plan, along with the Vanse technical workflow to ensure it never happens again. Before you fix it, you need to know why it failed. Uneven Broadcasting: Manual throwing from a bucket creates "thick" and "thin" zones. Timing Issues: Some areas were "over-troweled" while still wet, while others were finished too late. The Vanse Prevention Tip: The best remediation is prevention. Using the Vanse Automatic Topping Spreader instead of manual labor ensures a 100% uniform grams-per-square-meter application. By linking the spreader's output to the machine's speed, you eliminate the "human error" that causes color shifts and weak spots. If the strength variation is severe (the surface is "powdering"), you have to remove the weak layer. The Process: Use a planetary floor grinder with 30/40 grit metal-bond diamonds to strip away the inconsistent "skin." The Vanse Tool for the Job: In cases where deep remediation is needed, use a Vanse Concrete Cutting Machine (Floor Saw) to create clean, straight boundaries around the affected area if a partial re-pour is required. This ensures the "patch" doesn't spall or crack at the edges. Once the surface is opened up, you need to fix the strength variation. The Process: Apply a high-quality Lithium or Sodium Silicate Densifier. This penetrates the concrete, reacts with the free lime, and creates a uniform, hard-shell finish across both the "weak" and "strong" zones. Blending the Color: Use a tinted sealer or a "color-matched" penetrant during the densification process to mask the mottling and create a visually consistent finish. After densifying, you need to "seal" the surface mechanically. The Process: Transition to a Vanse Ride-on Power Trowel. With its high-torque engine and precision pitch control, you can "burnish" the densified surface. The heavy compaction of the Vanse rotors helps to blend the color and close the pores, resulting in a dense, dust-free, and uniform finish. Global buyers are moving away from manual methods because the cost of remediation is 3x higher than the cost of doing it right the first time. Here is the Vanse "Gold Standard" Workflow to avoid color and strength issues: Uniform Placement: Use a Vanse Concrete Distributor or a Mini Dumper to place the base slab. This ensures the water-cement ratio is consistent across the entire bay, preventing "wet spots" that cause color variation. Consolidated Leveling: Use a Vanse Concrete Laser Leveling Machine . Its high-frequency vibration consolidates the slab from the bottom up, ensuring a uniform "paste" is available to bond with the hardener. Mechanical Spreading: The Vanse Automatic Topping Spreader is your insurance policy. It applies the hardener in a single, even pass immediately behind the laser leveling, guaranteeing uniform strength and color. Precision Finishing: The Vanse Power Trowel provides the final compaction, "locking in" the color and density. Look, we've all been there-trying to "save money" by using manual labor for broadcasting, only to spend three times that amount on grinding and densifiers later. If you want to bid on FM1/FM2 high-spec projects, you need the precision of a Vanse fleet (www.vansemac.com). Stop fixing floors and start finishing them. Visit Vanse Machinery today to see how our Topping Spreaders and Laser leveling can guarantee your color and strength consistency on every pour. Note: The parameters provided in this document are for reference only and are not mandatory. Due to differences in technical characteristics between different brands and models of laser levelers, please consult the manufacturer for a suitable solution before actual operation. This reference document assumes no responsibility for any issues arising from failure to follow the manufacturer's instructions.Compaction Degree of Sub-base in Superflat Floors and Its Impact on Final Flatness
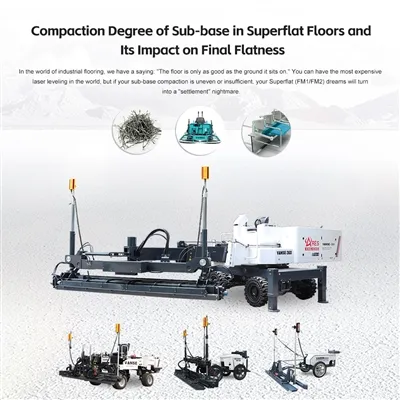
In the world of industrial flooring, we have a saying: "The floor is only as good as the ground it sits on." You can have the most expensive laser leveling in the world, but if your sub-base compaction is uneven or insufficient, your Superflat (FM1/FM2) dreams will turn into a "settlement" nightmare. If you're a contractor or facility owner, understanding the link between sub-base compaction degree and final flatness (FF/FL numbers) is critical. Here's a professional breakdown of how to get the foundation right, featuring the technical workflow from Vanse Machinery. Think of the sub-base as an anvil. When you use a Power Trowel to densify the concrete, the concrete is being compressed between the blades and the sub-base. If the sub-base has "soft spots" (low compaction degree), the slab will deflect under the weight of the machines and the concrete itself. The Impact: Even a 2mm settlement in the sub-base during the pour can tank your FL (Levelness) scores. This is why a compaction degree of at least 95% to 98% Proctor density is usually the standard for high-spec warehouses. A common mistake is compacting the sub-base perfectly, then driving heavy concrete trucks over it, creating deep ruts that ruin the uniformity. The Vanse Solution: Instead of heavy trucks, pro contractors use a Vanse Concrete Distributor or the Vanse Mini Dumper. These machines are designed to be agile. The Vanse Mini Dumper (available in electric or gasoline) allows you to move concrete to the exact spot without the massive point-load of a transit mixer, preserving the integrity of your compacted sub-grade. Even with good compaction, the weight of a leveling machine can sometimes cause micro-movements in the sub-base. The Vanse Solution: This is where the Vanse YZ30-4E Telescopic Boomed Laser leveling is a game-changer. Unlike traditional "drive-in" leveling, the telescopic boom allows the leveling head to reach out 6 meters while the machine stays stationary. This minimizes the "footprint" on the compacted sub-base, ensuring that the laser-accurate strike-off is based on a stable reference point, not a moving one. If the sub-base isn't uniform, the concrete will cure at different rates, leading to "curling" at the joints-the #1 enemy of long-term flatness. Use a Vanse Automatic Topping Spreader to apply hardener uniformly. This ensures the "skin" of the concrete is as tough as the base. Follow up with a Vanse VS1046H Ride-on Power Trowel. The high-torque 35HP BRIGGS & STRATTON engine provides the force needed to "burnish" the floor. If your sub-base is solid, this troweling process creates a rock-hard, Superflat surface that won't shift over time. Finally, protect those joints with a precision Vanse Concrete Cutting Machine (Floor Saw) to ensure stress is relieved exactly where it should be. Factor Poor Compaction Result Vanse-Enabled Professional Result FF/FL Scores Fails due to micro-settlement. Hits FM1/FM2 consistently. Joint Health Spalling and curling. Clean, stable transitions with Floor Saws. Labor Cost High (due to rework/grinding). Low (Get it right the first time). Equipment Performance Machines "sink" or vibrate poorly. Maximum precision with Telescopic leveling. You can't cheat the physics of a Superflat floor. Hitting ±1mm over 3 meters requires a solid sub-base and the world's most precise machinery. By combining the placement agility of the Mini Dumper with the telescopic reach of the Vanse Laser leveling (www.vansemac.com), you ensure that your floor stays flat from the day of the pour until decades of forklift traffic later. Don't build on a weak foundation. Explore the full Vanse fleet today and see how our technology supports your highest-spec projects. Note: The parameters provided in this document are for reference only and are not mandatory. Due to differences in technical characteristics between different brands and models of laser levelers, please consult the manufacturer for a suitable solution before actual operation. This reference document assumes no responsibility for any issues arising from failure to follow the manufacturer's instructions.