Technical Knowledge
What is the operation method of laser leveling machine?
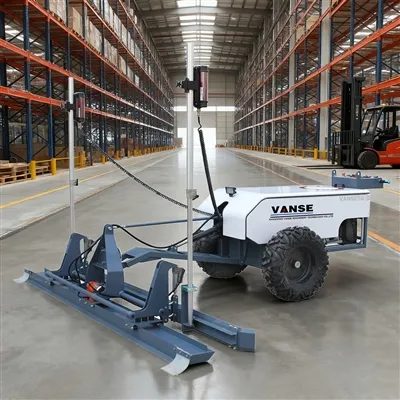
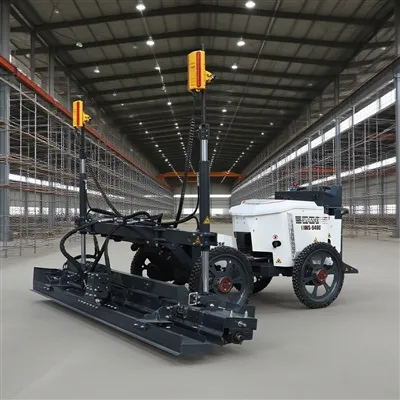
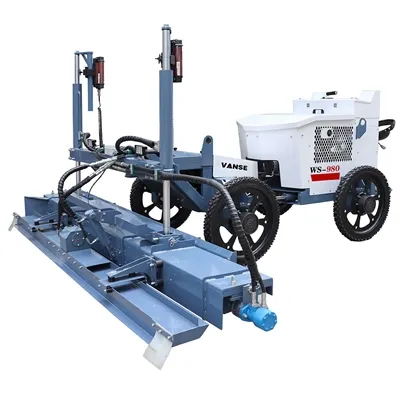
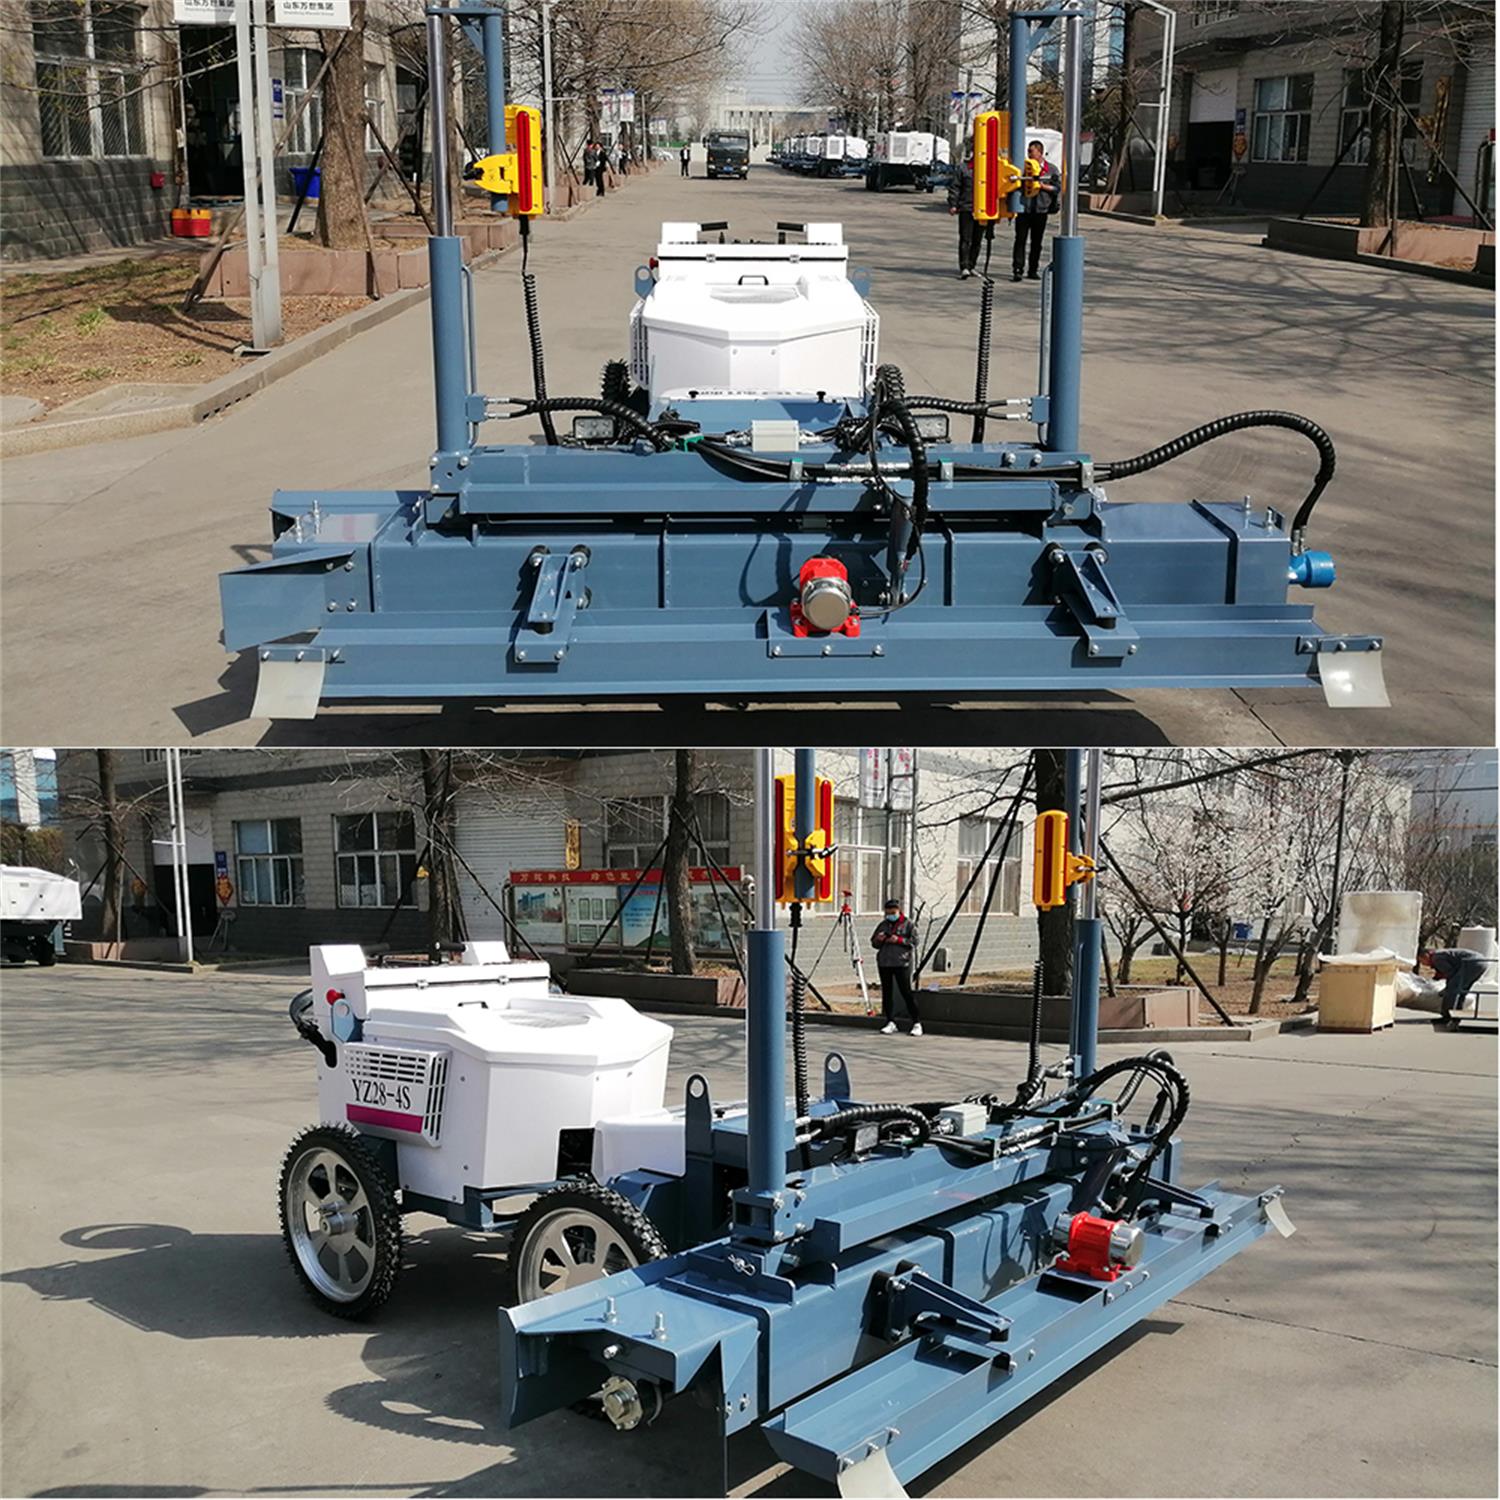
Do you know what is a laser leveler? This is a kind of equipment that uses laser as the reference plane, adopts the original receiving and sending system, and controls the leveling head in real time to achieve high-precision and rapid leveling of concrete. The use of laser leveling machines provides a lot of convenience for engineering construction. So how should we maintain the laser leveling machine after normal use? We will give you a specific introduction to the next article, thank you for your reading and support.
1. The operation method of the laser leveling machine will be introduced in detail for you
1) One operator checks the machine equipment before starting work, sets up the transmitter with the operator, and installs the handheld receiver; adjusts the scraper of the floor machine in a static state, and there must be no error in the two points; operates the concrete leveling machine and observes the machine Whether it is working normally, check whether the laser receiver is in a horizontal position, and supervise whether the material feeder picks up and fills in time; after the construction of the day is over, clean the machine after the laser leveling machine has cooled down, check whether the functions of the machine are normal, and check the power of the transmitter.
2) One operator shall assist the operator to install and debug the machine, set up the transmitter with the main operator, and install the handheld receiver. Check whether the location of the transmitter is safe; measure the height of the concrete after the initial paving (the range is controlled at 2mm ≥, ≤ 10MM); measure the height of the concrete after the laser leveling machine is leveled (the range should not be lower than -2MM and not higher than 3MM) Key points: Concrete edges and hand-scraped concrete surfaces; when the construction is over on the day, clean the machine after it cools down, and check the power of the hand-held receiver.
3) 2 filling workers When the laser leveling machine is not in operation, they will preliminarily level the concrete together with the pavers; when following the machine, they must obey the command of the main machine crew to scrape and fill the position of the machine scraper (required The concrete material shall not be lower than the edge of the scraper, and shall not be higher than the edge of the scraper by 35MM).
4) 2-4 pavers must obey the command of the operator; carry out preliminary leveling of the concrete.
2. Laser leveling machine manufacturers describe how to maintain
1) The liquid crystal surface on the body of the laser leveling machine also needs to be cleaned. You can use organic resin or a special cleaning cloth for the lens to wipe the dirt. If there is too much dirt, you can use the lens cleaning solution to remove it.
2) After the laser leveling machine is constructed, there will be a lot of dust and mud. First, the dust on the laser leveling machine should be wiped clean, and the dirt and oil stains should be wiped clean with tissue paper or cotton cloth.
3) If the laser signal is lost during the construction of the laser leveling machine, the machine needs to be restarted, and the interval should be more than ten seconds.
4) If there are too many stains, you can use a soft cloth to soak in water diluted with a neutral detergent, and then wring out to clean. The laser leveling machine manufacturer reminds everyone not to use volatile oil, thinner, gasoline and other chemicals to clean wipe. The use of advanced construction equipment and concrete laser leveling machines can not only shorten the construction period, but also ensure the construction quality to a large extent. This high-grade ground can guarantee normal use for more than 20 years, which can greatly reduce the use and maintenance costs.
Through the introduction of the article, I believe everyone has already understood how to operate the laser leveling machine. If you have other needs to know or are interested in our products, welcome to continue to pay attention to our official website, and look forward to your reading and support for more exciting information in the future.
Thanks to All the Friends Who Support and Trust Shandong Vanse Machinery Technology Co., Ltd.
If you want to know more about Shandong Vanse Machinery Technology Co., Ltd. or have any questions, please feel free to contact us:
Our Factory
Shandong Vanse Machinery Technology Co., Ltd.








Share this article

About the Author: Shandong Vanse Machinery Technology Co., Ltd.
Shandong Vanse Machinery Technology Co., Ltd. is a high-tech manufacturer specializing in concrete construction machinery, including laser screeds and related equipment. The company integrates R&D, production, and global sales, with products exported to over 60 countries and widely used in infrastructure projects worldwide.
Previous Post
Next Post
Related Articles
You Might Also Like
In a low-temperature winter environment, how should a concrete laser leveling machine be maintained to avoid difficulties in starting?
In a low-temperature winter environment (typically referring to an ambient temperature of ≤5℃), concrete laser leveling machines are prone to difficulties in starting due to issues such as increased oil viscosity, battery discharge, and fuel solidification (for diesel models). Maintenance should be carried out from four dimensions: "protection of the starting system, optimization of oil performance, anti-freezing of core components, and protection of idle storage". The specific measures are as follows: At low temperatures, the battery capacity will drop significantly (for every 10℃ drop in temperature, the capacity approximately decreases by 10% to 15%), and the load on the starting motor increases, which is the main reason for the difficulty in starting. Special protection is required: Check the battery status: Use a multimeter to measure the battery voltage. For a 12V battery, it should be ≥12.4V (fully charged state). If the voltage is lower than 12V, immediately use a dedicated low-temperature charger (to avoid the low charging efficiency of ordinary chargers) to recharge the battery. If the battery has been in use for more than two years, it is prone to "quick discharge" at low temperatures. It is recommended to replace the battery with a new one in advance (to avoid failure when starting temporarily). Prevent the battery from cracking due to freezing: The freezing point of the battery electrolyte varies with its concentration (if the concentration is too low, it may freeze and crack the casing). Check the electrolyte level (if it is below the scale line, add distilled water; do not add tap water or electrolyte). If necessary, test the density of the electrolyte (use a hydrometer, standard value 1.26-1.28g/cm³; if the density is low, adjust the concentration). Clean the battery connection: If there is white sulfide (which is prone to condensation at low temperatures) at the connection, rinse it with hot water, then sand it clean with sandpaper, and apply vaseline or battery protector (to prevent re-oxidation and ensure smooth current conduction). Check the terminal blocks of the starting motor: Ensure that the bolts are tightened (metal shrinks and is prone to loosening at low temperatures, resulting in poor contact). If the terminal blocks are oxidized, they need to be sanded with sandpaper. Manually rotate the starting motor gear to ensure there is no jamming (to avoid poor gear meshing at low temperatures). Additional inspection for diesel models: Check if the start preheater (if any) is functioning properly – after power-on, the preheater indicator light should be on. If it is not on, check the circuit or replace the preheater (the preheater can increase the temperature inside the cylinder, help diesel atomize, and avoid difficulties in cold starting). Low temperatures can cause a sharp increase in the viscosity of engine oil, hydraulic oil and diesel, resulting in slow flow and difficulty in oil suction by the pump body. It is necessary to ensure the fluidity of the oil through "oil change + preheating". Replace with low-grade diesel: Select the corresponding grade based on the ambient temperature (for example, -20 # diesel for -10 ℃ to -20℃ and -35 # diesel for -20℃ to -35 ℃), to prevent diesel from solidifying in the fuel tank or fuel line (solidification can cause fuel supply interruption and prevent starting). If high-grade diesel has been added, diesel pour point depressant should be added (add it in the proportion specified in the manual to lower the freezing point of the diesel). Fuel system preheating: Before starting, you can first turn on the ignition switch (without starting the engine), and let the fuel pump be powered on to work for 30 seconds (some models have a "fuel preheating" mode), allowing the diesel to preheat and flow in the fuel pipes. If the diesel in the fuel tank has slightly solidified, a small amount of low-grade diesel or kerosene (not exceeding 10%) can be added to the tank to help dilute and melt it. Do not add gasoline to avoid safety risks. Type of oil Maintenance measures Engine oil 1. Switch to winter-specific low-temperature engine oil (such as 5W-30, 10W-30, the smaller the number before the viscosity grade, the better the low-temperature fluidity) to prevent the original summer engine oil from having excessive viscosity at low temperatures, which could increase the engine's starting resistance. 2. Before starting, if the ambient temperature is ≤-10℃, you can first heat the engine oil through the engine preheater (external or built-in) for 30 to 60 minutes, or pour hot water over the oil pan (water temperature 50 to 60℃, do not use boiling water) to reduce the viscosity of the engine oil. Hydraulic oil 1. Replace it with low-temperature anti-wear hydraulic oil (such as L-HV46, L-HV32, which has better low-temperature fluidity than ordinary hydraulic oil) to prevent the hydraulic oil from getting stuck at low temperatures, which could lead to the failure of the leveling scraper and the walking action. After starting the equipment, let the hydraulic system run idle for 5 to 10 minutes (operate the handle to slowly extend and contract the cylinder). When the temperature of the hydraulic oil rises above 10℃, then carry out load operation to avoid damage to the hydraulic pump due to dry grinding at low temperatures. In winter, the air humidity is high, and moisture is likely to remain inside the equipment. Freezing at low temperatures can cause components to get stuck or break, so targeted protection is needed Laser transmitter/receiver: When not in use, it should be stored indoors (to avoid low temperature and moisture in the open air). Before use, check if there is any ice inside (if there is, it needs to be thawed naturally indoors. Do not use open flames to bake it to avoid damaging electronic components). Before powering on, wipe the casing and lens with a dry soft cloth to ensure there is no moisture residue. Control circuit: Check if there is any condensation water at the circuit joints (if so, dry it with a hair dryer using cold air). Wrap the joints with waterproof insulating tape to prevent water from seeping in and causing short circuits, which may affect the transmission of laser signals. Hydraulic oil tank: Check whether the seal of the oil tank cover is intact (to prevent rainwater or snow water from seeping in). If water is mixed into the hydraulic oil, it will freeze at low temperatures, blocking the oil pipes or damaging the hydraulic pump. It is necessary to regularly drain the accumulated water at the bottom of the oil tank (open the oil tank drain valve, release a small amount of oil, and observe whether there is any water sedimentation). If there is too much water, all the hydraulic oil needs to be replaced and the oil tank cleaned. Engine cooling system (diesel model) : Antifreeze must be used (tap water or ordinary water is not allowed). The antifreeze should be mixed in a ratio of "antifreeze + distilled water = 1:1" (the freezing point can be reduced to around -35 ℃). Check the antifreeze level (it should be between "MIN" and "MAX" in the expansion tank). If the level is insufficient, add the same type of antifreeze. Prevent the cooling system from freezing and cracking the water tank or cylinder block. Hydraulic oil tank: Check whether the seal of the oil tank cover is intact (to prevent rainwater or snow water from seeping in). If water is mixed into the hydraulic oil, it will freeze at low temperatures, blocking the oil pipes or damaging the hydraulic pump. It is necessary to regularly drain the accumulated water at the bottom of the oil tank (open the oil tank drain valve, release a small amount of oil, and observe whether there is any water sedimentation). If there is too much water, all the hydraulic oil needs to be replaced and the oil tank cleaned. Engine cooling system (diesel model) : Antifreeze must be used (tap water or ordinary water is not allowed). The antifreeze should be mixed in a ratio of "antifreeze + distilled water = 1:1" (the freezing point can be reduced to around -35 ℃). Check the antifreeze level (it should be between "MIN" and "MAX" in the expansion tank). If the level is insufficient, add the same type of antifreeze. Prevent the cooling system from freezing and cracking the water tank or cylinder block. First startup: If the ambient temperature is ≤-15℃, do not start directly. First, perform the "three-step preheating" : ① Connect the power supply and turn on the preheater (if available) for 30 seconds; Turn off the preheater, wait for 10 seconds, and repeat 2 to 3 times. ③ Gently press the accelerator (for diesel models), slowly turn the start key. If the start fails in one attempt, wait for 1-2 minutes and then try again (to avoid overheating and damage to the starting motor due to continuous operation). Do not start continuously more than three times. After starting: After the engine starts, it should idle for 10 to 15 minutes (do not accelerate immediately). Wait until the water temperature rises above 40℃ and the oil pressure is normal (the pointer is stable within the standard range), then operate the hydraulic system and traveling mechanism to gradually adapt the equipment to the low-temperature environment. If the battery is discharged and the device cannot be started: It can be started by jumper connection (use the battery of another device, connect the positive terminal to the positive terminal and the negative terminal to the negative terminal. After starting, keep the idle speed for 15 minutes to charge the discharged battery). Do not jumper for a long time to avoid damaging the electrical system. If the diesel solidifies and causes the fuel supply to be interrupted: The equipment should be moved indoors (temperature ≥5℃) to allow the diesel to melt naturally, or low-grade diesel can be added to the fuel tank for dilution. After the diesel flows normally, press the fuel pump to expel the air in the fuel pipe, and then try to start it. If the hydraulic system gets stuck: After starting, run the hydraulic system unloaded first. If it still gets stuck, check the temperature of the hydraulic oil (if it is below 0℃). You can heat the hydraulic oil by connecting an external heater (placed outside the hydraulic oil pipe). Wait until the temperature rises above 10℃ before operating. Through the above measures, the problem of difficult start-up in winter due to low temperatures can be solved from four aspects: "start-up source, oil, components, and operation". At the same time, it can reduce the hidden damage to the equipment caused by low temperatures and ensure the stability and accuracy of the laser leveling machine machine during winter construction. Note: The parameters provided in this document are for reference only and are not mandatory. Due to differences in technical characteristics between different brands and models of laser levelers, please consult the manufacturer for a suitable solution before actual operation. This reference document assumes no responsibility for any issues arising from failure to follow the manufacturer's instructions.The Concrete Laser Leveling Equipment Maintenance: Failure Rate Analysis and Maintenance Frequency Determination
Concrete Laser Leveling Equipment Maintenance: Failure Rate Analysis and Maintenance Frequency Determination Laser System (25%-30%): Construction dust and vibration can easily cause laser transmitter calibration deviation, or prolonged high temperature environments can cause poor circuit contact, resulting in leveling accuracy deviation and frequent alarms. Hydraulic System (20%-25%): Hydraulic oil contamination (impurities/water) and seal aging can lead to cylinder leakage and lag. Prolonged oil shortages can cause hydraulic pump wear, a major cause of downtime and maintenance. Travel and Transmission Components (15%-20%): Tire/Track wear (from friction on gravel roads), chain slack (from long-term load operation), and drive motor carbon brush wear can easily lead to equipment deviation and power loss. Electrical System (10%-15%): Oxidation of wiring terminals (from humid environments), wear of control switch contacts, and impact damage to sensors (such as elevation sensors) can easily cause equipment start/stop failures and false data reports. Structural parts and wearing parts (10%-15%): wear of the leveling scraper (concrete friction), damage to the vibrator bearing (high-frequency vibration), loose connection bolts (equipment vibration transmission). Although the cost of a single repair is low, it can easily affect construction efficiency. Environmental Factors: High temperatures (>35°C) accelerate hydraulic oil deterioration and circuit aging; humid/rainy environments increase the risk of electrical short circuits; dusty construction sites (such as those near gravel pits) shorten the lifespan of laser systems and heat dissipation components, increasing the failure rate by 20%-30%. Usage Habits: Overloading (e.g., exceeding the rated leveling thickness of the equipment), running at full load immediately after startup (without preheating), and failing to clean the machine promptly after shutdown (due to residual concrete buildup) can increase the failure rate by over 30%. Maintenance Level Maintenance Details Maintenance frequency (normal operating conditions) Adjustments for harsh operating conditions (high temperature, high dust, and humidity) Daily Maintenance 1. Clean dust from the laser transmitter and receiver; Daily before and after work Add one laser system cleaning during operation 2. Check the hydraulic oil level and quality; 3. Tighten the machine body connecting bolts; 4. Clean any remaining concrete from the leveling blades; Weekly Maintenance 1. Lubricate the travel chain and bearings (add grease); Every 50-80 work hours (or once a week) Reduced to every 30-50 operating hours 2. Check tire/track wear and tire pressure; 3. Test the laser system accuracy (check with a calibration ruler); 4. Check for loose electrical terminals; Monthly Maintenance 1. Replace the hydraulic oil filter; Every 200-300 work hours (or once a month) Reduced to every 150-200 operating hours 2. Check the hydraulic seals for leaks; 3. Calibrate the elevation sensor and travel deviation correction; 4. Check the drive motor operating temperature and noise Laser System: Professionally calibrate every 6 months (or 800 operating hours) and replace the laser transmitter dust cover (if worn). If accuracy deviation exceeds 0.5mm/2m, immediately shut down the machine for calibration. Hydraulic System: Replace hydraulic oil (and oil tank filter) every 12 months (or 2000 operating hours). Completely inspect and replace seals every 18 months (or 3000 operating hours). Electrical System: Replace control switch contacts and motor carbon brushes (if worn more than 1/2) every 8 months (or 1500 operating hours). Waterproof and seal the electrical cabinet before the rainy season. Consumable Parts: Leveling scraper (wear exceeds 5mm), vibrator bearings (noise during operation), tires (tread depth <3mm). Replace as needed (generally every 1000-1500 operating hours). Long-term shutdown (>15 days): Before shutdown, bleed residual hydraulic system pressure, clean the equipment inside and out, and store in a dry, ventilated area. Before restarting, perform a comprehensive inspection (hydraulic oil, electrical circuits, and precision calibration). Do not restart operations immediately. High-intensity operation (average daily operation time >8 hours): Reduce all maintenance frequency by 30%, and increase daily hydraulic system and motor temperature monitoring (if the temperature exceeds 60°C, shut down the machine for cooling). Note: The parameters provided in this document are for reference only and are not mandatory. Due to differences in technical characteristics between different brands and models of laser levelers, please consult the manufacturer for a suitable solution before actual operation. This reference document assumes no responsibility for any issues arising from failure to follow the manufacturer's instructions.How do the sensitivity & reception range of the laser receiver affect the construction effect of the leveler?
The sensitivity and reception range of the laser receiver have an important impact on the construction effect of the concrete laser leveling machine, which is mainly reflected in the following aspects: 1. Construction accuracy: The higher the sensitivity of the laser receiver, the stronger the laser signal that can be received, thereby more accurately detecting the height and level of concrete. This helps ensure the accuracy of the leveling's construction, reducing errors and improving overall flatness. 2. Construction efficiency: The reception range of the laser receiver determines the working range and speed of the leveler. If the receiving range is small, the leveler needs to stop frequently to adjust its position, which will reduce construction efficiency. A laser receiver with a larger reception range can support faster and continuous construction, thereby improving the operating efficiency of the leveler. 3. Degree of automation: Laser receivers with high sensitivity and large receiving range can support a higher degree of automated construction. For example, by integrating with automatic control systems, functions such as remote control, automatic navigation, and real-time monitoring can be realized, further reducing manual intervention and improving the level of automation and intelligence in construction. 4. Adaptability and flexibility: The sensitivity and reception range of the laser receiver will also affect the adaptability and flexibility of the leveler to different construction environments and conditions. For example, in complex construction environments, laser receivers with high sensitivity and large reception range can better cope with special situations such as obstacles, slopes, and corners, ensuring the consistency and stability of construction effects. In summary, the sensitivity and reception range of the laser receiver have a multifaceted impact on the construction effect of the concrete laser leveler. Therefore, selecting the right laser receiver and performing proper calibration and adjustment are crucial to optimizing the construction results of the leveling.