Technical Knowledge
What is the difference between a disc and blade concrete trowel?

Disc and blade concrete trowels are two different types of mechanical equipment used for concrete surface treatment. Their main differences lie in the working principle, applicable occasions, and operation methods.
1. Working principle:
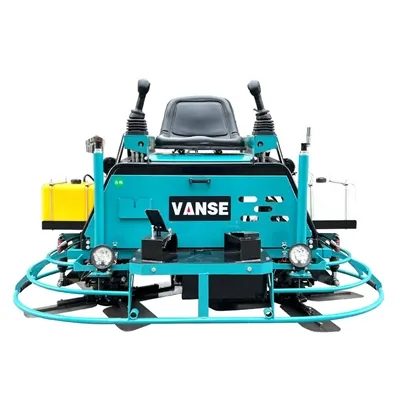
– Disc concrete trowel: This type of trowel is usually equipped with one or more circular steel discs that grind and smooth the concrete surface by rotating. The discs can be fixed or adjustable to suit different construction needs.
– Blade concrete trowel: Blade trowels use fan-shaped blades that are mounted on a rotating shaft. When the machine is running, the blades swing as the shaft rotates to polish and smooth the concrete surface. The angle of the blade is usually adjustable, which allows the operator to adjust the angle between the blade and the ground according to the state of the concrete to achieve the best smoothing effect.
2. Applicable occasions:
– Disc type: More suitable for larger areas of concrete surface treatment, especially when a large area needs to be covered quickly. It can provide good flatness and is suitable for the initial leveling stage.
– Blade type: More effective in detail processing, edge processing and situations where higher precision is required. Blade type trowels can be used when the concrete is still in a relatively soft state to help improve the density and smoothness of the surface.
3. Operation method:
– Disc type: Usually requires greater force to push or manipulate, especially when dealing with hard concrete. However, with the development of technology, there are now electric or gasoline-driven disc trowels, which greatly reduce the burden on the operator.
– Blade type: Relatively speaking, blade trowels are more flexible to operate, especially for small projects or occasions with special requirements. Due to its design features, blade trowels distribute pressure on the ground more evenly during operation, which helps to reduce damage to the concrete surface.
In short, which type of concrete trowel to choose depends on factors such as specific construction conditions, the type of work to be completed, and personal preference. In practical applications, these two types of trowels are sometimes used in combination to achieve the best construction results.
Thanks to All the Friends Who Support and Trust Shandong Vanse Machinery Technology Co., Ltd.
If you want to know more about Shandong Vanse Machinery Technology Co., Ltd. or have any questions, please feel free to contact us:
Our Factory
Shandong Vanse Machinery Technology Co., Ltd.








Share this article

About the Author: Shandong Vanse Machinery Technology Co., Ltd.
Shandong Vanse Machinery Technology Co., Ltd. is a high-tech manufacturer specializing in concrete construction machinery, including laser screeds and related equipment. The company integrates R&D, production, and global sales, with products exported to over 60 countries and widely used in infrastructure projects worldwide.
Previous Post
Next Post
Related Articles
You Might Also Like
What are the advantages of laser leveling machine compared with manual construction?
In recent years, not only the various construction industries have continued to grow, but the price of labor has also continued to rise, and various constructions have put forward higher requirements for construction quality. Therefore, laser leveling machines have been rapidly popularized and applied in construction, so , Compared with manual construction, what are the advantages of using laser leveling machine for concrete floor leveling construction? The following article has made some introductions for everyone, I hope you will be interested. 1. Advantages of using laser leveling machine: 1) Labor saving: each laser leveling machine can save 7-8 people Concrete leveling construction is carried out manually. Each team is composed of at least 15 people. Laser leveling machines are used for concrete leveling construction. Each team is equipped with 8 people. Different types of laser leveling machines have different numbers of personnel. Yes, the labor saved is also different. 2) Improve construction efficiency and shorten construction period The laser leveling machine is used for construction. The width of the leveling head is 2.5 meters to 3 meters. According to the normal driving speed of construction, 300-500 square meters can be constructed per hour, and 3000-5000 square meters can be constructed per shift. Manual construction is adopted, and each shift is completed within 800 square meters. In the same shift, the efficiency of machine construction is about 5 times that of manual construction. This will greatly shorten the construction period, and save construction costs without the need for multiple forms. 3) The laser leveling machine is used for leveling, which greatly improves the quality of floor construction The original manual floor construction, using vibrating pumps and point vibration, often has problems such as hollowing, cracking, and inaccurate leveling, and the construction quality is far lower than that of machine construction. The laser leveling machine is used for concrete floor construction, the leveling elevation is controlled by laser, and the surface extrusion is carried out by using the motor 3000 times per minute, each time with 2000N (200KG) excitation force, which greatly improves the concrete density and enhances the construction quality. 2. The method of judging the quality of laser leveling machine: 1) Look at the model; choose the appropriate concrete laser leveling machine mainly based on the construction site and area. 2) Look at the effect of the machine; the effect of high-quality concrete laser leveling machine is stable. 3) The speed of leveling; the high-quality laser leveling machine is fast. 4) Leveling accuracy requirements; high-quality concrete laser leveling machines have higher leveling accuracy. 5) The technical strength of laser leveling machine manufacturers directly affects the quality of equipment. 6) Look at safety; when choosing a concrete laser leveling, the braking performance and operating safety of the concrete laser leveling must also be fully considered. Based on the above, it is not difficult to see that the use of laser leveling machines to replace the original manual construction in the construction process of concrete floors not only has the characteristics of saving labor and improving construction efficiency, but also can improve construction quality, which has been unanimously agreed by people in the industry. favor. Thank you all for reading and supporting.What is the efficient of a large concrete trowel?
The working efficiency of large concrete trowels varies depending on factors such as model, configuration and construction conditions. The working efficiency of common ride-on double-disc trowels is generally around 400-500 square meters per hour. Calculated on an 8-hour workday, its working efficiency is between 3000-5000 square meters.Summer Concrete Construction Methods
In summer, the temperature is high and the drying is fast. The newly poured concrete may have an accelerated condensing speed and a decrease in strength. At this time, care should be taken when pouring, trimming and curing the concrete. First, mixing and transportation: When mixing, the measures should be taken to control the temperature rise of the crucible, and the additional water quantity should be controlled at one time to reduce the slump loss and reduce the plastic shrinkage cracking. The following measures can be taken during the mixing and transportation process. 1. Use water reducing agent or replace some cement with fly ash to reduce the amount of cement, and increase the aggregate particle size while the casting conditions allow. 2. If the transportation distance of the bismuth mixture is long, the setting time of the hydrazine can be controlled by a retarder, but it should be noted that the dosage of the retarder should be reasonable, especially for the large-scale slab floor project. 3. If you need a high slump bismuth mixture, use a superplasticizer. Some of the high- efficiency water reducing agent produced a slump of 2 h. The high-efficiency water reducing agent also reduces the friction between the aggregate particles during the mixing process and slows the heat accumulation in the mixing barrel. 4. In case of meeting the requirements of construction specifications, try to use slag Portland cement and fly ash Portland cement. 5. Sprinkle water into the aggregate to reduce the temperature of the aggregate; if it is sprayed with groundwater or well water, the cooling effect is better. 6. In the hot season or large volume concrete construction, cold water or ice cubes can be used instead of some mixing water. 7. For the long-distance transportation of sputum in the hot season, the delayed stirring of the mixer can be considered, so that the raft is still in agitating state when it arrives at the construction site. 8. It is recommended abroad to paint the outside of the drum of the mixer in white in the summer, so that the absorption of solar radiation by the drum is significantly reduced. In the summer, taking the transport distance of 1 h as an example, the temperature in the white mixing drum is at least 1 ° C lower than that in the conventional red mixing drum. 9. Construction organization design should be done to avoid pouring concrete at the highest temperature in the day. During the high temperature drying season, the evening pouring is relatively less affected by wind and temperature, and can be finally condensed near sunrise, while the relative humidity is high, so the possibility of early drying and cracking is minimal.