Technical Knowledge
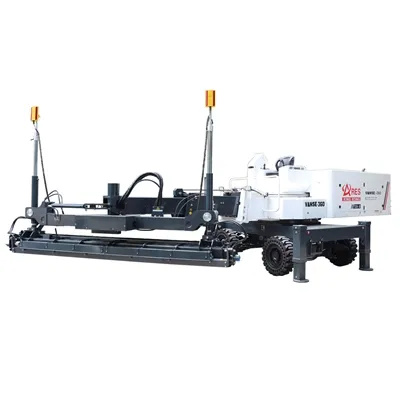
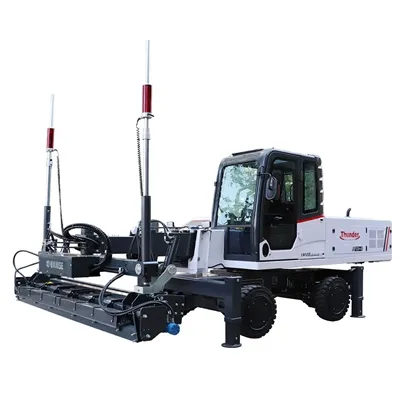
Vanse Machinery kindly reminds you what to pay attention to when purchasing a ride-on laser leveling machine

With the continuous increase in domestic labor costs, construction companies are increasingly in need of high-efficiency, short-term, and low-cost laser machinery. The ride-on laser leveling machine is easy and quick to operate, suitable for different engineering needs, and has become the mainstream nowadays. When purchasing a ride-on laser leveling machine, pay attention to the following aspects:
1. Look at the model: mainly based on the construction site and area for selection and determination.
2. Look at the use effect of the machine.
3. Leveling speed
4. Leveling accuracy requirements
5. Look at the manufacturer: The strength of the manufacturer directly affects the quality of the equipment.
6. Look at the price: If the price of a machine is too low than the average price of the industry, then the buyer should be alert. Without the conditions of large-scale production, too low prices do not mean low profits, but low costs, which will directly affect the life and use of the machinery, and even imply that the company will not invest too much in after-sales and R&D. Don't just look at the price because you don't know the technology very well, and in the end it's not worth the loss, so you can only buy it again. Not only waste money, but also delay your own production.
7. Look at safety: When choosing a laser leveling machine, you must also fully consider the braking performance and operational safety of the laser leveling machine.
The parts of Vanse Machinery's laser leveling machines are all products produced by large manufacturers in advanced countries such as Germany and the United States. The production process is strictly in accordance with national standards, enterprise standards, and quality control assurance systems to ensure that the product quality meets or exceeds the requirements of enterprise standards and relevant national standards, and is trusted and praised by users for its excellent quality, excellent performance, and superior cost performance.
Shandong Vanse Machinery's series of products have been widely used in factories, and customers are all over the country, inside and outside the Great Wall, and have been recognized by partners and customers of many engineering projects such as workshops, underground garages, floors, access bridges, square floors, logistics warehousing, etc.
Thanks to All the Friends Who Support and Trust Shandong Vanse Machinery Technology Co., Ltd.
If you want to know more about Shandong Vanse Machinery Technology Co., Ltd. or have any questions, please feel free to contact us:
Our Factory
Shandong Vanse Machinery Technology Co., Ltd.








Share this article

About the Author: Shandong Vanse Machinery Technology Co., Ltd.
Shandong Vanse Machinery Technology Co., Ltd. is a high-tech manufacturer specializing in concrete construction machinery, including laser screeds and related equipment. The company integrates R&D, production, and global sales, with products exported to over 60 countries and widely used in infrastructure projects worldwide.
Previous Post
Next Post
Related Articles
You Might Also Like
Laser leveling machine manufacturers professional sharing: the correct way to use the equipment
Laser leveling machine is an indispensable equipment in the construction industry. It is indispensable in the construction of large highways. In order to ensure the smooth progress of construction and the smoothness of the road surface, it is necessary to master the correct use of laser leveling machine. Secondly, you should read the instruction manual of the equipment before use, because this will make you familiar with the internal structure of the equipment as soon as possible, so as to achieve correct operation. The following laser leveling machine manufacturer will show you the correct use of laser leveling machine. 1. Laser leveling machine manufacturers explain from a professional perspective that it is important not to work under a load that exceeds the load that the machine can bear. The laser leveling machine should be used to the best of one's ability. As a laser leveling machine manager, when designating an operator, the laser leveling machine random data and operation manual should be handed over to the operator so that he can master the mechanical performance and operating procedures normally, and the relevant data should not be withheld at will. 2. Laser leveling machine manufacturers explain from a professional perspective that it is necessary to try to ensure the uniform addition and subtraction of the load of the laser leveling machine, so that the machine is in a relatively gentle load change. Specifically, it is necessary to add and subtract the throttle more evenly to prevent the ups and downs of the engine and working device. 3. Laser leveling machine manufacturers explain the scientific use of lubricants from a professional perspective. According to statistics, more than half of the leveling machine failures are caused by poor lubrication. Due to the precision of the various parts of the laser leveling machine, good lubrication can keep it in a normal working gap and a suitable working temperature, thereby reducing the degree of wear of the parts and reducing mechanical failures. Normal and reasonable lubrication is one of the effective measures to reduce mechanical failures. To this end, first, it is necessary to reasonably select lubricants. During use, neither low-grade lubricants nor other types of lubricants can be used as substitutes, let alone inferior products. Second, the quantity and quality of lubricants should be checked frequently. 4. Laser leveling machines should be maintained and repaired in a timely manner. Laser leveling machines will inevitably have various failures during use. Among these failures, some failures may have a very small impact on mechanical equipment, while some are more serious and may even cause major accidents of machine destruction and death. The knowledge shared by the laser leveling machine manufacturer for you has basically come to an end here. If you have the intention to understand the equipment, you can contact us by phone, or log in to our official website and leave us a message. We will solve your problem as soon as we see it. Thank you for your reading.How does the concrete curing agent maintain the flatness of the laser-tilled floor during the curing process?
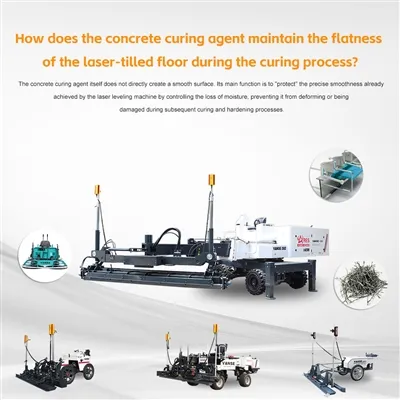
The concrete curing agent itself does not directly create a smooth surface. Its main function is to "protect" the precise smoothness already achieved by the laser leveling machine by controlling the loss of moisture, preventing it from deforming or being damaged during subsequent curing and hardening processes. The laser leveling machine lays a highly precise horizontal foundation for the ground. The curing agent is like an invisible "shield" that ensures this foundation is not damaged by factors such as contraction and warping. Its specific mechanism of action mainly manifests in the following two aspects: This is the most crucial approach for the protective flatness of the sealant. During the hardening process of concrete, if the moisture evaporates too quickly, it will generate huge internal stress, leading to two serious consequences that severely affect the flatness: Reducing shrinkage cracks: When the pore water inside the concrete evaporates to form a crescent surface, its surface tension will exert a pull on the pore walls, causing the concrete to shrink. If the shrinkage is not uniform, cracks will form, damaging the integrity of the floor. The sealant (especially the shrinkage-reducing type) can effectively reduce the surface tension of the pores, thereby reducing the drying shrinkage by 80% (28 days) to 50% (1 year or longer), eliminating the destructive force caused by shrinkage at its source. Preventing board warping: When the drying speeds of the upper and lower surfaces of the concrete slab are inconsistent (such as the upper surface drying faster and the bottom surface drying slower), warping occurs, that is, the edges or corners of the slab rise upwards. This is the number one killer of flatness. The moisture-retaining film formed by the sealant ensures that the slab surface is uniformly hydrated, minimizing this deformation caused by the humidity gradient. It has been reported that using the appropriate curing product can increase the spacing of the joint (the gap reserved to cope with shrinkage) and achieve a smoother and more durable floor. Some advanced curing agents, especially those that can be used during the finishing process, can also assist in achieving a smoother surface by optimizing the construction: Extended operation time: In hot or windy conditions, the concrete surface tends to harden too quickly, resulting in incomplete finishing and leaving knife marks or waves. Curing agents can slow down the evaporation of surface moisture, providing construction workers with a longer operation window, allowing them to make the floor smoother with more ease. Reduced finishing damage: High-quality curing agents can act as a lubricant, reducing the dragging force of the trowel on the concrete surface. This helps to reduce parallel micro-cracks beneath the surface and enables more precise seam cutting, preventing damage to the surface's smoothness due to improper finishing. This issue touches upon a crucial point. Based on your question, you may have come across various types of products, and they do have differences: Product type Main mechanism of action Contribution to flatness Traditional/membrane-forming curing agent Form a physical film on the surface of the concrete, locking in moisture. Passive protection: Through moisturization, it prevents shrinkage and cracking caused by excessive water loss, thereby maintaining the existing flatness. Reactive/permeation-type curing agent Penetrate into the concrete interior, react with the cement hydration products, fill the capillary pores, and play a role in densification and assisting in hydration. Active enhancement: In addition to moisturization, it can directly reduce micro-cracks and act as a finishing aid to improve construction quality, thus achieving a more excellent flatness effect. Retarding agent Added internally to the concrete, it reduces the surface tension of pore water at its source, significantly reducing shrinkage during drying. Root cause control: This is the most fundamental solution. By minimizing the contraction stress to the lowest level, it completely prevents flatness problems caused by contraction, allowing for a larger joint spacing. In summary, the concrete curing agent achieves the maximum reduction of volume changes and stress during the hardening process of concrete through both moisture-retaining curing and chemical shrinkage. This ensures that the high-precision results of laser leveling can be perfectly "locked" and preserved, ultimately resulting in a long-lasting, flat, and durable high-quality floor. Does your project have specific numerical requirements for the floor's flatness (such as FF/FL grades)? Also, is the floor planned to undergo sealing curing or polishing treatment? This will directly affect the selection of the curing agent. Some curing agents have better compatibility with subsequent coatings, while others are specifically designed for polishing systems. Please provide these details so that I can confirm if the current choice is the most suitable. Contact us NOW Note: The parameters provided in this document are for reference only and are not mandatory. Due to differences in technical characteristics between different brands and models of laser levelers, please consult the manufacturer for a suitable solution before actual operation. This reference document assumes no responsibility for any issues arising from failure to follow the manufacturer's instructions.How does the laser leveling machine improve construction quality and efficiency in industrial plants and warehouses?
The application of laser leveling machines in industrial plants and warehouses can significantly improve construction quality and efficiency, which is specifically reflected in the following aspects: 1. **Improve ground flatness**: – The laser leveling machine uses a high-precision laser system to control the flatness of the ground, reducing the errors caused by human factors in traditional construction methods. 2. **Increase construction speed**: – With a high degree of automation, the laser leveling machine can quickly complete large-area concrete laying and leveling work, greatly improving the construction speed compared to manual work. 3. **Ensure construction accuracy**: – The equipment is equipped with a sophisticated control system that can achieve precise control of the concrete floor to ensure that the horizontality and verticality of the floor meet the design requirements. 4. **Reduce material waste**: – The laser leveling machine effectively reduces material waste and construction costs by accurately controlling the laying thickness of concrete. 5. **Increase ground bearing capacity**: – The ground constructed by the laser leveling machine has a higher density, thereby improving the bearing capacity and durability of the ground, which is suitable for heavy machinery and cargo stacking in industrial plants and warehouses. 6. **Reduce the cost of later maintenance**: – High-quality construction results reduce problems such as ground cracks and potholes, thereby reducing the cost of later maintenance and repair. 7. **Improve the working environment**: – The flat and seamless ground reduces the accumulation of dust and debris, providing a cleaner and safer working environment for industrial plants and warehouses. 8. **Adapt to different construction conditions**: – The laser leveler can work in different climates and ground conditions, including wet, cold or hot environments, to ensure the continuity and efficiency of construction. 9. **Improve construction safety**: – Reduce the amount of manual work and reduce the safety risks of construction workers during the construction process. 10. **Facilitate subsequent construction and use**: – The ground constructed by the laser leveler provides a good foundation for subsequent equipment installation and internal logistics, which is conducive to improving the operating efficiency of the entire factory. In the above way, the application of laser levelers in industrial plants and warehouses not only improves the quality and efficiency of construction, but also brings long-term economic benefits and better use experience to owners. With the continuous advancement of technology, the application of laser leveling machines in the industrial field will become more extensive, and the construction quality and efficiency will be further improved.