Technical Knowledge
Laser leveling Flooring – Shandong Vanse Machinery Technology Co., Ltd.
February 9, 2023

How do you make sure that a single, large, contiguous area of concrete floor is completely flat, completely level and without hollow drum, shelling, cracking and inequality on the ground? The answer is a laser leveling flooring.
What is Laser leveling Concrete Flooring ?
When you are in your own home and need to use concrete to pave a concrete area of one square meter or less, you only need to use nails and a strong string to achieve leveling, but when you need to level the entire room when paving a large area of the floor or even a garden, a laser concrete leveling machine is needed.
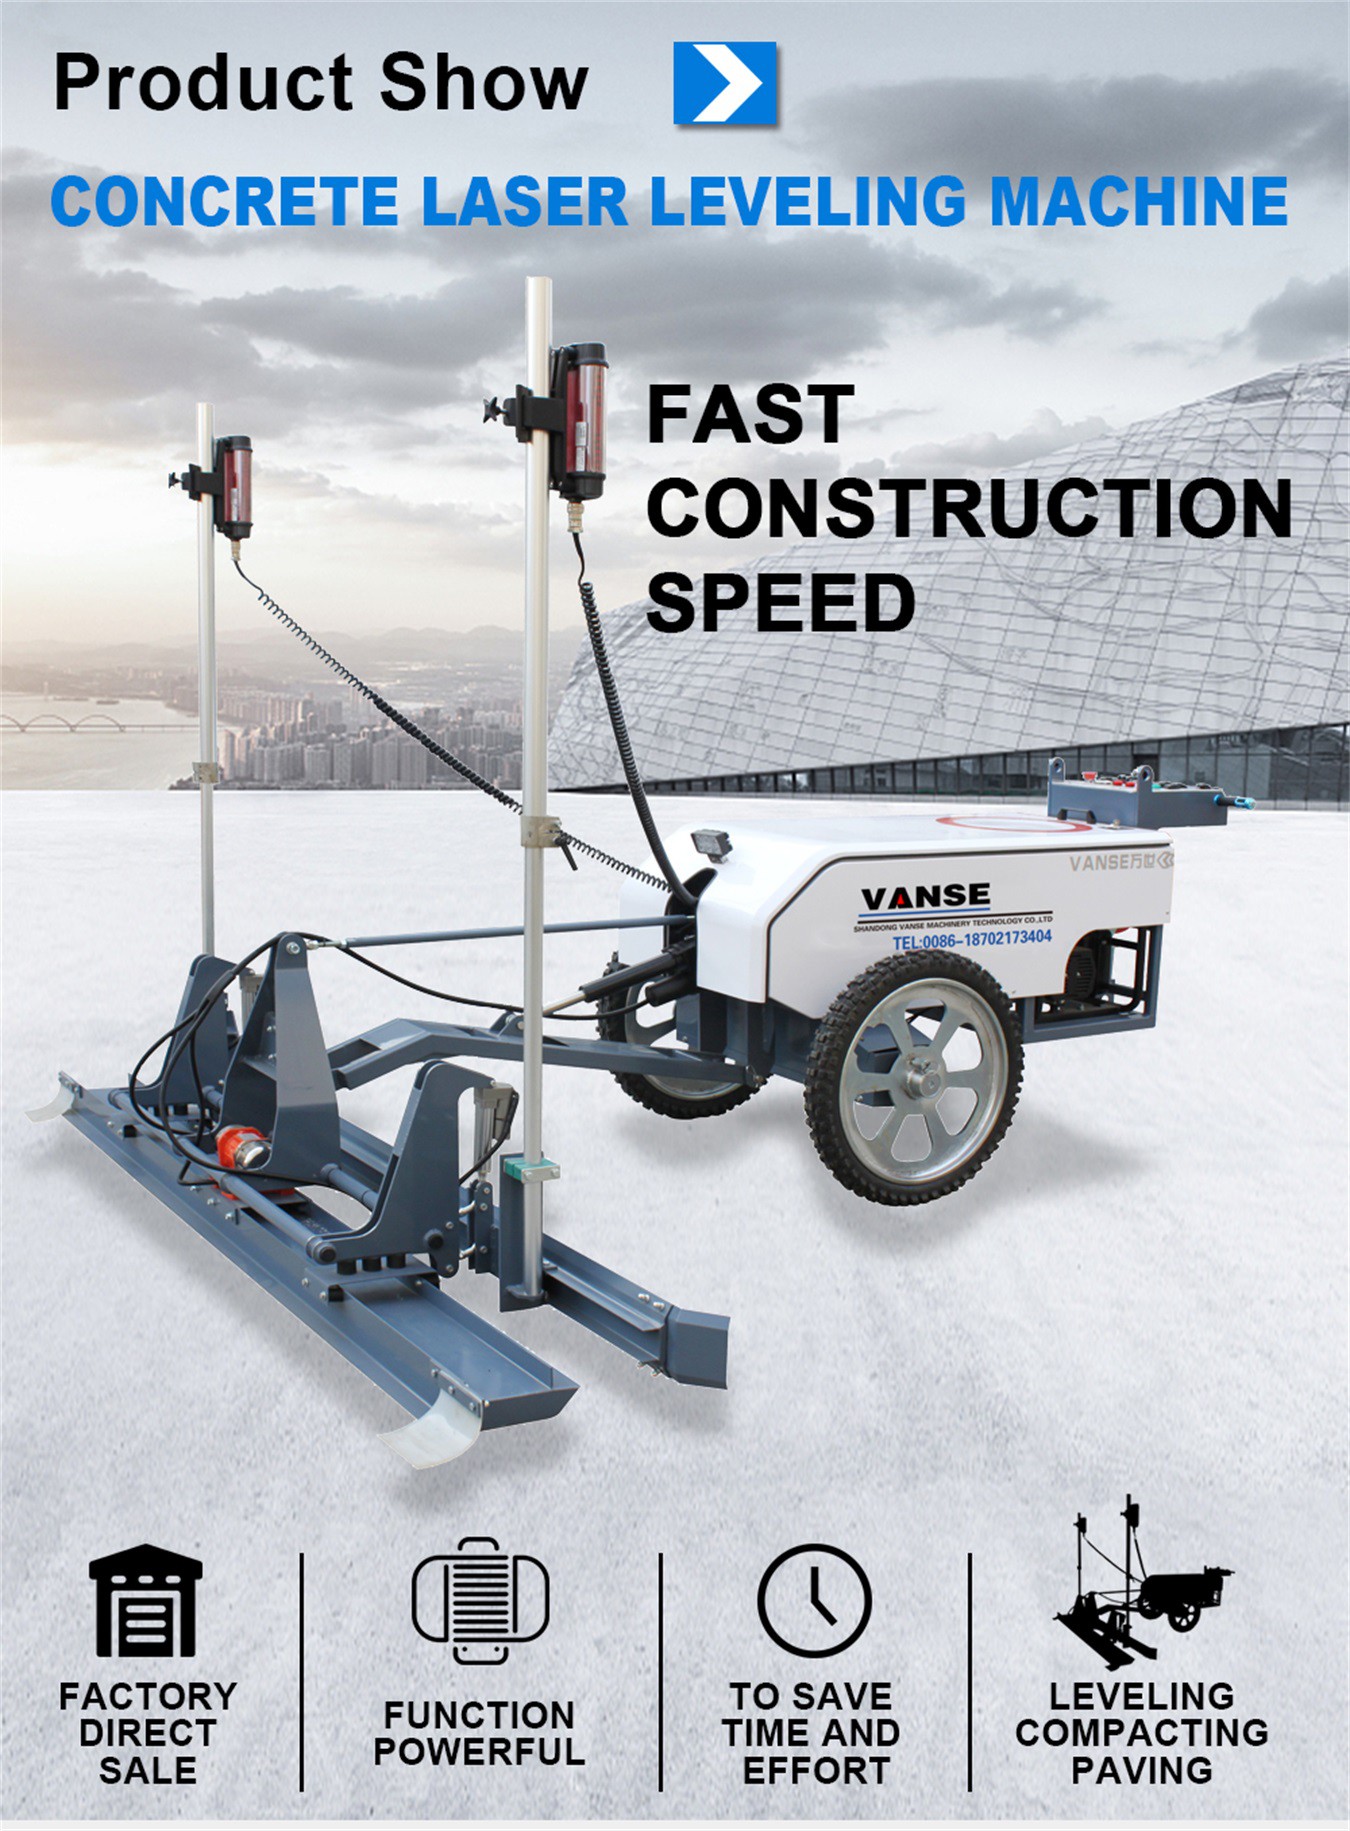
You can see in the image below that the system comprises two components, a laser transmitter and a levelling machine.
The laser transmitter is very similar to the laser system you see regularly being used on construction projects and public works. It transmits a laser beam across the area of the floor with exact precision.
The levelling system consists of a laser sensor, a vibration unit and a scraper plate.
The scraper plate is set at a fixed distance from the height of the laser sensor. The scraper is drawn across the freshly poured concrete levelling the surface with complete accuracy. The vibration unit follows behind making the concrete surface completely smooth.It improves the quality of floor. Effectively solve the problems of hollow drum, shelling, cracking and inequality on the ground, and the construction quality is more stable and smooth.
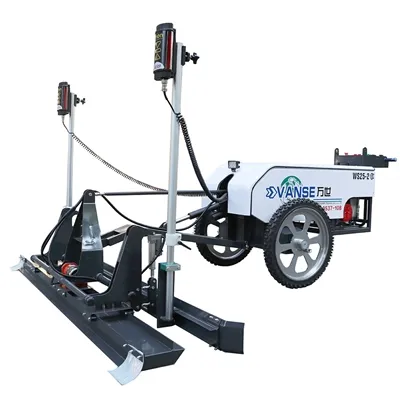
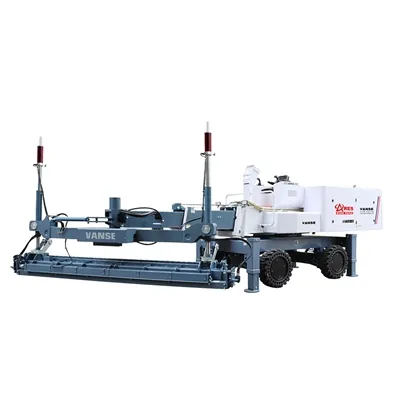
There are two basic types of laser levelling machine; two wheeled walk behind system like DZ25-2/ DZ30-2/ WS25-2 laser leveling, or four wheeled, ride-on machine like the YZ25-4/ YZ28-4S/ WS-940/ WS980/ WS-740/ WS-840/ YZ25-4E laser leveling, ( Large telescopic arm type concrete laser leveling such as YZ40-4E, YZ40-4, YZ30-4, YZ27-4.)
Our Product Advantages:
A. Famous brand engine, brand quality assurance, superior performance, start easily.
B. Gearbox large module design, aluminum alloy enclosure, free maintenance, long service life.
C. Wipe the line-structure-light bracket, choose the strict heat treatment of large diameter carbon structural steel, strong and durable.
D. Scientific design of the centrifugal clutch driving mechanism, transmission torque, long service life, maintenance is very convenient.
E. Surface coating, rust corrosion.
Thanks to All the Friends Who Support and Trust Shandong Vanse Machinery Technology Co., Ltd.
If you want to know more about Shandong Vanse Machinery Technology Co., Ltd. or have any questions, please feel free to contact us:
Our Factory
Shandong Vanse Machinery Technology Co., Ltd.


About the Author: Shandong Vanse Machinery Technology Co., Ltd.

Shandong Vanse Machinery Technology Co., Ltd. is a high-tech manufacturer specializing in concrete construction machinery, including laser screeds and related equipment. The company integrates R&D, production, and global sales, with products exported to over 60 countries and widely used in infrastructure projects worldwide.

Shandong Vanse Machinery
Leading manufacturer specializing in high-performance concrete laser screeds, telescopic arm flatwork handlers, and mechanical ride-on power trowels.
Post overview
Main PRODUCT Categories
Need Machine Guidance?
Speak directly with Shandong Vanse field specialists for tailored equipment quotes and site planning.
Contact Us TodayRelated Articles
You Might Also Like
October 9, 2023
How does the concrete laser leveling machine operate?
Preparation work: Grind the floor foundation to ensure that the surface is free of debris and dust, and rinse it with water; prepare the required materials and tools, such as cement, sand, interface agent, floor grinding discs, etc. Interface agent application: Apply interface agent on the treated floor to increase the adhesion of the floor surface. Cement mortar laying: Mix cement and sand according to a certain proportion and stir into cement mortar; lay the cement mortar evenly on the floor surface and use grinding discs for leveling. 1. Place the laser transmitter and set the height of the laser receivers at both ends of the laser leveling machine head. 2. Drive the machine to the concrete working area where the material has been spread. 3. According to the operator's instructions and with reference to the constant benchmark provided by the laser transmitter, the leveling machine head automatically lowers. 4. Move the machine backward slowly and evenly to compact the concrete to the finished surface of the floor. 5. Drive the laser leveling machine to the right and repeat the above operations, paying attention to sufficient overlap of the previous leveling track. 6. When the laser leveling machine completes the construction of a wide width of the formwork from left to right (depending on the floor design, sufficient concrete transportation, etc., the width of the formwork can range from 20m to 50m), drive the machine to the Remove the concrete to the far left of the pouring area and repeat the process. Ground polishing: After the cement mortar is dry, use floor grinding discs to polish the ground until the required smoothness is achieved. Clean the site: Clean the construction site to ensure there is no residue and water accumulation. Acceptance: Check the floor leveling quality to ensure it meets the construction requirements.Read More
November 26, 2025
Vanse Armor joint
In large-scale concrete floor projects such as industrial plants, logistics and warehousing centers, and large underground garages, joint treatment is the core link that determines the stability and service life of the floor structure. Conventional construction joints, due to their insufficient strength and weak resistance to deformation, are prone to problems such as misalignment, warping, and chipping, which seriously affect the load-bearing performance and functional use of the floor. As a specialized component specifically designed to address such issues, the structural design and application logic of armor joints are of crucial significance for enhancing the quality of floor engineering. Armor joint (also known as armor joint, armored joint, Bama joint, Ba Ma joint, zebra joint) is a composite structural component specially designed for strengthening the joint body of concrete floors. It is usually composed of high-strength metal substrates (such as galvanized steel plates, stainless steel plates, aluminum alloys, etc.), elastic sealing components (EPDM rubber strips, butyl rubber gaskets, etc.) and positioning and fixing systems (shear plates, anchor fasteners, support components). The edge of the seam is a straight metal/composite material cross-section. The upper and lower edges of the seam opening are flush with the ground/wall, without any additional curvature or inclination Angle, and the shape is simple. The edge of the seam is inclined to one side (the slope is usually 3°-5°), or both sides are beveled, forming a groove shape that is "low in the middle and high on both sides". It is advisable to pair it with more metal covers (such as stainless steel and galvanized steel plates). The top adopts an S-shaped curved surface design, formed by stamping steel plates. Combined with the force transmission plate and the telescopic sheath sleeve, it can achieve free expansion and contraction in both longitudinal and transverse directions. Triangular rib design: Triangular reinforcing ribs are welded on the outside of the steel plates of the sub-compartments to enhance the overall rigidity. Thick thrust plate: The thickness of the thrust plate can be selected from 6 to 12mm (material Q355), and it is suitable for heavy-duty areas above 80kN/m². Customized according to the diameter of the column, it is fixed with single-sided support, and the steel plates of the compartments surround the column to form a circular joint. The top edge guard is a flat steel plate, which is cut in the middle along a trapezoidal toothed curve, and the lower part is a punched and bent compartment steel plate and a sawtooth-shaped fixed plate. Cross-shaped, T-shaped, Y-shaped and other combined designs: They are used for the cross-connection of multiple Armor joints. For instance, a cross-shaped node Armor joint can simultaneously connect four straight seams. A stainless steel drainage ditch is integrated at the bottom of the Armor joint, and it is designed in an integrated manner with the steel plate of the compartment. The force transmission plate and the sheath are connected by sliding, allowing the floor to expand and contract freely when the temperature changes. Isolation joint: Also known as "structural separation joint", it is mainly used to achieve physical isolation between the concrete floor and the surrounding building structure. The applicable scenarios are the junctions between the floor and non-floor structures such as walls, reinforced concrete columns, equipment piers and abutments, and embedded part foundations. It separates two structures with different shrinkage coefficients and different load-bearing characteristics through joints, avoiding floor cracking caused by uncoordinated structural deformation. Elastic sealing materials (such as polyurethane sealant) are usually used for filling to ensure the separation effect and water resistance. Cutting joint: Also known as "shrinkage control joint", it is a preset joint body set up to address the problem of irregular cracks that are prone to occur after large-scale concrete pouring. The construction time is after the initial setting of the concrete and before the final setting (usually 24-48 hours after pouring, specifically adjusted according to the strength grade of the concrete). It is cut into shape with a special cutting machine, and the joint depth is usually 1/3 to 1/2 of the floor thickness. The joint spacing is determined according to the strength of the concrete and the ambient temperature (generally 4-6 meters). Its core function is to guide the concrete shrinkage stress to be concentrated and released at the preset joint, avoiding random cracks in the floor. Construction joint/partition joint: A construction joint is a temporary joint set at a preset position due to the excessive area of the floor pouring and the inability to carry out continuous construction at one time, used to divide the pouring sections. The partition joint is a permanent joint body that divides a large area of the floor into fixed-sized partition blocks to control the shrinkage and deformation of the floor in the long term. Essentially, both are "secondary pouring interfaces" of concrete. Such joints, due to the low bonding strength of the concrete joint surface and the uneven distribution of aggregates, have become weak links in the floor structure and are high-risk areas for diseases. Combining the characteristics of concrete structures with the force logic of the floor, the core reasons can be attributed to two points: The construction joint serves as the interface between two concrete pours. Due to the influence of the pouring interval time, the strength development of the concrete poured before and after is not synchronized, and the bonding force at the joint surface is insufficient. When the floor is subjected to vehicle rolling and equipment loads, the blocks on both sides of the joint body are prone to relative displacement, resulting in misalignment (height difference) or warping deformation. After the construction joint is opened, the concrete around the joint is prone to settlement of the internal aggregates under the action of vibration loads (such as vehicle passage and equipment operation), resulting in the separation of mortar and aggregates, and the density and strength of the concrete at the joint decrease. When the load exceeds the load-bearing limit of the joint concrete, edge cracking, corner chipping and other damages are prone to occur, and the damage will gradually expand after it occurs, affecting the structural stability of the entire silo block. Due to the inherent defects of construction joints, in projects with high requirements for the load-bearing capacity and durability of the floor, the use of armored joints has irreplaceable technical value. The metal frame of the armored joint can directly form a rigid connection with the concrete on both sides of the joint body, evenly transmitting the concentrated load at the joint to the surrounding floor, avoiding misalignment and warping caused by concentrated load. Meanwhile, the flexural and compressive properties of the metal substrate can effectively protect the joint concrete and prevent edge chipping caused by aggregate settlement. The elastic sealing components of the armored joint can accommodate the shrinkage deformation of the concrete floor (usually adaptable to ±5mm displacement) and slight settlement of the foundation. This not only prevents the joint from being cracked due to deformation but also ensures sealing performance, preventing oil stains and rainwater from seeping into the foundation. Traditional construction joints need to be repaired on average every 3 to 5 years (such as removing damaged concrete and refitting sealant), and in severe cases, local rework is required. The armored seam, with the anti-corrosion performance of the metal substrate (galvanization, anodizing treatment) and the aging resistance of the sealing components, can have a service life of 15 to 20 years, significantly reducing the frequency and cost of later maintenance. The layout of the armor joints should be determined comprehensively in combination with the floor structure form, load characteristics and usage scenarios. The core should follow the following five technical principles to ensure the effective performance of its functions: Arrange the Armor joints laterally along the load-bearing columns to divide the floor into independent compartments. The size of each compartment must be strictly controlled within 30m×30m. Exceeding this size will cause the shrinkage stress of the concrete to exceed the bearing limit of the armor joint, which is prone to cause cracking in the middle of the silo block. It is strictly prohibited to arrange Armor joints along the direction of directional main channels (such as forklift channels in logistics warehouses and entry and exit lanes in garages) – to prevent vehicle tires from long-term rolling along the seam opening, accelerating the wear of sealing components and deformation of the seam opening. It can be arranged perpendicularly to the direction of the passage to ensure smooth vehicle passage. The length-to-width ratio of floor compartments should be controlled within 1:1.5. If the aspect ratio is too large (such as 1:2 or above), the warehouse blocks are prone to torsional stress due to unidirectional contraction, which may lead to the failure of the Armor joint sealing assembly or the deformation of the metal frame. When armor joints encounter reinforced concrete columns, walls, equipment foundations and other structural bodies, a avoidance distance of 50-100mm should be reserved to prevent the deformation of the structural body and the floor from interfering with each other, which may cause the joint to be squeezed and damaged. Regardless of whether the floor adopts the form of soil foundation bearing or pile foundation bearing, PE sliding film must be laid at the contact surface between the floor and the foundation as well as the contact surface between the floor and the pile cap. PE sliding film can reduce the adhesion between concrete and the base layer, prevent floor cracking caused by foundation settlement, and at the same time provide a stable positioning reference for armor joints, ensuring installation accuracy. In line with the requirements of engineering applications, compared with traditional construction joints and cutting joints, armored joints have the following irreplaceable functional advantages: The metal frame can withstand a uniformly distributed load of 3-5 tons per square meter, making it suitable for high-frequency load scenarios such as heavy-duty forklifts and freight vehicles. The concrete at the joint will not crack due to concentrated loads. It can accommodate ±5mm contraction displacement of concrete floors and ±3mm settlement displacement of the foundation. The elastic sealing components expand and contract synchronously with the deformation, always maintaining the sealed state of the joint. The metal frame forms a "rigid constraint" on the concrete around the joint, preventing aggregate settlement and mortar loss caused by vibration, and fundamentally solving the problems of chipped edges and broken corners. It can be adapted to different types of foundation floors such as soil foundation and pile foundation, and achieve precise fixation in combination with PE sliding film. The installation process is seamlessly connected with the floor pouring procedure, without the need for additional complex processes. The metal substrate undergoes anti-corrosion treatment (galvanizing, anodizing), featuring strong weather resistance and rust resistance. The sealing components are made of anti-aging rubber material, with a service life of over 15 years, significantly reducing the later maintenance cost of the floor. When installing expansion joints, it is essential to meet the requirements of the floor design for levelness and straightness. During the installation process, a level should be used for inspection to ensure that they are precisely vertical in the vertical direction. The force transmission plate should be kept level so that it can slide freely within the plastic sheath when the floor expands and contract freely without generating resistance. In addition, a laser or optical level should also be used for level control and inspection. Step 1 Use nylon thread to position the designed expansion joint. With the assistance of the installation bracket, the straightness and levelness of the Armor joint are adjusted using an optical level until the design value is reached. Step 2 Start installation from the column or wall, and the Armor joint can only be fixed on one side. Use short-threaded steel bars with a diameter of 12 to 14mm to drive into the foundation on one side of the armor joint. Drive two fixed steel bars into each support position, and then weld the armor joint to the fixed steel bars with short steel bars with a diameter of 12mm to 14mm. Step 3 On the first day, pour the unsupported side. The next day, remove the supports and cut off the fixed reinforcing bars above the base layer (to prevent the floor and foundation from being locked and unable to expand or contract freely due to the presence of the fixed reinforcing bars). And pour the concrete on the other side of the armor joint. Step 4 When the curing period of the concrete is over, the edge steel of the armor joint will be gradually and naturally pulled apart. After the contraction stabilizes, remove the garbage in the joint, then fill the elastic adhesive, clean and protect the construction site, and cure for more than 3 days. As a key component for enhancing the quality of concrete floor engineering, the application value of armor joints lies not only in solving the disease problems of traditional joints, but also in improving the long-term stability and load-bearing reliability of the floor structure through standardized structural design and standardized layout principles. For engineering practitioners, it is necessary to strictly follow core principles such as "control of compartment size, reasonable avoidance of passageways, and avoidance of structural structures", and select models in combination with the usage scenarios of the floor and the conditions of the foundation. Only in this way can the technical advantages of the armor joint be fully exerted, and the construction quality and full life cycle value of the floor project be fundamentally improved. Note: The parameters provided in this document are for reference only and are not mandatory. Due to differences in technical characteristics between different brands and models of laser levelers, please consult the manufacturer for a suitable solution before actual operation. This reference document assumes no responsibility for any issues arising from failure to follow the manufacturer's instructions.Read More
November 5, 2025
Key points for purchasing second-hand power trowel and common methods to avoid pitfalls
Selecting a second-hand polishing machine is a job that requires a lot of experience and skills. It can help you obtain a practical device at a lower cost, but if you make a wrong judgment, the subsequent maintenance and delayed construction period may cause you to lose more than you gain. The following is a detailed list of key points for choosing a second-hand polishing machine and common methods to avoid pitfalls. We hope it can be of great help to you. Fuselage structure Chassis (grinding disc) : This is the most crucial part. Check if it is flat and free of deformation. Slight wear and tear is normal, but if the wear is severe, there are pits or obvious deformation, it will lead to poor polishing effect and higher replacement cost. Blade (scraper) : Check if there is still sufficient thickness. If the metal substrate has been worn out, it needs to be replaced immediately, and this cost should be included in the cost. Protective cover: Check for any damage or severe deformation, as this is related to operational safety. Overall framework: Check for any signs of welding, cracks or repairs, which could be a sign of severe impact or drop. Engine (heart) Brand: Give priority to well-known brands such as Honda, Kohler, Briggs & Stratton, etc. Spare parts are easy to find and maintenance is convenient. Appearance: Check for any cracks in the engine casing, especially in the base and radiator sections. Check for obvious oil stains or carbon deposits. This might be a sign of oil leakage or poor maintenance. Air filter: You can ask to remove the air filter to have a look. If the inside is very dirty or even soaked with oil, it indicates that the previous owner might not have paid much attention to maintenance. Engine oil: You can pull out the oil dipstick to check. If the engine oil is black, viscous or contains metal debris, it indicates that the engine wear may be relatively severe and the maintenance condition is poor. Transmission system Gearbox: Check if there are any signs of oil leakage on the gearbox housing. Rotate the drive shaft by hand to feel if it is smooth, and if there is any jamming or abnormal noise. Belt/chain: Open the protective cover and check if the belt has cracks, wear or looseness. Check if the chain is loose and free of oil and rust. Be sure to ask the seller to start the machine for testing! Startup performance Cold start is the most illustrative. Observe whether the rope pulling is smooth and whether the machine can start smoothly within one to three rope pulls. If it is difficult to start, there may be problems (such as carburetors, spark plugs, insufficient compression, etc.). Engine sound After starting, listen to the sounds of the engine idling and accelerating. The operation should be smooth. A regular "tap-tap" sound is normal (valve sound). If there are loud "clicking" sounds, knocking sounds or irregular noises, it indicates that there is severe wear inside. Transmission system sound Let the trowel run idle and listen for any abnormal "clattering" sounds from the gearbox and transmission parts. The voice should be even and deep. Vibration condition When the machine is running, it should be smooth and the vibration should be within a reasonable range. If the vibration is abnormally severe, it may be due to deformation of the chassis, unbalanced installation of the blades or problems with the engine base Purchase time and source: Inquire about the specific year and channel of purchase of the machine to determine its service life. Usage frequency and scenarios: Is it for occasional household use or long-term high-intensity use by professional teams? The latter naturally wears out more severely. Maintenance and repair history: This is of Paramount importance. Has there been any major overhaul? (Such as engine cylinder opening, gearbox replacement When was the last time the engine oil, air filter and spark plugs were changed? Have there been any accidents (such as tipping over or collision)? A reliable seller will tell the truth, while a evasive one needs to be on guard. If possible, conduct a brief load test (such as grinding it on the ground). Observe after the load is applied: Whether the engine is prone to stall and whether the power is sufficient. Check for any slippage or abnormal noise in the transmission system. Whether the machine moves smoothly and if it deviates. Trap description: Merchants thoroughly clean and paint the machines to make their appearance look as good as new, thereby covering up internal wear and tear and malfunctions. Avoidance methods Pay special attention to the screws and interfaces: It is very difficult for a refurbished machine to have no signs of any screws being turned. Check whether there are any signs of wear on the engine fixing screws, chassis screws, etc. Paint surface consistency: The original factory paint surface is usually uniform. If you find that the paint color of some parts does not match the overall color or the paint layer is too thick, it might be due to later spraying. Don't judge a machine by its appearance: Don't be deceived by a clean exterior. The key is to check its operating status and internal wear. Trap description: The machine was once sold after its chassis and frame were deformed due to a fall or collision. It was sold after simple repairs. Avoidance methods Check the flatness: Place the machine on a flat ground and observe from the side whether the chassis is fully in contact with the ground and if there is any warping. Check the welding points: Carefully inspect each connection point of the rack to see if there are any irregular or rough welding points in the later stage. Running test: During no-load operation, observe whether the machine is stable and if there is any regular swinging. This might be a sign of an uneven chassis. Trap description: Piecing together a complete machine with "good" parts from different scrapped machines, which has poor compatibility and stability. Avoidance methods Brand consistency: Check whether the brand, model and newness of the main components such as the engine and fuselage match. Assembly machines often give the impression of being "mismatched". Check the nameplate: Whether the information on the body nameplate (such as model and production date) is consistent with the seller's description. Poor comprehensive operation: When the assembly machine is in operation, various minor problems may occur frequently, making it feel "not smooth". Trap description: The machine performs okay when it is cold or unloaded, but once it is heated up or loaded, problems become apparent (such as insufficient power, severe abnormal noises, and engine stalling). Avoidance methods Persist in long-term testing: Let the machine run for 10 to 15 minutes and observe whether the state is stable after warming up. Load testing is required: This is the best way to verify the true state of the machine. Check the engine oil: After warming up the machine, stop it immediately and check the engine oil. If there are many small bubbles (emulsions) in the engine oil, it might be that the cylinder gasket is being washed away, which is a big problem. Before deciding to purchase, quickly check the following list: Inspection items Qualification standard Be cautious/give up Fuselage chassis Smooth, evenly worn, and without deformation Deformation, cracks, wear limit Engine Well-known brand, smooth start-up, stable operation, pure sound, no oil leakage Difficult to start, severe abnormal noise, oil leakage, and heavy smoke Transmission system The rotation is smooth without any abnormal noise, and the belt/chain is not aged There is abnormal noise, jamming and oil leakage Seller Description Be honest, answer all questions, and keep clear maintenance records Vague and evasive, concealing history Price In line with market conditions (approximately 30% to 50% of a new model) Far below the market price (" There's no such thing as a free lunch ") Test run situation The hot and cold units start well and operate stably under no-load or load conditions Any test is unqualified Final suggestion: If possible, bring along an experienced master craftsman or mechanic. Their experience can help you discover many problems that beginners fail to notice. When making a purchase, it is best to sign a simple written agreement with the seller, clearly stating the condition of the machine, and keep the payment voucher for unexpected needs. Remember, the primary principle when purchasing second-hand equipment is "It's better to miss out than to buy wrongly." Wish you could find a sturdy and durable good machine! Note: The parameters provided in this document are for reference only and are not mandatory. Due to differences in technical characteristics between different brands and models of laser levelers, please consult the manufacturer for a suitable solution before actual operation. This reference document assumes no responsibility for any issues arising from failure to follow the manufacturer's instructions.Read More