Technical Knowledge
How to clean power trowel blades after working with colored concrete?
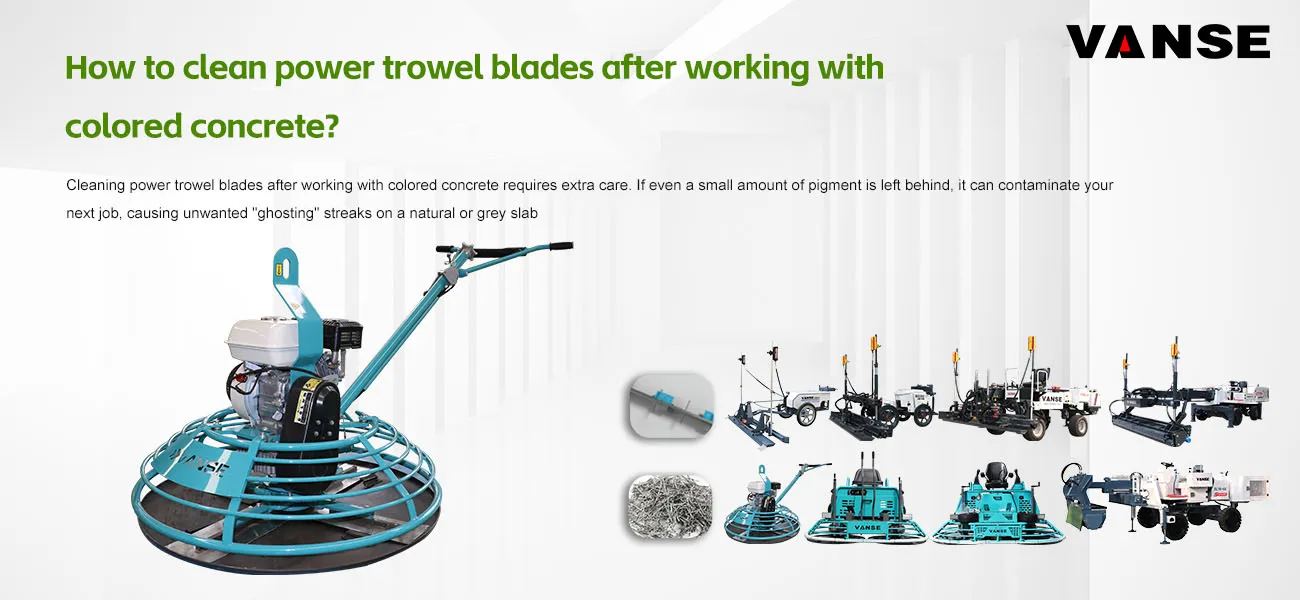
Cleaning power trowel blades after working with colored concrete requires extra care. If even a small amount of pigment is left behind, it can contaminate your next job, causing unwanted "ghosting" streaks on a natural or grey slab
Here is a step-by-step guide to ensure your blades are thoroughly cleaned and protected for future use.
🧼 Step-by-Step Cleaning Guide
1. The "Immediate" Wet Wash
Timing is the most critical factor. Once the pigment dries and bonds with the cement paste on the steel, it becomes incredibly difficult to remove
Pressure Wash Immediately: As soon as the machine is off the slab, use a high-pressure washer (at least 3,000 PSI is recommended) to blast the underside of the spider and the blades
Focus on Mounting Brackets: Pigment loves to hide in the "pockets" where the blades bolt onto the trowel arms. If these aren't cleaned, they can vibrate loose during the next job and drip old color into your fresh wet concrete
2. Chemical Neutralization (For Acid Stains)
If you were working with a reactive acid stain rather than integral color, you must neutralize the acid to stop the chemical reaction
Neutralize: Mix a solution of baking soda and water or ammonia and water.
Scrub: Use a stiff nylon brush to scrub the blades. This ensures no acid residue remains to react with or stain the next slab
3. The Abrasive Clean (For Dried Pigment)
If the color has already started to harden on the blades, you'll need to step up to mechanical cleaning
Abrasive Scouring: Use a pumice stone or a fine-grit sanding block to manually scour the blades.
Avoid Grinders: Do not use a metal grinding disk unless absolutely necessary, as this can create burrs or uneven edges that will "scar" your next floor
The "Sand Trick": Some operators run the trowel briefly on a pile of clean, damp sand. The friction acts like sandpaper and "polishes" the blades clean. (Note: Only do this if your machine can handle the torque without stalling)
🛡️ Post-Clean Protection
Steel blades rust almost instantly after being pressure washed .
Apply Oil: Spray the blades with a light coating of WD-40 or a specialized form release agent .
Wipe Down: Wipe off the excess. This prevents "flash rust" (orange dust), which can also stain your next concrete project .
✅ Color Contamination Prevention Checklist
To make sure no spot is missed, use this checklist from the guide
| Component | Cleaning Action | Why? |
| Blade Surface | Scrub with stiff brush + Water | Removes bulk pigment |
| Blade Edges | Sanding block / Pumice | Removes "hardened" color buildup |
| Bolts/Hardware | High-pressure blast | Prevents "bleeding" on next job |
| Spider Arms | Degreaser + Rinse | Prevents grease/color drips |
💡 Pro-Tip for Contractors
If you frequently work with colored concrete, many professionals keep a dedicated set of "Color Only" blades and a separate set of "Grey Only" blades. Swapping blades is often cheaper and less time-consuming than trying to remove every speck of pigment from a single setWould you like to know the best neutralizing ratios for specific brands of acid stains? Contact us NOW
Note: The parameters provided in this document are for reference only and are not mandatory. Due to differences in technical characteristics between different brands and models of laser levelers, please consult the manufacturer for a suitable solution before actual operation. This reference document assumes no responsibility for any issues arising from failure to follow the manufacturer's instructions.
Thanks to All the Friends Who Support and Trust Shandong Vanse Machinery Technology Co., Ltd.
If you want to know more about Shandong Vanse Machinery Technology Co., Ltd. or have any questions, please feel free to contact us:
Our Factory
Shandong Vanse Machinery Technology Co., Ltd.








Share this article

About the Author: Shandong Vanse Machinery Technology Co., Ltd.
Shandong Vanse Machinery Technology Co., Ltd. is a high-tech manufacturer specializing in concrete construction machinery, including laser screeds and related equipment. The company integrates R&D, production, and global sales, with products exported to over 60 countries and widely used in infrastructure projects worldwide.
Previous Post
Next Post
Related Articles
You Might Also Like
What is the leveling speed of the concrete laser leveling machine? How’s the effect?
What is the leveling speed of the concrete laser leveling machine? How's the effect? Concrete laser leveling machine is a kind of mechanical equipment for construction. Like many mechanical equipment, it is composed of multiple unit parts: motor, vibration head, body, etc. It is the reasonable combination of these parts that makes the performance of the whole machine become Like a powerful pressurized device, it is full of pressure. If we rely solely on manpower in our daily life, it takes a lot of experience and ability to deal with the smoothness of various grounds, bridge decks and construction equipment, so that people cannot do other things well. The performance of concrete laser leveling machine is as follows: 1. The combination of the equipment is good, it can be used in many coagulation projects, it is not affected by the environment and the size of the project, and has strong adaptability; 2. The concrete laser leveling machine has very good compression resistance. It can exert strong pressure on the working surface. This pressure is the main driving force for its work. Only when it can withstand these strong pressures can it be used for construction ; 3. This machine is made of high-quality steel, which has good resistance both in hardness and wear resistance, which is reflected in a long service life in use; 4. The cutting of this machine is smooth, the powerful laser processing is very fast, and the processing effect is also very good. Higher quality of flatness and levelness – the ground elevation can reach laser-level precision, the ground flatness and levelness are 2-3 times that of manual leveling, the concrete density is increased by more than 20%, and it is suitable for dry hard concrete , Fiber concrete and large aggregate concrete. Reduce the sub-bin seam, can achieve no sub-bin seam construction. Due to maintenance and formwork support, the sub-storage joints on the large-area concrete floor will have defects such as damage along the joints. These problems can be avoided by using laser leveling and joint cutting technology. The construction speed is faster – the work efficiency is increased by 100-300% (100-200 square meters of paving work can be completed per hour, and an average of 2000-3000 square meters can be completed per day), and labor is reduced by more than 30%, which is especially suitable for the construction period requirements Projects with compact size, large paving area and high quality requirements. Better ground integrity – it is very easy to achieve large-area overall pouring. On the one hand, this overall pouring technology can avoid problems such as easy hollowing and cracking caused by floor layered pouring, and on the other hand, it can reduce a lot of Construction joints make the integrity of the ground better. This is not easy to do with other construction techniques. It can reduce the post-maintenance cost of the ground – because the large-area overall paving can reduce the construction joints by more than 3 times – and the construction joints are easily damaged by the wheel load, thus reducing the post-maintenance cost of the ground. Long-term cooperation with supporting manufacturers has gone through a complete production process of R&D, manufacturing, and testing. It has the characteristics of high rigidity, high precision, high efficiency, and durability. It is mainly made of high-quality cast steel and is a product trusted by small and medium-sized enterprises. Adhering to the belief of "quality, reputation and service first", the company's VANSE laser leveling machine will be delivered in time within the time negotiated by both parties after confirming the customer's order. With strong technical strength, advanced and sophisticated processing equipment and strict Excellent management effectively guarantees the high quality and timely delivery of VANSE Laser Leveler.Are the transmission parts of concrete power trowels of different brands universal?
– Design differences: When designing trowels of different brands, different transmission methods and structural designs are adopted according to their own technical characteristics, performance requirements and cost control factors. For example, some brands may use belt drive, while others use chain drive or gear drive. The transmission parts used in these different transmission methods are different in shape, size, tooth shape, module, etc., and cannot be replaced with each other. – Specification model differences: Even for the same type of transmission parts, the specifications and models used by trowels of different brands may be different. Taking gears as an example, different brands may choose gears with different modules, numbers of teeth, and pressure angles according to the power, speed, torque and other parameters of the trowel. The sizes and parameters of these gears do not match and cannot be installed on trowels of other brands. – Installation size and interface differences: The transmission parts of trowels of different brands will also be different in installation size and interface design. For example, the connection method between the transmission parts and the engine, working parts, etc., the location and size of the mounting holes, etc., may vary from brand to brand. This means that even if the principles and specifications of the transmission components are similar, they cannot be used interchangeably due to mismatched installation dimensions and interfaces. – Brand-specific technology and compatibility: Some brands may use unique technology or design on transmission components to improve transmission efficiency, reduce noise, enhance durability, etc. These exclusive technologies make the transmission components more compatible and work together with other components of the brand, but also limit their interoperability with other brand components.How to match power trowel with concrete laser leveling machine for warehouse floors
In warehouse construction, the laser leveling sets the floor's flatness (FF), but the Power Trowel determines its levelness (FL) and surface durability. If these two aren't "in sync," you risk a floor that is flat but wavy, or a surface that delaminates under forklift traffic. Here is the strategy to match these machines for a high-tolerance warehouse floor. The most critical "match" isn't speed-it's chemistry. You must time the trowel start based on the leveling's progress. The Footprint Test: In a warehouse setting, the ride-on trowel should enter the slab when a worker's boot leaves an indentation of roughly 3mm to 5mm. The "Pass" Offset: Typically, the first power trowel should be starting its "panning" pass exactly 2 to 4 hours (depending on temperature and mix) after the laser leveling finished that specific section. Rate Matching: If your laser leveling is placing 500 m² per hour, you need enough trowel capacity to finish 500 m² per hour. Usually, this requires one 8ft or 10ft ride-on trowel for every 400–600 m² of daily pour to stay ahead of the "set." The laser leveling is excellent at striking off concrete, but it can leave minor "micro-ridges" from the vibration. The Large-Diameter Advantage: To match a laser-levelinged floor, use large-diameter ride-on trowels (10ft or 12ft) equipped with float pans. Why Pans? Unlike blades, pans act like giant flat-edges. They "cut" the high spots left by the leveling and "fill" the low spots, effectively magnifying the accuracy of the laser leveling. Cross-Troweling: Always run the power trowel perpendicular to the direction the laser leveling traveled. This eliminates any rhythmic undulations caused by the leveling head. As the warehouse floor hardens, you must transition from floating to finishing. Stage Tooling Matching the leveling Result Break-in Float Pans Levels the ridges left by the laser leveling head. Second Pass Combo Blades Begins to "close" the surface pores. Final Pass Finish Blades High-pitch "burnishing" for that mirror-like warehouse shine. To ensure the machines work as a team, verify these specs: Non-leveling Zones: For areas near docks or pits where the laser leveling can't reach, ensure your trowel operators have handheld vibratory leveling to maintain the same consolidation density as the main slab. Weight Ratio: Use heavy-duty ride-on trowels (e.g., 1000KG + machines) for warehouse floors. The weight is necessary to densify the surface that the laser leveling has already flattened. Fuel/Power: Ensure your trowels are running clean-burning engines (or have scrubbers) if the laser leveling is working in an enclosed warehouse space to prevent carbon monoxide buildup. In modern warehouses, "burnished" floors are the standard. This requires the power trowel to "burn" the surface at high RPMs. If the laser leveling didn't do its job, high-speed troweling will actually highlight the defects. Rule of thumb: If the trowel is "chattering" (jumping), the laser leveling pass was likely too fast or the mix was too stiff. Would you like me to create a labor-to-machine ratio table based on your typical daily pour size (in square feet or meters)? Contact us NOW Note: The parameters provided in this document are for reference only and are not mandatory. Due to differences in technical characteristics between different brands and models of laser levelers, please consult the manufacturer for a suitable solution before actual operation. This reference document assumes no responsibility for any issues arising from failure to follow the manufacturer's instructions.