Technical Knowledge
Comparison of Concrete Floor Construction Equipment Standards in Different Countries
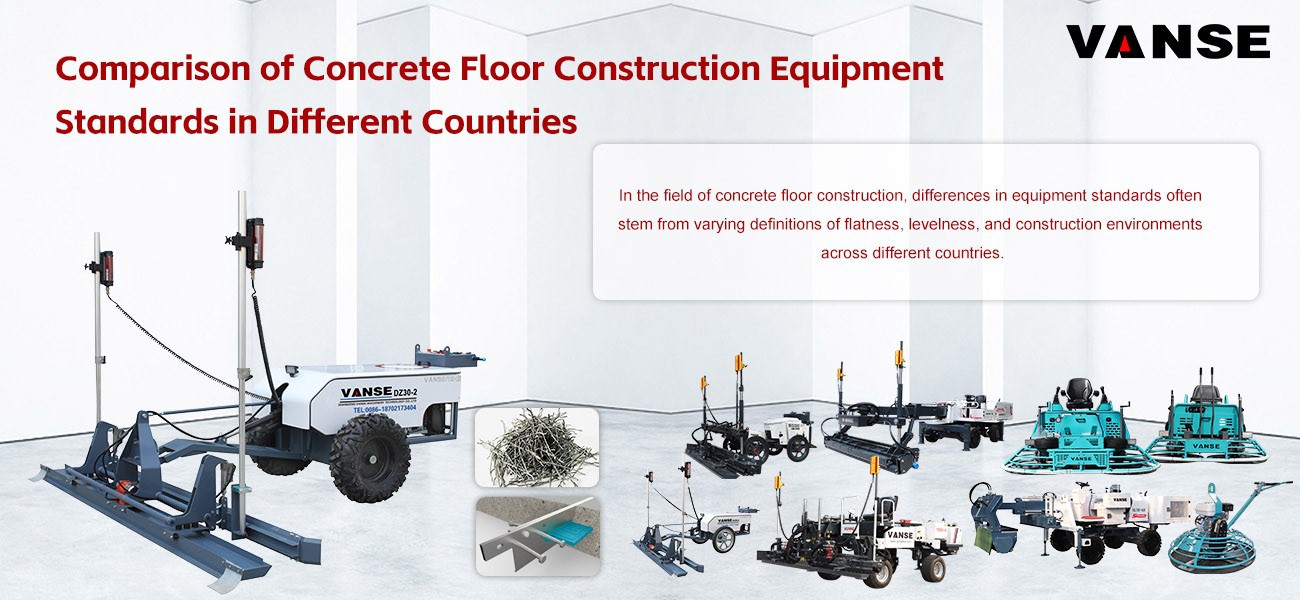
In the field of concrete floor construction, differences in equipment standards often stem from varying definitions of flatness, levelness, and construction environments across different countries.
Currently, there are three main standard systems globally: the United States (ACI/ASTM), Europe (EN/TR34), and China (GB/JGJ). The following is a detailed comparative analysis of construction equipment and technical standards:
1. Comparison of Core Technical Performance Indicators and Standards
The selection of construction equipment directly depends on how the country evaluates the quality of the flooring.
| Features | American Standards (ACI/ASTM) | European Standard (EN/TR34) | Chinese Standards (GB/JGJ) |
| Main Measurement System | F-Number (FF/FL) | FM/DM (TR34) | Straightedge Method (2m/3m) |
| Evaluation Dimensions | Emphasizes flatness (FF) and levelness (FL) for random traffic areas. | Distinguishes between free movement (FM) and defined movement (DM) | Measuring surface flatness and perpendicularity deviations |
| Trends in Mainstream Equipment | Laser Leveling, digital measuring instrument | High-precision laser leveling and grinding correction equipment | Laser leveling machine, traditional Leveling, straightedge |
2. Differences in Functional Requirements of Construction Equipment
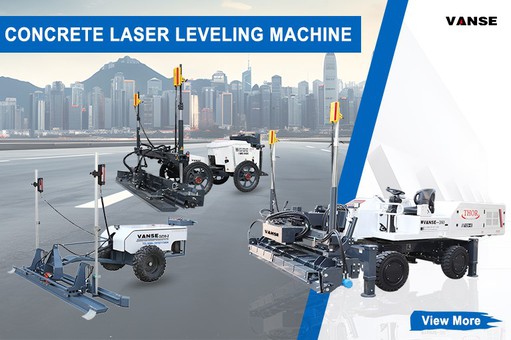
A. Laser Leveling Equipment
US Standards: ACI 302.1R strongly promotes large-area automated paving. Due to high labor costs and emphasis on the FF / FL index in the US, their equipment is typically equipped with high-frequency vibration and laser feedback systems to correct flatness in real time.European Standards: Especially in the UK and Germany, for very narrow aisle (VNA) warehouses, the equipment focuses more on lateral tilt control. The TR34 standard has very high requirements for "directional travel," so European floor finishing equipment often combines this with a "grinding and thinning" process.
Chinese Standards: Early practices favored traditional construction methods, but with the popularization of standards such as the "Code for Construction and Quality Acceptance of Floor Engineering," large-area laser Leveling have become mainstream. However, the requirements for automated data analysis in equipment are slightly lower than in Europe and the US.
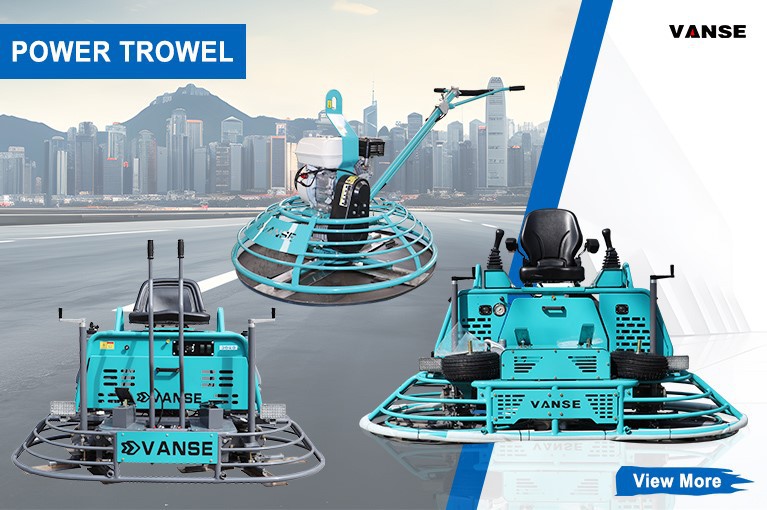
B. Grinding and Polishing Equipment
United States (CPAA/ASCC): Emphasizes dry grinding and dust collection (OSHA silica dust standards). Equipment often features high power and multi-planetary grinding heads.Europe (CE Standards): Mandatory requirement for equipment to comply with CE safety certification, with a strong emphasis on low noise and low energy consumption during operation.
China: Emphasizes efficiency and cost-effectiveness. Currently, domestically produced polishing machines have reached international standards in terms of weight and pressure adjustment, but there is still a gap compared to top European and American brands in terms of operational comfort (ergonomics) and intelligent control.
3. Safety and Electrical Standards
This is the most significant "hard barrier" when using equipment across borders:
Voltage and Frequency:
USA: Commonly 110V/240V, 60Hz.
Europe/China: 220V/380V, 50Hz. This means that the specifications for frequency converters and motors must be different.
Safety Protection:
Europe (CE): Mandates emergency stop switches, protective guards, and strict electromagnetic compatibility (EMC) testing.
USA (UL/OSHA): Places greater emphasis on fire risk prevention and operator dust protection.
4. Summary of Key Differences
American System: The core principle is "data-driven." Equipment often requires the use of laser measuring instruments (such as Dipstick or FloorPro) to provide real-time FF values.
European System: The core principle is "application-oriented." Floor surfaces are classified into FM (Free Movement) and DM (Defined Movement), and equipment requires more complex track or laser guidance systems during construction.
Chinese System: The core principle is "acceptance-based." Although it is rapidly aligning with European and American standards, there is still greater diversity in the standardized interfaces of construction equipment (such as grinding head fixing methods).
Next steps:
If you are planning to procure construction equipment internationally or need to develop construction plans based on specific national standards, I can assist you with:
A detailed explanation of the calculation formula for the FF / FL value and equipment requirements;
Providing construction process flowcharts for specific countries (such as German DIN or British TR34 standards).
Which part would you like to learn more about? Contact us NOW
Note: The parameters provided in this document are for reference only and are not mandatory. Due to differences in technical characteristics between different brands and models of laser levelers, please consult the manufacturer for a suitable solution before actual operation. This reference document assumes no responsibility for any issues arising from failure to follow the manufacturer's instructions.
Thanks to All the Friends Who Support and Trust Shandong Vanse Machinery Technology Co., Ltd.
If you want to know more about Shandong Vanse Machinery Technology Co., Ltd. or have any questions, please feel free to contact us:
Our Factory
Shandong Vanse Machinery Technology Co., Ltd.

Share this article

About the Author: Shandong Vanse Machinery Technology Co., Ltd.
Shandong Vanse Machinery Technology Co., Ltd. is a high-tech manufacturer specializing in concrete construction machinery, including laser screeds and related equipment. The company integrates R&D, production, and global sales, with products exported to over 60 countries and widely used in infrastructure projects worldwide.
Previous Post
Next Post
Related Articles
You Might Also Like
How to operate the concrete laser leveling machine
The operation method of the concrete laser leveling machine generally includes pre-operation preparation, equipment debugging, construction operation and post-operation processing. The following are the specific contents: 1. Site cleaning: Clear the debris and obstacles in the construction site to ensure that the ground is flat and there are no sharp objects to avoid affecting the operation of the equipment or damaging the tires and scrapers and other parts. 2. Equipment inspection: Conduct a comprehensive inspection of the equipment, including whether the connections of each component are firm, whether the electrical system and hydraulic system are normal, whether the laser transmitter and receiver can work normally, whether the water tank and oil tank levels are within the normal range, etc. 3. Material and tool preparation: Prepare the required concrete materials to ensure that their quality and performance meet the construction requirements. At the same time, prepare necessary auxiliary tools such as shovels, trowels, etc. 4. Staffing: Arrange at least one skilled operator and auxiliary construction personnel to be responsible for the loading and paving of concrete. Operators should be familiar with the operation methods and safety precautions of the equipment and wear appropriate personal protective equipment, such as safety helmets and safety shoes. 1. Laser system debugging: Turn on the laser transmitter and set the height and slope of the laser according to the construction requirements. Install the laser receiver on the corresponding position of the leveler, and adjust the height and angle of the receiver so that it can accurately receive the laser signal. Start the leveler and move the equipment to check the signal reception of the laser receiver to ensure that the signal is stable and accurate. 2. Scraper and vibration plate debugging: According to the paving thickness and construction requirements of the concrete, adjust the height and angle of the scraper to keep a suitable distance from the ground. Generally, the distance between the bottom of the scraper and the ground is slightly less than the design thickness of the concrete. At the same time, debug the vibration frequency and amplitude of the vibration plate. Usually, it is adjusted according to the slump and density requirements of the concrete. The vibration frequency and amplitude can be appropriately increased for concrete with a small slump. 3. Travel system debugging: Start the travel system and check whether the forward, backward, steering and other functions of the equipment are normal. Adjust the travel speed. According to the paving speed of the concrete and the construction progress requirements, select a suitable travel speed, generally within the range of 1-3 meters/minute. 1. Concrete loading and paving: Use concrete conveying equipment to transport concrete to the construction site, and auxiliary construction personnel will cooperate to evenly spread the concrete on the ground. The paving thickness should be slightly higher than the designed thickness, generally 5-10 cm higher, to compensate for the concrete sinking during the leveling process. 2. Leveling operation: The operator starts the concrete laser leveling machine and drives the equipment forward slowly. During the movement of the equipment, the scraper will scrape the raised concrete flat, and the vibration plate will vibrate and compact the concrete to make the concrete surface initially flat. During the leveling process, the operator should closely observe the signal changes of the laser receiver, and adjust the height of the scraper and vibration plate in time according to the signal indication to ensure that the flatness of the concrete surface meets the requirements. 3. Edge and corner processing: For corners that are difficult for the equipment to reach, auxiliary construction personnel need to use shovels, trowels and other tools for manual leveling to ensure the flatness and density of the entire construction surface. 4. Multiple leveling: For large-area concrete construction, multiple leveling operations may be required. After the first leveling, wait for the concrete surface to dry slightly, and then perform the second leveling to further improve the flatness and finish of the concrete surface. 1. Equipment cleaning: After the construction is completed, turn off the power supply of the equipment in time, use a high-pressure water gun or compressed air to thoroughly clean the equipment, and remove concrete residues, dust and other debris on the surface and components of the equipment. In particular, the scraper, vibrating plate, spiral feeder and other parts must be cleaned to prevent damage to the equipment after the concrete solidifies. 2. Component inspection and maintenance: Perform a comprehensive inspection of the equipment to check whether the components are damaged or loose, and repair and tighten them in time if there are any problems. At the same time, lubricate and maintain the parts that need lubrication in accordance with the equipment maintenance requirements, and add or replace lubricating oil, hydraulic oil, etc. 3. Storage equipment: Park the equipment at the designated storage location, ensure that the storage site is flat and dry, and avoid the equipment from being affected by natural factors such as rain and sun. If the equipment is not used for a long time, appropriate protective measures should be taken, such as covering with canvas.What scenarios are the super flat floors suitable for?
Super flat flooring is a high-precision, high-flatness floor treatment method that is suitable for various commercial places, industrial plants, airports and other places that require long-term use and maintenance. The following are the scenarios where super flat floors are suitable for use: ▶Commercial places Commercial places are one of the places where super flat floors are most commonly used, including shopping malls, department stores, supermarkets, restaurants, coffee shops, etc. In these locations, ultra-flat floors can provide a high level of surface flatness and wear resistance, improving customers' shopping experience and comfort while reducing maintenance costs and time. ▶Industrial plant Industrial plants are another place that requires high-precision floor treatment, including manufacturing workshops, warehouses, laboratories, etc. In these places, ultra-flat floors can provide better ground support and wear resistance, reduce damage to the ground by machines and vehicles, and at the same time improve work efficiency and safety. ▶Airport Airports are another place that requires high-precision floor treatment, including runways, aprons, terminals, etc. In these locations, ultra-flat floors can provide better surface flatness and wear resistance, improving the operational efficiency and safety of aircraft and vehicles while reducing maintenance costs and time. ▶Hospital The hospital is a place that requires a high degree of cleanliness and hygiene, and super-flat floors can meet these requirements to a certain extent. For example, in areas such as operating rooms and wards, ultra-flat floors can provide better surface flatness and dust-freeness, reducing the risk of bacterial growth and infection while improving patient comfort and satisfaction. ▶School The school is a place that requires a high degree of safety and maintenance, and super-flat floors can meet these requirements to a certain extent. For example, in areas such as classrooms and libraries, ultra-flat floors can provide better surface flatness and wear resistance, reducing the risk of slips and falls while improving students' learning efficiency and comfort. In general, super flat floors are suitable for various places that require long-term use and maintenance, including commercial places, industrial plants, airports, hospitals, schools, etc. In these places, super-flat floors can provide high levels of surface smoothness, wear resistance, waterproofness, anti-slip, pressure resistance, dust-freeness and aesthetics, improving work efficiency, safety and comfort. , while reducing maintenance costs and time.Cement Floor Cracks: Cause Analysis and Prevention
Cracks in cement floors (typically referring to cement concrete surfaces, such as indoor floors, outdoor plazas, and parking lots) not only affect appearance but can also reduce durability and even hinder functionality due to water seepage and debris accumulation. The following detailed analysis covers common crack symptoms, core causes, and targeted prevention and control measures to help accurately identify and effectively resolve the problem. The form, width, and distribution of cement floor cracks directly reflect their causes and can be categorized as follows: Crack Types Appearance Characteristics Common Locations Hazard Level Surface Cracks Cracks are short and thin (<0.1mm wide), forming an irregular network with no discernible depth, mostly concentrated in the surface layer (1-3mm deep). Large indoor floors and outdoor plazas Low (appearance only, no structural risk) Vertical/Horizontal Cracks Cracks are long (several to tens of meters long), straight, 0.1-0.5mm wide, and can penetrate the surface layer (5-10mm deep). Along the length/width of the floor, or along both sides of a partition joint Medium (easy to seep, accelerating surface degradation) Cracks at the Edges and Corners of Plates Cracks extend from the corners of the slab (such as the corners of a square floor) toward the center, forming an L-shaped or diagonal pattern, with a width of 0.2-0.8mm. At the joints of indoor and outdoor floor panels, near wall corners High (likely to cause edge peeling, affecting pedestrian safety) Through-Breaking Cracks Cracks extend through the entire cement surface layer (even penetrating the base layer), are >0.5mm wide, and are sometimes accompanied by slight ground subsidence or sanding. Highly loaded areas (such as parking lots and warehouses), and areas with uneven subgrades Extremely High (may cause floor damage and water accumulation, requiring urgent attention) The root cause of cement floor cracking is "internal stress in the surface layer exceeding its tensile strength." The sources of this stress are related to five key factors: material, base layer, construction, environment, and usage. The details are as follows: Improper material selection or proportioning directly leads to insufficient crack resistance in the surface layer: Incorrect cement selection: Using cement with a high heat of hydration (such as P.O. 42.5R rapid-hardening cement) to cast large surfaces releases a large amount of heat during hydration, raising the internal temperature of the surface layer. Contraction upon cooling creates "temperature stress," which can cause longitudinal and transverse cracks. Using expired cement (which has reduced strength) can also lead to insufficient tensile strength in the surface layer, making it more susceptible to cracking. Poor aggregate grading: If the fine aggregate (sand) is too fine (fineness modulus <2.3) or the mud content is too high (>3%), the cement requirement will increase (more cement paste is needed to coat the aggregate), leading to increased shrinkage of the surface layer. If the coarse aggregate (stone) is too small (<5mm) or missing, it will not form a "skeletal support," resulting in unrestrained shrinkage of the surface layer and prone to network cracking. If the water-cement ratio is too high: In pursuit of fluidity during construction, water usage is often blindly increased (water-cement ratio > 0.55). After the surface layer hardens, excess water evaporates, creating internal voids and reducing density. This significantly increases shrinkage (approximately 20% increase in shrinkage for every 0.1 increase in water-cement ratio), which can easily lead to surface cracking and edge cracking. Improper admixtures/admixtures: Failure to add or incorrect addition of admixtures (e.g., failure to add a retarder in summer, resulting in rapid initial setting of the surface layer and inability to grout after surface water evaporates; failure to add an antifreeze in winter, resulting in internal structural damage after freezing); and failure to add admixtures such as fly ash and mineral powder (key to reducing hydration heat and shrinkage) result in poor crack resistance in the surface layer. Cement floor surfaces rely on the stable support of a base layer (such as a lime soil base, crushed stone base, or concrete base). Base layer problems can directly affect the surface layer: Uneven base layer settlement: If the base layer is not compacted layer by layer during construction (e.g., a lime soil base with a compaction level less than 95%), or if there is a weak soil layer beneath the base layer (e.g., uncompacted backfill), the surface layer can experience partial subsidence during use, subjecting it to tensile stress and causing through-hole cracks or cracks at the edges and corners of the slabs. Uneven/contaminated base layer surface: The base layer surface has a height difference greater than 5mm (not leveled). The surface layer has uneven thickness after pouring, with thinner areas shrinking faster than thicker areas, creating "temperature differential stress." Oil and loose dust on the base layer surface have not been cleaned, resulting in insufficient adhesion between the surface layer and the base layer. After hardening, the two separate, and the surface layer shrinks independently, causing cracks. No isolation layer is provided for the base layer: When the base layer is concrete or a rigid material, without an insulating layer such as polyethylene film, the surface layer adheres too tightly to the base layer. During shrinkage, it is constrained by the base layer and cannot deform freely, causing cracks in areas of stress concentration (such as corners and joints). Construction operation is critical to crack control. Common mistakes include: Improper pouring and vibration: Failure to follow the "staged pouring, gradual progress" principle during pouring (e.g., large areas of ground are not divided into blocks, with individual blocks >20 m2), resulting in no channels for the surface layer to shrink as a whole; insufficient vibration during vibration (low density in some areas of the surface layer, insufficient tensile strength) or over-vibration (aggregate sinks, cement slurry floats, forming a "floating slurry layer" on the surface. After hardening, the floating slurry shrinks and cracks, known as crazing). Incorrect timing of surface calendering: Calendering too early (the surface layer has not yet set and the cement slurry has not yet developed strength) can easily cause sanding on the surface; calendering too late (the surface layer has already set and a crust has formed on the surface) can damage the surface structure, forming microcracks that later expand into cracks. Inadequate or improper sizing of the slurry: Large areas of flooring (single floor area >15 m2) are not provided with standardized expansion joints (spacing: ≤6 m vertically, ≤8 m horizontally). This lack of "stress relief" during surface shrinkage can lead to vertical/transverse cracks along weak areas (such as the center). Insufficient expansion joint depth (<1/3 of the surface layer thickness) or inadequate filler (such as asphalt mortar) can cause cracks to extend along both sides of the expansion joints. Untimely/inadequate curing: Failure to cover and cure the surface layer within 12 hours of pouring (e.g., exposure to direct sunlight in summer or wind in winter) allows surface moisture to evaporate rapidly, preventing internal moisture from being replenished. This results in "shrinkage stress" and causes surface cracking. Insufficient curing time (<7 days) prevents the surface layer from reaching its designed strength (typically ≥70% strength), leading to premature loading (e.g., pedestrians or vehicles), which can easily lead to corner cracks or through-hole cracks. Ambient temperature and humidity fluctuations can exacerbate stress in the surface layer and induce cracks: Severe Temperature Fluctuations: In summer, during daytime pouring (ambient temperature 35°C), the temperature drops sharply at night (15°C). The surface layer cools and contracts rapidly, while the interior cools and contracts slowly. This internal constraint creates "temperature stress" on the surface, leading to longitudinal, straight cracks. In winter, if the surface layer freezes before reaching its frost resistance (≥70% of design strength), the internal moisture freezes and expands, and upon thawing, the volume contracts, forming "freeze-thaw cracks" (mostly cracks at the edges and corners of the slabs, accompanied by surface spalling). Chronic and unstable humidity: In humid environments (such as bathrooms and underground garages), the surface layer absorbs moisture over time, softening the cement paste and reducing its tensile strength. In dry environments (such as heated rooms and warehouses in northern China), moisture from the surface layer continuously evaporates, accumulating shrinkage stress. The alternating effects of these two factors can easily lead to surface cracking or through-hole cracks. Improper load or maintenance during use can accelerate the development of cracks: Premature loading or overloading: Heavy objects (such as furniture and building materials) are piled on the surface before it reaches its design strength (28 days), or vehicles are driven on it (for example, a parking lot is opened to traffic without proper maintenance). This causes the surface to be subjected to loads exceeding its tensile strength, leading to through-cracks or cracks along the edges of the slabs. Lack of routine maintenance: Failure to promptly seal small cracks in the surface allows rainwater and oil to seep in, eroding the surface's internal structure. Furthermore, in winter, the water that seeps in freezes and expands, causing cracks to widen. Prolonged exposure to heavy loads (such as frequent forklift traffic in a warehouse) can lead to localized stress concentrations, causing longitudinal cracks. The core of prevention and control lies in "source control (materials + base layer), process control (construction), and post-maintenance (environment + use)." It is divided into two parts: "preventive measures" and "crack repair measures": Precise Material Selection: Prioritize cement with low hydration heat (such as P.O. 42.5 ordinary cement or slag Portland cement); use well-graded medium sand (fineness modulus 2.3-3.0, mud content ≤3%) and 5-10mm continuously graded crushed stone (mud content ≤1%) as aggregates; add Grade I fly ash (15%-20%) or mineral powder (20%-25%) to reduce hydration heat and shrinkage. Strictly control the water-cement ratio: The water-cement ratio should be ≤ 0.5 (for standard floors) and ≤ 0.45 (for impermeable floors). If necessary, add a retarding water reducer (at a dosage of 0.5%-1%) to maintain fluidity while reducing water consumption and minimizing shrinkage risk. Ensure the base layer is compacted and leveled: The base layer (lime soil/gravel) should be constructed in layers, with each layer ≤30cm thick and a compaction level ≥95% (tested using the knife ring method). The base layer surface should be leveled with cement mortar, with a height difference ≤3mm and cleaned (free of oil stains and loose dust). Apply a primer if necessary (to enhance adhesion between the surface layer and the base layer). Installing Isolation Layers and Expansion Joints: For rigid base layers (such as concrete), lay a 0.1mm thick polyethylene film isolation layer. For base layers >10m long, install expansion joints every 6-8m along the length (20mm wide and filled with asphalt hemp) to prevent base layer shrinkage from transferring to the surface layer. Scientific pouring and vibrating: For large floor areas, pour in blocks, with each block ≤15 m2 (rectangular blocks, aspect ratio ≤1.5). Leave 20 mm wide joints between blocks (the joint depth should be 1/3-1/2 the surface layer thickness). Vibrate with a flat vibrator (at a speed of 1-1.5 m/min) until the surface is free of bubbles and slurry. Avoid missed or over-vibration. Choose the right timing for calendering: Calender in three steps: ① Before initial setting (after the surface layer has absorbed water), smooth it with a wooden trowel; ② After initial setting (no visible finger marks remain), perform initial compaction with an iron trowel; ③ Before final setting (when the surface is nearly hardened), perform final compaction with an iron trowel to ensure a smooth surface without any marks. Strengthened maintenance management: Cover the surface with geotextile or plastic film (add a shade net in summer and a thermal blanket in winter) within 12 hours after pouring to keep the surface moist. Curing time for ordinary surfaces is ≥7 days, and for impermeable/load-bearing surfaces is ≥14 days. Pedestrians and vehicles are prohibited from entering during the curing period. Temperature Control: In summer, avoid pouring at noon (select morning and evening temperatures between 25-30°C). Cover the surface to maintain moisture. In winter, preheat the aggregate (≥5°C) before pouring, ensure the surface is at least 10°C before pouring, and maintain an ambient temperature of ≥5°C during curing (use heating if necessary). Usage and Management: The surface should be cured for 28 days before use. Premature stacking of heavy objects is prohibited. In areas such as parking lots and warehouses, limit vehicle/cargo weight to the designed load capacity to avoid local overloading. Regularly inspect the floor surface and seal any minor cracks with epoxy resin glue. If cracks have already appeared, first clean them (remove debris and dust, and flush with a high-pressure water gun), then repair them as follows: Crack Types: Repair methods Material Selection Key Points: Surface cracks Surface sealing method Epoxy sealer, cement-based penetrating crystallization coating (CCCW) Use a brush to evenly apply the glue/paint to the crack surface and a 5cm area on either side. Repeat 2-3 times. Cure for 24 hours. Vertical/horizontal cracks (width < 0.5mm) Low-pressure grouting method Cement slurry (water-cement ratio 0.45), epoxy slurry Drill an 8mm diameter hole (5mm deep) every 20cm along the crack. Insert a grouting tube and inject grout using a low-pressure pump (0.2-0.3MPa) until the grout overflows. Cure for 7 days. Cracks along edges and corners (width 0.2-0.8mm) Painting mortar filling method Polymer cement mortar (cement: sand: latex = 1:2:0.15) Chisel away the loose surface layer on both sides of the crack (5-10cm wide, 3-5mm deep). Clean and apply a primer. Fill with mortar and compact. Cure for 7 days. Through cracks (width > 0.5mm) Grouting + reinforcement method High-strength epoxy slurry, carbon fiber cloth First, fill the crack with high-pressure grouting (1.0-1.5MPa). Then, apply carbon fiber cloth (15cm wide, along the crack). Apply a topcoat. Cure for 14 days. The key to preventing and controlling cracks in cement floors is "prevention is better than cure": By optimizing the material mix (controlling the water-cement ratio and adding admixtures), stabilizing the base layer (compacting, leveling, and insulating layers), and standardizing construction (block-by-block pouring, timely maintenance, and appropriate gridding), stress can be reduced at the source. If cracks have already occurred, appropriate repair methods should be selected based on the crack morphology (width, depth, and location) to prevent further crack expansion. Paying attention to load control and regular maintenance during daily use can significantly extend the service life of cement floors. Note: The parameters provided in this document are for reference only and are not mandatory. Due to differences in technical characteristics between different brands and models of laser levelers, please consult the manufacturer for a suitable solution before actual operation. This reference document assumes no responsibility for any issues arising from failure to follow the manufacturer's instructions.