Technical Knowledge
Crack Control of Superflat Floors Optimization of Cutting Timing, Depth and Spacing
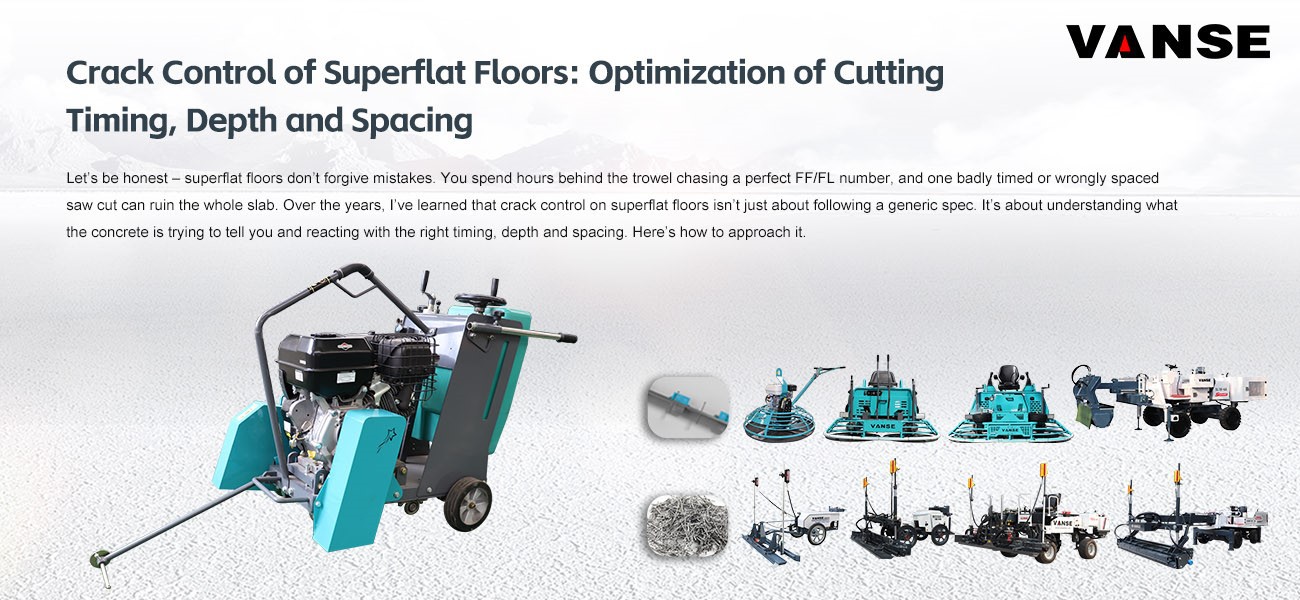
Let’s be honest – superflat floors don’t forgive mistakes. You spend hours behind the trowel chasing a perfect FF/FL number, and one badly timed or wrongly spaced saw cut can ruin the whole slab. Over the years, I’ve learned that crack control on superflat floors isn’t just about following a generic spec. It’s about understanding what the concrete is trying to tell you and reacting with the right timing, depth and spacing. Here’s how to approach it.
1. Why Superflat Floors Crack Differently
Superflat slabs are a different animal. Because we place them with very tight tolerances and often use large‑area finishing techniques, they tend to be denser at the surface and have less bleed water than a typical commercial floor. That dense, well‑closed surface is great – it’s what gives you the flatness – but it also means the top dries and shrinks a little faster than the body of the slab. If you don’t plan your cuts to relieve that stress at the right moment, you’ll see random cracks appear in the first 24 to 48 hours, before you even think about loading the floor.
Takeaway: A superflat slab puts more emphasis on early crack control because the tight‑finished surface concentrates drying shrinkage stress near the top. Your saw‑cutting game has to be spot on.
2. Cutting Timing – The "Goldilocks" Window
Forget the overnight‑wait-and‑see approach. With superflat floors, you want to be in what I call the "Green Cut" window – as soon as the concrete can support the saw operator and the saw itself without raveling the aggregate.
How early is too early? If your saw blade pulls out stones and leaves a ragged edge, you’re too early. Back off and wait another 30 to 60 minutes.
How late is too late? If you can see even a hairline random crack starting somewhere on the slab, you’ve already missed the boat. on superflat jobs, I want saw cuts in before the internal concrete temperature starts to drop from its peak, which is often 4 to 12 hours after finishing, depending on the weather and mix design.
Search‑friendly rule of thumb: "Cut as soon as possible without spalling." This simple statement gets typed into Google a lot by floor guys asking when to cut concrete superflat floor or green saw cut timing.
A pro tip: On hot or windy days when the slab is losing moisture fast, start cutting earlier. On cool, damp days you might have a slightly longer window, but never wait more than 12 hours on a superflat floor – the risk of random cracks skyrockets after that.
3. Cutting Depth – More Critical Than You Think
The old rule says "depth = one‑quarter of the slab thickness." That’s a minimum, not the target for superflat work. My rule of thumb: aim for one‑third of the slab thickness when you can. Here’s why.
Superflat floors are often 150 mm to 200 mm (6″ to 8″) thick and may contain steel fibers or light reinforcement. A deeper cut creates a stronger plane of weakness that reliably directs the shrinkage crack down into the joint, rather than letting it wander off sideways. I’ve seen too many floors where a shallow cut simply didn’t do its job and the crack ran parallel to the joint, ruining the flatness.
Soft‑cut (early) work: With a power trowel concrete floor this dense, use a soft‑cut saw with a thicker blade to make a wider kerf, especially with steel fibers.
Depth for fibers: For fiber‑reinforced superflat slabs, I increase the cut depth to 35‑40% of slab thickness. Fibers bridge the joint slightly, so a deeper cut is needed to overcome that and ensure the crack forms where you want it.
Search‑friendly note: People are Googling superflat concrete saw cut depth and control joint depth superflat warehouse floor. If your article includes these, you match buyer intent.
4. Joint Spacing – The Pattern That Works
Spacing formulas like "24 to 36 times the slab thickness" are a starting point, but on superflat floors you have to consider material handling traffic patterns and the flatness spec itself.
Here’s what I design by:
Typical spacing: 2.5 m to 3.7 m (8 ft to 12 ft) on center for a 150 mm slab.
Column lines matter: Always place joints directly over column lines and internal footings, no exceptions. If you don’t, you’ll get a classic restraint crack.
Aspect ratio: Keep panels as square as possible. A long, skinny panel (over 1.5:1) will try to crack across the middle every time.
Free‑movement joints at perimeters: Leave a proper isolation joint around columns and walls, filled with compressible material, because the superflat floor will shrink and move as a whole.
Now here’s where the finishing machine comes in. When you use a reliable walk‑behind power trowel like the VANSE VS424 with Honda GX160 power, you get a very consistent blade pressure and speed across the slab. That consistent finish means the concrete surface behaves uniformly during shrinking, so your joint plan works more predictably. I’ve had far fewer problems with erratic cracks after switching to a machine that holds blade pitch and rpm consistently – the slab doesn’t have weak, rougher spots where shrinkage stress concentrates.
5. Sawing Practice for Superflat Edges
How you cut matters as much as when and where. A few points from the job site:
Use a straightedge guide for the initial cut, especially in very open areas. Any wobble looks terrible on a superflat floor.
Match the saw blade to your aggregate. Hard aggregate, like granite or quartzite, needs a soft‑bond blade so it wears and exposes new diamonds. Soft aggregate needs a hard‑bond blade. This is a common question guys search: best blade for cutting superflat concrete.
Clean the joints immediately. Use compressed air or a wet/dry vac – do not let slurry dry in the joint, because it stops the joint from closing properly during thermal expansion and can cause edge spalling later.
Cure the slab before and after cutting. Apply a high‑quality curing compound right behind the finishing operation, and re‑apply over the saw cuts. This keeps the joint edges hard and chip‑free.
6. What If You’re a Contractor Offering Superflat Floors?
If you’re promoting your floor finishing service or selling equipment to guys who do this work, you need to talk about crack control in a way that builds trust. Your buyer is searching for crack control superflat floors, saw cut depth for superflat, and also concrete power trowel for superflat. They want to know two things: how to avoid call‑backs, and which machine gives a surface that’s easy to cut cleanly.
That’s where a machine like the VANSE VS424 walk‑behind power trowel comes into the conversation naturally. It produces a dense, high‑quality finish that:
Reduces micro‑cracking before sawing even starts,
Holds blade pitch precisely, so the surface is uniformly closed,
Is lightweight enough (62 kg) to be lifted onto a superflat slab without rutting the fresh concrete.
When you finish a superflat floor with a consistent machine, the cutting operation goes more smoothly – fewer random cracks, better‑looking joints, and a floor that stays flat for years.
7. Quick Checklist for Your Next Superflat Cutting Job
Here’s a no‑nonsense list you can pin to your job‑box – and it also works well as a featured snippet in search results:
Timing: cut as soon as you can walk on the slab without leaving marks deeper than 3 mm, typically 4‑12 hours after finishing.
Depth: minimum 1/4 slab thickness, but aim for 1/3 thickness; go deeper for fiber‑reinforced slabs.
Spacing: 2.4 m to 3.6 m on center for 150–200 mm slabs; always cut over columns.
Pattern: keep panels as square as possible; no aspect ratio over 1.5:1.
Equipment: use a steady, well‑balanced power trowel to get a uniform surface before you start cutting – a 24‑inch walk‑behind power trowel like the VS424 is the sweet spot for superflat detail work and edging.
Clean and cure: blow out joints immediately; apply cure over cuts.
8. Final Thoughts
Listen, crack control on superflat floors isn’t rocket science, but it does require discipline. Don’t push the cutting to the next morning just because "the concrete needs to harden." That’s old thinking. With today’s fast‑track construction, you want early‑entry saws and a crew that’s ready to go while the finishers are still packing up.
Note: The parameters provided in this document are for reference only and are not mandatory. Due to differences in technical characteristics between different brands and models of laser levelers, please consult the manufacturer for a suitable solution before actual operation. This reference document assumes no responsibility for any issues arising from failure to follow the manufacturer's instructions.
Thanks to All the Friends Who Support and Trust Shandong Vanse Machinery Technology Co., Ltd.
If you want to know more about Shandong Vanse Machinery Technology Co., Ltd. or have any questions, please feel free to contact us:
Our Factory
Shandong Vanse Machinery Technology Co., Ltd.








Share this article

About the Author: Shandong Vanse Machinery Technology Co., Ltd.
Shandong Vanse Machinery Technology Co., Ltd. is a high-tech manufacturer specializing in concrete construction machinery, including laser screeds and related equipment. The company integrates R&D, production, and global sales, with products exported to over 60 countries and widely used in infrastructure projects worldwide.
Previous Post
Next Post
Related Articles
You Might Also Like
In addition to the angle, what other factors will affect the performance of the power trowel?
Slump: Slump reflects the fluidity of concrete. If the slump is too large, the concrete is too thin and soft, and it is easy to seep water and slurry when troweling, making it difficult to form a solid surface, and cracks are easy to appear on the surface after troweling; if the slump is too small, the concrete is too dry and hard, and it is difficult for the trowel blade to effectively trowel it, which will cause uneven surface and increase the workload of the trowel. Setting time: The setting time of concrete is crucial for troweling. If troweling is performed before the initial setting of concrete, the concrete is still in a plastic state and can be easily smoothed by the trowel, but troweling too early may damage the internal structure of the concrete and affect its strength; if troweling is performed after the final setting, the concrete has hardened, and it is difficult for the trowel to operate it effectively, leaving trowel marks on the surface, and it is impossible to achieve the ideal flatness and finish. Speed: The speed of the trowel directly affects the troweling effect. If the speed is too low, the blade will not be able to vibrate and smooth the concrete surface enough, and the cement slurry on the concrete surface cannot be evenly distributed, resulting in poor surface finish; if the speed is too high, the concrete surface will be subjected to excessive centrifugal force, which may cause cement slurry splashing, and will also increase the wear and energy consumption of the machine. Power: The power determines the working capacity of the trowel. If the power is insufficient, when encountering large concrete resistance during the troweling process, the trowel may be underpowered, resulting in unsmooth rotation of the blade, affecting the troweling effect; if the power is too high, it may cause energy waste, and it is easy to cause excessive vibration and damage to the concrete surface if the operation is improper. Operation technique: The operator's operation technique has a great impact on the troweling effect. Skilled operators can reasonably control the travel speed, direction and troweling time of the trowel according to the state of the concrete and the performance of the trowel, so that the concrete surface can achieve a flat and smooth effect; while unskilled operators may encounter problems such as uneven travel speed, overlapping or missing troweling areas, resulting in poor troweling quality. Judgment ability: Experienced operators can accurately judge the setting time and state of concrete and choose the right time to perform the troweling operation. They can also adjust the parameters and operation methods of the troweling machine in time according to the problems that occur during the troweling process, such as bubbles and trowel marks on the surface; while inexperienced operators may not be able to accurately judge these situations, thus affecting the troweling effect. Temperature: The ambient temperature has a significant impact on the setting time and troweling effect of concrete. In a high temperature environment, the moisture of concrete evaporates quickly, the setting time is shortened, the troweling operation time window becomes smaller, and surface shrinkage cracks are prone to occur; in a low temperature environment, the setting time of concrete is prolonged, and the troweling quality may be affected by the freezing of the internal moisture of the concrete during troweling, and it will also increase the difficulty of starting the troweling machine and energy consumption. Humidity: If the ambient humidity is too high, the moisture on the concrete surface is not easy to evaporate, which will delay the setting time of the concrete, resulting in water seepage on the surface after troweling; if the humidity is too low, the moisture on the concrete surface evaporates too quickly, and problems such as surface dryness and peeling are prone to occur, affecting the troweling effect. Wind speed: Higher wind speed will accelerate the evaporation of moisture on the concrete surface, causing uneven drying of the concrete surface, increasing the difficulty of polishing, and may also cause cracks on the polished surface.Experience in adjusting the operating parameters of the power trowel machine (such as rotational speed and blade Angle) for different concrete mix ratios and additives
Adjusting the operating parameters of the power trowel machine for different concrete ratios and additives is a key technology for achieving high-grade floor quality (such as super-flat floors and wear-resistant floors). The following are the experiences and guidelines for adjusting the operating parameters of the power trowel machine according to the characteristics of different concretes: Understanding the interaction: The "temperament" of concrete (setting speed, hardness, bleeding) determines how the power trowel should "treat" it. Observation is more important than presetting: Parameters have no fixed values, and the only criterion is the state of the concrete surface. An excellent operator is one who "watches the work" during construction rather than mechanically timing. Step by step: From low speed to high speed, from large angles to small angles, gradually apply pressure and improve precision. Characteristics: High cement content, dense slurry, fast setting speed, high early strength, and low bleeding. Operational challenge: The operation window period is short, making it easy to miss the best polishing opportunity. The surface is prone to rapid hardening and it is difficult to extract slurry. Adjustment strategy Rotational speed The first pass (disc slurry lifting) : It should be done a little earlier and at a medium to low speed (about 60-80 RPM). Because the slurry is thick, sufficient force is needed to bring it to the surface, but if the rotational speed is too high, it will curl the slurry and roughen the surface. Second and third coats (power trowel polishing) : After the surface is slightly dry, immediately change the power trowel and use medium-high speed (about 90-120 RPM). High speed helps to make the surface very dense and bright. Once you notice a significant increase in machine resistance and the surface starts to feel "rough", it indicates that the final setting is approaching and you need to stop immediately. Blade Angle The first power trowel: The Angle can be slightly level (about 3-5°), mainly for leveling and avoiding too deep a cut. Subsequent power trowel: As the surface hardness increases, gradually raise the blade Angle (about 5-10°), and use the sharp edge of the blade to perform a "cutting" type of polishing to achieve an extremely high gloss. Core experience: "Racing against time". Personnel and equipment must be ready. Once the concrete meets the conditions for machine operation, continuous work should be carried out immediately until completion. Characteristics: The initial and final setting times are significantly prolonged. The surface remains in a "soft" state for a long time, but the interior is slowly setting. Operational challenges: Prone to premature operation, which can damage the surface structure; The long waiting time affects the construction efficiency. It may be accompanied by bleeding. Adjustment strategy Rotational speed First round (disc) : You must wait! Until the depth of the foot depression is less than 5mm. Use a low speed (about 50-70 RPM) to lift the slurry smoothly, as the surface support force is still insufficient. Subsequent polishing: The interval between each application is quite long, requiring great patience. Always use medium and low speeds to avoid surface "wavy" or "curled skin" caused by excessive speed. Blade Angle Throughout the entire process, always maintain a relatively small Angle (approximately 0-5°). Because concrete is soft, if the Angle is too large, it will overly erode the surface and form grooves. Core experience: "Patience". Never be in a hurry to use the computer. If there is bleeding on the surface, it should be scraped off with water first or wait for it to evaporate. The operation mainly involves "gentle kneading". Characteristics: Fast setting speed and rapid strength growth. Operational challenge: The operational window period is extremely short, almost an "accelerated version" of high-grade concrete, making it easier to miss the opportunity. Adjustment strategy Rotational speed All rounds: The pace should be fast. The disc and the first power trowel operation can be combined or carried out quickly and continuously. The rotational speed can be medium to high (80-100 RPM) to complete compaction and smoothness within a limited time. Blade Angle The blade Angle can be raised relatively quickly. When applying the second coat of gloss, a relatively large Angle (about 7-10°) can be adopted to seize the final opportunity for pressing. Core experience: "Prediction and connection". The operator must constantly observe the surface changes. After the disc operation, the power trowel operation should be seamlessly connected. Machines can't stop. When people rest, the machines don't. Characteristics: The early strength is relatively low, and the setting speed is slightly slower, but the later strength is high, and the surface is easier to smooth. Operational challenges: Low surface strength in the early stage and prone to damage; However, the slurry has good lubricity and is prone to excessive polishing, which can lead to bleeding. Adjustment strategy Rotational speed First pass (disc) : The waiting time is similar to or slightly longer than that of ordinary concrete. Lift the slurry smoothly at medium speed (about 70-90 RPM). Subsequent polishing: Due to its excellent lubricity and wear resistance, it can be polished multiple times at medium speed, making it easy Concrete type Disk stage rotational speed The rotational speed of the power trowel stage Suggested blade Angle Core operational philosophy High grade/low water-binder ratio Medium and low speed (60-80 Medium and high speeds (90-120) From flat (3-5°) to steep (5-10°) Race against time and increase pressure step by step Add retarder Low speed (50-70 Medium and low speed (70-90) Always maintain a small Angle (0-5°) Wait patiently and operate gently Adulterated with early strength agents Medium and high speeds (80-100) Medium and high speeds (90-110 Quickly increase the Angle (7-10°) Predictive connection, quick and decisive High-admixture Medium speed (70-90) Medium speed (80-100) Medium Angle (5-8° Gentle multiple times, taking advantage of the characteristics Note: The unit of rotational speed is RPM (revolutions per minute), which is an empirical reference value. The specific speed should be subject to the machine model and on-site conditions. The "Better late than early" rule: No matter what the ratio is, it is better to apply the gloss on the machine a little later than a little earlier. The machine may be strenuous at night, but in the morning it will completely damage the surface structure and cannot be remedied. Footprint Method for timing: Disc operation: Footprint depth is approximately 3 to 5 mm. The first power trowel: The depth of the footprint is approximately 1-2 mm. Final polished: The footprints are extremely shallow or non-existent, and the foot feel is hard. Listen to its sound, observe its trace Too high rotational speed/too early timing: The machine makes a dull sound, has high resistance, and there are "slurry" or "scratches" marks on the back of the blade. Too low speed/too late timing: The machine jumps severely, the blade "floats" on the surface and cannot be eaten, leaving white scratches without luster. The Angle and rotational speed are optimally matched: the machine operates smoothly, with uniform sound, and the blade leaves a uniform, bright, and traceless surface after passing through. Mastering these adjustment experiences requires a great deal of practice and careful observation. The best approach is to consciously associate the concrete mix ratio, weather conditions, the adopted operation parameters and the final effect with each construction, constantly accumulate and correct one's own "experience database", and thus become an expert in concrete plastering capable of handling any "temper". Note: The parameters provided in this document are for reference only and are not mandatory. Due to differences in technical characteristics between different brands and models of laser levelers, please consult the manufacturer for a suitable solution before actual operation. This reference document assumes no responsibility for any issues arising from failure to follow the manufacturer's instructions.Inadequate maintenance will affect the use effect of the concrete laser leveling machine!
Inadequate maintenance will affect the use effect of the concrete laser leveling machine! The word "maintenance" is the prerequisite for the normal use of mechanical equipment. The laser leveling machine is a kind of precision paving equipment. The use of laser self-leveling completely achieves the purpose of automation, but if the maintenance is not in place, the equipment may be damaged. There are various problems that affect the subsequent normal use. Let's find out how to maintain the laser leveling machine. During the use of the laser leveling machine, due to the different working intensity, there may be some minor faults after use. At this time, road builders should pay attention to it. After use, it is necessary to properly do some daily maintenance for the machine. This can prolong the service life of the machine equipment. 1. Check the connection and fastening of the parts of the laser leveling machine, whether the connecting bolts are loose or broken, and tighten or replace them if necessary. Check for leaks and eliminate leaks in various parts in time. Pay attention to the quantity of engine oil, fuel, coolant and hydraulic oil, and add new oil to the scale indicated on the oil mark as required. Whether there is proper amount of grease in the centralized lubrication device. 2. Be careful not to work under the maximum load that the machine can bear, and use the machine within your ability. As a laser leveling machine manager, when appointing an operator, the laser leveling machine random data and operation manual should be handed over to the operator, so that they can normally grasp the mechanical properties and operating procedures, and should not arbitrarily hand over the relevant information Buckle it down. 3. Try to ensure the uniform addition and subtraction of the mechanical load, so that the machinery is in a relatively gentle load change. Specifically, it is necessary to increase and decrease the accelerator more evenly to prevent the engine and working devices from fluctuating greatly. 4. There will be a lot of dust and mud on the laser leveling machine after construction. First, wipe off the dust on the laser leveling machine, and wipe off the dirt and oil stains with tissue paper or cotton cloth. 5. If the laser signal is lost during the construction of the laser leveling machine, the machine needs to be restarted, and the interval time needs to be more than ten seconds. 6. If there are too many stains, you can use a soft cloth to soak in water diluted with a neutral detergent, and then wring it out to clean it. The manufacturer of Leilong laser leveling machine reminds everyone to remember not to use volatile oil, thinner, gasoline and other chemicals. Product cleaning and wiping. Developing a good habit of operating the laser leveling machine will be of great help to the construction and storage of the laser leveling machine in the future. This will not only improve the work efficiency, but also extend the service life of the machine to a certain extent .