Technical Knowledge
Jointing Process between Manual Trowel and Mechanical Troweling in Edge Areas
April 28, 2026

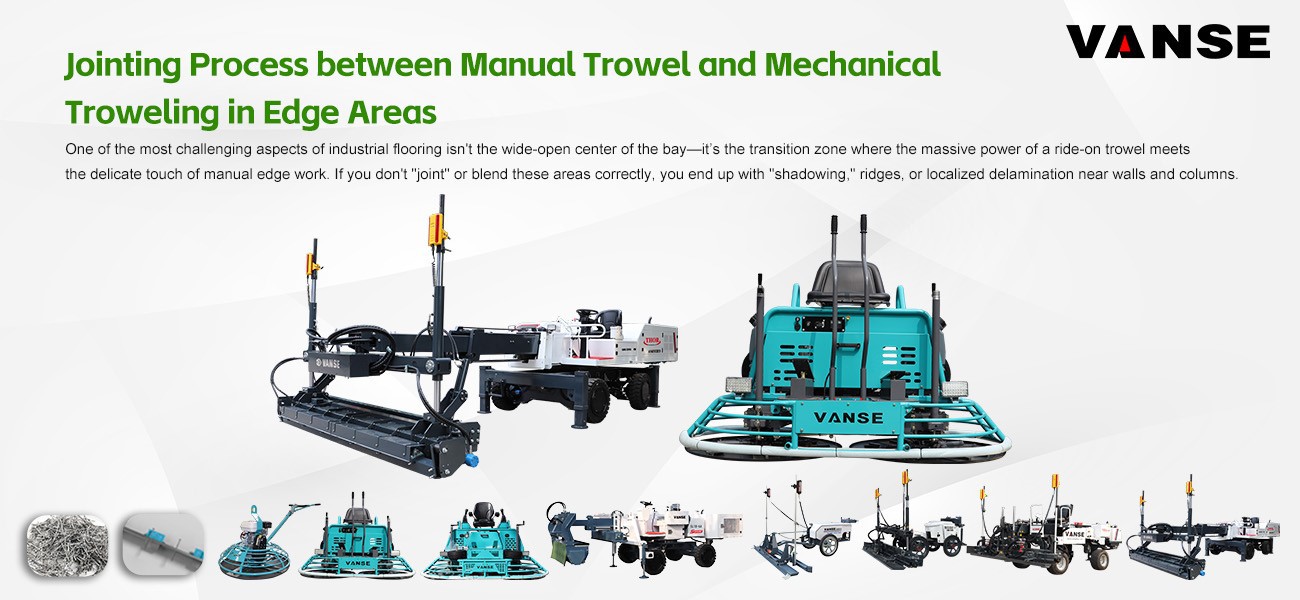
One of the most challenging aspects of industrial flooring isn't the wide-open center of the bay-it’s the transition zone where the massive power of a ride-on trowel meets the delicate touch of manual edge work. If you don't "joint" or blend these areas correctly, you end up with "shadowing," ridges, or localized delamination near walls and columns.
To achieve a seamless, professional finish that passes high-spec inspections, you need a workflow that bridges the gap between manual precision and mechanical force. Here is the pro’s guide to mastering the edge transition using the Vanse professional fleet.
1. Precision Placement: The "Zero-Spill" Edge
The transition starts before the concrete is even poured. If you have "mounds" of concrete near the formwork, the manual crew has to work twice as hard to get it flat.
The Vanse Workflow: Use a Vanse Concrete Distributor to place an even ribbon of material along the edges. For tight corners or indoor pillars where a truck can't reach, the Vanse Mini Dumper is the perfect "last-mile" tool. It allows you to dump concrete with surgical precision right up to the edge, reducing the manual labor needed to "pull" the concrete into place.
2. The Leveling Baseline: Getting Close to the Form
If the edge isn't level, the power trowel will "hop" when it hits the transition, creating a visible ridge.
The Vanse Workflow: A Vanse Concrete Laser Leveling Machine (like the agile YZ25-4) is designed to get incredibly close to the formwork. The high-frequency vibration consolidates the edges just as effectively as the center. This creates a uniform "baseline" flatness, so the manual crew only has to focus on the final 15cm of finish rather than trying to fix the level.
3. Integrated Hardening: Don't Forget the Boundaries
A common failure point is the "soft edge"-where the center of the floor is hard as iron but the edges are dusty because the dry-shake wasn't applied correctly.
The Vanse Workflow: The Vanse Automatic Topping Spreader ensures that your wear-resistant hardener is applied uniformly right up to the boundary lines. This means the manual troweling in the edge area will have the same material density as the mechanically troweled center.
4. The "Seamless Blend" Troweling Technique
This is the critical "jointing" phase. The goal is to make it impossible to tell where the manual work ends and the machine work begins.
The Strategy: As the manual crew finishes the edges with hand floats, the Power Trowel operator (using a machine like the Vanse VS836 walk-behind or the VS1046H ride-on) must overlap the manual work by at least 15-20cm.
Vanse Edge-Friendly Tech: Vanse power trowels feature precision pitch control and balanced rotor designs. This allows the operator to "feather" the edge of the trowel pass, slowly decreasing the blade angle as they approach the manual work to create a perfectly flat, blended transition without "digging" into the fresh edge.
5. Final Stress Relief: The Clean Cut
Once the transition is blended, the edge area is under a lot of stress during the drying phase.
The Vanse Workflow: Use a Vanse Concrete Cutting Machine (Floor Saw) to execute the contraction joints near walls and columns. A stable, high-speed cut ensures that any shrinkage stress is relieved exactly where you want it, preventing "random cracks" from ruining your beautiful edge work.
Comparison: Manual vs. Mechanical Transition
| Stage | Manual Edge Focus | Vanse Mechanical Support |
| Placement | Pulling concrete by hand. | Mini Dumper / Distributor precision. |
| Leveling | Manual leveling (variable). | Laser Leveling Machine (±1mm accuracy). |
| Hardening | Hand-throwing (uneven). | Automatic Topping Spreader (uniform). |
| Finishing | Hand troweling (lower density). | High-Torque Power Trowel (dense/burnished). |
| Jointing | Hand-tooling joints. | Concrete Cutting Machine (clean/straight). |
Final Word
The quality of a floor is judged by its weakest point-which is usually the edges. By utilizing a complete "system" from Vanse Machinery (www.vansemac.com), you ensure that your edges aren't just an afterthought. They become a seamless extension of the superflat floor you’ve worked so hard to create.
Tired of "shadowed" edges? Visit Vanse today to see how our fleet can perfect your next project from center to boundary.
Note: The parameters provided in this document are for reference only and are not mandatory. Due to differences in technical characteristics between different brands and models of laser levelers, please consult the manufacturer for a suitable solution before actual operation. This reference document assumes no responsibility for any issues arising from failure to follow the manufacturer's instructions.
Thanks to All the Friends Who Support and Trust Shandong Vanse Machinery Technology Co., Ltd.
If you want to know more about Shandong Vanse Machinery Technology Co., Ltd. or have any questions, please feel free to contact us:
Our Factory
Shandong Vanse Machinery Technology Co., Ltd.


About the Author: Shandong Vanse Machinery Technology Co., Ltd.

Shandong Vanse Machinery Technology Co., Ltd. is a high-tech manufacturer specializing in concrete construction machinery, including laser screeds and related equipment. The company integrates R&D, production, and global sales, with products exported to over 60 countries and widely used in infrastructure projects worldwide.

Shandong Vanse Machinery
Leading manufacturer specializing in high-performance concrete laser screeds, telescopic arm flatwork handlers, and mechanical ride-on power trowels.
Post overview
Main PRODUCT Categories
Need Machine Guidance?
Speak directly with Shandong Vanse field specialists for tailored equipment quotes and site planning.
Contact Us TodayRelated Articles
You Might Also Like
September 16, 2025
How to Control the Quality of Ultra-Large Laser-Leveled Wear-Resistant Concrete Floors
Quality control for ultra-large laser-leveled, wear-resistant concrete floors requires a comprehensive process encompassing "pre-construction prevention, in-construction control, and post-construction acceptance." Combining the technical characteristics (laser precision leveling and the synergistic effect of wear-resistant materials) with the challenges of ultra-large-scale construction (temperature cracking, flatness control, and interface bonding), a control system is established across five core dimensions: personnel, materials, equipment, process, and environment. This can be broken down into the following key steps: Pre-construction preparation for ultra-large flooring directly impacts subsequent quality stability, focusing on addressing three key issues: "unified technical standards, adequate resource allocation, and proactive risk mitigation." Drawing Refinement and Technical Briefing: Based on the building's function (e.g., load and flatness requirements for factories and logistics warehouses must be clearly defined), floor compartment design should be refined (extra-large areas should be divided into 6m×6m or 8m×8m compartments to avoid thermal stress cracking). Key parameters should be clarified, including laser leveling accuracy (typically ±3mm/2m), wear-resistant material dosage (approximately 5-7kg/m2 for metallic aggregates, 3-5kg/m2 for non-metallic aggregates), and concrete strength grade (minimum C30, flexural strength ≥4.0MPa). Technical briefings should be conducted for all employees, with a focus on training laser operators, concrete vibrators, and wear-resistant material spreaders to ensure that all positions understand the key technical aspects of flatness control, wear-resistant layer bonding, and crack prevention. Risk Contingency Plan Development: To address potential issues that may arise during large-scale construction (e.g., insufficient initial setting time for concrete resulting in inability to apply the wear-resistant layer, laser equipment failure resulting in uneven flatness, and cracking due to high summer temperatures), develop a contingency plan: Confirm the initial setting time of concrete with the commercial concrete mixing plant in advance (adjusted to the temperature; ≥4 hours in summer, ≥6 hours in winter), and add a retarder if necessary. Keep one or two spare sets of core concrete laser leveling components (such as laser transmitters and receivers) to prevent interruptions to construction due to equipment failure. Prepare awnings and spray cooling equipment for summer construction, and thermal blankets and electric blankets for winter construction to maintain a temperature difference between the inside and outside of the concrete at ≤25°C. Materials are the core of floor quality. Three key materials, concrete, wear-resistant materials, and surface treatment agents, require full-process inspection: Material Type Key Control Points Inspection Standards Ready-mixed concrete 1. Mix Ratio: Crushed stone particle size 5-20mm (avoid large particles that affect smoothness), sand content 35%-40%; Slump test for each truck upon arrival. Compressive/flexural test blocks are retained according to specifications (one set per 100m³; less than 100m³ is counted as one set). 2. Slump: 120 ± 20mm (slump too large will cause sanding, too small will make vibration difficult); 3. Initial Setting Time: Adapt to the construction schedule (single-chamber construction requires leveling and wear-resistant layer application to be completed before initial setting). Wear-resistant material 1. Composition: Metallic aggregates (such as iron filings and corundum) must have a carbon content ≤ 0.2%, and non-metallic aggregates (such as quartz sand) must have a hardness ≥ Mohs 7; Sampling is randomly sent for inspection upon arrival to test compressive strength (≥60MPa) and abrasion resistance (wear loss ≤0.3g/cm²). 2. Moisture Content: ≤ 1% (avoid clumping that affects spreading uniformity); 3. Adhesion: No risk of delamination at the concrete interface. Interface treatment agent Used at the interface between the concrete base and the wear-resistant layer (if separate-chamber construction requires treatment of the interface between new and old concrete), high adhesion and crack resistance are required. Bond strength is also tested upon arrival (≥1.5MPa). Expired or clumped products are strictly prohibited. The core equipment for laser-leveling wear-resistant flooring is the concrete laser leveling. Its accuracy directly determines the flatness of the floor, so key control measures are required: Equipment Calibration: 24 hours before construction, calibrate the concrete laser leveling blade, vibrator, and laser receiver using a standard calibration ruler (2m straightedge) to ensure the laser transmitter's leveling error is ≤0.1mm/m and the screed blade's flatness error is ≤0.5mm. Equipment Selection: For very large areas (single area ≥1000㎡), a "large concrete laser leveling" (working width ≥2.5m) should be used, combined with a small walk-behind concrete laser leveling for corners (within 300mm of the wall). Equipment Maintenance: Before construction daily, check the equipment's fuel, hydraulic oil, and vibrator motor. After work, clean the screed blade and laser head to prevent concrete residue from affecting subsequent use. Large-scale floor construction requires a "divided-cell flow" approach. The connection between processes within each cell (concrete pouring → laser leveling → wear-resistant layer application → joint cutting and maintenance) is central to quality control, requiring on-site supervision of these five key processes. Separate compartment pouring: Strictly divide the construction area according to pre-designed compartment gaps, using the "skip compartment method" (with ≥48 hours between each compartment) to avoid temperature cracking caused by continuous pouring. The "slant layer method" is used during pouring, with each layer ≤300mm thick. The placement speed is matched to the laser leveling speed (approximately 10-15 m³/h). Vibration Control: After concrete placement, first use an inserted vibrator (vibration interval ≤500mm, vibration time 15-20 seconds, until no bubbles escape) to achieve compaction. Then, use a laser leveler to perform a simultaneous "vibration + leveling" operation (vibration frequency 3000-5000 times/minute) to ensure concrete density (rebound strength must meet the standard) while avoiding excessive vibration that can cause aggregate sinking and surface sanding. Benchmark Setting: The laser transmitter must be set up in a location away from the construction area and free from vibration interference (such as nearby fixed structures). Set the laser baseline according to the design elevation and recheck the baseline every two hours to prevent transmitter drift. Working Path: The concrete laser leveling uses a staggered back-and-forth method (first pass horizontally, second pass vertically). The screed height must be fine-tuned based on the concrete slump (higher slumps, lower slumps). Ensure the finished concrete surface is ≤3mm/2m flat. (Use a 2m ruler for immediate inspection, and correct any unsatisfactory areas immediately.) Corner Treatment: For areas beyond the concrete laser leveling's reach, such as walls and column bases, manual leveling is performed using a small handheld concrete laser leveling with an aluminum alloy screed to ensure consistent flatness across the entire surface. The timing and uniformity of spreading wear-resistant material directly impacts its bond with concrete. Spreading should be done in two stages, with strict timing controls. First Spreading: After the concrete is poured and leveled, wait until the surface moisture has evaporated to the point where no visible indentation is observed when pressed with a finger (approximately 1-2 hours before initial setting). Apply 60% of the total amount of material, evenly spreading using a "plum blossom" pattern (avoiding any accumulation). After spreading, use a grinder (with a circular disc) at low speed to embed the wear-resistant material into the concrete surface. Second Spreading: 30-60 minutes after the first grinding, when the surface of the wear-resistant material has initially set, spread the remaining 40% of the wear-resistant material. Use a grinder (with a different blade) at high speed until the surface is smooth and scratch-free. Control the grinding pressure to avoid thinning the wear-resistant layer; the thickness should be ≥ 3mm. Large-area floors are most susceptible to shrinkage cracks, requiring stress relief through slitting. Key control points: Joint cutting time: Start 24-48 hours after concrete pouring (adjusted to the temperature, within 24 hours in summer and within 48 hours in winter), when the concrete strength reaches 25%-30% of the design strength (rebound value approximately 20 MPa). Avoid premature joint edge cracking and delayed joint cutting, which can cause random cracking. Joint cutting parameters: Compartment joints should be "through joints" (depth ≥ 1/3 of the floor thickness; for example, for a 150mm thick floor, the joint depth should be ≥ 50mm). Longitudinal and transverse joint spacing should be designed based on the compartment design (6-8m), with a joint width of 5-8mm. Polyurethane sealant should be applied promptly after joint cutting to prevent rainwater from seeping into the base layer. Temporary contraction joints: If the area of a single compartment is large (≥ 1000 m2), temporary contraction joints (one every 3-4m, 20-30mm deep) should be installed during pouring. These temporary contraction joints will be extended to through joints during subsequent joint cutting. Inadequate curing can lead to sanding and insufficient strength on the concrete surface. Therefore, a "covering + watering" curing method is necessary. Curing Time: Within 12 hours after finishing the wear-resistant layer, immediately cover with plastic film and geotextile (to prevent rapid evaporation). Curing period: ≥7 days (if using impermeable concrete, curing period: ≥14 days). Curing Frequency: Water 3-4 times daily (increase to 5-6 times in summer) to ensure the geotextile is constantly moist to prevent the concrete surface from drying out and cracking. During winter curing, cover with a thermal blanket and maintain an ambient temperature of ≥5°C (if temperatures fall below 5°C, winter construction measures, such as adding antifreeze, are required). After completion of ultra-large floor construction, a comprehensive inspection is required in accordance with the "Concrete Structure Construction Quality Acceptance Code" (GB50204) and the "Technical Code for Wear-Resistant Concrete Floors" (JGJ/T 337), focusing on the three core indicators of flatness, wear resistance, and crack control. Appearance Inspection: A comprehensive inspection of the floor surface is required. The floor must be free of sanding, peeling, exposed surfaces, or scratches. The wear-resistant layer must be uniform in color with no significant color variations. Crack Inspection: A crack width gauge is used to inspect for cracks. "Non-through surface cracks" (width ≤ 0.2mm) are permitted. "Through cracks" or cracks with a width greater than 0.2mm are strictly prohibited. If excessive cracks are found, the cracked area must be chiseled out (extending 100mm), and the concrete and wear-resistant layer must be re-poured. After rectification, re-inspection will be conducted. Test Items Testing Method Qualification Criteria Smoothness Using a 2m straightedge and a feeler gauge, test at five points (evenly distributed) per 100 m2, recording the maximum deviation. Deviation at any point ≤ 3mm/2m, and a pass rate ≥ 95% Abrasion Resistance Using the Taber Abrasion Test, sample a representative area (100 mm × 100 mm) and weigh it after 500 cycles of abrasion. Abrasion loss ≤ 0.3g/cm² (metal aggregate wear layer), ≤ 0.5g/cm² (non-metal aggregate wear layer) Compressive Strength Concrete test blocks were collected according to specifications (one per 1000 m2) and tested after 28 days of standard curing. Concrete compressive strength ≥ design value (e.g., C30 ≥ 30MPa), flexural strength ≥ 4.0MPa Adhesive Strength Using the Pull-Out Test, samples (50 mm diameter) were taken at the interface between the wear-resistant layer and concrete, and the pull-out strength was measured. Bond strength ≥ 1.0MPa, with failure mode being "cohesive failure of concrete" (not interfacial debonding) After acceptance, finished product protection measures must be implemented to prevent subsequent construction (such as equipment installation and pipeline laying) from damaging the floor: Do not allow heavy equipment (such as forklifts or cranes) to directly roll over the floor (a steel plate is required). Avoid sharp objects (such as rebar or steel pipes) from striking the floor surface. If holes need to be drilled in the floor (e.g., to install a floor drain), use specialized drilling equipment. Manual chiseling is strictly prohibited to prevent cracking of the surrounding concrete. Large-scale floor construction is susceptible to extreme environmental impacts, such as high temperatures, low temperatures, and strong winds. Targeted adjustments to control measures are required: During high-temperature construction (temperature ≥30°C): Adjust the concrete pouring time to the morning and evening (avoid the high-temperature period of 10:00 AM to 4:00 PM); Pour the concrete immediately after arrival to avoid prolonged standing (this shortens the initial setting time); Immediately cover the wear-resistant layer after finishing to maintain moisture, and increase the watering frequency (once every hour). Low-temperature construction (temperature ≤ 5°C): Add antifreeze to the concrete (dosage according to the instructions, strictly prohibit exceeding the standard) to ensure the concrete enters the mold at a temperature ≥ 10°C. After construction, cover with a thermal blanket and electric heating blanket to maintain an ambient temperature ≥ 5°C. Extend the curing period (≥ 10 days) and remove the insulation only after the concrete strength reaches 70%. In strong winds (wind speed ≥ 5m/s): Suspend the application of the wear-resistant layer (to prevent the material from being blown away by the wind); Immediately cover the concrete with plastic sheeting after pouring (to prevent rapid evaporation of surface moisture and resulting in sanding). Through the above full-process and multi-dimensional quality control, the three core quality problems of "poor flatness, peeling of the wear-resistant layer, and shrinkage cracks" of ultra-large-area laser-leveled wear-resistant concrete floors can be effectively solved, and ultimately the floor's "high strength, high wear resistance, and high flatness" requirements can be achieved. Note: The parameters provided in this document are for reference only and are not mandatory. Due to differences in technical characteristics between different brands and models of laser levelers, please consult the manufacturer for a suitable solution before actual operation. This reference document assumes no responsibility for any issues arising from failure to follow the manufacturer's instructions.Read More
May 28, 2024
Concrete Laser Leveling Machine Construction Operation Steps
Concrete laser leveling machine construction operation steps The concrete laser leveling is an indispensable and efficient tool in modern building construction. Its precise operation ability can significantly improve the flatness of the ground and lay a solid foundation for the quality and aesthetics of subsequent projects. This article will introduce the concrete laser leveling machine in detail from seven aspects: preliminary preparation and inspection, equipment installation and debugging, laser system calibration, concrete pouring and initial leveling, laser leveling machine operation, construction quality inspection, and equipment cleaning and maintenance. Construction operation steps. 1. Preliminary preparation and inspection Adequate preparation is crucial before proceeding with concrete laser leveling construction. First, conduct a comprehensive inspection and planning of the construction site to ensure that the site is flat, the size of the space meets the construction requirements, and there is no interference from debris. Clean the site to ensure the construction surface is clean and tidy, and provide a good working environment for subsequent concrete laying and leveling work. At the same time, necessary protection is provided to the construction site to prevent the external environment from affecting the construction quality. In addition, the concrete materials required for construction are inspected to ensure that the quality and quantity of the materials meet the design requirements. If problems are found, the supplier should be contacted in time for replacement or supplementation to ensure the smooth progress of the construction. 2. Equipment installation and debugging Equipment installation and debugging are key steps to ensure the normal operation of the laser leveler. First of all, install the concrete laser leveling reasonably according to the actual conditions of the construction site. During the installation process, attention should be paid to the stability and safety of the equipment to prevent the equipment from shifting or toppling during work. After the installation is complete, debug the equipment. During the debugging process, it is necessary to check whether the various functions of the equipment are normal, such as laser sensors, control systems, etc. At the same time, the flatness, cutting depth and other parameters of the leveling system are debugged to ensure that the equipment can achieve the preset construction goals and requirements. 3. Laser system calibration Laser system calibration is a key link in the construction of concrete laser leveling machines. First, install and debug the laser system to ensure the laser horizontal line is accurate. Then, set target values for concrete height and flatness according to project needs. The calibration accuracy of the laser system directly affects the leveling effect, so the operating procedures must be strictly followed during the calibration process to ensure the accuracy and stability of the laser system. During the laser system calibration process, you also need to pay attention to the safe use of the laser transmitter. Avoid direct exposure of personnel to the laser beam to prevent eye injury. At the same time, regularly check the performance of the laser transmitter to ensure that it is working properly. 4. Concrete pouring and initial leveling Concrete pouring and initial leveling are the basic steps in the construction of concrete laser leveling. First, concrete is poured according to the design and requirements. During the pouring process, the quality and uniformity of the concrete must be ensured to avoid problems such as cracking and deformation. After pouring is completed, use a vibrator or other tools to vibrate the concrete surface to ensure that the surface is smooth and free of bubbles. Then proceed with the initial leveling of the concrete. Preliminary leveling mainly uses manual or mechanical means to initially level the concrete surface to eliminate large height differences and uneven parts. The quality of the initial leveling directly affects the subsequent laser leveling effect, so it needs to be taken seriously to ensure that the concrete surface after the initial leveling is smooth and has no obvious unevenness. 5. Laser leveling machine operation Laser leveling machine operation is the core link in the entire construction process. Before operation, the equipment needs to be checked again to ensure that all instruments and equipment are operating normally. Start the laser leveling machine and operate the leveling machine to perform leveling operations according to the guidance of the laser system. During the operation, parameters such as the flatness and cutting depth of the laser leveler need to be adjusted according to actual needs to obtain the best leveling effect. At the same time, operators need to maintain a high degree of attention and concentration, and pay close attention to the instructions of the laser system and the changes in flatness of the concrete surface. Once differences in height or uneven parts are found, machine parameters or operating methods need to be adjusted in time to ensure the leveling quality. In addition, you need to pay attention to safe operations during the operation. Operators should wear protective equipment and abide by safety procedures to prevent accidents. 6. Construction quality inspection After completing the laser leveling machine operation, the leveled concrete surface needs to be inspected. The inspection content mainly includes flatness, elevation and smoothness. First, use measuring tools to measure the flatness of the concrete surface to ensure that it meets the design requirements. Secondly, check whether the elevation meets the predetermined standards to avoid unevenness. Finally, observe the smoothness of the concrete surface to ensure there are no obvious roughness or scratches. If problems are found during the inspection, they need to be dealt with promptly. For parts where the flatness does not meet the requirements, handheld leveling tools can be used to repair and adjust; for parts where the elevation does not meet the standards, the laser leveling operation needs to be performed again; for rough or scratched surfaces, grinding or grinding can be used Processed by polishing and other methods. 7. Equipment cleaning and maintenance After the construction is completed, cleaning and maintaining the concrete laser leveling is an important part of ensuring the long-term stable operation of the equipment. First, turn off the power to the device and make sure it comes to a complete stop. Then, use cleaning tools to clean the equipment and remove dust, dirt and other debris on the surface. The internal components of the equipment need to be inspected and maintained regularly to ensure their normal operation. In addition, laser systems need to be inspected and maintained. Clean the laser transmitter and receiver regularly to ensure stable and accurate performance. If any problems or faults are found, they should be dealt with promptly or contact professionals for repair. In short, the construction operation steps of the concrete laser levelinging machine involve multiple links, and each link needs to be taken seriously and operated carefully. Through standardized operations such as preliminary preparation and inspection, equipment installation and debugging, laser system calibration, concrete pouring and initial leveling, laser leveling machine operation, construction quality inspection, and equipment cleaning and maintenance, we can ensure the safety of concrete laser leveling machine construction. Quality and efficiency provide a solid foundation for construction projects. In terms of equipment cleaning and maintenance, in addition to daily cleaning work, the laser leveling machine should also be comprehensively inspected and maintained regularly. This includes checking the tightening of each component of the equipment to ensure there are no loose or damaged parts; checking and replenishing the lubrication system of the equipment to ensure normal operation of the equipment; checking the electrical system of the equipment to prevent the occurrence of electrical faults. . In addition, with the continuous advancement of technology, concrete laser leveling machines are also constantly being updated. New equipment and technology may lead to higher construction efficiency and better construction quality. Therefore, operators should continue to learn and master new technologies to adapt to the development needs of the industry. In terms of construction quality, in addition to relying on the precise operating capabilities of the laser leveler, we should also pay attention to quality control during the construction process. This includes quality control of construction materials, monitoring of the construction process, and acceptance of construction results. Only by comprehensively controlling construction quality can the long-term effectiveness of the project be ensured. In addition, the construction operation of concrete laser levelinging machine should also pay attention to environmental protection and energy saving. During the construction process, environmental damage and pollution should be minimized, stolen sources should be rationally utilized, and energy consumption should be reduced. This is not only a manifestation of corporate social responsibility, but also a requirement for sustainable development. In summary, the standardization and refinement of concrete laser leveling construction operation steps are the key to ensuring construction quality and efficiency. Through strict control of preliminary preparation and inspection, equipment installation and debugging, laser system calibration, concrete pouring and initial leveling, laser leveling machine operation, construction quality inspection, and equipment cleaning and maintenance, we can ensure that the warm soil laser leveling machine Play the greatest role in the construction project and provide a strong guarantee for the smooth progress of the construction project. In future construction projects, with the continuous advancement and application of technology, concrete laser levelings will become more intelligent, automated and efficient. We expect it to play a greater role in future construction and contribute more to the quality and efficiency of construction projects. Finally, it needs to be emphasized that the installation and maintenance of a concrete laser leveling requires professional knowledge and skills. Therefore, operators should receive professional training. Be familiar with the performance and use of equipment, and operate in strict accordance with the lifting procedures. At the same time, enterprises should also strengthen the maintenance and management of equipment to ensure the normal operation and long-term use of equipment. To sum up, the construction operation of concrete laser leveling machine is a complex and delicate process, which requires the operator to have professional knowledge and rigorous working attitude. Through standardized machine operation and meticulous management, it can be ensured that the concrete laser leveling machine plays its greatest role in construction projects, providing a strong guarantee for the quality and efficiency of construction projects. In the future development, with the continuous emergence of new technologies and new materials, concrete laser leveling machines will also face more challenges and opportunities. We should continue to strengthen technology research and development and innovation, promote the application and development of concrete laser leveling machines in construction projects, and make greater contributions to the progress of the construction industry. At the end of this article, we once again emphasize the importance of concrete laser leveling construction operations and look forward to its playing a more important role in the future construction industry. Let us look forward to more innovations and breakthroughs in this field together, injecting new vitality and impetus into the development of construction engineering.Read More
December 4, 2025
The correct way to store power trowels for a long time
The long-term storage of the power trowel machine during the off-season of construction or during project intervals (usually referring to more than one month) is of vital importance. Proper storage and maintenance can greatly prevent equipment from rusting, aging and being damaged, ensuring that its performance remains as good as new when it is used again and extending its service life. The following is the standard "seven-step method" for the long-term storage of a power trowel. Please be sure to follow the sequence. This is the foundation of all steps and must never be stored with cement slurry on the machine. High-pressure flushing: Use a high-pressure water gun or a large amount of clean water to thoroughly rinse all parts of the machine body, blades, chassis, walking wheels, etc., and remove all cement, mortar, and mud lumps. Pay special attention to cleaning the connection area of the blade, the lifting screw and the area around the bearing sealing ring. Detail cleaning: Use tools such as scrapers and wire brushes to remove stubborn lumps. Comprehensive inspection: During the cleaning process, check whether the blades are worn or deformed, whether the screws and nuts are loose, whether the machine body is cracked, and whether the cables/oil pipes are damaged. Record the problems to facilitate subsequent maintenance. Move the machine to a well-ventilated, dry and rain-free indoor storage point. Dry/blow dry all surface moisture with a dry cloth or compressed air, especially: Exposed metal parts (lifting screw, adjusting rod). Blade. Engine surface. All oil injectors and gaps. Make sure that the inside and outside of the machine are completely dry, with no signs of dampness at all. Drain the old grease and add new grease: Use a grease gun to inject an adequate amount of new grease into all grease nozzles (spindle of the cutter head, bearings of the traveling wheels, steering mechanism, etc.) until all the old grease that may contain water is completely squeezed out. This can expel moisture and form a protective film inside. Apply anti-rust oil to key areas: Apply a layer of anti-rust oil or grease to all exposed metal surfaces prone to rust (non-friction contact surfaces). Key points include: Lifting screw and thread: Thickly coated with grease. Blade: Apply a thin layer of anti-rust oil to both sides (wipe it off before reuse). Chassis metal frame. Exposed bolts and nuts. Engine maintenance (for gasoline/diesel engines) : Change the engine oil: Drain the old oil when the engine is hot and add new oil to the specified mark. Fuel system treatment (crucial!)" : Option A (Recommended) : Completely drain the fuel from the fuel tank. Then start the engine and let it shut down naturally to deplete the residual fuel in the carburetor or fuel lines. Option B: If it is impossible to empty the fuel tank, fill it up with fuel and add fuel stabilizer. Then run the engine for 5 to 10 minutes to allow the stabilizer to circulate throughout the fuel line. This can prevent the fuel from gelatinizing and clogging the carburetor and fuel injector. Spark plug/fuel injector: Remove the spark plug, inject a small amount (about 10-15ml) of engine oil into the cylinder, manually and slowly pull the start rope several times to coat the cylinder wall with the engine oil, and then reinstall the spark plug (without connecting the high-voltage wire). Disconnect the battery: If the machine has power to start the battery, the negative cable should be disconnected. Remove the battery, store it in a cool and dry place, and perform a charge maintenance every 1 to 2 months. Protect the circuit: Wrap the exposed circuit joints with waterproof tape. Air filter: Remove the air filter, clean or replace it. Stuff a clean cloth into the air intake to prevent dust from entering. Tire: Lift the machine up to lift the tire off the ground to prevent the tread from being deformed and aged due to long-term single-point pressure. If it cannot be lifted, make sure the tire pressure is sufficient and move the position regularly. Blade: The blade can be removed. After cleaning, apply anti-rust oil separately and store it. Or at least ensure that rust prevention measures have been taken on the machine. Ideal environment: In a dry, cool and well-ventilated warehouse or shed. Avoid outdoor storage. Stay away from corrosion: Keep away from fertilizers, chemicals and damp ground. Stable placement: Place the machine on a flat ground and level it with wooden blocks if necessary. Cover: Use a breathable dust cover (such as a canvas cover) to cover the entire machine. It is strictly prohibited to directly wrap with completely impermeable plastic sheeting, otherwise water vapor will condense inside, causing severe rust. Marking: Hang a label that reads "Maintained and ready for storage" in a prominent position, and indicate the storage date and the date when the next inspection is required. Storage period: Every 1-2 months, check the machine for any abnormalities (such as tire pressure, the integrity of the covering, and whether there is any rat damage or wire biting), and recharge the battery. Before reactivation (very important!)" : Remove the coverings and check the overall condition. Check whether the grease in all parts has hardened and replenish or replace it if necessary. Reinstall the battery (if it has been removed) and connect it firmly. Remove the blockage at the air intake and reinstall the air filter. Wipe off the excess anti-rust oil from the key friction areas (such as the contact surface between the blade and the ground). Check the fuel and engine oil according to the normal start-up procedure, and then start the machine. First, run it at low speed without load for a few minutes to allow all components to lubricate and circulate. Only after there are no abnormal sounds can it be put into construction. Cleanliness is the prerequisite: no cement residue. Drying is fundamental: eliminate moisture. Lubrication and rust prevention are key: putting on a "protective suit" for metals. The fuel system needs to be properly handled: to prevent clogging. It's better to store off the ground: protect the tires. Regular inspections are indispensable: dynamic management. By following the above methods, your power trowel machine can quickly regain its "combat effectiveness" even after being idle for several months, effectively avoiding problems such as difficult startup, component jamming, and rust damage, truly achieving "always on standby, reliable and durable". Note: The parameters provided in this document are for reference only and are not mandatory. Due to differences in technical characteristics between different brands and models of laser levelers, please consult the manufacturer for a suitable solution before actual operation. This reference document assumes no responsibility for any issues arising from failure to follow the manufacturer's instructions.Read More