Technical Knowledge
Concrete laser leveling machine usage tips and experience sharing

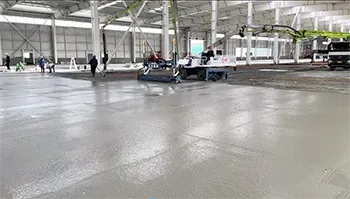
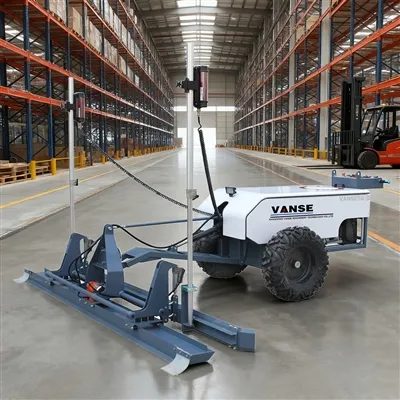
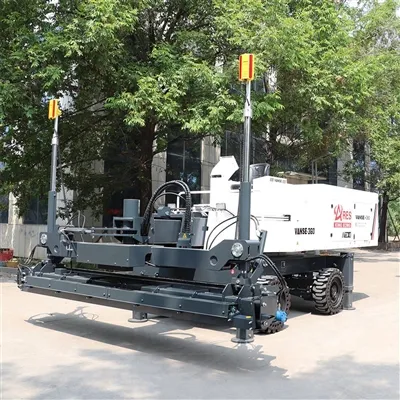
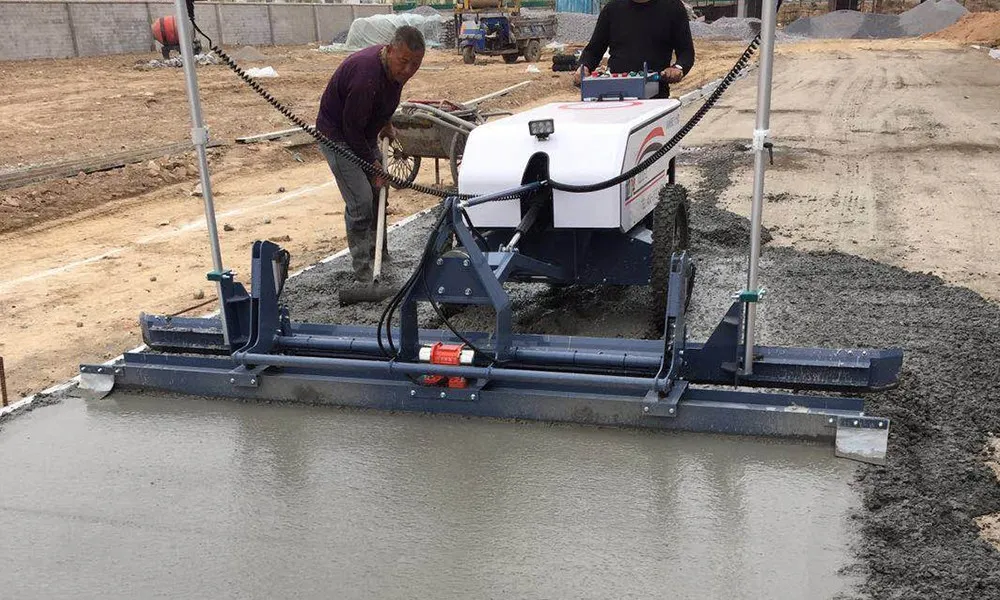
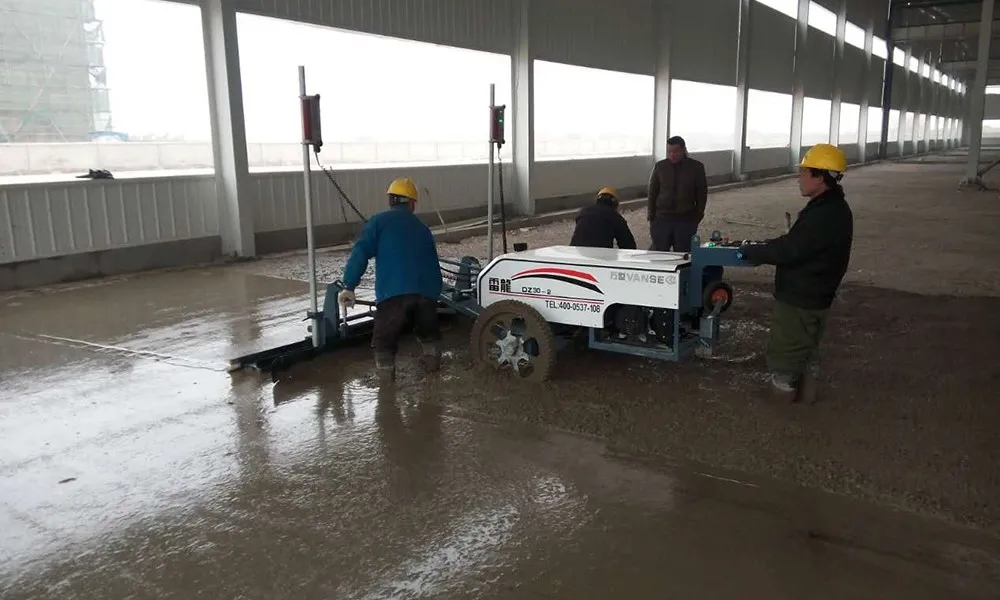
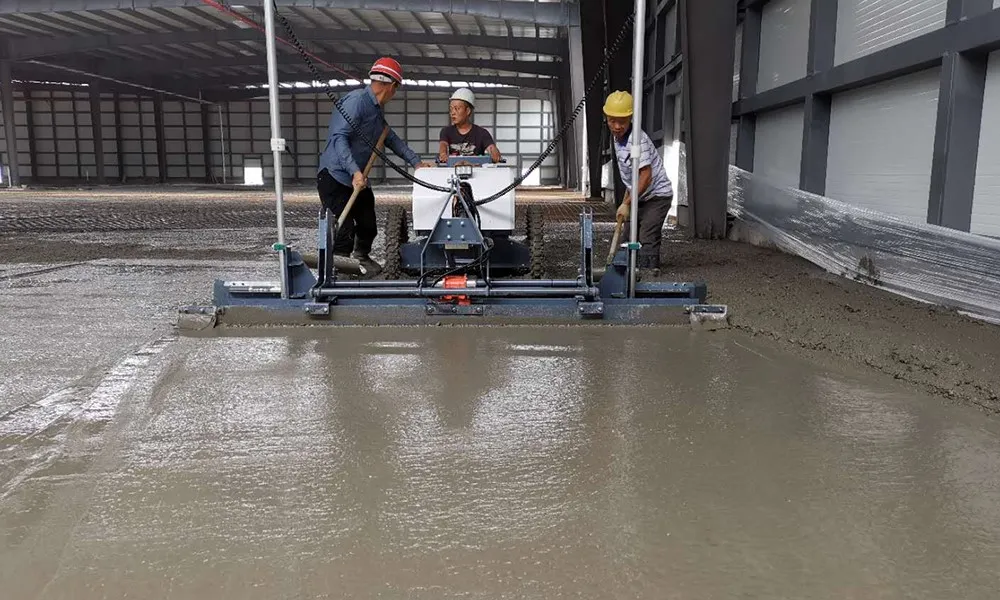
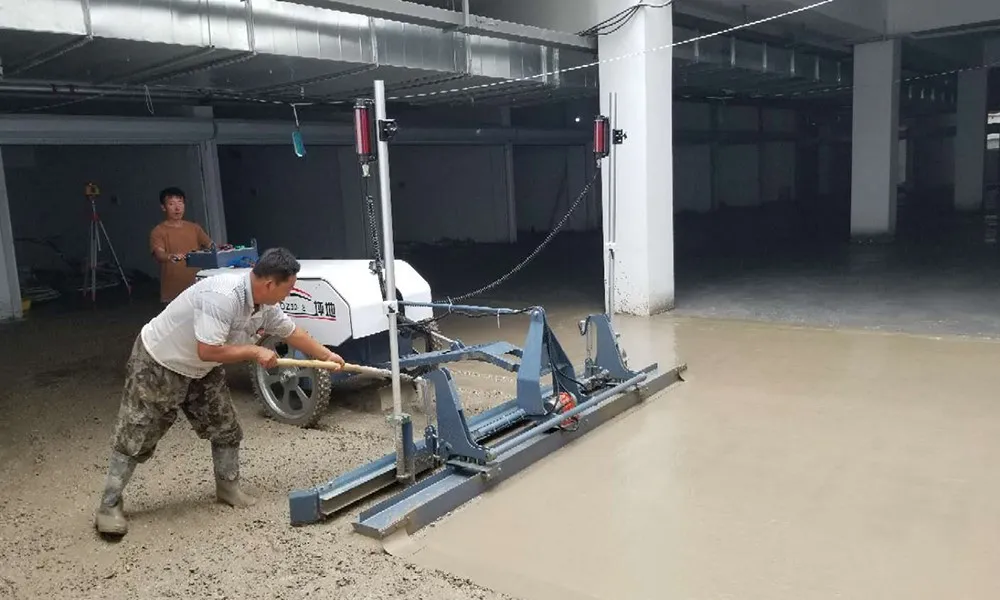
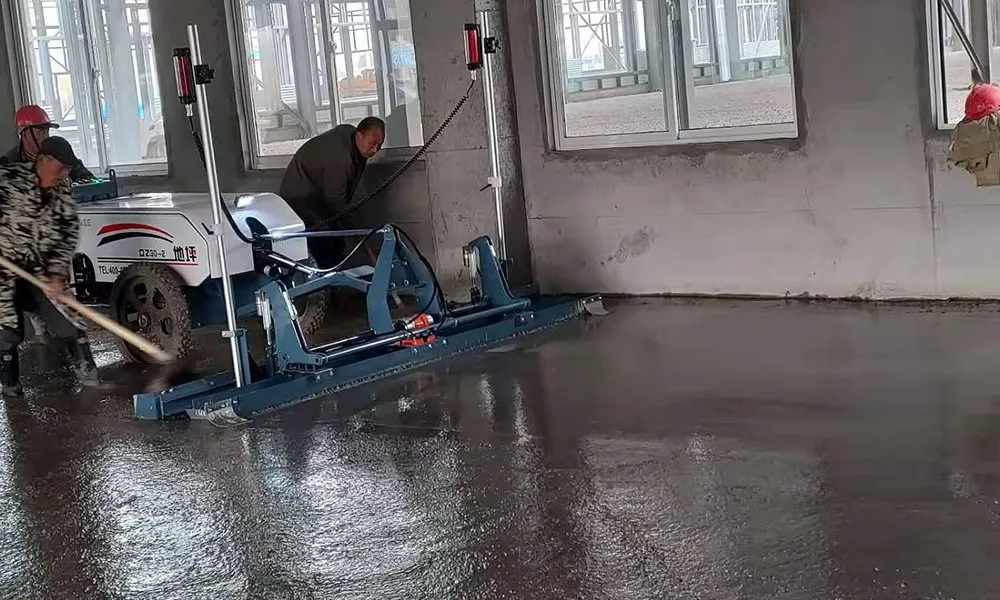
The concrete laser leveling is a high-precision concrete construction equipment that can quickly and accurately flatten and smooth the concrete surface. The following is a sharing of tips and precautions for using concrete laser levelingers. I hope it will be helpful to you.
1. Tips for using concrete laser leveling machine
Preparation work before construction
Before construction, you first need to select the appropriate concrete laser leveling machine model and specifications, and check whether its performance and accuracy meet the construction requirements. At the same time, corresponding construction auxiliary equipment needs to be prepared, such as templates, locators, etc.
Operation details
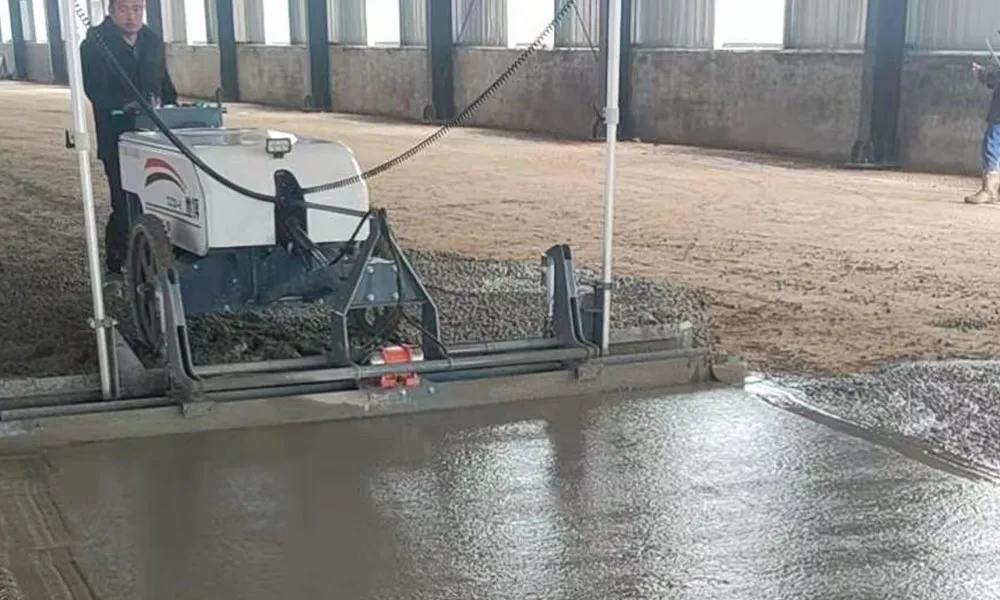
When operating the concrete laser leveling machine, you need to place the machine on the construction surface first, and adjust the horizontal and vertical angles of the machine to ensure that the machine is in a stable working condition. Then, set the corresponding parameters according to the construction requirements, such as flat thickness, flat width, etc.
During operation, you need to pay attention to the following points:
(1) During the smoothing process, keep the machine moving at a constant speed and avoid rapid acceleration or deceleration to avoid affecting the smoothing effect.
(2) During the leveling process, pay attention to the vibration of the machine at all times. If the machine vibrates abnormally, it needs to be stopped in time to check and troubleshoot.
(3) During the smoothing process, the quality of the flat surface needs to be observed at any time. If any unevenness or non-compliance is found, it needs to be repaired in time.
Precautions
When using a concrete laser leveling, you need to pay attention to the following points:
(1) During operation, external forces such as collision and extrusion need to be avoided to avoid damage to the machine.
(2) During use, the machine needs to be inspected and maintained regularly to keep the machine clean and in good condition.
(3) During use, you need to pay attention to safety issues, such as wearing corresponding safety protective equipment and avoiding operating in environments with safety hazards.
2. Maintenance of concrete laser leveling machine
Periodic inspection
Regularly check various performance indicators and accuracy of the concrete laser leveling, including the working status of the laser transmitter, receiver, engine and other components, as well as the tightening of each connection part. If abnormalities or failures are found, they should be repaired or replaced in time.
Lubrication and maintenance
Regularly lubricate and maintain all lubricating parts of the concrete laser leveling, including mechanical transmission parts, electrical components and motors, to reduce mechanical wear and electrical failure of the equipment.
Cleaning and maintenance
Regularly clean the dust, debris and corrosive substances on the surface of the concrete laser leveling to keep the equipment clean and operating normally. In particular, pay attention to cleaning the lenses of the laser transmitter and receiver to ensure the laser beam transmission quality and reception accuracy of the equipment.
Security protection
When using the concrete laser leveling, you need to pay attention to safety protection issues. For example, wear appropriate safety equipment and avoid operating in environments with potential safety hazards. At the same time, it is necessary to regularly check whether the safety protection devices of the equipment are intact and effective to ensure the safe use of the equipment. 5. Record archiving
During the use of the concrete laser leveling, it is necessary to record and archive the various performance indicators and operating status of the equipment for future maintenance and reference. At the same time, the equipment must be regularly upgraded or modified to improve its performance and service life.
In short, the use skills and maintenance of concrete laser levelinging machines are systematic tasks that require users to continuously accumulate experience and summarize in actual operations. Only through scientific and reasonable use and maintenance can the normal operation of the equipment be ensured and efficiency improved.
Thanks to All the Friends Who Support and Trust Shandong Vanse Machinery Technology Co., Ltd.
If you want to know more about Shandong Vanse Machinery Technology Co., Ltd. or have any questions, please feel free to contact us:
Our Factory
Shandong Vanse Machinery Technology Co., Ltd.








Share this article

About the Author: Shandong Vanse Machinery Technology Co., Ltd.
Shandong Vanse Machinery Technology Co., Ltd. is a high-tech manufacturer specializing in concrete construction machinery, including laser screeds and related equipment. The company integrates R&D, production, and global sales, with products exported to over 60 countries and widely used in infrastructure projects worldwide.
Previous Post
Next Post
Related Articles
You Might Also Like
How to strengthen the concrete soil floorto to control the cracking
Reinforced rebar and welding mesh control the crack width on non-structural soil flooring. Most of the earthen floors do not do enhanced treatment, or simply do nominal enhancement measures to control the width of the cracks. When reinforced rebar is placed in the upper or top position of the floor thickness, it can limit the width of random cracks caused by concrete shrinkage, temperature stress, foundation subsidence, external loads, and other problems. This type of enhancement is often referred to as a shrinkage and temperature enhancement device. Most soil layers do not be reinforced, or simply do nominal enhancement measures to control the width of the cracks. When the rebar is placed in the upper or top position of the floor thickness, the width of random cracks caused by concrete shrinkage, temperature stress, foundation subsidence, external loads, and other problems can be limited. This type of enhancement is often referred to as a shrinkage and temperature enhancement device. Basic principle Since there are many optional enhancements to non-structural soil flooring, this article will focus on controlling the crack width through reinforcement and mesh enhancement. Reinforced rebar and welding mesh do not prevent cracking. Before the concrete cracking, the function of the enhancement device is basically dormant. Once cracking occurs, the function is activated and its width is controlled by limiting the development of the crack. If the concrete slab is paved on a high-quality base and ensures good support, while using low-shrink concrete material, seam spacing is set at 4.5 meters or less and installed correctly, there is generally no need to take enhancement measures. In general, there is little random or non-seam cracking. If random cracks do occur, the crack width should also be kept smaller due to the relationship between smaller seam spacing and low shrink ingress to concrete materials, thus avoiding the problem of subsequent repairs or maintenance. Once this happens, the edge of the crack is exposed and the edge is likely to burst, especially when the concrete slab is crushed by wheels, especially high-level forklifts with hard wheels. Once the phenomenon of bursting occurs, the crack width of the surface will increase and the damage of the concrete slab along the crack site will deteriorate rapidly. Shrinking and temperature enhancement methods are required when shrink seams are not allowed in the field and are not installed. Sometimes this method is also known as continuously enhanced or seamless flooring, which allows for a large number of tightly distributed (90 to 180 cm) small cracks. Methods of crack control In general, there are 2 ways to control cracks: (1) to control the position of the crack by installing a shrink seam (no control over the width of the crack), or (2) to control the crack width by installing an enhancement device (uncontrollable of the crack position). Method 1, we can control the cracking position of the concrete slab, the width of the shrink seam or the cracking in the seam is largely controlled by seam spacing and concrete shrinkage. As seam spacing and concrete shrinkage increase, so does the seam width. Similar to cracks, if the seam width is close to about 0.9 mm, the efficiency of locking and conducting loads between the aggregates and avoiding vertical displacement between seams is greatly reduced. With this in mind, many designers use load conduction designs such as force levers, force transfer sheets, or continuity reinforcements in the shrink seam position to ensure good load transfer and limit vertical displacement between seams. Method 2, we allow the concrete slab to crack randomly, but use reinforced steel or welded mesh to control the crack width. In general, this method is not used when setting the shrink seam. Cracking occurs randomly, forming numerous small, interlaced cracks. Due to appearance considerations, this type of crack control method needs to be communicated with the owner in advance.In a low-temperature winter environment, how should a concrete laser leveling machine be maintained to avoid difficulties in starting?
In a low-temperature winter environment (typically referring to an ambient temperature of ≤5℃), concrete laser leveling machines are prone to difficulties in starting due to issues such as increased oil viscosity, battery discharge, and fuel solidification (for diesel models). Maintenance should be carried out from four dimensions: "protection of the starting system, optimization of oil performance, anti-freezing of core components, and protection of idle storage". The specific measures are as follows: At low temperatures, the battery capacity will drop significantly (for every 10℃ drop in temperature, the capacity approximately decreases by 10% to 15%), and the load on the starting motor increases, which is the main reason for the difficulty in starting. Special protection is required: Check the battery status: Use a multimeter to measure the battery voltage. For a 12V battery, it should be ≥12.4V (fully charged state). If the voltage is lower than 12V, immediately use a dedicated low-temperature charger (to avoid the low charging efficiency of ordinary chargers) to recharge the battery. If the battery has been in use for more than two years, it is prone to "quick discharge" at low temperatures. It is recommended to replace the battery with a new one in advance (to avoid failure when starting temporarily). Prevent the battery from cracking due to freezing: The freezing point of the battery electrolyte varies with its concentration (if the concentration is too low, it may freeze and crack the casing). Check the electrolyte level (if it is below the scale line, add distilled water; do not add tap water or electrolyte). If necessary, test the density of the electrolyte (use a hydrometer, standard value 1.26-1.28g/cm³; if the density is low, adjust the concentration). Clean the battery connection: If there is white sulfide (which is prone to condensation at low temperatures) at the connection, rinse it with hot water, then sand it clean with sandpaper, and apply vaseline or battery protector (to prevent re-oxidation and ensure smooth current conduction). Check the terminal blocks of the starting motor: Ensure that the bolts are tightened (metal shrinks and is prone to loosening at low temperatures, resulting in poor contact). If the terminal blocks are oxidized, they need to be sanded with sandpaper. Manually rotate the starting motor gear to ensure there is no jamming (to avoid poor gear meshing at low temperatures). Additional inspection for diesel models: Check if the start preheater (if any) is functioning properly – after power-on, the preheater indicator light should be on. If it is not on, check the circuit or replace the preheater (the preheater can increase the temperature inside the cylinder, help diesel atomize, and avoid difficulties in cold starting). Low temperatures can cause a sharp increase in the viscosity of engine oil, hydraulic oil and diesel, resulting in slow flow and difficulty in oil suction by the pump body. It is necessary to ensure the fluidity of the oil through "oil change + preheating". Replace with low-grade diesel: Select the corresponding grade based on the ambient temperature (for example, -20 # diesel for -10 ℃ to -20℃ and -35 # diesel for -20℃ to -35 ℃), to prevent diesel from solidifying in the fuel tank or fuel line (solidification can cause fuel supply interruption and prevent starting). If high-grade diesel has been added, diesel pour point depressant should be added (add it in the proportion specified in the manual to lower the freezing point of the diesel). Fuel system preheating: Before starting, you can first turn on the ignition switch (without starting the engine), and let the fuel pump be powered on to work for 30 seconds (some models have a "fuel preheating" mode), allowing the diesel to preheat and flow in the fuel pipes. If the diesel in the fuel tank has slightly solidified, a small amount of low-grade diesel or kerosene (not exceeding 10%) can be added to the tank to help dilute and melt it. Do not add gasoline to avoid safety risks. Type of oil Maintenance measures Engine oil 1. Switch to winter-specific low-temperature engine oil (such as 5W-30, 10W-30, the smaller the number before the viscosity grade, the better the low-temperature fluidity) to prevent the original summer engine oil from having excessive viscosity at low temperatures, which could increase the engine's starting resistance. 2. Before starting, if the ambient temperature is ≤-10℃, you can first heat the engine oil through the engine preheater (external or built-in) for 30 to 60 minutes, or pour hot water over the oil pan (water temperature 50 to 60℃, do not use boiling water) to reduce the viscosity of the engine oil. Hydraulic oil 1. Replace it with low-temperature anti-wear hydraulic oil (such as L-HV46, L-HV32, which has better low-temperature fluidity than ordinary hydraulic oil) to prevent the hydraulic oil from getting stuck at low temperatures, which could lead to the failure of the leveling scraper and the walking action. After starting the equipment, let the hydraulic system run idle for 5 to 10 minutes (operate the handle to slowly extend and contract the cylinder). When the temperature of the hydraulic oil rises above 10℃, then carry out load operation to avoid damage to the hydraulic pump due to dry grinding at low temperatures. In winter, the air humidity is high, and moisture is likely to remain inside the equipment. Freezing at low temperatures can cause components to get stuck or break, so targeted protection is needed Laser transmitter/receiver: When not in use, it should be stored indoors (to avoid low temperature and moisture in the open air). Before use, check if there is any ice inside (if there is, it needs to be thawed naturally indoors. Do not use open flames to bake it to avoid damaging electronic components). Before powering on, wipe the casing and lens with a dry soft cloth to ensure there is no moisture residue. Control circuit: Check if there is any condensation water at the circuit joints (if so, dry it with a hair dryer using cold air). Wrap the joints with waterproof insulating tape to prevent water from seeping in and causing short circuits, which may affect the transmission of laser signals. Hydraulic oil tank: Check whether the seal of the oil tank cover is intact (to prevent rainwater or snow water from seeping in). If water is mixed into the hydraulic oil, it will freeze at low temperatures, blocking the oil pipes or damaging the hydraulic pump. It is necessary to regularly drain the accumulated water at the bottom of the oil tank (open the oil tank drain valve, release a small amount of oil, and observe whether there is any water sedimentation). If there is too much water, all the hydraulic oil needs to be replaced and the oil tank cleaned. Engine cooling system (diesel model) : Antifreeze must be used (tap water or ordinary water is not allowed). The antifreeze should be mixed in a ratio of "antifreeze + distilled water = 1:1" (the freezing point can be reduced to around -35 ℃). Check the antifreeze level (it should be between "MIN" and "MAX" in the expansion tank). If the level is insufficient, add the same type of antifreeze. Prevent the cooling system from freezing and cracking the water tank or cylinder block. Hydraulic oil tank: Check whether the seal of the oil tank cover is intact (to prevent rainwater or snow water from seeping in). If water is mixed into the hydraulic oil, it will freeze at low temperatures, blocking the oil pipes or damaging the hydraulic pump. It is necessary to regularly drain the accumulated water at the bottom of the oil tank (open the oil tank drain valve, release a small amount of oil, and observe whether there is any water sedimentation). If there is too much water, all the hydraulic oil needs to be replaced and the oil tank cleaned. Engine cooling system (diesel model) : Antifreeze must be used (tap water or ordinary water is not allowed). The antifreeze should be mixed in a ratio of "antifreeze + distilled water = 1:1" (the freezing point can be reduced to around -35 ℃). Check the antifreeze level (it should be between "MIN" and "MAX" in the expansion tank). If the level is insufficient, add the same type of antifreeze. Prevent the cooling system from freezing and cracking the water tank or cylinder block. First startup: If the ambient temperature is ≤-15℃, do not start directly. First, perform the "three-step preheating" : ① Connect the power supply and turn on the preheater (if available) for 30 seconds; Turn off the preheater, wait for 10 seconds, and repeat 2 to 3 times. ③ Gently press the accelerator (for diesel models), slowly turn the start key. If the start fails in one attempt, wait for 1-2 minutes and then try again (to avoid overheating and damage to the starting motor due to continuous operation). Do not start continuously more than three times. After starting: After the engine starts, it should idle for 10 to 15 minutes (do not accelerate immediately). Wait until the water temperature rises above 40℃ and the oil pressure is normal (the pointer is stable within the standard range), then operate the hydraulic system and traveling mechanism to gradually adapt the equipment to the low-temperature environment. If the battery is discharged and the device cannot be started: It can be started by jumper connection (use the battery of another device, connect the positive terminal to the positive terminal and the negative terminal to the negative terminal. After starting, keep the idle speed for 15 minutes to charge the discharged battery). Do not jumper for a long time to avoid damaging the electrical system. If the diesel solidifies and causes the fuel supply to be interrupted: The equipment should be moved indoors (temperature ≥5℃) to allow the diesel to melt naturally, or low-grade diesel can be added to the fuel tank for dilution. After the diesel flows normally, press the fuel pump to expel the air in the fuel pipe, and then try to start it. If the hydraulic system gets stuck: After starting, run the hydraulic system unloaded first. If it still gets stuck, check the temperature of the hydraulic oil (if it is below 0℃). You can heat the hydraulic oil by connecting an external heater (placed outside the hydraulic oil pipe). Wait until the temperature rises above 10℃ before operating. Through the above measures, the problem of difficult start-up in winter due to low temperatures can be solved from four aspects: "start-up source, oil, components, and operation". At the same time, it can reduce the hidden damage to the equipment caused by low temperatures and ensure the stability and accuracy of the laser leveling machine machine during winter construction. Note: The parameters provided in this document are for reference only and are not mandatory. Due to differences in technical characteristics between different brands and models of laser levelers, please consult the manufacturer for a suitable solution before actual operation. This reference document assumes no responsibility for any issues arising from failure to follow the manufacturer's instructions.How to construct concrete laser leveling machine in complex environment
Concrete laser leveling operate in complex environments, requiring specialized plans tailored to specific environmental characteristics (such as confined spaces, areas with varying heights, inclement weather, and numerous obstacles), ensuring a balanced balance of efficiency, precision, and safety. The following details construction strategies and key technical points based on common complex environments: The core challenges of confined spaces are limited equipment maneuverability and the susceptibility of laser signals to obstruction. These limitations must be overcome through equipment selection and operational optimization. Select a compact machine: Prefer a small laser leveling (such as a walk-behind or mini-ride model) with a wheelbase ≤ 2.5m and a width ≤ 1.2m. Keep the minimum turning radius within 1.5m to allow for operation in narrow passages (widths ≥ 1.5m). Laser System Adaptation: Utilize multi-transmitter networking technology, placing 2-3 laser transmitters at different locations within the space (e.g., corners, near pillars) to prevent a single transmitter from being blocked by walls or pillars. Use anti-interference laser receivers (operating at 635nm red light or 532nm green light) to reduce signal interference from obstacles. Zoned and Miniaturized Operations: Divide a narrow space into multiple micro-blocks, such as 3m x 3m units, based on the equipment's operating radius (usually 2-3m). Work progresses zone by zone, avoiding frequent equipment maneuvers. Manually Assisted Spreading and Finishing: Due to space constraints, large-scale spreading equipment cannot be used. Manually spread the concrete in advance to a height 3-5cm above the design elevation (to reduce the burden on the equipment). Corners that cannot be reached by the equipment (e.g., walls and pillar bases) are manually leveled using aluminum alloy scrapers and vibrators to ensure a smooth transition with the machine work area. Real-time Signal Monitoring: Assign a dedicated person to monitor the laser receiver indicator light (green indicates normal operation, red indicates signal loss). Immediately stop the machine and adjust the transmitter position if a signal interruption is detected to avoid elevation errors caused by signal deviation. Precise control of elevation gradients is required in areas with complex level differences to avoid step-like errors. The key lies in the flexible adaptability and reference setting of the laser system. Slope Construction: Slope Sensor Interaction: Install a slope sensor (accuracy ±0.1%) on the leveling machine. Interact with the laser system to preset the laser plane inclination angle based on the designed slope (e.g., 2% or 5%). During operation, the machine automatically adjusts the scraper blade height according to the slope, ensuring that the elevation difference per meter meets the designed value (e.g., a 2% slope means a 2cm elevation difference per meter). Step/Platform Construction: Layered Reference Stakes: Set layered reference stakes (spacing ≤3m) at the intersection of height differences. Use a total station to calibrate the top elevation of the stakes. Mount the laser transmitter on the stakes to create a "stepped laser plane." Complete the lower elevation area first, then adjust the laser system parameters to accommodate the higher elevation area. Overlap the work at the intersection by 5-10cm. Preventing Segregation on Slopes: Control the concrete slump to 80-100mm (slightly lower than when working on flat ground) to prevent aggregate sinking due to the slope. Lay the concrete from the bottom of the slope toward the top, with each layer ≤20cm thick to prevent concrete from sliding down. Edge Height Adjustment: Set temporary barriers (height equal to the designed height difference) at the edge of the height difference (e.g., where the platform meets the ramp). After the equipment is in place, manually remove the barriers and trim the edges to ensure a height difference error of ≤3mm. Obstacles (e.g., rebar, pipelines, embedded components, walls) can hinder equipment movement and laser signals, requiring path planning and protective measures. Locate obstacles using 3D modeling: Utilize BIM technology or on-site surveying to mark the location, height, and spacing of obstacles (e.g., pipeline depth, rebar mesh elevation). Generate a feasible equipment route map, avoiding areas with dense obstacles (manual handling is preferred for areas with spacing ≤1m). "Obstacle Avoidance + Compensation" Combined Process: The equipment operates by circumventing obstacles 10-15cm from the edge. Pre-defined obstruction areas are manually compensated using a small vibrator (≤1m in length). After compensation, a 2m ruler is used to level the area with the machine work area to ensure a smooth connection. Signal Blind Spot Solutions: For areas blocked by walls or large structures, use wired references (e.g., installing aluminum alloy guide beams next to the obstacles, attaching the laser receiver to the guide beams, and using the guide beams to transmit the elevation reference). Alternatively, use a handheld laser leveler for real-time calibration of manually adjusted areas. Equipment Collision Protection: Install rubber anti-collision strips on the front of the equipment and wear-resistant alloy plates on the bottom of the scraper to prevent scratching rebar. During operation, a supervisor should be assigned to provide real-time distance between the equipment and obstacles, ensuring a safe distance of ≥5cm. Weather factors can affect concrete performance and equipment stability, requiring targeted adjustments to construction parameters and schedules. Concrete Temperature and Initial Setting Control: Use cooling aggregates (such as ice water mixing) to keep the concrete temperature at ≤ 30°C upon entering the mold. Add a retarding water reducer to extend the initial setting time (from 2-3 hours to 4-5 hours) to prevent initial setting before the equipment is fully operational. Protecting the Laser System from Sun Exposure: Install a sunshade for the laser transmitter to prevent direct sunlight from overheating and freezing the device. Regularly water the receiver to cool it down (keep the surface clean to prevent high temperatures from affecting signal reception sensitivity). Staggered Operation: Choose construction hours between 6:00 AM and 4:00 PM to avoid the midday heat, and shorten the interval between work steps (complete finishing within 30 minutes after leveling). Concrete Insulation and Freeze Protection: Use hot water mixing or add antifreeze to ensure the concrete temperature at ≥ 10°C upon entering the mold. Immediately cover the unused area with a blanket after paving to prevent low temperatures from reducing fluidity. Equipment Preheating and Lubrication: Preheat the engine for 10-15 minutes before starting. Run the hydraulic system at no load for 3-5 minutes until the oil temperature reaches ≥15°C to prevent component wear caused by low temperatures. Install the laser transmitter away from drafts and, if necessary, wrap it in an insulation cover to prevent frost. In high winds (wind speed ≥ Level 5): The laser transmitter must be mounted on a weighted base (weighing ≥50kg) or a windproof transmitter (wind resistance rating ≥ Level 8) must be used. During operation, reduce the laser reception range (adjust the receiver sensitivity to "high") to minimize wind-induced signal fluctuations. In Rain and Snow: In light rain, a temporary awning can be constructed (e.g., covering the work area with tarpaulin). Waterproofing can be added to the concrete. In moderate rain or snow, work should be suspended immediately. Cover the paved concrete with tarpaulin and drain the water. Before resuming work, check the moisture content of the base layer (≤10%). Unstable terrain can cause base settlement or equipment tilt, requiring enhanced base treatment and equipment support. Soft Base Treatment: Use a replacement method (replace with 30-50cm of graded sand and gravel) or reinforce with cement-soil mixing piles to ensure a base bearing capacity ≥150kPa to prevent equipment sinking during operation (settlement ≤2mm/h). Leveling Mountainous Terrain: First, use a bulldozer to roughly level the terrain (slope ≤10%). Then, lay a 10-15cm thick crushed stone cushion and compact it. This serves as the base for the laser leveling machine, reducing the need for frequent adjustments to the equipment due to uneven terrain. Track/Tire Grounding Treatment: Lay steel plates (thickness ≥ 10mm) or roadbed boxes on soft subgrade to increase the equipment's ground contact area (ground pressure ≤ 50kPa) and prevent the equipment from sinking. Tracked equipment can be tightened to improve its climbing ability (maximum climbing angle ≤ 15°). Real-Time Tilt Monitoring: The equipment is equipped with a horizontal tilt sensor that automatically alarms when the tilt angle exceeds 3°, prompting the operator to immediately adjust the equipment's position to avoid leveling errors caused by machine tilt. Emergency Plan Preparation: Develop contingency plans for equipment failure, signal interruption, and abnormal concrete supply, including backup laser transmitters, small generators (for power outages), and manual leveling tool kits (vibrator, scraper, trowel), etc. Real-Time Quality Inspection: After completing every 50 square meters, use a laser leveler (accuracy ±0.5mm) to check levelness. Areas with errors exceeding 5mm require immediate re-leveling to avoid further losses from rework. Specialized team training: Operators undergo complex environment simulation training, focusing on skills such as obstacle avoidance, signal calibration, and emergency shutdown, ensuring that each operator masters at least two emergency response methods. Through these strategies, the concrete laser leveling machine can achieve the goal of "maintaining accuracy and minimizing efficiency loss" in complex environments. The flatness pass rate remains above 90%, and operating efficiency only decreases by 10%-20% compared to conventional environments (400-500 square meters/day in conventional environments, 300-400 square meters/day in complex environments). The core principles are: proactively adapting to the environment, flexibly adjusting parameters, strengthening human-machine collaboration, and strictly controlling quality milestones. ARMOUR JOINT CONCRETE LASER LEVELING MACHINE POWER TROWEL TOPPING SPREADER