Technical Knowledge
Three common misunderstandings about maintenance of concrete laser levelers. Have you fallen into any of these misunderstandings?

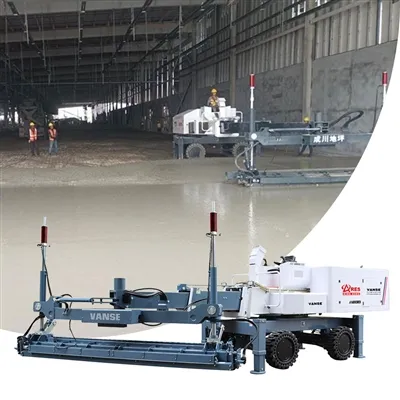
Concrete laser leveling machines can meet the construction requirements of large areas with high requirements for flatness and levelness. They play a very important role in the construction process. After the equipment is used, I believe everyone knows the maintenance of the leveling machine, but it is very likely that wrong operations will occur during the maintenance process, which will only have a counterproductive effect. In this article, our staff will explain the three major maintenance misunderstandings of concrete laser leveling machines.
1. Bolts are tightened too tight
There are many fasteners of bolts and nuts in the concrete laser leveling machine. In order to make the connection reliable, it should be ensured that there is sufficient preload. However, it is not wrong to think that the tighter the bolts are tightened, the better. Blindly increasing the torque of the bolts will not only cause the fasteners to be permanently deformed by excessive external force, but also the screw will cause thread stripping or screw breakage due to excessive tension.
2. The tire pressure is too high
The tire inflation pressure of the concrete laser leveling machine is the main factor that determines its service life and work quality. When the air pressure is too low, the deformation of the tire body increases, which will cause the internal stress to increase, and accelerate the aging of rubber and the fatigue of the cord; at the same time, the rolling resistance increases, so the tire shoulder wear is aggravated. However, when the inflation pressure is too high, the tire cord will produce a lot of tension, the resistance to impact will be weakened, and the rock edges will easily damage the tire; at the same time, the tire tread will be aggravated, causing the tire to slip, which will reduce the operating efficiency of the concrete laser leveler.
3. When replacing the hydraulic oil, only drain the oil in the tank
The concrete laser leveler has many hydraulic components and requires sufficient hydraulic oil. Whenever the hydraulic oil deteriorates due to long-term use and needs to be replaced, there will always be people who mistakenly think that they only need to drain the oil in the hydraulic oil tank and fill it with new hydraulic oil. In fact, the correct oil change procedure should first drain the hydraulic oil in the hydraulic oil tank, then clean the tank and add new hydraulic oil; then remove the circuit main pipe, start the engine and run it at a low speed, which will cause the oil pump truck operator to operate manually. If each mechanism is operated separately, the old oil in the circuit will be discharged one by one by relying on hydraulic oil until new oil flows out of the return oil main pipe; then connect the return oil main pipe to the oil tank, and then add new hydraulic oil to the concrete laser leveler tank to the specified position.
If you make the mistakes mentioned in the above article when maintaining the concrete laser leveler, we hope you can correct them in time and use the correct maintenance method to avoid machine failure due to improper maintenance. We will continue to organize and publish relevant information about the leveler, and you are welcome to follow our website.
Thanks to All the Friends Who Support and Trust Shandong Vanse Machinery Technology Co., Ltd.
If you want to know more about Shandong Vanse Machinery Technology Co., Ltd. or have any questions, please feel free to contact us:
Our Factory
Shandong Vanse Machinery Technology Co., Ltd.








Share this article

About the Author: Shandong Vanse Machinery Technology Co., Ltd.
Shandong Vanse Machinery Technology Co., Ltd. is a high-tech manufacturer specializing in concrete construction machinery, including laser screeds and related equipment. The company integrates R&D, production, and global sales, with products exported to over 60 countries and widely used in infrastructure projects worldwide.
Previous Post
Next Post
Related Articles
You Might Also Like
FF 100 / FL 60 ultra-smooth floor: The complete schedule table of the laser leveling machine + ride-on trowel + topping spreader
Why This Combination Matters Achieving FF 100 / FL 60 isn't about one miracle machine – it's about the right sequence at the right time. The combination of a laser leveling machine, a ride‑on power trowel, and a topping spreader is what transforms a normal floor into an ultra‑smooth, high‑flatness slab. I've put together the complete schedule below, based on how the best teams I know run their pours. No theory – just what works on site. This table follows a single pour from placement through to joint cutting. Times are referenced from the moment the concrete hits the deck. Adjust for ambient temperature, wind, and mix design, but the sequence stays the same. Time After Placement Operation Equipment Used Key Targets & Checks 0:00 – 0:20 Concrete placement & rough leveling Laser leveling machine (ride‑on or walking type) Hit design elevation ± 3mm; no low spots that trap bleed water 0:20 – 0:45 Laser re‑leveling (if needed) Laser leveling with fine‑tune box Double‑pass over column lines and perimeter edges where settlement occurs 0:45 – 1:30 Wait on bleed water – Concrete must not be worked while bleed water is present; wait until surface looks matte, not glossy wet 1:30 – 2:30 First topping spread (2/3 of total dosage) Automatic topping spreader or manual spreader Even distribution; topping must absorb moisture from the slab before floating 2:30 – 3:30 First mechanical floating Ride‑on power trowel with float pans (48" to 60") Open the surface, embed topping, eliminate any remaining low spots 3:30 – 4:30 Second topping spread (1/3 of dosage) Topping spreader This layer fills any small voids and evens out the surface color 4:30 – 5:30 Final floating & close surface Ride‑on power trowel with float pans or combo blades Surface should be tight enough that foot pressure barely leaves a mark 5:30 – 7:00 Rest period – check bleed & surface condition – If you see moisture coming back, wait; don't close the surface over trapped water 7:00 – 9:00 First finishing pass Ride‑on power trowel with finishing blades Slowly increase blade pitch; use lower rotor speed to avoid tearing 9:00 – 11:00 Intermediate finishing passes (2‑3 times) Ride‑on power trowel with finishing blades Incrementally increase pitch each pass; look for a uniform "velvet" surface 11:00 – 13:00 Final finishing – high‑pitch burnishing Ride‑on power trowel (experienced operator only) High blade pitch, high speed – produce the final dense, glossy surface Within 1 hour of finishing Quality check – FF/FL measurement Dipstick, F‑meter, or profilograph Confirm FF ≥ 100 / FL ≥ 60 before curing compound goes on Immediately after pass Apply curing compound Low‑pressure sprayer, two even coats Full coverage; no puddles; re‑apply over saw cuts later 4‑12 hours after finishing Green saw cutting Early‑entry saw or soft‑cut saw Cut depth ≥ 1/3 slab thickness; follow pre‑planned joint layout 24 hours + Protection & cold weather provisions Insulated blankets or plastic sheeting if cold Maintain slab temperature above 10°C for first 72 hours Laser Leveling – The Foundation If the laser leveling leaves the surface more than 3mm out of plane, no amount of troweling will salvage FF 100. The key is a tight initial grade. I always run the laser receiver on a 900mm mast and double‑check the elevation after the first pass, especially over conduit trenches or at the edges of the pour where the leveling tends to sink slightly. A lot of teams search for laser leveling superflat floor schedule looking for exactly this: the order of operations before the trowels even start. Wait‑on‑Bleed – The Discipline This is where impatient teams lose their FF number. The moment you see someone floating concrete that's still shiny, you know they'll be chasing low spots all night. The surface must go dull – no standing water, no glossy patches. On a cool, humid day, this wait might stretch to 2 hours; on a hot, dry day, it might be 45 minutes. The rule: don't work the surface until it can absorb the topping, because the topping is part of the flatness system. Topping Spreader – Building the Wear Surface An automatic topping spreader ensures uniform dosage, which is critical for both wear resistance and consistent surface color. If you spread manually, use a calibrated bucket and work in two directions. The first 2/3 of the topping is designed to draw moisture from the slab; the remaining 1/3 fills the small imperfections left after floating. Search‑wise, buyers also look for topping spreader ride‑on trowel combination and floor hardener application schedule – so we're answering both searches in one place. Ride‑On Trowel Work – The Heart of FF/FL This is where the machine quality can make or break your numbers. When you run a large ride‑on power trowel, you need consistent blade pitch control and absolutely no vibration at high speeds. The VANSE VS‑series ride‑on power trowels, for example, are built with heavy‑duty gearboxes that maintain blade alignment through multiple finishing passes. No skipping, no chatter – just uniform densification. I'll say this plainly: you cannot achieve FF 100 with a machine that shakes or won't hold pitch. The team on site needs confidence that every pass is improving the surface, not tearing it. After the final burnishing pass with high‑pitch blades, the surface should look uniformly dense – almost like polished stone – with no visible blade marks running off‑track. Curing and Cutting – Protecting the Investment A perfect FF/FL floor will still crack if cutting is delayed or the curing compound is applied unevenly. The joint layout should be pre‑planned with spacing around 2.5m to 3.5m for 150‑200mm slabs. With the dense finish a ride‑on trowel creates, a green saw cut within the first 4‑12 hours is best; don't wait overnight. Search volume for superflat floor saw cut timing remains high, so smart contractors are paying attention to this step. If you're kitting out a team– here's the complete setup I'd recommend for an ultra‑smooth floor operation: Laser Leveling Machine – ride‑on or walking type with a fine‑adjust leveling box. Absolute accuracy at this stage is non‑negotiable. Automatic Topping Spreader – keeps dosage uniform and speed fast enough to match the pour. Large Ride‑On Power Trowel – at least 46" pan, heavy enough to densify, with precise blade pitch control. VANSE VS models fit naturally here; they're designed for multi‑pass superflat finishing and built to handle long hours under load. Walk‑Behind Power Trowel – for edges, corners, and columns where the ride‑on can't reach. A 24‑inch machine like the VANSE VS424 with Honda engine makes tidy work of these areas without tearing the surface. Quality Control Kit – F‑meter or dipstick, floor straightedge, and a good lighting setup for final inspection. Early‑Entry Saw – essential to cut as soon as the concrete can support the operator, before random cracking starts. Buyers searching internationally are combining terms like FF100 floor equipment cost, superflat floor machine package, or laser leveling ride‑on trowel complete set. This section matches that intent exactly. Here's the simple version I give to new foremen: Place and laser‑level immediately. Don't let the concrete stiffen before it's at grade. Respect the bleed water. Wait it out completely. Spread topping in two stages. The first two‑thirds embeds into the slab; the last third finishes the surface. Float with pans, then finish with blades. Increase blade pitch gradually across 3‑4 finishing passes. The ride‑on trowel is your diamond tool. Feed it a good operator and it gives you FF 100; feed it vibration or a worn gearbox and it gives you callbacks. Measure before you cure. And cut while the slab is still "green." This schedule is designed to answer the cross‑section of searches real contractors make: superflat floor finishing schedule, topping spreader ride‑on trowel sequence, FF100 FL60 construction timeline, and more. It's written from the job site, for the job site. If you're building ultra‑smooth floors, this sequence gives you a fighting chance at the numbers – and the right equipment keeps you there consistently. Note: The parameters provided in this document are for reference only and are not mandatory. Due to differences in technical characteristics between different brands and models of laser levelers, please consult the manufacturer for a suitable solution before actual operation. This reference document assumes no responsibility for any issues arising from failure to follow the manufacturer's instructions.What are the differences in construction technology between concrete pavements with large slump and concrete pavements with small slump?
Concrete with large slump: The mixing time needs to be appropriately increased, generally 30-60 seconds longer than concrete with small slump, to ensure that the concrete is mixed evenly, so that the excess water is fully mixed with cement and other materials to avoid segregation. At the same time, the amount of water should be strictly controlled and accurately measured, because the amount of water has a greater impact on the slump. Concrete with small slump: When mixing, pay attention to controlling the mixing force and time to avoid excessive mixing that causes the concrete to be too dry and hard, and lose good workability. Generally, the mixing time is relatively short, so that all materials can be evenly mixed. Concrete with large slump: Prevent concrete from segregation and water evaporation during transportation. The mixer truck should maintain a uniform speed, avoid sudden braking and sharp turns, and reduce the shaking of the concrete in the tank. At the same time, the tank body can be covered with a sunshade to prevent direct sunlight from causing water to evaporate too quickly and affect the slump. Concrete with small slump: During transportation, care should be taken to prevent excessive loss of concrete slump. If the transportation time is long, some plastic preservation measures can be considered, such as adding an appropriate amount of retarder. However, attention should be paid to the amount of retarder added to avoid affecting the setting time and strength of the concrete. Concrete with large slump: The pouring speed should not be too fast and should be controlled within a certain range, such as the pouring volume per minute should not exceed 1-1.5 cubic meters to avoid rapid flow and accumulation of concrete in the formwork, resulting in loose vibration or segregation. At the same time, it is necessary to avoid excessive free fall height of concrete. When it exceeds 2m, auxiliary tools such as string barrels and chutes need to be used. Concrete with small slump: Due to its poor fluidity, some auxiliary measures are needed during pouring to ensure that the concrete can fill every corner of the formwork. For example, artificial auxiliary spreading can be used to evenly distribute the concrete in the formwork to avoid concrete accumulation or local vacancies. Concrete with large slump: It is advisable to use a low-frequency vibrator, and the vibration frequency is generally 2000-3000 times/minute. Avoid using a high-frequency vibrator to cause over-vibration of the concrete. The vibration time should not be too long. The vibration time at each point should be controlled within 20-30 seconds, and the concrete surface no longer sinks significantly, no bubbles appear, and cement slurry appears on the surface. Concrete with small slump: It is usually necessary to use a high-frequency vibrator, and the vibration frequency is generally 3000-5000 times/minute to improve the fluidity and density of the concrete. The vibration time should be appropriately extended, and the vibration time at each point may take 30-40 seconds to ensure that the concrete is vibrated and dense, but it is also necessary to prevent excessive slurry on the concrete surface due to over-vibration. Concrete with large slump: When finishing, wait for the surface moisture to evaporate properly before proceeding, generally 1-2 hours after the concrete pouring is completed. The specific time is determined according to the site environment and the concrete coagulation. Usually 2-3 times of plastering are required to eliminate moisture and defects on the surface. Plastic film, geotextile, etc. should be used to cover the surface immediately during curing to prevent the water from evaporating too quickly and causing the surface to lose water and crack. The curing time is generally not less than 14 days. Concrete with small slump: Plastering can be done in time after the concrete surface is slightly dry, generally about 0.5-1 hour after pouring. Due to its low moisture content and fast surface drying, fewer plastering times may be required, but attention should be paid to the plastering quality to ensure that the surface is flat and smooth. It should also be covered and moisturized in time during curing. The curing time is generally not less than 7 days, but if the environment is dry or the temperature is high, the curing time should be appropriately extended.How can the concrete laser leveling machine process be coordinated with the design of concrete construction to achieve the best level effect?
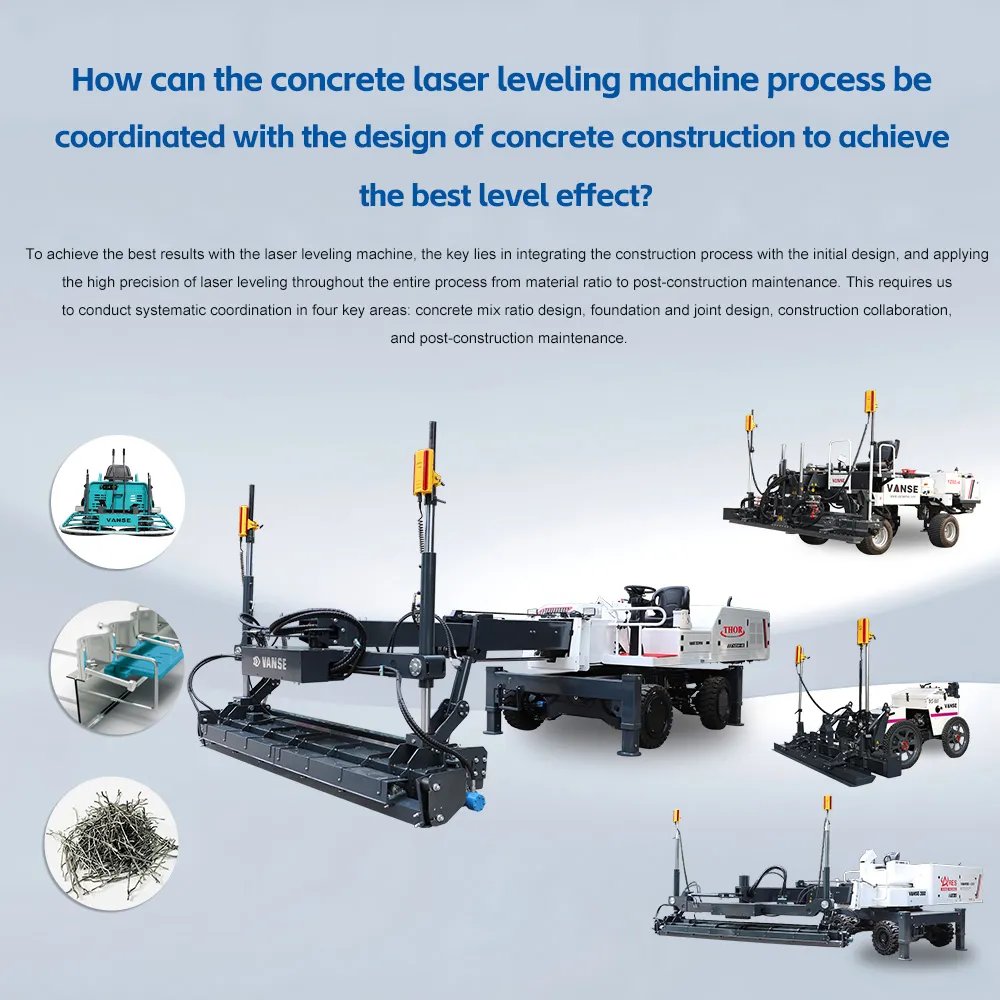
To achieve the best results with the laser leveling machine, the key lies in integrating the construction process with the initial design, and applying the high precision of laser leveling throughout the entire process from material ratio to post-construction maintenance. This requires us to conduct systematic coordination in four key areas: concrete mix ratio design, foundation and joint design, construction collaboration, and post-construction maintenance. Objective: To prevent problems before they occur and promptly identify potential issues through daily observation. The high-frequency vibration and precise leveling of the laser leveling machine require that the concrete itself have good and stable working performance. Mix ratio design is the foundation. Design parameters Recommendation requirements: The influence on the laser leveling effect Water-cement ratio Not more than 0.5, no water addition allowed on site Controlling the water-cement ratio can ensure the strength and volume stability of the hardened concrete, preventing shrinkage cracks or insufficient strength due to excessive moisture. Adding water on-site will disrupt the mix ratio, causing segregation and bleeding, which seriously affects the leveling accuracy. Consistency 14 ± 2 cm (maximum 16 cm) This slump range can ensure that the concrete has good fluidity, facilitating the leveling by the laser leveling machine, while not being too thin to maintain the shape after leveling, which is the key to ensuring the stability of the leveling accuracy. Setting time Initial setting time controlled within 3-5 hours It provides sufficient operation windows for the spreading, vibrating and repeated leveling of the laser leveling machine, ensuring the continuity of large-scale construction and avoiding cold joints. Aggregate gradation Maximum particle size of coarse aggregate ≤ 25 mm; sand ratio controlled within 35% – 40% Good gradation can ensure the concrete is dense and uniform, avoiding surface defects (such as cracking and sanding) caused by aggregate segregation, creating a uniform working surface for laser leveling. Without a solid foundation and scientific joint design, the accuracy of laser leveling will be impossible to achieve. Foundation preparation: Before concrete pouring, it is necessary to ensure that the base has been leveled, compacted, and precisely controlled in terms of elevation. This is the fundamental measure to prevent ground settlement and deformation after completion, thereby ensuring the final levelness. Joint design: Construction joints: In design, efforts should be made to minimize the occurrence of construction joints. When they cannot be avoided, a force transmission system should be set up. This can effectively transfer the load between the slabs and prevent misalignment at the joint, thus avoiding damage to the overall flatness of the ground. Expansion joints/cutting joints: The design should clearly define the time and method for cutting the joints. To overcome concrete shrinkage and temperature stress, the cutting should be carried out as early as possible (usually within 24 hours), and the quality of the cutting should be strictly controlled to prevent the edges from cracking or the formation of irregular cracks. The laser leveling machine is the core, but it cannot function without the close collaboration between humans and the environment. Human-machine collaboration: The equipment operator is responsible for precise leveling, while 3-4 workers are needed to assist, responsible for quickly leveling the concrete, handling the formwork, the edges of columns, and the corner areas that the machine cannot cover. This "machine operator with human assistance" model is the key to ensuring overall flatness without any blind spots. Process control: Material supply stability: It is necessary to ensure continuous concrete supply (speed ≥ 40m³/h), and the slump and initial setting time of each truckload of concrete should be highly consistent to avoid affecting the construction quality and progress due to material fluctuations. Leveling verification: During the leveling process, the ground elevation should be regularly rechecked to ensure that the laser emitter is working properly. Once any problems are identified, they should be immediately adjusted to prevent large-scale rework. Environmental protection: The ground that has just been leveled must not be exposed to direct sunlight, strong winds, or rainwater. At the same time, the construction site should avoid electric welding operations and reflective objects to prevent interference with the reception of the laser signal. The later maintenance and surface treatment are the final procedures for protecting and enhancing the laser-levelled finished products. Timely maintenance: Use the maintenance agent compatible with the floor material for maintenance. This can form a high-density crystalline film, effectively locking in moisture and preventing concrete from developing dry shrinkage cracks or surface dusting due to rapid water loss, ensuring strength and flatness. Wear resistance and joint sealing: For floors with wear resistance requirements, apply high-performance floor hardener at the appropriate time (determined by the concrete setting time). After cutting the joints, use polyurethane joint sealing adhesive of the same color as the floor to handle the joints, to ensure the tear resistance, aging resistance and aesthetic performance of the joints. To achieve the best results with the laser leveler, it must be regarded as a systematic project. From the design stage, create the best conditions for this efficient and high-precision process, and strictly control the entire construction process. If you can provide more information about your project, such as whether it is a logistics warehouse with super-leveling or a basement with decoration requirements, I can provide you with more targeted design suggestions. Contact us NOW Note: The parameters provided in this document are for reference only and are not mandatory. Due to differences in technical characteristics between different brands and models of laser levelers, please consult the manufacturer for a suitable solution before actual operation. This reference document assumes no responsibility for any issues arising from failure to follow the manufacturer's instructions.