Technical Knowledge
Preventive Measures for Powdering or Surface Peeling Caused by Excessive Troweling
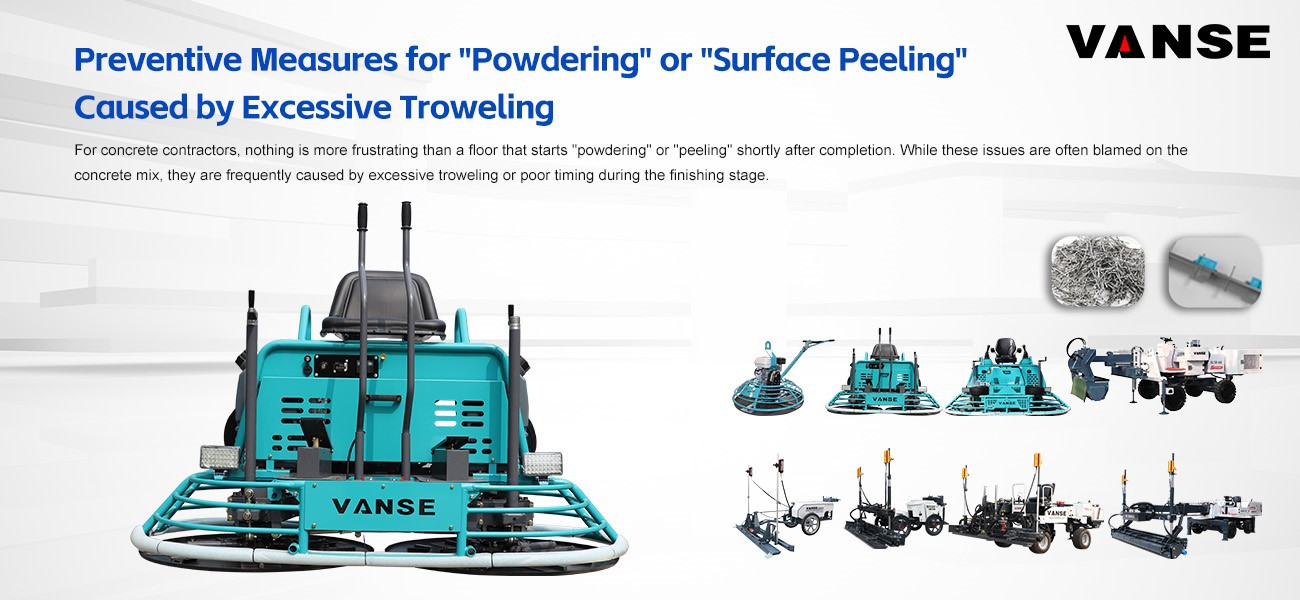
How to Prevent Concrete "Dusting" and "Surface Peeling": Expert Tips for Power Trowel Operators
For concrete contractors, nothing is more frustrating than a floor that starts "powdering" or "peeling" shortly after completion. While these issues are often blamed on the concrete mix, they are frequently caused by excessive troweling or poor timing during the finishing stage.
Achieving a durable, wear-resistant surface requires the right technique and, more importantly, high-precision Power Trowel equipment.
1. Master the Timing: Never Trowel Bleed Water
One of the most common causes of surface peeling (delamination) is troweling while bleed water is still present on the surface. Doing so traps water and air under a prematurely sealed top layer, creating a weak bond that eventually peels off.
The Vanse Solution: Professional finishing requires patience. Using a Vanse Ride-on Power Trowel with its responsive control system allows operators to wait for the exact moment when the concrete can support the machine's weight without sinking, ensuring that bleed water has fully evaporated before the final high-speed pass.
2. Precise Blade Pitch Management
"Over-troweling" often happens when the blade angle is too aggressive too early. This "burns" the surface but weakens the structure underneath, leading to a chalky, powdering effect once the floor dries.
Vanse Equipment Advantage: Precision is key. Vanse Power Trowels (such as the VS836H or VS1046H) are equipped with a high-precision blade pitch adjustment system. This allows the operator to make micro-adjustments to the blade angle, ensuring a smooth finish without over-compacting the surface "skin," which is critical for preventing late-stage dusting.
3. Maintain Consistent Speed and Pressure
Uneven pressure from low-quality equipment can cause "shingling" or localized peeling. Look for machines that offer stability and consistent RPM to ensure a uniform finish across large industrial bays.
Vanse Equipment Advantage: The balanced weight distribution and heavy-duty rotor design of Vanse machinery ensure that every square inch of the floor receives equal pressure. The high-torque performance from HONDA GX690 engines provides the steady power needed to maintain constant RPM, reducing the risk of over-working specific areas which typically leads to surface scaling.
4. Avoid Adding Water During Finishing
A common mistake on hot or windy days is "throwing water" on the concrete to make it easier to trowel. This significantly weakens the water-to-cement ratio at the surface, guaranteed to cause powdering.
Pro Tip: Instead of adding water, use a high-efficiency Ride-on Power Trowel from Vanse that can cover the area faster, finishing the job before the surface becomes too unworkable.
Comparison: Why Vanse Equipment Prevents Surface Failures
| Technical Cause of Peeling | Prevention Strategy | Vanse Feature Support |
| Trapped Bleed Water | Delaying the final pass until water disappears. | Smooth, low-speed idling and stable control. |
| Surface Over-working | Reducing blade friction and pass frequency. | Precision Pitch Control for exact finishing. |
| Weak Surface Paste | Avoiding the addition of "finishing water." | High-speed rotation for efficient finishing. |
| Uneven Compaction | Uniform pressure across the entire slab. | Dual-Rotor Balanced Design (VS836/VS1046). |
Summary
Preventing "powdering" and "peeling" is a combination of site discipline and equipment quality. By using Vanse’s range of high-performance Power Trowels ( www.vansemac.com ), you ensure that your operators have the precision tools needed to hit the perfect finish every time, securing a durable, dust-free floor that meets the highest international standards.
Note: The parameters provided in this document are for reference only and are not mandatory. Due to differences in technical characteristics between different brands and models of laser levelers, please consult the manufacturer for a suitable solution before actual operation. This reference document assumes no responsibility for any issues arising from failure to follow the manufacturer's instructions.
Thanks to All the Friends Who Support and Trust Shandong Vanse Machinery Technology Co., Ltd.
If you want to know more about Shandong Vanse Machinery Technology Co., Ltd. or have any questions, please feel free to contact us:
Our Factory
Shandong Vanse Machinery Technology Co., Ltd.








Share this article

About the Author: Shandong Vanse Machinery Technology Co., Ltd.
Shandong Vanse Machinery Technology Co., Ltd. is a high-tech manufacturer specializing in concrete construction machinery, including laser screeds and related equipment. The company integrates R&D, production, and global sales, with products exported to over 60 countries and widely used in infrastructure projects worldwide.
Previous Post
Next Post
Related Articles
You Might Also Like
Quality Control Requirements for Ultra-Large Laser-Leveled Wear-Resistant Concrete Floors
Ultra-large laser-leveled, wear-resistant concrete floors combine precise laser leveling technology with the enhanced properties of wear-resistant materials. They are widely used in industrial plants, logistics warehouses, large commercial spaces, and other applications. Quality control must be implemented throughout the entire process: design, materials, construction, maintenance, and acceptance. The core goal is to achieve high flatness, high wear resistance, low cracking, and strong durability. The following details the quality control requirements from seven key perspectives: Ultra-large flooring (typically >1000 m2) is prone to cracking due to concrete shrinkage. Therefore, the initial design plan must focus on deformation control and construction feasibility. Specific requirements are as follows: Compartment Area: The size of a single compartment should be considered based on concrete shrinkage characteristics, typically ranging from 6m x 6m to 12m x 12m (aspect ratio ≤ 1.5) to avoid thermal stress cracking caused by excessive area. Joint Type Requirements: Expansion joints should be 8-12mm wide and ≥ 1/3 the floor thickness (or continuous). Use foam strips and sealant to prevent debris from entering and mitigate deformation. False Joint Installation: For long floors (e.g., >30m in length), false joints (cut depth 5-8mm) with intervals of ≤ 6m between compartment joints should be added to guide shrinkage cracks along the false joints. Clearly define the floor design elevation (±0.000 relative to the reference point). The laser leveling's reference line must be calibrated with a high-precision level (±1mm accuracy) to avoid cumulative errors. Flatness requirements: According to the "Code for Design of Building Floors" GB 50037, the allowable flatness deviation for industrial floors is ≤3mm/2m (laser detection), and for commercial floors, ≤2mm/2m. Strength Grade: Determined based on the application scenario. Industrial plants (load-bearing capacity 5-10t): ≥C30; logistics warehouses (load-bearing capacity >10t): ≥C35. Slump: Laser leveling requires low-slump concrete, controlled within 120±20mm (on-site measurement) to avoid delamination and sanding caused by excessive slump. Crack Resistance: Add polypropylene fiber (0.9-1.2kg/m³) or steel fiber (20-30kg/m³) to reduce plastic shrinkage cracking. Use a slow-setting water-reducing admixture to extend the initial setting time (≥6h) to ensure continuous construction over large areas. Material Type Core Control Indicators Inspection Requirements Commodity Concrete 1. Strength Grade (C30/C35); 2. Slump (120 ± 20 mm); 3. Initial Setting Time (≥ 6 hours); 4. Air Content (≤ 3%) One set of compression test blocks must be collected for every 500m³ of material. Slump must be measured on each truck upon arrival; any exceeding the standard must be immediately returned. Metal Wear-Resistant Materials 1. Metal Aggregate Content (≥ 60%, e.g., corundum, chromite sand); 2. Mohs Hardness (≥ 6); 3. Compressive Strength (≥ 80 MPa) Three sets of samples must be collected from each batch to test for hardness and strength. The appearance must be free of lumps and impurities. Non-Metal Wear-Resistant Materials 1. Quartz Sand Particle Size (0.3-1.2 mm, Continuous Grading); 2. Abrasion Resistance (Abrasion Loss ≤ 0.3 g/cm²); 3. Color Consistency Material within the same batch must exhibit no color variation. Abrasion resistance must be tested in accordance with GB/T 12988, "Test Method for Abrasion Resistance of Building Floor Materials." Auxiliary Materials 1. Polypropylene Fiber (Length 6-12 mm, Tensile Strength ≥ 300 MPa); 2. Sealant (Elastic Modulus ≥ 0.8 MPa) Fibers must be evenly dispersed and free of agglomerates. Sealant must comply with GB/T 14683, "Building Sealing Materials." Laser leveling is key to ensuring floor flatness. The entire "concrete paving – laser leveling – vibration – slurry preparation" process requires strict control. Specific requirements include: Construction Preparation and Equipment Calibration The concern laser leveling machine must be preheated one hour in advance. Use two independent reference points to calibrate the laser transmitter (with an error of ≤0.5mm) to avoid deviation from a single reference point. Base Preparation: The base layer (such as lime soil or gravel cushion) must be compacted (compaction degree ≥95%), with a surface flatness of ≤5mm/2m and no water accumulation or loose debris. Apply plastic sheeting (thickness ≥0.12mm) to prevent water absorption from the base layer, which could lead to rapid dehydration of the concrete. Paving Order: Divide the area by the gaps between the paving bays, and proceed from far to near, high to low, to avoid trampling on the already paved concrete. Thickness Control: Pave according to the designed thickness (usually 100-150mm) + 5% of the void thickness. Control the laser leveling speed between 0.8-1.2m/min, ensuring sufficient vibration with the vibrator (vibration frequency ≥ 50Hz) to remove air bubbles. Smoothness Monitoring: After every 50㎡ of paving, check the smoothness with a 2m straightedge and a feeler gauge. If the deviation exceeds 3mm, immediately use the laser leveling to level the surface. Manual repairs are strictly prohibited. Spreading and finishing of wear-resistant materials Spreading Timing: Before the concrete begins to set (press the concrete surface with your finger, leaving a 3-5mm indentation). Spread the concrete in two passes (60% for the first pass and 40% for the second pass) to avoid sinking if spread too early or preventing the concrete from bonding if spread too late. Spreading Uniformity: Use a "plum blossom dot" method with manual leveling to ensure the material dosage per square meter meets the design (usually 5-8kg/square meter for wear-resistant metals and 3-5kg/square meter for non-metals). Mechanical Finishing: After the first pass, smooth the surface with a disc trowel (150-200 rpm). After the second pass, finish the surface with a blade trowel (250-300 rpm). The surface should be free of smear marks, exposed areas, and have a uniform gloss. Large-scale floors are most susceptible to "plastic shrinkage cracks" (during construction) and "thermal shrinkage cracks" (during curing). These cracks must be controlled from three perspectives: Controlling Plastic Cracks During Construction Environmental Control: In high temperatures (>30°C) or strong winds (>5m/s), erect a sunshade and apply moisturizing spray (the temperature difference between the water and concrete should be ≤10°C) to prevent rapid surface water loss. Pre-setting Treatment: Within 30 minutes after paving, vibrate the concrete a second time using a vibrating beam to eliminate surface bubbles. If fine cracks are found, immediately re-press and close them with a trowel. Curing Time: 1-2 hours after finishing (initial setting of the surface), immediately cover with a moisture-retaining film and geotextile (or flame-retardant straw mat). Avoid direct sunlight exposure. Curning Time: ≥7 days for ordinary concrete, ≥14 days for concrete with admixtures or waterproofing. Water 3-4 times daily (keep the geotextile moist), and avoid sudden temperature drops. (If the temperature difference between day and night exceeds 15°C, cover with an insulation layer.) Post-Crack Treatment Fine cracks (width < 0.3mm): Seal with epoxy putty. Wide cracks (width ≥ 0.3mm): Cut a V-shaped groove (depth ≥ 10mm, width ≥ 8mm) along the crack, clean it, fill it with elastic sealant, and smooth the surface with wear-resistant material. After construction (during the curing period), the floor is susceptible to external damage and requires strict protective measures: Premature loading is prohibited: No personnel (except maintenance personnel) are allowed to move about within 7 days of curing, and no vehicles (including carts) are allowed to pass through within 14 days. Loading can only be carried after the floor has fully reached its design strength (28 days). Machinery protection: Machinery that requires operation on the floor (such as forklifts) must have rubber mats on their tires. Sharp turns and sudden braking are strictly prohibited to avoid scratching the surface. Pollution protection: Paint, engine oil, and other chemicals must not be piled on the floor. If spilled, rinse immediately with clean water (use a dedicated degreaser to remove oil stains) to prevent penetration and corrosion. Acceptance must be conducted in accordance with the "Concrete Structure Construction Quality Acceptance Code" (GB 50204) and the "Building Floor Construction Quality Acceptance Code" (GB 50209). Core testing items are as follows: Acceptance Items Quality Requirements Testing Methods: Smoothness Tolerance: ≤3mm/2m (industrial flooring), ≤2mm/2m (commercial flooring) Laser flatness tester (measure one point per 100 m2) or 2m straightedge + feeler gauge (measure three points per 50 m2). Abrasion Resistance Abrasion loss: ≤0.15g/cm² for metal wear-resistant flooring, ≤0.3g/cm² for non-metallic flooring Testing with an abrasion resistance testing machine in accordance with GB/T 12988 (measure one point per 1000 m2). Strength Concrete compressive strength: ≥ design value (C30/C35), surface hardness (rebound value): ≥35MPa (metal wear-resistant flooring) 28-day compression test of concrete specimens; surface hardness test with a rebound hammer (measure 10 points per 500 m2). Appearance Quality 1. No exposed surfaces, sanding, or hollows; 2. Uniform color variation (no significant differences within the same batch); 3. Crack width: <0.3mm Visual inspection (full inspection); tapping with a small hammer to detect hollows (measure 10 points per 100 m2, hollow rate ≤ 2%). Partition Joints/Expansion Joints Joint width and depth must meet design requirements, sealant must be fully applied without flaking, and no foreign matter must be present. Measurement with a tape measure (measure one point every 10 m); visual inspection of the sealant appearance. Common Problems Causes: Preventative Measures Surface Sanding 1. Excessive concrete slump; 2. Premature application of wear-resistant material; 3. Inadequate curing; Control slump at 120 ± 20 mm; apply wear-resistant material at the time of initial setting; apply moisturizing coating within 1 hour of finishing. Excessive Flatness 1. Uncalibrated laser leveling; 2. Uneven base layer; 3. Uneven paving thickness; Calibrate laser equipment (double reference points) before construction; compact and level the base layer (≤ 5 mm/2 m); apply paving according to the required thickness. Cracks (Width > 0.3mm) 1. Excessively large slab area; 2. Large temperature differences during curing; 3. High concrete shrinkage; Block size ≤ 12 m × 12 m; apply insulation when the temperature difference between day and night exceeds 15°C; incorporate polypropylene fiber to reduce shrinkage. Hollowing 1. Inadequate base layer cleaning; 2. Poor adhesion between concrete and base layer. Remove loose debris from the base layer and moisten it with water. When laying plastic film for insulation, partially cut the film to facilitate bonding. In summary, the quality control of ultra-large area laser-leveled wear-resistant concrete floors should focus on "prevention first, process control". Through strict material inspection, precise laser construction, and scientific maintenance and protection, the ultimate goal of "flatness, wear resistance, crack resistance, and durability" of the floor can be achieved. Note: The parameters provided in this document are for reference only and are not mandatory. Due to differences in technical characteristics between different brands and models of laser levelers, please consult the manufacturer for a suitable solution before actual operation. This reference document assumes no responsibility for any issues arising from failure to follow the manufacturer's instructions.In what scenarios is the concrete laser leveling not applicable?
Concrete laser levelings may not be suitable or have limitations in the following scenarios: 1. The principle of laser leveling machine in small spaces or irregular terrain or the operation of very irregular terrain may be limited. Because laser leveling machines require enough space to expand and move, conventional laser leveling machines may not be effective in very small spaces or in places with complex and varied terrain. 2. Short-time construction: For emergency situations where construction needs to be completed in a short time, a laser leveler may not be the best choice. Because the laser leveling machine takes a certain amount of time to measure and position the construction area, the leveling process may need to be repeated multiple times to obtain a high-precision leveling effect. 3. Large-scale projects or large-area construction: For large-scale projects or large-area construction areas, laser leveling machines may not be suitable. In this case, a larger or more powerful laser leveling equipment may be needed to meet the demand. 4. Complex shapes or specific requirements: For construction that requires complex shapes or special requirements, the laser leveler may not be able to meet the requirements. Because laser leveling machines are mainly used to level the ground, other professional equipment and processes may be required for specific shapes or special requirements. 5. Maintenance and repairs: For projects that have already been built or sites that require regular maintenance and repairs, a laser leveler may not be the best choice. Because laser levelings are primarily used for new project construction or large-scale levelinging projects, for small-scale repair or maintenance work, using traditional tools and methods may be more suitable. Although the above scenario may not be applicable to laser leveling machines, you can still consider whether to use laser leveling machines or other methods for construction based on actual conditions. In practical applications, the construction unit should comprehensively consider factors such as the specific requirements of the project, construction conditions, budget, and construction period to select the most suitable construction methods and equipment.Key points for purchasing second-hand power trowel and common methods to avoid pitfalls
Selecting a second-hand polishing machine is a job that requires a lot of experience and skills. It can help you obtain a practical device at a lower cost, but if you make a wrong judgment, the subsequent maintenance and delayed construction period may cause you to lose more than you gain. The following is a detailed list of key points for choosing a second-hand polishing machine and common methods to avoid pitfalls. We hope it can be of great help to you. Fuselage structure Chassis (grinding disc) : This is the most crucial part. Check if it is flat and free of deformation. Slight wear and tear is normal, but if the wear is severe, there are pits or obvious deformation, it will lead to poor polishing effect and higher replacement cost. Blade (scraper) : Check if there is still sufficient thickness. If the metal substrate has been worn out, it needs to be replaced immediately, and this cost should be included in the cost. Protective cover: Check for any damage or severe deformation, as this is related to operational safety. Overall framework: Check for any signs of welding, cracks or repairs, which could be a sign of severe impact or drop. Engine (heart) Brand: Give priority to well-known brands such as Honda, Kohler, Briggs & Stratton, etc. Spare parts are easy to find and maintenance is convenient. Appearance: Check for any cracks in the engine casing, especially in the base and radiator sections. Check for obvious oil stains or carbon deposits. This might be a sign of oil leakage or poor maintenance. Air filter: You can ask to remove the air filter to have a look. If the inside is very dirty or even soaked with oil, it indicates that the previous owner might not have paid much attention to maintenance. Engine oil: You can pull out the oil dipstick to check. If the engine oil is black, viscous or contains metal debris, it indicates that the engine wear may be relatively severe and the maintenance condition is poor. Transmission system Gearbox: Check if there are any signs of oil leakage on the gearbox housing. Rotate the drive shaft by hand to feel if it is smooth, and if there is any jamming or abnormal noise. Belt/chain: Open the protective cover and check if the belt has cracks, wear or looseness. Check if the chain is loose and free of oil and rust. Be sure to ask the seller to start the machine for testing! Startup performance Cold start is the most illustrative. Observe whether the rope pulling is smooth and whether the machine can start smoothly within one to three rope pulls. If it is difficult to start, there may be problems (such as carburetors, spark plugs, insufficient compression, etc.). Engine sound After starting, listen to the sounds of the engine idling and accelerating. The operation should be smooth. A regular "tap-tap" sound is normal (valve sound). If there are loud "clicking" sounds, knocking sounds or irregular noises, it indicates that there is severe wear inside. Transmission system sound Let the trowel run idle and listen for any abnormal "clattering" sounds from the gearbox and transmission parts. The voice should be even and deep. Vibration condition When the machine is running, it should be smooth and the vibration should be within a reasonable range. If the vibration is abnormally severe, it may be due to deformation of the chassis, unbalanced installation of the blades or problems with the engine base Purchase time and source: Inquire about the specific year and channel of purchase of the machine to determine its service life. Usage frequency and scenarios: Is it for occasional household use or long-term high-intensity use by professional teams? The latter naturally wears out more severely. Maintenance and repair history: This is of Paramount importance. Has there been any major overhaul? (Such as engine cylinder opening, gearbox replacement When was the last time the engine oil, air filter and spark plugs were changed? Have there been any accidents (such as tipping over or collision)? A reliable seller will tell the truth, while a evasive one needs to be on guard. If possible, conduct a brief load test (such as grinding it on the ground). Observe after the load is applied: Whether the engine is prone to stall and whether the power is sufficient. Check for any slippage or abnormal noise in the transmission system. Whether the machine moves smoothly and if it deviates. Trap description: Merchants thoroughly clean and paint the machines to make their appearance look as good as new, thereby covering up internal wear and tear and malfunctions. Avoidance methods Pay special attention to the screws and interfaces: It is very difficult for a refurbished machine to have no signs of any screws being turned. Check whether there are any signs of wear on the engine fixing screws, chassis screws, etc. Paint surface consistency: The original factory paint surface is usually uniform. If you find that the paint color of some parts does not match the overall color or the paint layer is too thick, it might be due to later spraying. Don't judge a machine by its appearance: Don't be deceived by a clean exterior. The key is to check its operating status and internal wear. Trap description: The machine was once sold after its chassis and frame were deformed due to a fall or collision. It was sold after simple repairs. Avoidance methods Check the flatness: Place the machine on a flat ground and observe from the side whether the chassis is fully in contact with the ground and if there is any warping. Check the welding points: Carefully inspect each connection point of the rack to see if there are any irregular or rough welding points in the later stage. Running test: During no-load operation, observe whether the machine is stable and if there is any regular swinging. This might be a sign of an uneven chassis. Trap description: Piecing together a complete machine with "good" parts from different scrapped machines, which has poor compatibility and stability. Avoidance methods Brand consistency: Check whether the brand, model and newness of the main components such as the engine and fuselage match. Assembly machines often give the impression of being "mismatched". Check the nameplate: Whether the information on the body nameplate (such as model and production date) is consistent with the seller's description. Poor comprehensive operation: When the assembly machine is in operation, various minor problems may occur frequently, making it feel "not smooth". Trap description: The machine performs okay when it is cold or unloaded, but once it is heated up or loaded, problems become apparent (such as insufficient power, severe abnormal noises, and engine stalling). Avoidance methods Persist in long-term testing: Let the machine run for 10 to 15 minutes and observe whether the state is stable after warming up. Load testing is required: This is the best way to verify the true state of the machine. Check the engine oil: After warming up the machine, stop it immediately and check the engine oil. If there are many small bubbles (emulsions) in the engine oil, it might be that the cylinder gasket is being washed away, which is a big problem. Before deciding to purchase, quickly check the following list: Inspection items Qualification standard Be cautious/give up Fuselage chassis Smooth, evenly worn, and without deformation Deformation, cracks, wear limit Engine Well-known brand, smooth start-up, stable operation, pure sound, no oil leakage Difficult to start, severe abnormal noise, oil leakage, and heavy smoke Transmission system The rotation is smooth without any abnormal noise, and the belt/chain is not aged There is abnormal noise, jamming and oil leakage Seller Description Be honest, answer all questions, and keep clear maintenance records Vague and evasive, concealing history Price In line with market conditions (approximately 30% to 50% of a new model) Far below the market price (" There's no such thing as a free lunch ") Test run situation The hot and cold units start well and operate stably under no-load or load conditions Any test is unqualified Final suggestion: If possible, bring along an experienced master craftsman or mechanic. Their experience can help you discover many problems that beginners fail to notice. When making a purchase, it is best to sign a simple written agreement with the seller, clearly stating the condition of the machine, and keep the payment voucher for unexpected needs. Remember, the primary principle when purchasing second-hand equipment is "It's better to miss out than to buy wrongly." Wish you could find a sturdy and durable good machine! Note: The parameters provided in this document are for reference only and are not mandatory. Due to differences in technical characteristics between different brands and models of laser levelers, please consult the manufacturer for a suitable solution before actual operation. This reference document assumes no responsibility for any issues arising from failure to follow the manufacturer's instructions.