Technical Knowledge
What are the specific advantages of using concrete laser leveling machines in the construction industry?
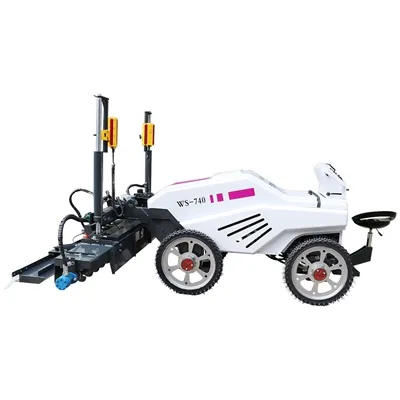
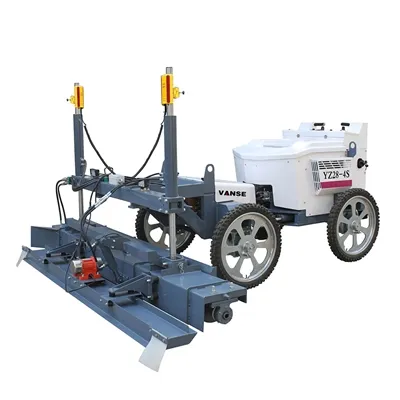
The application of concrete laser leveling machines in the construction industry has the following specific advantages:
1. High construction accuracy:
The concrete laser leveling machine uses laser technology to control the ground elevation and flatness, which can significantly improve the flatness of the ground. Compared with traditional methods, the average flatness of the ground leveled by the laser leveling machine is lower and the leveling quality is higher.
2. High construction efficiency:
The concrete laser leveling can achieve one-time overall paving of large areas, reducing a large number of construction joints and improving construction efficiency. Compared with the traditional beam vibrator method, the laser leveling machine can improve work efficiency by 3 times, save 30%, and can complete an average of 2000m of construction area per day.
3. Better ground quality:
During the leveling process, the concrete laser leveler uses a high-frequency vibrator to cause the leveling head vibration plate to produce uniform high-frequency vibration, making the concrete ground denser and more uniform. At the same time, the laser leveling machine can reduce concrete slump and improve concrete strength, making the ground more integrated and less prone to cracks.
4. Reduce resource investment:
The concrete laser leveling machine is hand-held and can be operated by a single person, turning heavy manual labor into mechanical paving, vibrating, leveling, slurry lifting, and plastering. The number of operators is greatly reduced. At the same time, the labor intensity is greatly reduced.
In summary, the concrete laser leveling machine has specific advantages in the construction industry such as high construction accuracy, high construction efficiency, good ground quality, and reduced resource investment. It can improve construction efficiency and quality, reduce construction costs, and promote the development of the construction industry. sustainable development.


Thanks to All the Friends Who Support and Trust Shandong Vanse Machinery Technology Co., Ltd.
If you want to know more about Shandong Vanse Machinery Technology Co., Ltd. or have any questions, please feel free to contact us:
Our Factory
Shandong Vanse Machinery Technology Co., Ltd.








Share this article

About the Author: Shandong Vanse Machinery Technology Co., Ltd.
Shandong Vanse Machinery Technology Co., Ltd. is a high-tech manufacturer specializing in concrete construction machinery, including laser screeds and related equipment. The company integrates R&D, production, and global sales, with products exported to over 60 countries and widely used in infrastructure projects worldwide.
Previous Post
Next Post
Related Articles
You Might Also Like
How does the laser leveling machine ensure the uniform distribution and flatness of the concrete during the leveling process?
As an advanced construction equipment, laser leveling machine is widely used in concrete floor leveling operations. It utilizes laser technology for precise control, enabling efficient and precise leveling operations. However, ensuring even distribution and flatness of concrete is a crucial challenge during the leveling process. This article will explore in detail how laser levelings ensure uniform distribution and flatness of concrete, and analyze the key factors that influence these two factors and the corresponding solutions. ••• ★ ••• The importance of uniform distribution of concrete and its influencing factors 1. Importance: Uniform distribution of concrete is essential to ensure the quality and service life of the ground. If the concrete is unevenly distributed, it may cause cracks, settlement and other problems on the ground, seriously affecting the use effect and safety. 2. Influencing factors: Factors affecting the uniform distribution of concrete mainly include the material properties of concrete, construction technology and the performance of the leveler. For example, the water-cement ratio and aggregate particle size of concrete will affect its fluidity and distribution effect; the rationality of the construction process, such as the execution of steps such as spreading and vibration, will also have a direct impact on the uniform distribution of concrete; In addition, performance parameters such as laser leveling accuracy, power and vibration frequency will also have an impact on the uniform distribution of concrete. ••• ★ ••• The importance of flatness control and its influencing factors 1. Importance: Flatness is one of the important indicators to measure the quality of concrete floor. Good flatness can not only improve the aesthetics of the floor, but also ensure the functionality and safety of the floor. If the ground flatness is insufficient, it may lead to problems such as uneven ground and water accumulation, which will affect the use effect. 2. Influencing factors: Factors affecting flatness include the accuracy of the leveler, the skill level of the operator, the construction environment, etc. The accuracy of the leveler directly determines the smoothness of the ground, while the skill level of the operator affects the performance of the leveler. In addition, the construction environment such as temperature, humidity, etc. will also have an impact on flatness. ••• ★ ••• Laser leveling's specific measures to ensure uniform distribution and flatness of concrete 1. Equipment selection and calibration: Select a laser leveler with stable performance and high precision, and perform regular equipment calibration and maintenance to ensure that the equipment is in optimal working condition. 2. Optimize the construction process: Develop a reasonable construction process, including spreading, vibrating, leveling and other steps to ensure uniform distribution of concrete. At the same time, the construction process parameters, such as cloth speed, vibration frequency, etc., are adjusted according to the actual conditions on site to obtain the best leveling effect. 3. Improve the skill level of the selected characters: Strengthen the training and education of the operating characters, improve their skill level and professional knowledge, and ensure that the selected characters can be practiced through regular skill assessment and practical work drills The operating skills of leather grip laser leveling machine ensure the uniform distribution and flatness of concrete. 4. Environmental monitoring and adjustment: Pay close attention to changes in the construction environment during the construction process, such as temperature, humidity, etc. Timely adjust construction technology and equipment parameters according to environmental changes to ensure the stability and reliability of leveling operations. ••• ★ ••• Implement effectiveness evaluation and continuous improvement After the above measures are implemented, the leveling effect needs to be regularly evaluated to understand the actual effect of the measures. Evaluation can be carried out by observing the appearance quality of the ground, measuring flatness indicators, collecting usage feedback, etc. Based on the evaluation results, measures are continuously optimized and improved to adapt to different engineering needs and construction environments. ••• ★ ••• Conclusion During the leveling process, the laser leveling machine can effectively ensure the uniform distribution and flatness of concrete through reasonable equipment selection, calibration, optimization of construction technology, improvement of operator skills, and environmental monitoring and adjustment. The implementation of these measures requires comprehensive consideration of multiple factors, including equipment performance, construction technology, operator skill level, and construction environment. By continuously improving and optimizing these measures, the leveling effect of the laser leveling machine can be further improved, providing strong support for the healthy development of the construction industry.List of Common Quality Defects and Countermeasures in Super Flat Floor Construction
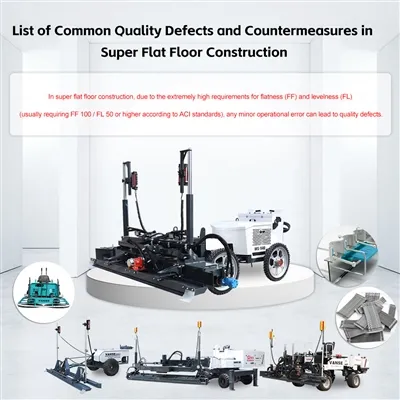
In super flat floor construction, due to the extremely high requirements for flatness (FF) and levelness (FL) (usually requiring FF 100 / FL 50 or higher according to ACI standards), any minor operational error can lead to quality defects. The following is a list of common quality defects and their countermeasures in super flat floor construction: This is the most critical quality issue for super-flat floors. Unstable installation of side forms (channel steel) or errors in elevation control. Laser Leveling signal interference or inaccurate sensor calibration. Excessive fluctuations in concrete slump, leading to uneven shrinkage during the hardening process. High-precision formwork: Use high-rigidity channel steel and use a total station and level to re-measure, controlling the error within ± 1mm. Digital monitoring: Use an F-Number measuring instrument (such as a Dipstick) for real-time monitoring during construction. Material consistency: Strictly control the slump of concrete delivered to the site; the fluctuation range should be within ± 20mm. Excessive water-cement ratio. Delayed saw cutting, leading to concentrated release of internal stress. Inadequate curing, resulting in rapid evaporation of surface moisture. Optimize the mix design: Increase aggregate size, reduce cement paste volume, and add shrinkage-reducing admixtures. Timely saw cutting: Use a "early-age saw cutting machine" (Soff-Cut) immediately after the concrete reaches initial setting strength (usually within 4-12 hours). Strengthen curing: Immediately after finishing the surface, spray a high-concentration curing agent, or cover with a film for water curing for at least 7 days. Excessive bleeding during the Leveling process, resulting in a high water-cement ratio on the surface. Premature or uneven application of wear-resistant material. High humidity in the construction environment or construction during rainy periods. Bleeding treatment: Use a rubber squeegee to promptly remove surface bleeding water; do not sprinkle dry cement on the undried surface. Staged application: The wear-resistant material should be applied in two stages; apply 2/3 first, and then apply the remaining portion after the first application has absorbed moisture. Mechanical finishing: Adjust the blade angle and rotation speed of the ride-on power trowel according to the concrete setting degree. The dowel bars are not installed vertically, leading to restricted expansion and contraction of the slabs and differential settlement. The construction interval between adjacent slabs is too long. Dowel bar sleeves: Use high-precision dowel bar supports and ensure the sleeves are properly installed, allowing for horizontal movement of the slabs but restricting vertical movement. Edge reinforcement: Use rigid joint protectors (such as Armor Joint) at the joints to prevent edge spalling under heavy loads. Inconsistent polishing frequency of the polishing machine, leading to localized overheating and discoloration. Uneven application of curing agent. Standardized operation: Standardize the polishing machine's movement path and pressure settings. Controlled curing: Ensure the curing film is applied evenly and adheres properly to prevent color differences caused by localized condensation. Common quality defects Key Control Points Poor flatness Template rigidity + Laser precision calibration Cracking Early saw cutting + Strict water-cement ratio Surface disintegration (sanding) Bleeding water treatment + Wear-resistant materials applied in two stages Uneven joints Dowel bar accuracy + Steel edge protection Would you like me to provide you with a more detailed checklist for "construction joint treatment" or "laser leveling machine operation procedures"? Contact us NOW Note: The parameters provided in this document are for reference only and are not mandatory. Due to differences in technical characteristics between different brands and models of laser levelers, please consult the manufacturer for a suitable solution before actual operation. This reference document assumes no responsibility for any issues arising from failure to follow the manufacturer's instructions.In actual construction, what performance indicators should the construction unit evaluate based on specific needs?
1. Adaptability and adjustability of the construction site The on-site adaptability and adjustability of the concrete laser leveling are also very important evaluation indicators. An excellent leveling should be able to adjust quickly and maintain stable performance in different construction site environments. Terrain adaptability: The equipment should be able to adapt to different terrain conditions, such as slope, height inequality. Equipment with strong terrain adaptability can maintain efficient grading operations in complex construction environments. Material adaptability: Different concrete materials have different characteristics, such as viscosity, fluidity, etc. The equipment should be able to adapt to the characteristics of different concrete materials to ensure smoothing results. Adjustability: Various parameters of the equipment, such as leveling speed, laser ranging range, etc., should be easily adjusted to adapt to different construction needs. 2. Safety and protective measures Safety and protective measures are also aspects that cannot be ignored when evaluating concrete laser levelings. Safety design: The equipment should have good safety design, such as emergency stop buttons, protective covers, etc., to ensure the safety of operators. Fault warning and protection: The equipment should have fault warning and protection functions, which can issue timely warnings when equipment malfunctions or abnormal conditions occur, and take protective measures to prevent accidents. 3. Cost-benefit analysis When evaluating a concrete laser leveling, you also need to consider its cost-effectiveness Purchase cost: Different brands and models of concrete laser levelings may have different purchase costs, which need to be considered comprehensively based on the budget. Operating costs: Operating costs include equipment maintenance, consumable replacement, operator training, etc., and are also factors that need to be considered when evaluating the cost-effectiveness of equipment. Long-term return: Considering the service life and long-term return of the equipment, it is a wiser choice to choose equipment with stable performance and strong durability. 4. After-sales service and support Excellent after-sales service and support can ensure that the equipment is maintained and maintained in a timely manner during use and ensure the normal operation of the equipment. After-sales service network: Evaluate whether the after-sales service network of the equipment manufacturer or seller is complete and whether it can provide timely technical support and maintenance services. Warranty period and maintenance policy: Understand the warranty period and maintenance policy of the equipment to ensure that the equipment can be handled in a timely manner when it fails. 5. Market feedback and user evaluation Understanding the reviews and feedback of other users on the market about concrete laser levelings can help to more fully evaluate the performance of the equipment. Market reputation: Understand the reputation and user reviews of the device in the market by consulting relevant forums, social media and other channels. Professional evaluation: Refer to the evaluation reports of concrete laser leveling machines by professional organizations or media to understand the performance, advantages and disadvantages of the equipment. To sum up, evaluating the performance indicators of concrete laser leveling requires comprehensive consideration from multiple dimensions. Through a comprehensive evaluation of the equipment's leveling efficiency, flatness accuracy, equipment stability, laser control system, energy consumption and environmental protection, ease of operation, maintenance and upkeep, durability and lifespan, adaptability and adjustability of the construction site, Safety and protective measures, cost-benefit analysis, and after-sales service and support can provide comprehensive decision-making support for construction units to choose the appropriate concrete laser leveling. At the same time, paying attention to market feedback and user evaluations will also help to understand the actual performance and user satisfaction of the equipment, and provide a reference for the selection and use of equipment.