Technical Knowledge
Small laser leveling machine pouring leveling construction and control matters
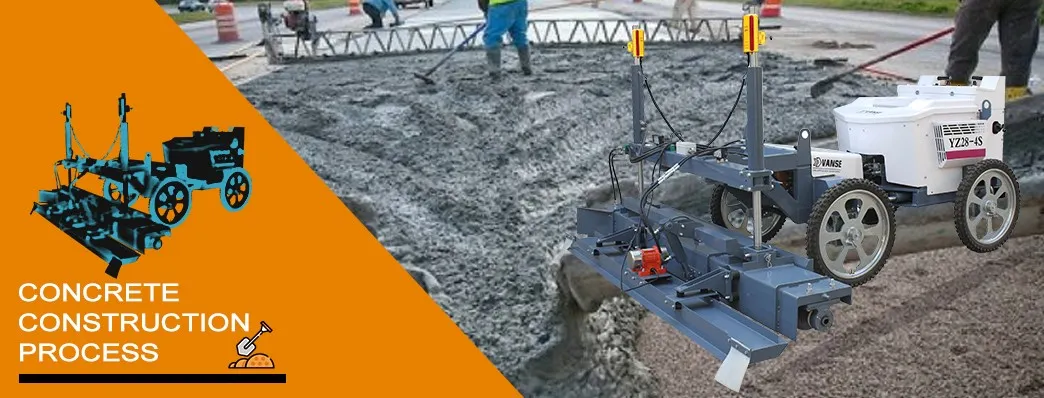
The LCD on the body of the small laser leveler also needs to be cleaned. You can use organic resin or lens cleaning cloth to wipe off the dirt. If there is too much dirt, it can be removed with a lens cleaning solution.
The small laser leveling machine is a kind of equipment that takes the laser as the reference plane, adopts the original imported receiving and sending system, and controls the leveling head in real time to achieve high-precision and fast leveling of concrete. The leveling machine has a certain understanding, so how to maintain the small laser leveling machine after normal use? The small laser leveling machine manufacturer will explain to you how to maintain the small laser leveling machine after use.
1. The LCD on the body of the small laser leveler also needs to be cleaned. You can use organic resin or lens cleaning cloth to wipe off the dirt. If there is too much dirt, it can be removed with a lens cleaning solution.
2. There will be a lot of dust and mud on the small laser leveling machine after construction. First, wipe off the dust on the small laser leveling machine, and wipe off the dirt and oil stains with tissue paper or cotton cloth.
3. If the laser signal is lost during the construction of the small laser leveling machine, the machine needs to be restarted, and the interval should be more than ten seconds.
4. If there are too many stains, you can use a soft cloth to soak in water diluted with a neutral detergent, and then wring it out for cleaning. Small laser leveling machine manufacturers remind everyone not to use volatile oil, thinner, gasoline and other chemicals Clean and wipe.
Small laser leveling machine pouring leveling construction and control items:
1. Preparation
①. After the base layer is processed, the small laser leveling machine is debugged, and the fixed reference level is drawn according to the original level; the non-woven fabric is laid, the side mold is supported, the laser transmitter is erected, and the ground is leveled according to the original level. Elevation introduced a small laser leveling machine. Small laser leveling machine manufacturer
②, conveying concrete
Commercial concrete is used, and the commercial concrete is transported to the entrance and exit of the garage by tank truck, and then transported to the construction site by a three-wheel dump truck.
③, standard college verification
Use a handheld laser receiver to check the level of the floor, introduce the level into a small laser leveler, and adjust the reference point (±0.00) on the leveler.
2. Concrete pouring
Pouring steps:
① After the formwork is supported, the warehouse should be cleaned one day in advance and rinsed and soaked with water before pouring concrete. When pouring is approaching, drain the open water and sweep the cement slurry or interface agent. At this time, no obvious water accumulation is strictly prohibited. If there is, it must be resolutely removed before paving concrete. Small laser leveling machine manufacturer
②. After the concrete is put down, it should be preliminarily leveled, and the leveling height should be 3 cm thicker than the elevation. Then level it with a small laser leveler. The corners that cannot be leveled can be leveled with a gasoline leveler or manually.
③ When the warehouse near the wall is being poured, after the leveling machine walks over, it must be scraped with a scraper in time. and so on.
④. For areas where concrete mixer trucks cannot be driven to the site, tractors must be used to transfer concrete. After the pouring is completed, the floor finishing construction begins when the concrete is initially set.
3. Receiver signal adjustment during construction
The laser signal (frequency of 10 times/second) received by the receiver of the small and medium-sized laser leveling machine in construction automatically adjusts the elevation in real time to ensure that the construction elevation is always at the set standard. Because the laser transmitter is fixed after being set up, it can ensure that the construction of a large area of ground does not produce cumulative errors.
During construction, the operator uses a hand-held laser receiver to detect the ground after the construction of the machine to ensure that the flatness error is within the controllable range.
Thanks to All the Friends Who Support and Trust Shandong Vanse Machinery Technology Co., Ltd.
If you want to know more about Shandong Vanse Machinery Technology Co., Ltd. or have any questions, please feel free to contact us:
Our Factory
Shandong Vanse Machinery Technology Co., Ltd.








Share this article

About the Author: Shandong Vanse Machinery Technology Co., Ltd.
Shandong Vanse Machinery Technology Co., Ltd. is a high-tech manufacturer specializing in concrete construction machinery, including laser screeds and related equipment. The company integrates R&D, production, and global sales, with products exported to over 60 countries and widely used in infrastructure projects worldwide.
Previous Post
Next Post
Related Articles
You Might Also Like
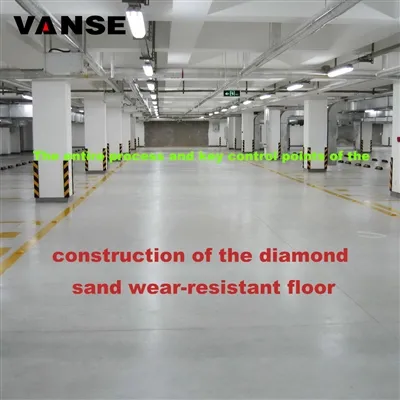
The entire process and key control points of the construction of the diamond sand wear-resistant floor
There are various methods for basement floor construction. Among them, the construction of diamond sand floor and diamond sand floor with curing agent is favored by many real estate projects due to its economic, wear-resistant, pressure-resistant, anti-pollution and easy-to-clean features. However, improper manufacturing processes can also lead to quality issues and potential risks. This article will respectively introduce the diamond sand wear-resistant floor from the perspective of technology and the prevention and control of common problems. 1. Diamond sand floor Compared with ordinary concrete floors, diamond sand floors have better wear resistance, compressive strength and impact resistance, and have a longer service life. However, from the perspective of microstructure, the surface of the diamond sand floor is relatively rough, and the capillary structure of concrete has a low resistance to the penetration, pollution and corrosion of substances such as acids, alkalis and oils. 2. Corundum + cured floor The construction of adding curing agent to the diamond sand floor. When the diamond sand floor is applied with a curing agent, it better makes up for the above deficiencies. Moreover, as the curing agent penetrates and forms a film, it enhances the integrity of the original surface, significantly improving its surface strength and wear resistance. After long-term use, it is obviously superior to the ordinary diamond sand floor in terms of cracking, powdering, and dusting, and is also easier to clean. It has extremely strong wear resistance, pressure resistance and impact resistance The diamond sand floor itself has excellent wear resistance. After adding a curing agent, the strength and hardness of the floor are further enhanced, and its wear resistance, pressure resistance and impact resistance are also significantly improved, and the durability of the floor is greatly enhanced. 2) Prevent sanding and dusting The main advantage of the diamond sand reinforced floor is its ability to prevent sanding and dusting. After the application of the curing agent, the surface hardness (indicated by the diameter of the indentation) and wear resistance (indicated by the length of the grinding pit) can be effectively enhanced. The surface becomes denser and has better integrity, which can effectively prevent sanding and dusting. 3) Waterproof, oil-proof and anti-corrosion The surface of a common diamond sand floor has pores that are hard to see with the naked eye. Water, oil and other corrosive liquids can seep into the interior of the floor through these holes and gaps. The most notable feature of the curing agent is its excellent sealing property, just like coating the floor with a film to prevent erosion. 1. The surface of the floor is firmly combined with the base layer, without any hollowing or sanding phenomena. 2. Surface layer quality: Uniform color, no obvious color difference, no scratches, no slag inclusions. The surface must not have cracks and hollowing is not allowed. 3. Gloss requirements: Achieve medium to high brightness, and the lamp should have a reflective effect when illuminated. 4. Joint: Uniform width, and the inside of the joint should be thoroughly cleaned. 5. The hardness of the floor should reach above 6.5 on the Mohs scale (tested by a hardness tester). 6. The trachoma rate shall not exceed 3 per square meter. 1. The strength of the concrete shall not be lower than C25. 2. The smallest possible water-cement ratio. A water-cement ratio that is too high can cause bleeding on the concrete surface and reduce the compressive strength of the concrete surface. Therefore, the water-cement ratio should be as small as possible, generally controlled below 0.5. 3. Commercial concrete should be used as much as possible. If on-site mixed concrete is used, its slump should be controlled at 1 to 3cm. The slump of commercial concrete is between 12 and 14cm. The diameter of the larger crushed stones shall not exceed 30mm. 4. When the concrete thickness is greater than 8cm, ordinary concrete should be used for pouring; when the concrete thickness is less than 8cm, fine aggregate concrete should be used for pouring. 5. Concrete should be leveled immediately after pouring, with a flatness of no more than 2mm within a 2-meter range. 6. Before the surface layer construction, the base concrete and vibration slurry should be sufficient (not less than 5mm). 7. The mud content of sand and gravel in concrete shall not exceed 2%. 8. After vibration grouting, the bleeding of the concrete should be uniform. If there are water pits, they must be removed and the surface leveled again; otherwise, the flatness of the diamond sand floor construction cannot be guaranteed. 1. Construction of diamond sand floor 1) The ground concrete is poured in sections and leveled immediately after pouring. When multiple locations are being poured simultaneously, pay attention to the construction sequence being carried out in one direction and consider the consistency of the mating surfaces. ② Concrete should be leveled with a long roller or a long straightedge after being pushed flat. Three to five hours after the concrete is poured, it should be observed that there is no bleeding on the surface and it has reached the initial setting state. 2) Use a mechanical trowel to tap the slurry in a round motion. For fine areas, use a wooden trowel to trim the edges. The main purpose is to smooth the concrete surface and reduce the floating slurry. Pay attention to troweling in the same direction as pouring. 3) Sprinkle the wear-resistant aggregate in two batches. In the first batch, evenly spread two-thirds of the wear-resistant material on the already troweled cement floor. 4) For the second time, evenly spread the remaining 1/3 of the wear-resistant material on the surface of the concrete, and use a mechanical trowel with a disc installed to work crisscross and cross at least twice. 5) Use a mechanical trowel (metal disc) to smooth it out multiple times back and forth. For the fine corners and edges, use a manual trowel in coordination with the construction. The time for the next process should be determined based on the temperature and humidity. 6) When the surface of the floor begins to harden, use a mechanical trowel with a metal blade to grind and smooth it, and repeat this operation 3 to 4 times. (Construction workers must wear soft flat shoes to avoid damaging the surface. The fine corners and edges should be polished by hand.) 7) Water curing should be carried out on the polished wear-resistant floor (mainly to prevent the evaporation of surface moisture and ensure the stable growth of the wear-resistant material's strength). The curing period is 7 days. 8) After the surface has cured for a certain period of time (5 to 6 hours after the completion of the wear-resistant material floor), use a mechanical trowel equipped with a metal blade for the final polishing and leveling. 9) Mold and compartment cutting (this can be done according to the actual situation on site and the owner's needs). Mold removal can be carried out the day after the completion of the diamond sand floor. During the operation, be careful not to damage the edge of the floor. The size of the compartments shall be determined by Party A on the third day after the completion of the diamond sand floor. 2. Application of penetrating liquid hardener (commonly known as curing agent) The original color of the diamond sand floor should be cured for more than 14 days, while the colored diamond sand floor usually needs to be cured for 28 days. Only after the color has matured can the penetrating liquid hardener be applied. The specific measures are as follows: Before construction, clean and remove debris, oil stains, paints, curing agents, etc. from the ground. If there are any pits or cracks, they should be repaired in advance with cement-based jointing mortar and maintained for 3 days. If no repair is needed, proceed with the construction directly. 2) Sprinkle water on the base layer until it is fully moistened. Do not sprinkle too much. 3) Use a 50-mesh resin grinding disc to grind the base layer, removing the floating slurry and stains on the base layer to make it free of roughness and gradually smooth. 4) After the 50-mesh grinding is completed, use a 150-mesh resin grinding disc for grinding. After grinding, use a high-power vacuum cleaner to suck up the mud and sewage on the surface of the base layer. 5) Sprinkle water on the surface of the base layer and grind it with a 300-mesh resin grinding disc (the ground should be ground evenly in a grid pattern, and the machine's pushing speed should be one step per second to grind off the remaining materials and fine scratches on the ground). After grinding, grind it with a 500-mesh grinding disc. Then, use a vacuum cleaner to suck up the wastewater and ventilate to dry the base layer. 6) After the base layer is dry, if the surface turns slightly white, apply the concrete sealant and hardener. Sprinkle the material evenly and spread it evenly with a mop. Keep the base layer surface moist for 30 minutes. If there is rapid penetration in some areas and it has dried, sprinkle the material again and use a mop to evenly moisten the base layer. 7) After 30 minutes, the surface of the concrete sealant and hardener begins to thicken. Water should be sprinkled on its surface and pushed back and forth with a long-bristled brush or floor scrubber to dilute the excess hardener and better penetrate into the base layer. After one hour, the excess material and water should be sucked dry with a vacuum cleaner to ensure that the base layer is dry for more than 12 hours. 8) After 12 hours, sprinkle water on the base surface of the completed construction material, and grind it with a 500-mesh resin grinding disc to remove the excess material. Then, grind it with a 1000-mesh grinding process. After grinding, use a vacuum cleaner to suck up the wastewater. 9) After 12 hours, the base layer has basically dried. Then, it is ground and polished with a 2000-mesh resin grinding disc to gradually give its surface a lustrous appearance. 10) For each mesh size, the grinding discs should be cross-ground 3 to 5 times in both the longitudinal and transverse directions. 11) Special treatment ① Corner and edge treatment: Large machinery can only be used for large-scale grinding. For corner and edge positions, a portable Angle grinder should be used for grinding and polishing, following the same method as for large-scale construction. When the base layer has poor strength and severe sanding, it is necessary to reinforce the base layer first, and then proceed with the normal construction process. First, use a 300-mesh resin grinding disc to remove the floating slurry on the surface of the base layer. Then, evenly sprinkle the concrete sealant and hardener to ensure it fully wets and penetrates into the base layer. After 12 hours, when the concrete sealant and hardener has cured and the strength of the base layer has improved, follow the normal process: 50-mesh grinding (water grinding) → 150-mesh grinding (water grinding) → 300-mesh grinding (water grinding) → construction materials → 12-hour drying and curing → 500-mesh grinding (water grinding) → 1000-mesh grinding (water grinding) → 2000-mesh grinding (dry grinding). The aesthetic effect of the floor cannot be achieved without meticulous control during the construction process. Besides strictly adhering to the corresponding techniques and methods, the prevention of common quality problems also requires attention. If the construction is not done properly, many problems will occur during later use. Now let's talk about the common quality problems of the diamond sand wear-resistant floor and how to prevent them. There are mainly three reasons for the color difference of corundum: 1) Material selection issues; 2) The materials were not spread in several portions, the amount of materials used was insufficient, and the thickness was uneven. 3) Maintenance issues: The use of covering with plastic film for maintenance led to uneven evaporation of ground moisture. The area where the film comes into contact with the floor is whitish, while the area where it does not touch the floor is normal in color. Preventive measures Choose a manufacturer with stable and reliable product quality and a good reputation. 2) The spreading of materials should be carried out strictly in accordance with the requirements of the briefing in several portions, with a usage of no less than 5kg/m². 3) Plastic film curing is strictly prohibited. During summer construction, water spraying curing can be adopted in several batches (with an interval of 2 to 3 hours). The allowable deviation of ground flatness is ≤2.5mm/2m in both longitudinal and transverse directions. The reasons for the deviation during construction are: 1) The template setup is out of tolerance; 2) The concrete part was not leveled in accordance with the standard. 3) The wear-resistant material is not evenly spread. Preventive measures 1) Strictly calibrate the elevation lines. Set up steel rods every 2 meters or so. The elevation of the steel rods should be the same as that on the longitudinal seam formwork. Check with a level. 2) The joints should be roughened and leveled in advance. When pouring new concrete, the levelness should be consistent with that of the already poured ground. Any low-lying areas should be replenished and filled in a timely manner. 3) Wear-resistant aggregates should be spread in two portions. The first dosage should be two-thirds of the total dosage. Ensure that the mixture falls evenly. Do not throw it forcefully to avoid the separation of aggregates and cement. After the wear-resistant material has absorbed a certain amount of moisture, it is ground and dispersed with a grinding machine and then combined with the base concrete slurry. For the second spreading, apply the remaining one-third in a direction perpendicular to that of the first spreading. When spreading, first use a straightedge or a straight scraper to measure the levelness, and adjust the uneven areas of the first spreading. After spreading, immediately smooth and polish it, and repeat the grinding machine operation at least twice. When the grinding machine is in operation, it should be carried out alternately in the longitudinal and transverse directions, evenly and orderly, to prevent material accumulation. The third time mainly involves repair treatment. For low-lying areas, materials are replenished and leveled. For corners and edges that cannot be covered by the grinding machine, manual flattening and smoothing are adopted. There are the following situations regarding ground cracks: If the initial setting time of concrete is not well controlled and the diamond sand wear-resistant aggregate is scattered when the moisture content of the concrete is relatively low, it is easy to cause cracks after the construction is completed. 2) Improper construction methods, insufficient thickness of the wear-resistant layer (corundum layer), rapid water loss (such as excessive construction environment atmosphere, etc.), resulting in volume shrinkage and linear shrinkage, causing cracks or hollowing. 3) Improper maintenance: After the completion of construction, the ground was not maintained within the prescribed time or was not adequately watered for maintenance. When the concrete temperature is relatively high, pouring cold water for curing can also cause cracks. Note: When using only the diamond sand floor, it is recommended to use a maintenance agent (oily and film-forming effect) to maintain the floor. If the corundum is reinforced (or epoxy), water curing can be directly adopted. 4) The contraction joint was cut late, and cracks appeared due to thermal expansion and contraction. Under normal circumstances, it is advisable to cut the expansion joints 24 to 48 hours after the completion of the construction of the corundum floor. If it is too late, as the hardness of the floor gradually increases, the floor is prone to "cracking" and developing cracks during the cutting process. 5) If the spacing of the division joints is too large, cracks may also occur. Preventive measures 1) Strictly control the time of the first sprinkling of materials; 2) The concrete layer and the wear-resistant layer (corundum) are constructed simultaneously. 3) The curing time shall be no less than 14 days; 4) Reasonably control the cutting time; The spacing of the division joints should generally not exceed 6m*6m. Cause of formation 1) The roughening and polishing processes are rough. 2) Inadequate maintenance and insufficient maintenance time; 3) The spreading time of wear-resistant aggregates is not well controlled. Preventive measures 1) Use a grinding machine to thoroughly smooth, compact and roughen the ground for no less than three times, and use a floor trowel to thoroughly smooth and level the ground for no less than three times. 2) The curing time shall be no less than 14 days; 3) Strictly control the spreading time of wear-resistant materials. The timing of spreading wear-resistant materials varies as needed, depending on factors such as climate, temperature, and concrete mix ratio. Spreading too early will cause the wear-resistant material to sink into the concrete and lose its effect. If it is spread too late, the concrete will gradually lose its adhesive force due to solidification, preventing the wear-resistant material from fully bonding with it. The most convenient way to determine the time for spreading wear-resistant materials is to let your feet sink about 5mm when stepping on the ground, and then you can start the first spreading work. The moisture at the edges of walls, columns, doors and formwork disappears more quickly. It is advisable to prioritize the application of water to prevent the effect from being reduced due to water loss. 1. Local damage: Clean the damaged area thoroughly, soak it in water to moisten it, then repair it with a putty made of styrene-butadiene latex mixed with water and a hardener material that has screened out the aggregates. Finally, apply the styrene-butadiene latex mixed with water emulsion. 2. Large-scale damage: According to actual needs, lines can be drawn and sawn on the damaged area, the surface layer and part of the base layer can be chiseled off, then the area can be cleaned and moistened, the plain cement slurry can be swept, concrete can be poured, and finally the surface layer of the diamond sand hardener can be applied. 3. Floor peeling: The surface of the wear-resistant diamond sand floor curls and peels. Remedial measures: Cut and chisel off the peeling area (chiseling it into a pitted surface), spray water on the pitted area to moisten it, then apply repair mortar of the same grade as the concrete and press it down to level the ground. Finally, apply a curing agent. 4. Remedial measures for cracks in diamond sand floor: 1) Cracks in areas with requirements for anti-seepage, impact resistance and wear resistance on the surface should undergo surface treatment. 2) For cracks that can affect the integrity, strength, impermeability and steel bar corrosion of the structure, grouting treatment should be carried out. 3) For cracks that endanger the safe operation of buildings, in addition to grouting treatment, other reinforcement measures should also be taken when necessary. 4) Cracks that are sensitive to temperature should be treated when the crack opening is relatively large in the later stage of the low-temperature season. 5) Flexible materials must be used to treat active cracks. Note: The parameters provided in this document are for reference only and are not mandatory. Due to differences in technical characteristics between different brands and models of laser levelers, please consult the manufacturer for a suitable solution before actual operation. This reference document assumes no responsibility for any issues arising from failure to follow the manufacturer's instructions.What are the wearing parts of concrete power trowel?
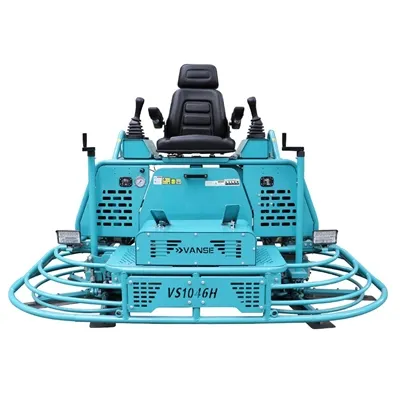
– Wear cause: The trowel blade is a part that is in direct contact with the concrete surface. During the working process, due to the continuous friction with the concrete, the blade edge is easily worn. And when facing a rough concrete surface or concrete containing hard particles, the wear rate will be faster. For example, if there are unmelted ice or large sand particles in the newly poured concrete, the wear of the blade will be aggravated. – Impact and replacement: When the blade is worn, the trowel effect will deteriorate, and the flatness and finish of the ground will be reduced. Generally speaking, when the blade edge wears more than a certain degree (such as more than 2-3 mm) or there are obvious gaps or deformations, it needs to be replaced. When replacing the blade, make sure that the specifications of the blade match the trowel model and that it is firmly installed. – Wear cause: When the trowel is working, the bearing needs to withstand the radial and axial forces generated by the rotation of the trowel blade. At the same time, since there may be impurities such as dust and concrete particles entering the bearing in the working environment, the bearing wear will be aggravated. Moreover, long-term high-speed operation will also cause fatigue wear of the bearing. – Impact and replacement: The worn bearing will not run smoothly and make abnormal noises. In severe cases, the trowel blade of the trowel machine will not rotate normally, affecting work efficiency. If the bearing is found to be faulty, it should be replaced in time to ensure the normal operation of the trowel machine. – Cause of wear: During the working process, the drive belt needs to transmit power to drive the trowel blade to rotate. Due to long-term friction, stretching and possible overload, the belt is prone to wear. For example, when the trowel machine encounters greater resistance, if the motor continues to output power, the belt will bear greater tension and accelerate wear. – Impact and replacement: The worn belt will slip, making the speed of the trowel blade unstable, affecting the trowel quality. At the same time, excessive belt wear may cause breakage, making the trowel machine unable to work. Generally, the need for replacement is determined by observing whether the surface of the belt has cracks, wear and thinning, etc. – Wear cause: Spark plugs play a key role in the combustion process of the engine. As the number of uses increases, the electrodes of the spark plugs will gradually wear and the gap between the electrodes will become larger. In addition, carbon deposits in the combustion chamber will also adhere to the spark plugs, affecting their normal operation. – Impact and replacement: When the spark plugs are worn, the engine may have problems such as difficulty in starting, lack of power, and poor fuel economy. It is generally recommended to replace the spark plugs according to the mileage or time interval specified in the engine's instruction manual to ensure good engine performance.Quantitative evaluation of single-machine operation efficiency of concrete laser leveling machines (such as the number of square meters processed per day) and analysis of influencing factors
It is of vital importance to plan the construction period, conduct cost accounting and resource allocation for the construction party. The operational efficiency of a concrete laser leveling is not a fixed value; it is significantly influenced by multiple factors. Therefore, we provide a range reference and theoretical calculation method. In well-organized and well-conditioned industrial or warehouse floor projects, the typical operational efficiency of a concrete laser leveling is usually between 1,500 and 3,500 square meters per day. Lower limit (below 1,500 m²/ day) : It usually occurs in the following situations: Small in area, complex in shape, with many columns and reserved holes. The grassroots conditions are poor and require multiple treatments. The supply of concrete is unstable and there is a phenomenon of "waiting for materials". The team coordination is not proficient and the process connection is not smooth. Average/Good (2,000-2,500 m²/ day) : This is the efficiency that most well-planned projects can achieve. The working surface is relatively regular, the supply of concrete is continuous, and the teams work in perfect harmony. High efficiency (above 3,000 m²/ day) : It usually occurs in the following ideal situations: Warehouses and factories with large areas and blocks (over ten thousand square meters) and regular shapes. The base layer has a high degree of flatness, and the concrete quality is good with an abundant supply. Adopt the "multi-machine cooperative operation" model (such as two leveling machines working in coordination). The team is extremely experienced and all processes are seamlessly connected. We can understand the composition of efficiency through a simple formula: The daily operation area (m²/ day) = the effective working efficiency of the flattening head (m²/ hour) × the net daily operation time (hours) Effective working efficiency of the flat head (m²/ hour) : The working width of the leveling head of a concrete laser leveling usually ranges from 2.5m to 6m, with common models being 3m or 4m. The walking speed is usually adjustable between 0.5 and 1.5 meters per minute. Calculation example: Suppose a 3-meter-wide leveling is used and operates at an average speed of 1 meter per minute. The working area per minute = 3m × 1m/min = 3m ²/min The theoretical efficiency per hour = 3 m²/min × 60 min = 180 m²/h However, this is a purely theoretical value and does not take into account turning, positioning, overlapping areas, etc. Therefore, the effective working efficiency is usually taken as 60% to 80% of the theoretical value, that is, 180 m²/h × 0.7 ≈ 126 m²/h. Daily net working hours (hours) : A working day is calculated as 8 to 10 hours. The net operation time is far less than the total time, and the following non-productive time needs to be deducted: Wait for the concrete transport vehicle. Equipment fault debugging and laser instrument calibration. Workers take a break and hand over shifts. Area conversion, equipment movement. On well-managed construction sites, the net daily working hours may only be 4 to 6 hours. Comprehensive calculation Effective working efficiency: 126 m²/h Net daily working hours: 5.5 hours The daily working area = 126 m²/h × 5.5 h = 693 m² This calculation result seems lower than the empirical value because the concrete laser leveling is usually not a single-point operation. In practice, through efficient construction organization, a continuous operation of "spreading and initial leveling" and "laser fine leveling" will be achieved, thereby making the utilization rate of the leveling machine approach or even exceed its theoretical effective working efficiency, and thus reaching a high level of over 1,500 square meters per day. The factors influencing work efficiency can be classified into the following five major categories: Working surface area and shape The larger the area and the more regular the shape (such as a rectangle), the higher the efficiency. The equipment can operate continuously in a straight line for a long time, reducing the number of turns and repositioning. Small area and complex shape (multilateral, circular, with a large number of columns and equipment foundations) will significantly reduce efficiency, requiring frequent equipment movement and supplemented by a large amount of manual work. Floor design thickness: An increase in thickness means a greater volume of concrete is needed. The paving and supply time of concrete will become a new bottleneck. Although it has little impact on the speed of the leveling itself, it will prolong the overall operation cycle. Concrete supply capacity and continuity: This is one of the most crucial constraints. If the supply of concrete is interrupted, the leveling machine and the entire team will have to stop work and wait for materials. The position and efficiency of the pump truck also directly affect the feeding speed. The properties of concrete Slump/Spread: A moderate slump (such as dry-hard or plastic concrete used for flooring) is beneficial for supporting equipment. The slump is too large, the concrete is too soft, and it needs to wait for initial setting, which wastes time. If it is too small, it will be difficult to spread. Initial setting time: As mentioned in the previous question, the initial setting time determines the "operation window" of the concrete laser leveling. The time is too short, and the pressure on construction organization is huge. If the time is too long, it will affect the entry of subsequent processes (such as polishing). The flatness and quality of the base layer: The flatness of the base layer (usually gravel or plain concrete bedding) directly affects the working load of the concrete laser leveling. If the base layer is uneven, more concrete will be consumed to level it and the traveling speed of the leveling will be reduced. The proficiency of the construction team in cooperation The cooperation between the "front team" (responsible for unloading, initial spreading, and edge treatment) and the "leveler operator" is of vital importance. A well-coordinated team can ensure that the concrete materials are always kept at the optimal distance and volume in front of the leveling, achieving a smooth operation where "materials wait for people, not people waiting for materials". Process connection: Whether the connection between processes such as laser leveling, grinding machine polishing, and curing agent spraying is tight determines the assembly line rhythm of the entire floor construction The model and performance of the leveling: The power of the equipment, the track/wheel design, the width of the leveling head and the vibration frequency will all affect its adaptability and efficiency. The wider flat head covers a larger area at one time. The sensitivity of the laser emission system and receiver: The stability and accuracy of the system determine whether the operator needs to frequently stop for calibration, which directly affects the smoothness of the operation. Equipment reliability: Equipment failure can directly lead to work stoppages and cause huge losses. Weather conditions: High temperatures and strong winds will accelerate the evaporation of moisture on the surface of concrete, shorten the initial setting time, and bring huge pressure to the construction organization. Construction will be interrupted on rainy days. To maximize the operational efficiency of the concrete laser leveling, systematic planning and meticulous on-site management must be carried out Precise construction planning: Reasonably divide construction sections based on area and shape, and formulate detailed daily operation plans. Ensure concrete supply: Communicate fully with the mixing plant to ensure that its supply capacity matches the on-site consumption rate, and arrange the positions of the pump trucks properly. Strengthen team building: Use fixed and skilled teams to carry out clear division of labor and collaborative drills. Proper base treatment: Devoting efforts to the flatness of the base is like "sharpening the axe does not delay the woodcutting". Strengthen equipment maintenance: Before construction, conduct a comprehensive inspection and calibration of the leveling machine and laser system to prevent "working while faulty". Only by comprehensively optimizing these factors can the technical advantages of the concrete laser leveling be truly transformed into tangible high efficiency and high quality. Note: The parameters provided in this document are for reference only and are not mandatory. Due to differences in technical characteristics between different brands and models of laser levelers, please consult the manufacturer for a suitable solution before actual operation. This reference document assumes no responsibility for any issues arising from failure to follow the manufacturer's instructions.