Technical Knowledge
How to avoid a wavy surface during power trowel application?
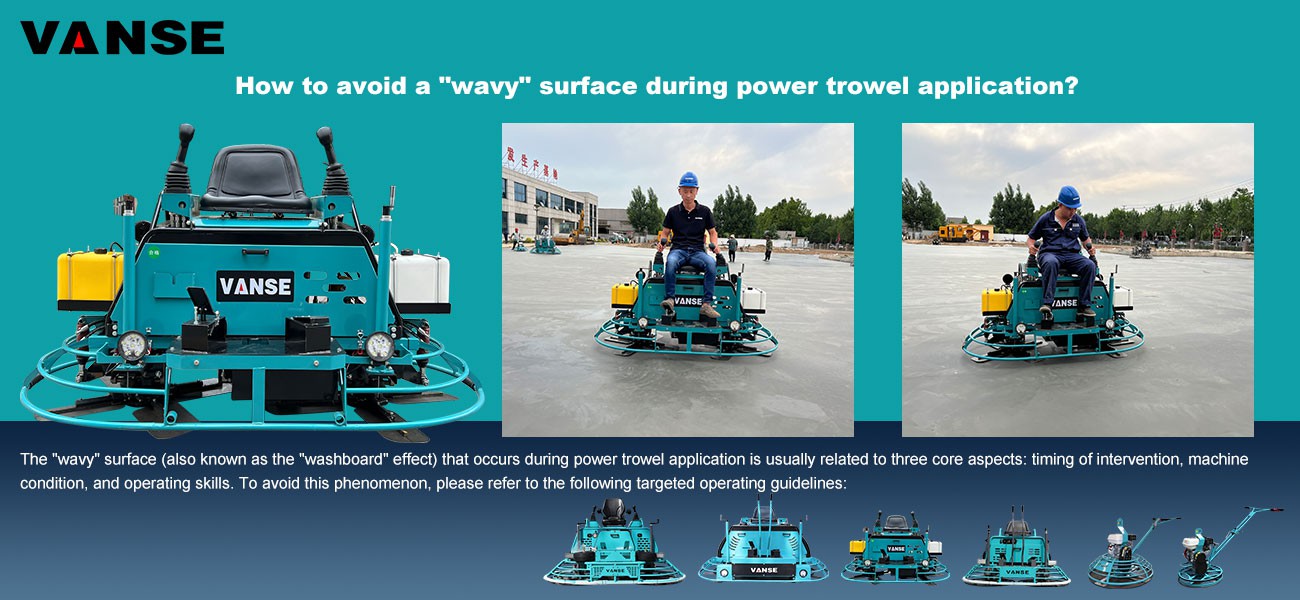
The "wavy" surface (also known as the "washboard" effect) that occurs during power trowel application is usually related to three core aspects: timing of intervention, machine condition, and operating skills. To avoid this phenomenon, please refer to the following targeted operating guidelines:
1. Strictly Control the Timing of Intervention
This is the most common reason. If troweling begins when the concrete is too soft, the blades will push the slurry up, creating waves.
Footprint Test: The optimal time to begin slurry application/troweling is when the worker stands on the concrete and the footprint depth is approximately 3mm-5mm.
Initial Use of Float Pans: It is recommended to use slurry pans (float pans) for the first step. The large contact area and even pressure of the pans effectively eliminate minor undulations left from the initial paving and prevent the blades from directly cutting into the soft, wet concrete and creating grooves.
2. Precise Pitch Control for Blade Angle
Improper blade angle adjustment is the direct physical cause of wavy patterns.
From Flat to Steep: During the first pass, the blades should be kept nearly horizontal (0° – 5°). As the concrete hardens, gradually increase the angle with each subsequent pass.
Avoid Prematurely "Forced" Starts: If the blade angle is adjusted too large while the concrete is still relatively wet, the blade tips will cut into the surface like a "shovel," creating stepped wavy patterns.
3. Standardize Machinery Operation Paths
Overlapping Construction: Each troweling path should overlap the width of the previous path by 1/3 to 1/2.
Cross-shaped Method: Change the troweling direction. If the first pass is east-west, the second pass should be north-south, using different dimensions of cutting to counteract textures created in a single direction.
Uniform Speed Movement: Keep the trowel moving smoothly and continuously. Dwelling in the same position for too long or suddenly accelerating will cause localized sinking.
4. Maintenance and Inspection of Mechanical Equipment
Vibration or imbalance of the equipment itself can also cause uneven surfaces.
Blade Balance: Check if the blades of the power trowel are unevenly worn, bent, or loose. Any blade with inconsistent height will cause "jumping" during high-speed rotation.
Bearings and Cross Assembly: Check the cross assembly of the power trowel for clearance or play.
Summary and Comparison Table
| Causes | Manifestations: | Corrective Measures: |
| Premature intervention | Surface slurry thickness and depth vary | Wait for the concrete to harden until the footprint is 3-5mm deep. |
| Excessive angle | Distinct stepped horizontal lines | Initially keep the blades horizontal, gradually increasing the angle. |
| Simple path | Undulating along the paving direction | Use the cross-hatching method to smooth the surface multiple times. |
| Uneven blades | Regular arc-shaped scratches | Replace or recalibrate the blades to ensure even stress on all four blades. |
You can check these aspects: What is the current concrete slump? And did you use a trowel during the first pass of construction?
Note: The parameters provided in this document are for reference only and are not mandatory. Due to differences in technical characteristics between different brands and models of laser levelers, please consult the manufacturer for a suitable solution before actual operation. This reference document assumes no responsibility for any issues arising from failure to follow the manufacturer's instructions.
Thanks to All the Friends Who Support and Trust Shandong Vanse Machinery Technology Co., Ltd.
If you want to know more about Shandong Vanse Machinery Technology Co., Ltd. or have any questions, please feel free to contact us:
Our Factory
Shandong Vanse Machinery Technology Co., Ltd.








Share this article

About the Author: Shandong Vanse Machinery Technology Co., Ltd.
Shandong Vanse Machinery Technology Co., Ltd. is a high-tech manufacturer specializing in concrete construction machinery, including laser screeds and related equipment. The company integrates R&D, production, and global sales, with products exported to over 60 countries and widely used in infrastructure projects worldwide.
Previous Post
Next Post
Related Articles
You Might Also Like
How does the concrete laser leveling machine deal with complex terrain and irregular ground?
When dealing with complex terrain and irregular ground, the concrete laser leveling can take the following measures: 1. Flexible reference plane setting: When the laser leveling machine performs automatic leveling, it can set an accurate reference plane (line) according to actual needs. For complex terrain and irregular ground, you can choose an appropriate datum setting method according to the characteristics of the terrain. For example, when the main focus is to control the height, the tightrope method can be used; when the main focus is to control the thickness, the floating datum beam method can be used. In this way, the leveling machine can adapt to changes in terrain according to the adjustment of the datum. 2. Precise laser positioning: The laser leveling machine achieves precise positioning and control through the laser measurement and control system. On complex terrain and irregular ground, the laser measurement and control system can sense changes in the ground in real time and adjust the operation of the leveling machine through the control system to ensure the flatness of the ground. 3. Intelligent control system: Modern concrete laser leveling machines are usually equipped with intelligent control systems that can automatically adjust the operating parameters and working methods of the leveling machine according to changes in terrain and ground. This intelligent control system can monitor the flatness of the ground in real time and automatically adjust parameters such as the speed and power of the leveling machine to achieve the best leveling effect. 4. Experienced operators: For complex terrain and irregular ground, the experience and skills of the operator are also very important. Experienced operators can flexibly adjust the operating methods and parameters of the leveling machine according to changes in terrain and ground, ensuring that the leveling machine can achieve ideal leveling effects in complex environments. To sum up, the concrete laser leveling machine can handle complex terrain and irregular ground well through flexible datum setting, precise laser positioning, intelligent control system and experienced operators to ensure the leveling work. progressed smoothly.How to do a good job of laser leveling machine construction cooperation ?
In order to ensure the construction quality of concrete floors, more and more construction units are choosing to use precision laser leveling machines to lay concrete floors. However, in the process of actual construction work, because some enterprises do not cooperate in the construction work in place, or do not strictly follow the regulations and operate correctly, the problem of low construction quality of concrete floors sometimes occurs. In order to avoid the recurrence of this kind of situation, our company has detailed some construction cooperation matters during the construction process of the laser leveling machine as follows, and we hope that the relevant construction personnel must keep in mind. ❖Wire setting and leveling at the wall: Since the laser leveling machine at the wall cannot be touched, manual leveling is required within 200mm from the wall, so line setting is required as a reference for manual leveling. At the same time, 2 to 3 benchmark points (ground design elevation, ie ±0.0) that will not be disturbed during the construction period are set up for the laser leveling machine at one time, and good communication with each other is required. Bench point accuracy ±1mm. ❖Set formwork (steel formwork, position according to design requirements) along the periphery of the column to form separation joints. The elevation of the top surface of the formwork should be controlled within +0mm and -2mm, so as not to affect the flatness of the joints. ❖Install the construction joint formwork (steel formwork is recommended) along the range to be poured on the day, and the formwork should reserve holes with a spacing of 300mm for the insertion of dowel bars. The elevation of the top surface of the formwork should be controlled within +0mm and -2mm, so as to avoid large deviations in the flatness of the joints of different warehouses. ❖Establishment of the laser transmitter: It is intended to be erected on the column. The specific position should be set in a better position according to the amount of shop injection on the day. If it cannot be erected on the column, it should be erected on a special tripod. ❖In order to ensure the quality of concrete floor paving, each group needs to arrange 10-12 workers to cooperate to level the surface of the concrete paved on the ground, so that the stacking height is slightly higher than the design level (about 20-30mm). At the same time, for the parts near the wall, the outcropping pipeline and the surrounding formwork, arrange 2 workers to manually smooth the concrete material about 20~30cm away from the wall (formwork) side (using a 2m scraper and an iron trowel). Workers responsible for plastering must be trained skilled plasterers. These workers must obey the command and follow the arrangement in order to ensure the quality of the construction. ❖Since the thickness of the concrete reaches 200mm, and due to the setting of steel mesh, in order to ensure that the concrete is compacted by vibration, this project needs to arrange a vibrator to cooperate with the vibration. At the same time, in order to ensure that the protective layer of steel mesh reaches the thickness required by the design (70mm), it is necessary to arrange in advance to manually lift the steel mesh and place support blocks in the area to be laid. ❖The width of the concrete material laid on the platform is required to be no more than 5m each time, and the length is subject to the formwork boundary. The construction direction is from left to right (along the short side direction), from front to back (along the long side direction). The daily injection volume is recommended to be 1200~1500㎡. Calculated on the basis of 12 hours of working time per day, this requires a feed rate of 30 to 40m³. ❖Others: In order to ensure the flatness of the ground, special attention should be paid during the construction of the laser leveling machine: the slump of the concrete sent to the platform must be consistent each time; the concrete feeding speed must reach 40m/h or above, and each batch of concrete The initial setting time must be consistent; ensure that the formwork elevation is accurate, and cannot be disturbed during construction; the environment is coordinated. The concrete floor that has just been constructed cannot be exposed to sunlight, wind, rain, etc. that are unfavorable to concrete health.How are complex slopes, two-way drains,or 3D floor designs poured using a concrete laser leveling?
Excellent question. You've pinpointed the exact transition from basic to advanced laser leveling. Moving beyond flat slabs to complex slopes, drains, and 3D designs is where modern laser leveling technology truly becomes revolutionary. It shifts from being a simple leveling tool to a robotic 3D concrete printing and finishing system. Here's a detailed breakdown of how it's done, focusing on the advanced systems you mentioned. The critical leap is abandoning the single spinning laser plane (which only creates a flat surface at a fixed grade). Instead, 3D Profiler Systems or 3D Machine Control is used. This system integrates three key components: The 3D Design Model: A digital blueprint (CAD file) of the finished slab, including all slopes, drains, and elevations. This is often a Digital Terrain Model (DTM). The Positioning System: Typically a robotic total station or GPS rover that tracks the leveling's exact location (X, Y, and Z) on the job site in real-time. The Laser leveling's Onboard Computer: This brain takes the design model and the real-time position, calculates the exact required height of the leveling head at that precise coordinate, and automatically adjusts the machine. Design: Engineers create a precise 3D model of the slab. For a two-way drain, this is a warped surface (a parabola or cone) sloping to a central point. For a ramp with a cross-slope, it's an inclined plane. For truly complex 3D floors (e.g., skate parks, test tracks), it's a fully sculpted surface. Site Calibration: The 3D model is geo-referenced to the physical job site. Surveyors establish control points. The robotic total station is set up with a clear view, and its position is registered in the same digital coordinate system as the design model. Machine Setup: A prism or GPS receiver is mounted on the laser leveling. The total station now "sees" the leveling and relays its position 5-10 times per second to the leveling's computer. This is where the magic happens. The process is fully model-driven. For a Two-Way Drain (Warped Surface): The operator drives the leveling onto the fresh concrete in a systematic pattern (e.g., spiral out from the drain or back-and-forth passes). In real-time, for every inch the machine moves: The total station reports: *"You are at coordinate X=105, Y=87."* The computer checks the 3D model: *"At coordinate (105,87), the design elevation is Z=100.25 inches."* The computer commands the leveling's hydraulic cylinders: *"Raise/Lower the strike-off head to exactly 100.25 inches NOW."* The leveling head continuously adjusts, tilting subtly in all directions, to perfectly match the design's curvature. It creates a smooth, mathematically perfect bowl without any manual grade checking. For a Slope or Ramp (Inclined Plane): The process is identical. The model defines a constant slope. As the leveling moves up the ramp, the computer constantly updates the target height, keeping the leveling head precisely on the inclined plane. For Complex 3D Terrain (e.g., a Skate Park Bowl): The operator drives in a tight, overlapping pattern (like mowing a lawn). The leveling head acts like a 3D printer nozzle, constantly adjusting its height and tilt to "touch" the virtual design surface. One pass might place the concrete for the transition, the next for the flat bottom, all seamlessly. Eliminates Physical Forms: No need to build intricate wood forms to define curved drains or slopes. This saves immense labor and material. Unmatched Accuracy & Consistency: Achieves tolerances of ±1/8" (3mm) or better over the entire complex surface. Manual sloping is prone to waves, flat spots, and inconsistencies. Speed: Complex geometry can be placed and finished at the same speed as a flat slab-often 10,000+ sq. ft. per day. Monolithic Quality: Large, complex areas are poured in one continuous operation, eliminating cold joints and ensuring uniform density and strength, which is critical for waterproofing in drainage applications. Data Verification: The system can log "as-built" data, proving the floor was built to specification. The operator's role shifts from "grade checker" to machine pilot and concrete manager: Path Planning: Choosing the optimal driving pattern to efficiently cover the area without trapping the machine. Managing Concrete Supply: Ensuring a consistent volume of concrete is placed ahead of the leveling, critical for maintaining the design profile. Monitoring Systems: Watching for signal loss from the total station and ensuring the system is functioning. Edgework & Finishing: The laser leveling does not do edges. Skilled finishers still hand-work perimeter details, using the levelinged surface as their guide. They also perform final finishing (bullfloating, troweling) on the perfectly placed surface. Multi-Prong Laser leveling: For very large pours, machines with multiple, independently controlled vibrating heads can cover more area faster, with each head adjusting to the 3D model. Gyroscope & Inertial Systems: Used in tandem with GPS for areas where satellite signal is lost (e.g., inside buildings), ensuring continuous accuracy. Think of it like this: The 3D Model is the sheet music. The Robotic Total Station is the conductor, keeping time and position. The Laser leveling's Computer is the musician reading the score. The Hydraulic Cylinders & Vibrating Head are the instrument, playing the exact notes (elevations) to produce the final product: a perfectly shaped, densely consolidated concrete slab. This technology has transformed complex concrete flooring from a high-skill, labor-intensive craft into a precise, digital fabrication process, enabling designs that were previously too costly or difficult to achieve with consistent quality. Note: The parameters provided in this document are for reference only and are not mandatory. Due to differences in technical characteristics between different brands and models of laser levelers, please consult the manufacturer for a suitable solution before actual operation. This reference document assumes no responsibility for any issues arising from failure to follow the manufacturer's instructions.