Technical Knowledge
cold planer purpose
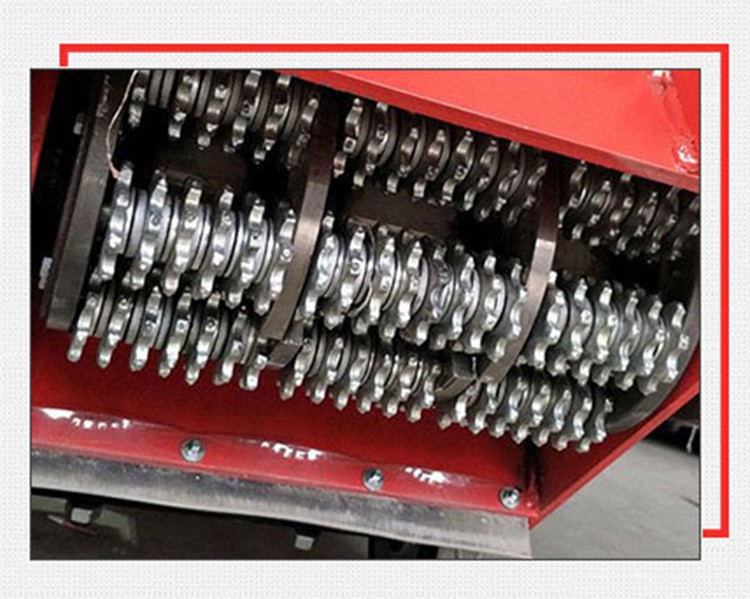
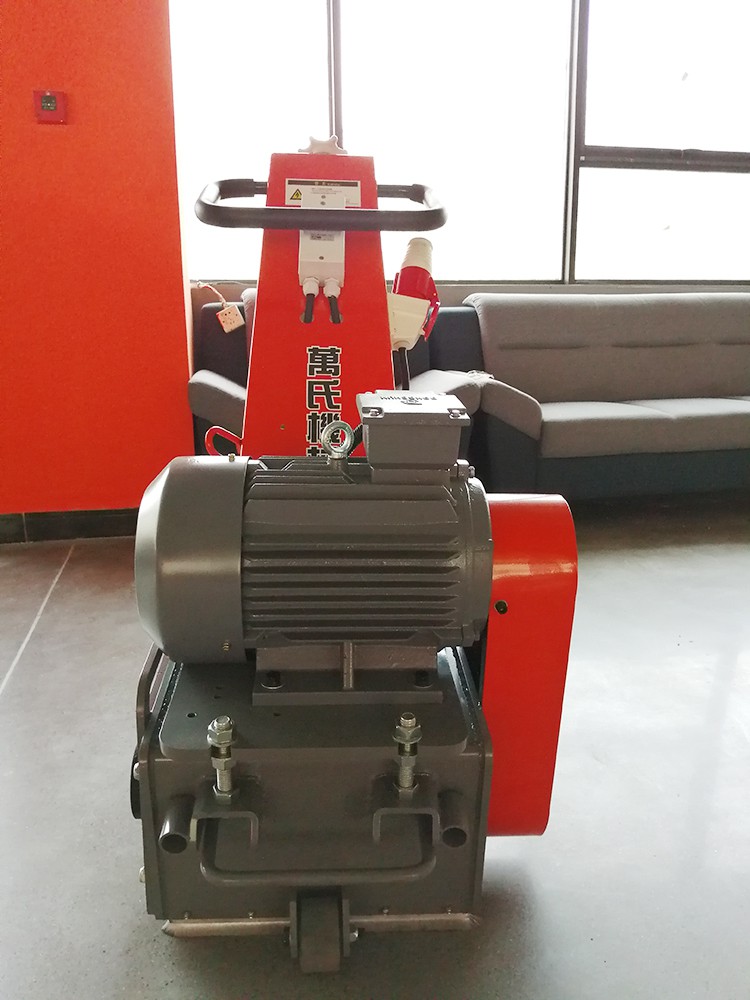
Cold planer is the key machine for pavement milling. Recycling of the road surface is one of the main reasons for milling a road surface. Milling is widely used for pavement recycling today, where the pavement is removed and ground up to be used as the aggregate in new pavement. For asphalt surfaces the product of milling is reclaimed asphalt pavement (RAP), which can be recycled in the asphalt hot mix asphalt (pavement) by combining with new aggregate and asphalt cement (binder) or a recycling agent. This reduces the impact that resurfacing has on the environment.
Milling can also remove distresses from the surface, providing a better driving experience and/or longer roadway life. Some of the issues that milling can remove include:
Raveling: aggregate becoming separated from the binder and loose on the road
Bleeding: the binder (asphalt) coming up to the surface of the road
Rutting: formation of low spots in pavement along the direction of travel usually in the wheel path
Shoving: a washboard like effect transverse to the direction of travel
Ride quality: uneven road surface such as swells, bumps, sags, or depressions
Damage: resulting from accidents and/or fires
It can also be used to control or change the height of part or all of the road. This can be done to control heights and clearances of other road structures such as: curb reveals, manhole and catch basin heights, shoulder and guardrail heights, and overhead clearances. It can also be done to change the slope or camber of the road or for grade adjustments which can help with drainage.
Thanks to All the Friends Who Support and Trust Shandong Vanse Machinery Technology Co., Ltd.
If you want to know more about Shandong Vanse Machinery Technology Co., Ltd. or have any questions, please feel free to contact us:
Our Factory
Shandong Vanse Machinery Technology Co., Ltd.








Share this article

About the Author: Shandong Vanse Machinery Technology Co., Ltd.
Shandong Vanse Machinery Technology Co., Ltd. is a high-tech manufacturer specializing in concrete construction machinery, including laser screeds and related equipment. The company integrates R&D, production, and global sales, with products exported to over 60 countries and widely used in infrastructure projects worldwide.
Previous Post
Next Post
Related Articles
You Might Also Like
How to ensure that the parameters and performance of the concrete laser leveling machine meet the requirements
To ensure that the parameters and performance of the concrete laser leveling machine meet the standards, the core is to establish " Source selection → Preoperative calibration → Intraoperative verification → Postoperative maintenance "The whole process is closed-loop controlled, and each link is closely linked to "parameter standards" and "matching of actual working conditions", avoiding single reliance on debugging or calibration. The factory parameters of the equipment itself are the performance bottom line and must be strictly checked upon purchase and arrival to avoid "innate deficiencies". Selection and benchmarking parameter standards: Clarify core parameter requirements: Based on construction requirements (such as ground flatness grade and working area), benchmark against national standards (such as "Concrete Laser Leveling Machine" GB/T 37497-2019), and lock in key parameters – laser system accuracy (≤±0.1mm/m), maximum leveling thickness (such as 100-300mm), travel speed (0-6m/min adjustable), and flatness error (≤3mm/2m) to ensure that the selected parameters cover construction requirements. Give priority to brands with "parameter traceability": require manufacturers to provide calibration certificates for laser transmitters and receivers (such as those issued by a third-party metrology agency) to confirm that the parameters of core components are within the validity period, and avoid purchasing equipment with "three no's" or ambiguous parameters. After unpacking, check the "document compliance" first: check the product certificate and instruction manual, and confirm that the standard values of each parameter (such as the effective distance of the laser signal and the working pressure of the hydraulic system) are clearly marked in the manual. Simple core performance test: Use a high-precision level (0.02mm/m) to check the levelness of the laser transmitter. After powering on, observe the signal stability of the receiver within a range of 5 meters (uninterrupted flashing). Manually push the leveler to check that the travel wheels are not stuck and the blade rises and falls smoothly, preliminarily eliminating mechanical faults. Calibration before use is the key to "making the equipment work according to the standard". The core system needs to be calibrated item by item according to the instructions and standards. Transmitter calibration: Place it on a stable base and adjust the bottom feet so that the built-in level bubble is centered (or the electronic level displays "0±0.1mm"). Set the "elevation reference" according to the instructions and use a tape measure to measure the height from the center of the transmitter to the ground. The deviation from the designed elevation must be ≤1mm. Receiver and mechanical linkage: Fix the receiver to the "zero point scale" of the lifting rod and ensure that the receiver sensing surface is flush with the bottom surface of the leveling blade (verify by placing a ruler close to the blade); start the equipment and let the receiver sense the laser signal. If the display on the operation panel is not "0", adjust it to zero using the "zero point calibration" button to ensure that "signal deviation = mechanical action deviation". Travel system: Mark a 10-meter straight line on the ground, start the leveling machine and move it along the straight line. After the line is drawn, use a tape measure to measure the deviation of the machine body. The requirement is ≤5mm/10m. If it exceeds the standard, use the "travel speed fine-tuning" function on the operation panel to calibrate the speed difference of the motors on both sides. Level the blade: Use a spirit level to press against both ends of the blade. If the bubble is offset, adjust the hydraulic cylinders on both sides of the blade until the spirit level shows level (deviation ≤ 0.02mm/m) to prevent the blade from tilting and causing a height difference on the ground. After calibration, performance needs to be verified through actual operation, and parameters must be monitored in real time during construction to avoid "calibration passed but operation failed". Pour 2-3㎡ concrete test blocks according to the normal process. After completion, use a 2-meter ruler + feeler gauge to check the flatness. The deviation is required to be ≤3mm/2m (in accordance with the "Concrete Structure Engineering Construction Quality Acceptance Code" GB 50204); use a laser altimeter to check the ground elevation. The deviation from the design value is ≤2mm. If it does not meet the standard, return for calibration. Test performance stability: Operate continuously for 30 minutes to observe whether the laser signal is continuously stable (the receiver indicator light does not flicker) and whether the blade raises and lowers in a timely manner (the blade moves within 0.5 seconds after the signal offset) to avoid parameter drift caused by long-term operation. For every 100 square meters of work, stop the machine and randomly check 3-5 points with a ruler. If the flatness deviation exceeds 3mm, stop the machine immediately to check whether the laser transmitter is shifted or the receiver is blocked by dust, and recalibrate in time. Pay attention to abnormal signals: If the operation panel displays errors such as "weak laser signal" or "low hydraulic pressure", stop the machine immediately for investigation to avoid operating with faults that may cause parameters to lose control. Equipment parameters will decay with use, and long-term maintenance is required to prevent performance degradation. The core is "regular inspection + recalibration upon expiration." Daily maintenance: preventing parameter drift After each use: Clean the lenses of the laser transmitter and receiver (wipe with a dust-free cloth to avoid scratches), and check whether the travel wheel and blade connecting bolts are loose (tightening torque is in accordance with the instructions, such as M16 bolt torque 40-50N·m). Weekly inspection: Check the hydraulic oil level (must be between the oil mark "MIN-MAX") and the circuit terminals for oxidation to avoid delayed operation due to insufficient hydraulic pressure or poor circuit contact. Perform a "simple recalibration" once a month: focus on calibrating the laser transmitter level and the receiver zero point to ensure that the parameters are within the standard range. Perform a "full recalibration" every 3 months or after 500 hours of operation: contact the manufacturer or a third-party metrology agency to conduct professional testing of the laser system's accuracy, travel linearity, and blade levelness, and issue a calibration report. If any parameters are out of tolerance, immediately adjust or replace components (such as aging laser modules). Ensuring that equipment parameters and performance meet requirements is essentially "Don't let standards remain on paperFrom benchmarking during model selection to precise calibration before use, real-time verification during operation, and regular maintenance, every step is based on measurable parameters, avoiding empirical judgment. Only by establishing a "traceable and verifiable" control system throughout the entire process can we continuously ensure leveling accuracy.The importance of a commissioning process before using a laser leveling machine
The trial run process is an experimental process before the laser leveler is officially put into use, and only the equipment that has been successfully tested can be officially put into use. It can be seen that the trial run is a very important step in the use of the laser leveler. In order to help everyone realize the necessity of this step, the following article mainly introduces the importance of the trial run process before using the laser leveler. 1. Clean the laser leveler, the surface of each component, and check whether all joints are firmly tightened. 2. All lubricating parts of the laser leveler are filled with oil, check whether the electrical system is intact, whether the limit switch is set correctly, whether the connection is reliable, and the no-load test. The lifting motor is lifted and lowered for no less than 10 times, requiring flexible transmission, high precision, parking, stable resistance of the main drive, normal sound, and after the empty car is put into trial operation, a load test is carried out. 3. According to the width of the corrected I-beam flange plate, adjust the position of the frame, and according to the thickness of the plate, adjust the correct position of the guide rod. 4. Start the laser leveler with power supply, start the laser leveler to run empty, ensure that the parts and components of each transmission part are running normally, there is no cassette, no overheating, and the load can be loaded. Use a crane to hang the welded H-beam on the roller table. 5. Start the drive roller to convey the steel into the laser leveler. This end exceeds the frame leveler. This end stops after exceeding the center of the correction wheel by about 150mm. Press the upper roller to reduce the linkage. When the upper roller contacts the workpiece, stop immediately, and then press the upper and lower pressure rollers. The pressure may have errors and can be adjusted at any time. 6. Correctly adjust the pressure during the test run of the laser leveler. The dial of the screw indicates 0.5mm per grid. The amount of over-deformation under pressure shall not exceed 1mm. However, the adjustment of the upper pressure roller can only be carried out during the stop process. The output of the workpiece is about 200mm. The flange plate after initial correction is perpendicular to the web to prevent over-correction. 7. If the correction amount needs to be adjusted, the workpiece is retracted into the main unit (the end is about 150mm from the center of the correction wheel) to adjust the reduction of the correction roller, start the main drive motor, and perform normal correction output. If multiple corrections are required on one side, the workpiece should be stopped immediately after the end of the workpiece is about 100mm from the center of the correction wheel, and the laser leveling machine workpiece should return to the front end of the front end about 150mm beyond the center of the correction wheel. The above article is all the information introduced by the manufacturer about the importance of the test run process before using the laser leveling machine. Do you understand it? If you feel interested in our products after reading the article, you can call us for details. Thank you for your reading and support.Common faults & solutions of laser leveling machines
As laser leveling machines become more and more widely used, minor problems encountered during construction also arise. After investigating and summarizing the problems encountered by customers during use, we found that these problems are basically caused by improper operation. Here is a brief summary. 1: The leveling head slides by itself Possible reasons: The hydraulic lock valve core of the laser control system is dirty, or the O-ring of the valve core is damaged and cannot seal. Solution: First clean the surface of the valve group. Lower the leveling mechanism so that the cylinder is not stressed. Remove the hydraulic lock and check if there is any stolen goods inside. If there is any stolen goods, throw it out with force. Check whether the sealing ring is damaged and replace it if it is damaged. 2: The lifting cylinder is not sensitive Possible reasons: The proportional valve core is dirty, or the valve core is damaged, or there is air in the oil pipe. Solution: Remove the proportional valve core and see if there is dirt inside the valve core, throw it out if there is any; open the lift switch and see if the valve core moves normally. Failure to move, one-way movement or slow movement indicates that the proportional valve is damaged. Needs to be replaced. Without dismantling the valve core, start the machine, turn on the lift switch of the oil cylinder, and check whether the oil pipe vibrates greatly. If it is larger, tap the pipe gently with the lift switch open to eliminate the gas in the pipe. 3: The water pump does not produce water Possible reasons: There is no water in the pump and negative pressure cannot be formed; dirt enters the water pump and the water pump is clogged. Solution: Add water to the water inlet pipe or connect the water inlet pipe directly to the faucet; if dirt enters the water pump, first connect the water inlet pipe to the faucet, remove the water gun, and turn on the machine to see if the stolen goods can be flushed out. If that doesn't work, remove the water inlet valve bolt and clean out the dirt.