Technical Knowledge
Vanse The advantages of the world laser leveling machine
November 11, 2022

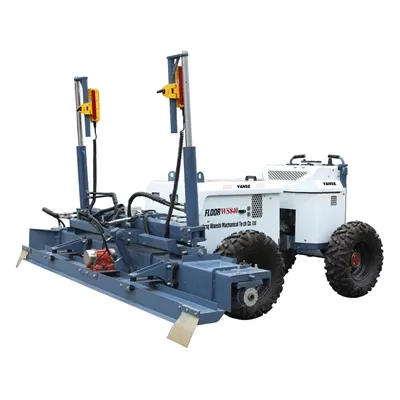
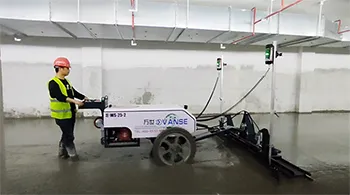
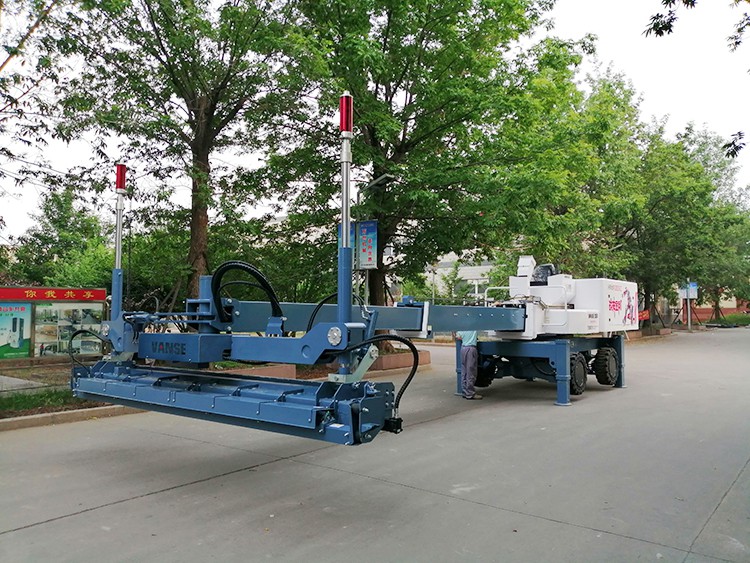
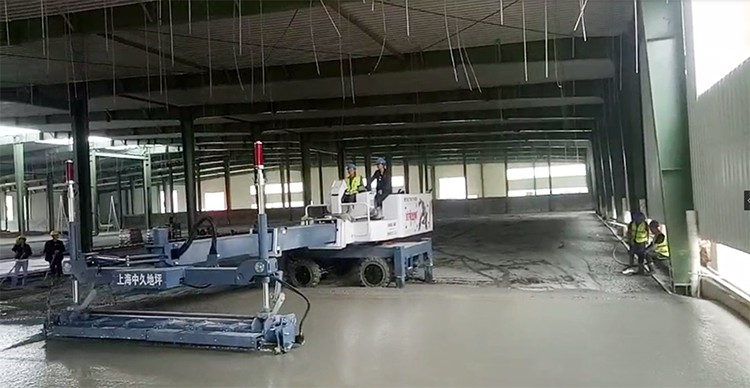
YZ40-4 large-scale telescopic boom laser leveling machine is equipped with laser system and full hydraulic control system,
which makes the concrete construction ground level more accurate, and at the same time of high-efficiency construction,
it can meet high-standard construction requirements. YZ40-4 large-scale telescopic arm laser leveling machine controls the
leveling head in real time through the laser receiver on the laser leveling machine, so as to realize the equipment for high-precision
and fast leveling of concrete.
1. High construction quality: The ground construction of laser leveling machine can significantly improve the flatness of the ground,
the average flatness can reach 2mm, and the flatness quality is more than 3 times higher than the traditional method. It can also realize
large area construction, reduce a large number of construction gaps, the required concrete collapse can be reduced, the concrete strength
is guaranteed, so that the ground integrity is good, not easy to crack.
2. Fast construction speed: more than 3 times the work efficiency than
the traditional beam vibrator, scraper, manual paving and so on, the average daily can complete 3,000 square meters of ground pouring,
especially suitable for the simple shape, large working surface of the floor layer construction.
3. Reduce the amount of template support:
with 20000 square meters of concrete pavement statistics, the traditional method needs to support 6300m side of the template, and the
use of laser leveling machine construction, support only 2400m, template consumption is only 38%.
4. High degree of automation, small labor intensity: the heavy manual labor into mechanical spreading, vibrating, leveling, pulping, so that the operator reduces 30%,
while reducing labor intensity. 5. High economic benefits: compared with the traditional process, the cost per square meter is reduced by 30%,
and the ground maintenance cost is reduced in the later stage, thus significantly improving the economic benefits.
Thanks to All the Friends Who Support and Trust Shandong Vanse Machinery Technology Co., Ltd.
If you want to know more about Shandong Vanse Machinery Technology Co., Ltd. or have any questions, please feel free to contact us:
Our Factory
Shandong Vanse Machinery Technology Co., Ltd.


About the Author: Shandong Vanse Machinery Technology Co., Ltd.

Shandong Vanse Machinery Technology Co., Ltd. is a high-tech manufacturer specializing in concrete construction machinery, including laser screeds and related equipment. The company integrates R&D, production, and global sales, with products exported to over 60 countries and widely used in infrastructure projects worldwide.

Shandong Vanse Machinery
Leading manufacturer specializing in high-performance concrete laser screeds, telescopic arm flatwork handlers, and mechanical ride-on power trowels.
Post overview
Main PRODUCT Categories
Need Machine Guidance?
Speak directly with Shandong Vanse field specialists for tailored equipment quotes and site planning.
Contact Us TodayRelated Articles
You Might Also Like
December 23, 2024
How to measure the compaction effect of concrete power trowel?
– Measurement tools and methods: Use a 2m ruler and a feeler gauge to measure the flatness of the concrete surface. Place the 2m ruler on the concrete surface and use the feeler gauge to measure the gap between the ruler and the ground. The smaller the gap, the higher the ground flatness and the better the compaction effect of the trowel. For example, in the construction of high-precision industrial plant floors, the flatness deviation is required to be within 2-3mm, which requires the trowel to have good compaction performance to meet this standard. – Industry standards and requirements of actual application scenarios: Different application scenarios have different requirements for flatness. For general outdoor road surfaces, the allowable flatness deviation may be 5-10mm; while for indoor high-end shopping malls, exhibition hall floors, etc., the requirements may be higher, and the deviation is usually 1-3mm. If the flatness of the ground after compaction by the trowel can meet the requirements of the corresponding scene, it means that the compaction effect is good. – Test method: The density can be indirectly reflected by surface hardness test. Use a rebound hammer to test the concrete surface. The higher the rebound value, the harder the concrete surface is and the higher its density may be. In addition, the core sampling method can also be used to observe the internal structure of the concrete core sample. If the core sample has small pores and a dense structure, it means that the compaction effect of the trowel machine is good. – Influence on concrete durability: Good density can improve the durability of concrete. A concrete surface with good compaction effect can effectively resist the erosion of external environmental factors (such as moisture, chemicals, etc.) and reduce the occurrence of cracks. For example, on the concrete surface of hydraulic structures, high density can prevent water penetration and extend the service life of the building. – Visual evaluation and standards: Observe the uniformity of the trowel marks on the concrete surface with the naked eye. Uniform trowel marks indicate that the pressure applied by the trowel machine to the ground during work is uniform and the compaction effect is good. If the surface is obviously uneven, wavy, or partially troweled, it means that there is a problem in the compaction process. – Correlation with compaction quality: The uniformity of the trowel marks reflects the stability and uniformity of the contact between the trowel blade and the ground during the compaction process. Stable and uniform contact can ensure that the concrete particles are evenly distributed under pressure, thereby improving the compaction quality. For example, in the construction of a large area of parking lot floor, uniform trowel marks can make the ground look smoother and more beautiful, and also mean a good compaction effect. – Laboratory testing and field evaluation: In the laboratory, standard concrete test blocks can be made, one part is compacted by the trowel machine, and the other part is not treated, and their compressive strength is tested under the same curing conditions. On site, it can be evaluated by testing the actual bearing capacity of the concrete structure. If the strength growth of the concrete compacted by the trowel machine meets the expected design requirements, or even exceeds that of the untreated concrete, it means that the compaction effect of the trowel machine helps to improve the strength of the concrete. – Importance to building structure safety: Concrete strength is an important indicator of building structure safety. Good compaction effect can make the internal structure of concrete denser, effectively improve the strength of concrete, and thus ensure the safety of the building structure. For example, in the concrete construction of key parts such as the foundation, beams and columns of a building, the compaction effect of the trowel plays a vital role in the long-term stability of the structure.Read More
September 23, 2025
Causes and Treatment of Concrete Cracking
Concrete cracking is a very common and complex problem. Below, I will explain in detail the main causes of concrete cracking, how to identify different types of cracks, and the corresponding treatment and prevention measures. Concrete cracking can be categorized into two main types: early cracking and late cracking. Plastic settlement cracking: Cause: After pouring, concrete is still in a plastic state. Aggregates (gravel, sand) sink, while the cement slurry rises (called "bleeding"). When this settling is hindered by rebar, formwork, or larger aggregate, cracks develop on the concrete surface along the direction of the rebar. Characteristics: Surface cracks typically occur along the direction of the rebar. Plastic shrinkage cracks: Cause: Before the concrete finally sets, surface moisture evaporates faster than the rate at which moisture seeps upward, causing the surface to shrink rapidly while the concrete inside remains plastic, resulting in irregular, network-like cracks and crazing. Causes: High temperatures, strong winds, low humidity, and inadequate curing. Temperature stress cracks (caused by hydration heat): Cause: After pouring large volumes of concrete (such as foundation slabs and beams), the cement hydration reaction releases a large amount of heat, causing the internal temperature to rise sharply (up to 50-70°C). This rapid heat dissipation from the surface creates a significant temperature difference between the inside and outside, generating thermal stress. When the tensile stress exceeds the concrete's early tensile strength, cracking occurs. Characteristics: Cracks are deep and wide, often occurring at cross-sectional changes or in the middle of the structure. Construction process issues: Excessive water addition: Adding water arbitrarily for ease of construction increases the water-cement ratio, severely reducing concrete strength. Improper vibration: Excessive vibration causes aggregate sinking and water seepage; inadequate vibration results in loose concrete. Failure to apply a secondary trowel to the surface before initial setting prevents the closure of early plastic cracks. Drying shrinkage cracks: Cause: After concrete hardens, excess moisture gradually evaporates, causing volumetric shrinkage. When this shrinkage is constrained by external forces (such as foundations and columns) or internal forces (such as rebar), tensile stresses are generated, leading to cracking. This is the most common type of crack. Characteristics: Cracks are shallow and fine, often forming an irregular network or parallel lines. Load-induced cracking: Cause: The loads borne by the structure (such as deadweight or operational load) exceed its design capacity. Characteristics: The cracks are relatively wide, and their direction is related to the nature of the load (e.g., vertical cracks in the middle of the beam bottom are bending cracks, while diagonal cracks at the ends of the beam are shear cracks). These cracks require special attention, as they may affect structural safety. Uneven foundation settlement: Cause: Uneven foundation soil quality, softening due to waterlogging, or excessive loads lead to uneven foundation settlement, resulting in additional stress within the structure and cracking. Characteristics: Cracks are often penetrating, with their direction related to settlement. Alkali-aggregate reaction: Cause: The alkali in the cement reacts chemically with the active silica in the aggregate, forming an expansive gel. This gel expands in volume after absorbing water, causing concrete cracking. Characteristics: A map-like or network-like pattern of cracks with silicone gel seeping out of the surface. Rebar Corrosion Cracks: Cause: Insufficient concrete cover or carbonization reaching the rebar surface. In the presence of water and oxygen, the rebar rusts, causing the rust to expand several times in volume, cracking the concrete. Characteristics: Cracks run along the rebar, later accompanied by brown rust. Before treating cracks, it is necessary to first analyze and determine the crack type, width, depth, stability, and impact on structural safety. Treatment methods are primarily categorized as surface sealing and internal reinforcement. Surface Sealing Method (Suitable for Micro-Cracks <0.2mm) Brushing method: Apply a cement-based penetrating crystallizing waterproofing material, epoxy resin, or polymer-modified cement slurry directly to the crack surface to seal the crack and prevent the intrusion of moisture and harmful substances. Grooving and filling method (suitable for static cracks 0.2-0.5mm wide): Steps: Chisel a "V" or "U"-shaped groove along the crack → Clean thoroughly → Apply a primer → Fill with epoxy resin mortar, polymer cement mortar, or a specialized sealant. Low-pressure grouting (injection method) (suitable for cracks 0.1-1.5mm wide) Steps: Surface cleaning: Clean the area around the crack. Inserting grouting nozzles: Attach grouting nozzles at regular intervals along the crack. Crack sealing: Use sealant to seal the crack surface to prevent grout from leaking. Pressure grouting: Use a low-pressure syringe to inject epoxy or polyurethane grout into the crack from a grouting nozzle until grout is released from the adjacent grouting nozzle. Surface finishing: After the grout has solidified, remove the grouting nozzle and smooth the surface. Structural reinforcement method (suitable for wide cracks that affect bearing capacity) Bonding fiber composite materials (carbon fiber cloth/plate): High-strength carbon fiber cloth is bonded to the surface of the cracked area, utilizing its high tensile strength to share the load. Bonding steel plates: Steel plates are bonded to the concrete surface using structural adhesive to increase structural rigidity. Enlarging the cross-section: A layer of concrete is wrapped around the existing component to increase its cross-sectional dimensions and reinforcement. Prestressing: Prestressed tendons are used to actively apply pressure to the structure, offsetting some of the tensile stress. Important: For cracks caused by uneven foundation settlement, alkali-aggregate reaction, etc., the root cause must be addressed first (such as strengthening the foundation) before crack repair. Prevention is far better than cure. Strict control should be applied to all aspects of the process, including materials, design, construction, and maintenance. Materials: Optimize mix proportions, reduce the water-cement ratio, and use high-efficiency water reducers. Use well-graded aggregates and reduce cement dosage to reduce hydration heat and shrinkage. Use low-heat or medium-heat cement for large-volume concrete. Design aspects: Ensure proper reinforcement placement and add structural reinforcement (such as crack-resistant steel mesh) in areas prone to cracking (such as around holes and at cross-section changes). Properly establish expansion joints and post-cast joints (for extra-long structures). Ensure sufficient concrete cover thickness. Construction: The addition of water on site is strictly prohibited. Strictly control the pouring and vibration processes to ensure uniform compaction and avoid over-vibration and missed vibration. Implement cooling measures (such as water-cooling aggregates) during hot seasons and insulation measures in winter. Perform secondary troweling and compaction promptly to eliminate plastic cracks. Maintenance (critical!): Early Curing: Immediately cover with plastic sheeting or a curing blanket after pouring to prevent rapid evaporation. Sufficient Moisturization: After final set, begin regular watering or use a curing agent to keep the concrete surface moist for at least 7-14 days. Insulation Curing: For large concrete volumes, monitor the temperature difference between inside and outside, implement insulation and moisture curing, and maintain the temperature difference within 25°C. Crack Types Main causes: Treatment Focus Prevention of core problems Plastic Shrinkage/Settlement Cracks Early water loss and impeded settlement Surface Sealing Timely screeding and covering to retain moisture Temperature Cracks Heat of hydration and large temperature difference between inside and outside Grouting Reinforcement Use low-heat cement, cooling, and thermal insulation Desiccation Shrinkage Cracks Later water evaporation and shrinkage Surface Sealing/Grouting Reduce the water-cement ratio and enhance moisture retention Load/Settlement Cracks Overloading and foundation problems Structural Reinforcement + Root Cause Treatment Reasonable design to ensure construction quality When you encounter concrete cracks, don't blindly address them. First, determine their nature and severity. For cracks that are wide, persistent, or potentially impacting structural safety, consult a professional structural engineer or testing company for evaluation. Based on the results, develop a sound treatment plan. Note: The parameters provided in this document are for reference only and are not mandatory. Due to differences in technical characteristics between different brands and models of laser levelers, please consult the manufacturer for a suitable solution before actual operation. This reference document assumes no responsibility for any issues arising from failure to follow the manufacturer's instructions.Read More
March 29, 2024
Laser leveling machine operation steps and slope adjustment?
•••▶★◀••• Introduction As an indispensable construction equipment in the modern construction industry, the laser leveler's efficient and accurate leveling capabilities provide a strong guarantee for the construction of large-area concrete floors. Correct operation of the laser leveler and reasonable adjustment of the slope can not only ensure Improve construction quality, improve construction efficiency and reduce costs. This article aims to introduce in detail the operating steps and slope adjustment methods of the laser leveling machine, with a view to providing clear and practical operating guidelines for relevant construction personnel. •••▶★◀••• Equipment inspection and preparation Before operating the laser leveling machine, a comprehensive equipment inspection and preparation must be carried out. Specific steps are as follows: 1. Check the appearance of the equipment to ensure that the leveler has no obvious damage, deformation or rust. 2. Check the power system, including engine, battery, etc., to ensure that it is in good condition and has sufficient fuel or power. 3. Check the laser system, including laser transmitter, receiver, etc., to ensure that they are intact and working properly 4. Check the walking system of the leveler, including tires, tracks, etc., to ensure smooth walking and no jamming. 5. Check the control system, including the operation panel, sensors, etc., to ensure that its functions are normal and the display is accurate. After completing the above inspection, the operator should be familiar with the various function keys and operation panel of the leveling machine to ensure that they can operate it skillfully. •••▶★◀••• Laser system calibration The leveling accuracy of a laser leveler depends largely on the calibration of the laser system. The specific steps for laser system calibration are as follows: 1. Set a reference point in the construction area to ensure that the reference point is stable and at the same height. 2. Install the laser transmitter on the reference point, adjust the level of the transmitter, and ensure that the laser beam is projected vertically downward. 3. Turn on the laser transmitter and place the laser receiver on the ground to be leveled to ensure that the receiver can accurately receive the laser signal. 4. According to the data displayed by the receiver, adjust the parameters of the laser system to ensure that the laser beam is consistent with the actual ground height. After completing the laser system calibration, a test should be conducted to ensure that the leveler can accurately level according to the guidance of the laser beam. •••▶★◀••• Set leveling parameters Before officially starting the leveling operation, the leveling parameters need to be set according to the construction requirements. The specific steps for setting leveling parameters are as follows: 1. According to the construction drawings or design requirements, determine the flatness, levelness and other indicators of the ground. 2. Set the leveling speed, lifting range and other parameters of the leveling machine according to the ground indicators. 3. Set the vibration frequency, spatula angle and other parameters of the leveler according to the construction environment. After completing the parameter setting, a trial run should be carried out to ensure that the leveling machine can perform leveling operations according to the set parameters. •••▶★◀••• Start leveling operation After equipment inspection, laser system calibration and parameter setting are completed, leveling operations can begin. The specific steps are as follows: 1. Turn on the leveler and drive the leveler to the ground to be leveled. 2. According to the guidance of the laser system, operate the leveling machine to perform leveling operations. During the leveling process, the operator should promptly adjust the speed and lifting range of the leveling machine according to the actual situation to ensure the leveling quality. 3. During the leveling process, attention should be paid to the operating status and leveling effect of the leveling machine. If any abnormality is found, the machine should be stopped in time for inspection and treatment. After the leveling operation is completed, the leveling machine should be closed and necessary cleaning and maintenance should be carried out. Work. •••▶★◀••• Adjust the slope If the slope needs to be adjusted, this can be achieved by adjusting the lifting device of the leveling machine. The specific steps to adjust the slope are as follows: 1. Set up slope control points in the construction area to ensure that the control points are stable and highly accurate. 2. Install the slope sensor on the leveling machine and calibrate its sensitivity. 3. Determine the slope requirements of the ground according to construction drawings or design requirements. 4. Operate the leveling machine to the slope adjustment area. According to the instructions of the slope sensor, adjust the lifting device of the leveling machine so that the ground reaches the preset slope. During the slope adjustment process, attention should be paid to maintaining the stability and stability of the leveling machine. Level the quality to avoid obvious waves or unevenness. •••▶★◀••• Monitoring and Adjustment During the leveling operation, the leveling quality should be monitored and adjusted in real time. The specific steps are as follows: 1. Use a laser receiver or other measurement tools to measure the leveled ground in real time to ensure that the leveling quality meets the requirements. 2. According to the measurement results, timely adjust the parameters and operating methods of the leveling machine to improve the leveling quality. 3. During the leveling operation, attention should be paid to observing the operating status of the leveling machine and changes in the surrounding environment to ensure the safety and continuity of the leveling operation. 8. End operation and maintenance After the leveling operation is completed, necessary equipment cleaning and maintenance work should be carried out. Specific steps are as follows: 1. Turn off the leveler and clean the dust and debris on the surface of the leveler. 2. Check all components and systems of the leveler to ensure they are intact and functioning properly. 3. Lubricate and maintain the lubricating parts of the leveling machine to ensure that the equipment can operate normally the next time it is used. 4. Park the leveler in a dry and ventilated place, and take necessary protective measures to prevent the equipment from getting damp or damaged. •••▶★◀••• Safety precautions When operating a laser leveling machine, the following safety precautions must be strictly observed to ensure the safety of the operator and the normal operation of the equipment: 1. Operator training: Ensure that all operators have received professional training and are familiar with the operating instructions and safety procedures of the leveling machine. 2. Wear protective equipment: When working near the leveling machine, operators should wear personal protective equipment that meets regulations, such as hard hats, protective glasses, protective shoes, etc. 3. Regular inspection and maintenance: Regular inspection and maintenance of the leveling machine to ensure that the equipment is in good working condition. In particular, important components such as laser systems and power systems should be inspected and calibrated regularly. 4. Pay attention to the surrounding environment: When operating the leveling machine, you should pay attention to changes in the surrounding environment, such as terrain, obstacles, other construction personnel, etc. Avoid operating the leveling on unstable or dangerous ground. 5. Overloading is prohibited: The leveler should operate within the specified load range and must not be overloaded. Overloading may cause equipment damage or cause safety accidents. 6. Observe the operating procedures: When operating the leveling machine, the operating procedures should be strictly followed, and the operating sequence or equipment parameters should not be changed at will. 7. Stop the machine to deal with abnormal situations: During the leveling operation, if any abnormality or malfunction is found in the equipment, the machine should be stopped immediately and professionals should be sought for inspection and repair. Do not disassemble or repair the equipment without authorization. 8. Keep away from power sources and water sources: The leveler should be placed away from power sources and water sources to prevent electrical failure or equipment damage. 9. Prevent dust and noise hazards: The leveling machine may produce dust and noise during operation. Operators should wear corresponding protective equipment, such as dust-proof mouthpieces, earplugs, etc. 10. Obey safety warning signs: When operating the leveling machine, pay special attention to the safety warning signs and prompt information on the equipment, and operate as required. •••▶★◀••• Summary As an important piece of equipment in modern building construction, the laser leveling machine's operation steps and slope adjustment methods are of great significance to ensure construction quality and improve construction efficiency. This article introduces in detail the operating steps and slope adjustment methods of the laser leveling machine, and emphasizes the importance of safety precautions. It is hoped that this article can provide useful reference and guidance for relevant construction personnel to ensure the safe and efficient operation of laser leveling machines. At the same time, it is also recommended that construction units strengthen the training and management of operators, improve the skill level and safety awareness of operators, and jointly promote the healthy development of the construction industry.Read More