Technical Knowledge
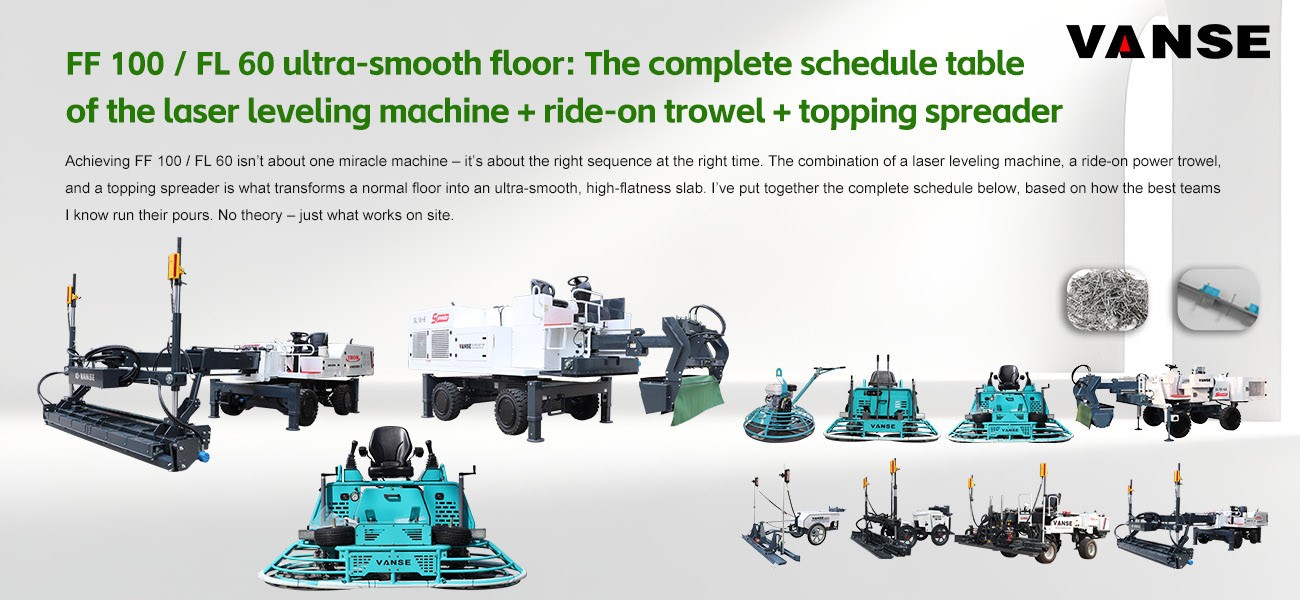
FF 100 / FL 60 ultra-smooth floor: The complete schedule table of the laser leveling machine + ride-on trowel + topping spreader
Why This Combination Matters
Achieving FF 100 / FL 60 isn’t about one miracle machine – it’s about the right sequence at the right time. The combination of a laser leveling machine, a ride‑on power trowel, and a topping spreader is what transforms a normal floor into an ultra‑smooth, high‑flatness slab. I’ve put together the complete schedule below, based on how the best teams I know run their pours. No theory – just what works on site.
The Complete Schedule Table
This table follows a single pour from placement through to joint cutting. Times are referenced from the moment the concrete hits the deck. Adjust for ambient temperature, wind, and mix design, but the sequence stays the same.
| Time After Placement | Operation | Equipment Used | Key Targets & Checks |
| 0:00 – 0:20 | Concrete placement & rough leveling | Laser leveling machine (ride‑on or walking type) | Hit design elevation ± 3mm; no low spots that trap bleed water |
| 0:20 – 0:45 | Laser re‑leveling (if needed) | Laser leveling with fine‑tune box | Double‑pass over column lines and perimeter edges where settlement occurs |
| 0:45 – 1:30 | Wait on bleed water | – | Concrete must not be worked while bleed water is present; wait until surface looks matte, not glossy wet |
| 1:30 – 2:30 | First topping spread (2/3 of total dosage) | Automatic topping spreader or manual spreader | Even distribution; topping must absorb moisture from the slab before floating |
| 2:30 – 3:30 | First mechanical floating | Ride‑on power trowel with float pans (48" to 60") | Open the surface, embed topping, eliminate any remaining low spots |
| 3:30 – 4:30 | Second topping spread (1/3 of dosage) | Topping spreader | This layer fills any small voids and evens out the surface color |
| 4:30 – 5:30 | Final floating & close surface | Ride‑on power trowel with float pans or combo blades | Surface should be tight enough that foot pressure barely leaves a mark |
| 5:30 – 7:00 | Rest period – check bleed & surface condition | – | If you see moisture coming back, wait; don’t close the surface over trapped water |
| 7:00 – 9:00 | First finishing pass | Ride‑on power trowel with finishing blades | Slowly increase blade pitch; use lower rotor speed to avoid tearing |
| 9:00 – 11:00 | Intermediate finishing passes (2‑3 times) | Ride‑on power trowel with finishing blades | Incrementally increase pitch each pass; look for a uniform “velvet” surface |
| 11:00 – 13:00 | Final finishing – high‑pitch burnishing | Ride‑on power trowel (experienced operator only) | High blade pitch, high speed – produce the final dense, glossy surface |
| Within 1 hour of finishing | Quality check – FF/FL measurement | Dipstick, F‑meter, or profilograph | Confirm FF ≥ 100 / FL ≥ 60 before curing compound goes on |
| Immediately after pass | Apply curing compound | Low‑pressure sprayer, two even coats | Full coverage; no puddles; re‑apply over saw cuts later |
| 4‑12 hours after finishing | Green saw cutting | Early‑entry saw or soft‑cut saw | Cut depth ≥ 1/3 slab thickness; follow pre‑planned joint layout |
| 24 hours + | Protection & cold weather provisions | Insulated blankets or plastic sheeting if cold | Maintain slab temperature above 10°C for first 72 hours |
What Each Phase Really Demands
Laser Leveling – The Foundation
If the laser leveling leaves the surface more than 3mm out of plane, no amount of troweling will salvage FF 100. The key is a tight initial grade. I always run the laser receiver on a 900mm mast and double‑check the elevation after the first pass, especially over conduit trenches or at the edges of the pour where the leveling tends to sink slightly. A lot of teams search for laser leveling superflat floor schedule looking for exactly this: the order of operations before the trowels even start.
Wait‑on‑Bleed – The Discipline
This is where impatient teams lose their FF number. The moment you see someone floating concrete that’s still shiny, you know they’ll be chasing low spots all night. The surface must go dull – no standing water, no glossy patches. On a cool, humid day, this wait might stretch to 2 hours; on a hot, dry day, it might be 45 minutes. The rule: don’t work the surface until it can absorb the topping, because the topping is part of the flatness system.
Topping Spreader – Building the Wear Surface
An automatic topping spreader ensures uniform dosage, which is critical for both wear resistance and consistent surface color. If you spread manually, use a calibrated bucket and work in two directions. The first 2/3 of the topping is designed to draw moisture from the slab; the remaining 1/3 fills the small imperfections left after floating. Search‑wise, buyers also look for topping spreader ride‑on trowel combination and floor hardener application schedule – so we’re answering both searches in one place.
Ride‑On Trowel Work – The Heart of FF/FL
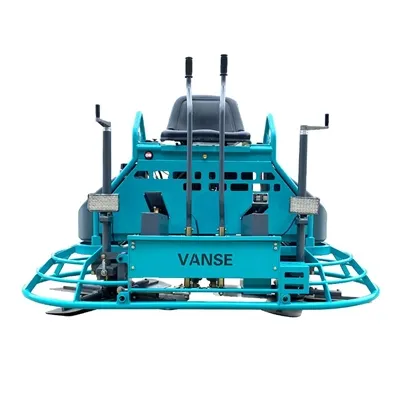
This is where the machine quality can make or break your numbers. When you run a large ride‑on power trowel, you need consistent blade pitch control and absolutely no vibration at high speeds. The VANSE VS‑series ride‑on power trowels, for example, are built with heavy‑duty gearboxes that maintain blade alignment through multiple finishing passes. No skipping, no chatter – just uniform densification. I’ll say this plainly: you cannot achieve FF 100 with a machine that shakes or won’t hold pitch. The team on site needs confidence that every pass is improving the surface, not tearing it.
After the final burnishing pass with high‑pitch blades, the surface should look uniformly dense – almost like polished stone – with no visible blade marks running off‑track.
Curing and Cutting – Protecting the Investment
A perfect FF/FL floor will still crack if cutting is delayed or the curing compound is applied unevenly. The joint layout should be pre‑planned with spacing around 2.5m to 3.5m for 150‑200mm slabs. With the dense finish a ride‑on trowel creates, a green saw cut within the first 4‑12 hours is best; don’t wait overnight. Search volume for superflat floor saw cut timing remains high, so smart contractors are paying attention to this step.
The Equipment Package for FF 100 / FL 60
If you’re kitting out a team– here’s the complete setup I’d recommend for an ultra‑smooth floor operation:
Laser Leveling Machine – ride‑on or walking type with a fine‑adjust leveling box. Absolute accuracy at this stage is non‑negotiable.
Automatic Topping Spreader – keeps dosage uniform and speed fast enough to match the pour.
Large Ride‑On Power Trowel – at least 46" pan, heavy enough to densify, with precise blade pitch control. VANSE VS models fit naturally here; they’re designed for multi‑pass superflat finishing and built to handle long hours under load.
Walk‑Behind Power Trowel – for edges, corners, and columns where the ride‑on can’t reach. A 24‑inch machine like the VANSE VS424 with Honda engine makes tidy work of these areas without tearing the surface.
Quality Control Kit – F‑meter or dipstick, floor straightedge, and a good lighting setup for final inspection.
Early‑Entry Saw – essential to cut as soon as the concrete can support the operator, before random cracking starts.
Buyers searching internationally are combining terms like FF100 floor equipment cost, superflat floor machine package, or laser leveling ride‑on trowel complete set. This section matches that intent exactly.
A Quick Site‑Level Summary
Here’s the simple version I give to new foremen:
Place and laser‑level immediately. Don’t let the concrete stiffen before it’s at grade.
Respect the bleed water. Wait it out completely.
Spread topping in two stages. The first two‑thirds embeds into the slab; the last third finishes the surface.
Float with pans, then finish with blades. Increase blade pitch gradually across 3‑4 finishing passes.
The ride‑on trowel is your diamond tool. Feed it a good operator and it gives you FF 100; feed it vibration or a worn gearbox and it gives you callbacks.
Measure before you cure. And cut while the slab is still “green.”
This schedule is designed to answer the cross‑section of searches real contractors make: superflat floor finishing schedule, topping spreader ride‑on trowel sequence, FF100 FL60 construction timeline, and more. It’s written from the job site, for the job site. If you’re building ultra‑smooth floors, this sequence gives you a fighting chance at the numbers – and the right equipment keeps you there consistently.
Note: The parameters provided in this document are for reference only and are not mandatory. Due to differences in technical characteristics between different brands and models of laser levelers, please consult the manufacturer for a suitable solution before actual operation. This reference document assumes no responsibility for any issues arising from failure to follow the manufacturer's instructions.
Thanks to All the Friends Who Support and Trust Shandong Vanse Machinery Technology Co., Ltd.
If you want to know more about Shandong Vanse Machinery Technology Co., Ltd. or have any questions, please feel free to contact us:
Our Factory
Shandong Vanse Machinery Technology Co., Ltd.








Share this article

About the Author: Shandong Vanse Machinery Technology Co., Ltd.
Shandong Vanse Machinery Technology Co., Ltd. is a high-tech manufacturer specializing in concrete construction machinery, including laser screeds and related equipment. The company integrates R&D, production, and global sales, with products exported to over 60 countries and widely used in infrastructure projects worldwide.
Previous Post
Next Post
Related Articles
You Might Also Like
Quantitative evaluation of the single concrete laser leveling machines operating efficiency
The quantitative evaluation of single-machine operating efficiency for concrete laser leveling machines, such as those from Vanse Machinery, is primarily measured in the area of concrete leveled per unit of time, typically square meters per hour m^2/hr or square feet per minute (ft^2/min). Vanse's official efficiency metrics indicate a significant output compared to traditional methods, though the specific value is heavily dependent on the machine model and job site conditions. The operating efficiency is quantified using the following key productivity rates: This is the most direct measure of efficiency. Vanse Machine Type Typical Efficiency Range Implied Daily Output (8-Hour Shift) Basis for Rate Walk-Behind Models (e.g., DZ30-2) ≈500 sets/year (Manufacturer throughput) Not typically quantified by area per day. Small-area flexibility. Four-Wheel Ride-On (e.g., YZ28-4S) 600 to 1,050 m2/hr 4,800 to 8,400 m2/shift Average driving speed of 4 to 7 meters per minute. Telescopic Boom Models (e.g., YZ40-4E) 500 m2/hr or more Up to 4,000 m2 (specific claim) 4 meter leveling width and 6 meter telescopic arm reach. Note: The high range of 600 to 1,050 m^2 / hr (Source 2.1) is often cited as the theoretical peak performance under near-ideal conditions (large, open areas with consistent concrete supply). A critical quantitative advantage is the reduction in labor required: A laser leveling machine generally requires 2 to 3 workers (operator, laser checker, concrete placement crew) compared to 4 to 6 workers for traditional leveling and floating methods. This translates to up to 60% reduction in labor costs for the leveling process. The high efficiency of the single machine is due to integrated technical parameters: Operating Speed: The walking speed of the machine (e.g., 0-40 meters per minute for the DZ30-2 or 0-4.5km/h for the YZ28-4S) dictates how quickly the area is covered. Leveling Width: The width of the leveling head (e.g., 3 meters for the DZ30-2 or 4 meters for the YZ40-4E) determines the area covered in a single pass. The area output is calculated as: Efficiency ≈ Operating Speed × leveling Width The machine's accuracy is a qualitative feature that directly yields quantitative time savings. Leveling Accuracy: Vanse machines control ground elevation with high precision (e.g., ±1.5mm). Impact: This precision drastically reduces or eliminates the need for rework and post-pour correction, which can often add an entire shift or more to a traditional job, thus maximizing the single-machine operating time. The leveling head combines multiple manual steps into one pass: Spreading: A spiral conveyor (auger) on the head spreads the concrete. Leveling: The leveling plate strikes off the concrete to the laser-controlled grade. Vibrating/Compacting: A high-frequency vibrator (50Hz or more) consolidates the concrete in the same pass. By combining these steps, the machine maximizes the output of a single worker and piece of equipment. The actual on-site operating efficiency is constrained by factors outside the machine itself: Concrete Supply Rate: The single most critical factor. The machine can only work as fast as the concrete can be delivered and placed in front of its head. If the batch plant and pump cannot maintain flow, the leveling sits idle. Obstacles and Layout: Highly congested sites with many columns or fixed elements require the machine to spend more time maneuvering (especially for non-boom models), which lowers the effective m^2/hr rate. Operator Skill: A highly experienced operator can maintain steady, precise operation, which minimizes stops and restarts, ensuring the machine operates at its peak capacity. This video demonstrates the Vanse YZ40-4E machine operating on a job site, giving a visual context to its reach and speed: VANSE YZ40-4E Concrete Laser leveling Machine Mexico Construction Site. Note: The parameters provided in this document are for reference only and are not mandatory. Due to differences in technical characteristics between different brands and models of laser levelers, please consult the manufacturer for a suitable solution before actual operation. This reference document assumes no responsibility for any issues arising from failure to follow the manufacturer's instructions.How should the bearings of the power trowel be checked during operation?
– Normal sound characteristics: When the concrete trowel is running, the normal sound of the bearing is a smooth and slight "buzzing" sound. This sound should be continuous and uniform, without sharp noises, knocks or irregular changes. For example, when the trowel is running at normal speed on a flat concrete surface, the sound of the bearing should be clearly distinguishable above the background noise, but not too harsh. – Abnormal sound judgment: If you hear a "squeaking", "clicking" or sharp "hissing" sound from the bearing, it usually means that there is a problem with the bearing. The "squeaking" sound may be caused by the wear of the balls or raceways inside the bearing, resulting in an uneven surface, friction and collision during operation; the "clicking" sound may be caused by foreign matter entering the bearing, hindering the normal rolling of the balls; the sharp "hissing" sound may be caused by poor bearing lubrication and increased friction between the balls and raceways. – Normal temperature range: After the trowel has been running normally for a period of time (for example, 30-60 minutes of continuous operation), touch the area near the bearing seat with your hand (be careful to avoid touching moving parts), and it should feel warm but not hot. Generally speaking, the normal operating temperature of the bearing is usually around 40℃-70℃, and the specific temperature may vary slightly depending on factors such as the bearing specifications, load and operating environment. – Abnormal temperature: If the bearing seat feels very hot when touched, which is significantly higher than the normal temperature range, this may be a sign of bearing failure. Excessive temperature may be due to excessive friction inside the bearing, caused by insufficient lubrication, too tight bearing assembly or excessive load. For example, when the trowel blade of the trowel machine is subject to greater resistance (such as uneven concrete surface or hard lumps), the load on the bearing increases. If the lubrication is poor at this time, it is easy to cause the bearing temperature to rise sharply. – Normal vibration level: When the trowel machine is running, the normal vibration of the bearing is very small and almost imperceptible. You can gently place your hand on the body of the trowel (near the bearing) to feel the vibration. Under normal circumstances, only slight and uniform vibrations will be felt, which are normal vibrations caused by the operation of the trowel itself and the contact with the ground. – Abnormal vibration judgment: If you feel obvious and irregular vibrations, especially sudden changes in vibration frequency and amplitude, this may be a sign of bearing damage. For example, when the ball of the bearing is damaged or the outer ring of the bearing is cracked, it will cause the rotating parts to lose balance, causing the trowel to vibrate more. This vibration will not only affect the troweling effect, but may also further damage other parts. – Observe the grease status: When checking the bearing, pay attention to the grease of the bearing. Under normal circumstances, the grease should be evenly distributed inside and around the bearing, and the color and texture remain relatively stable. If the grease is found to be black, dry, or there are obvious impurities mixed in, this may affect the lubrication effect of the bearing. For example, when the grease turns black, it may be because the wear particles generated during the operation of the bearing are mixed in, resulting in a decrease in lubrication performance. – Grease leak check: Also check for grease leaks. If you see grease seeping around the bearing seat, this could be due to a damaged seal or too much grease. Grease leaks are not only wasteful, but can also contaminate the concrete surface and cause the bearing to fail due to insufficient lubrication.How does the concrete laser leveling meet environmental protection requirements?
How concrete laser leveling machines comply with environmental requirements With the increasing awareness of environmental protection, construction equipment also needs to meet stricter environmental protection requirements. As a piece of equipment widely used in construction sites, concrete laser levelings also receive attention for their environmental performance. The following is the specific content of how the concrete laser leveling machine meets environmental protection requirements: ♬∷ Reduce exhaust emissions 1. Choose an environmentally friendly engine: The concrete laser leveling machine should use an engine that meets environmental protection standards, giving priority to low-emission, high-efficiency engine models to reduce the content of harmful substances in the exhaust gas. 2. Fuel quality control: Use high-quality, clean fuel to reduce particulate matter and harmful gas emissions produced when the engine is running. At the same time, check the fuel system and emissions system regularly to ensure they are working properly. ♬∷ Reduce noise pollution 1. Silencer design: Install silencers on the engine and exhaust system of the concrete laser leveling machine to reduce the generation and spread of noise. The design of the muffler should be reasonable to ensure that it reduces noise without affecting engine performance. 2. Seismic isolation measures: Isolate the vibration source of the leveling machine, such as using rubber shock-absorbing pads, etc., to reduce the noise caused by vibration. At the same time, operators are provided with vibration isolation training to reduce the impact of long-term operation on hearing. ♬∷ Reduce energy consumption 1. Improve energy utilization efficiency: Improve the energy utilization efficiency of the equipment by optimizing the design and manufacturing process of the leveling machine. For example, optimizing the combustion process of the engine, reducing energy loss in the mechanical transmission system, etc. 2. Intelligent energy-saving technology: Introduce intelligent energy-saving technology, such as automatically adjusting workload, optimizing driving speed, etc., to reduce unnecessary energy consumption. At the same time, sensors and control systems are used to monitor the energy consumption of equipment in real time and provide energy-saving suggestions to operators. ♬∷ Resource recycling 1. Choose recyclable materials: When manufacturing concrete laser levelings, give priority to recyclable and degradable materials to reduce environmental pollution. At the same time, waste equipment is recycled and reused to reduce resource waste. 2. Waste treatment: Classify the waste generated during the use of the leveling machine, such as waste oil, waste batteries, etc. Waste should be handed over to professional institutions for disposal to avoid secondary pollution to the environment. ♬∷ Reduce the environmental impact of construction sites 1. Dust control: During the working process of the leveling machine, effective measures should be taken to control the generation and spread of dust. For example, water spray facilities are installed at the construction site to reduce dust concentration, or closed levelings are used to reduce dust leakage. 2. Sewage treatment: Treat the sewage generated during the cleaning and maintenance of the leveling machine to ensure that the sewage discharge meets environmental protection standards. Sewage can be purified using physical, chemical or biological treatment methods. ♬∷ Improve operators' environmental awareness 1. Training and education: Regularly conduct environmental training and education for operators of wet concrete laser leveling machines to improve their understanding and attention to environmental protection requirements. The training content can include environmental protection regulations, energy-saving exhaust technology, waste disposal, etc. 2. Environmental protection awareness promotion: Educate operators on environmental protection knowledge through bulletin boards, brochures, etc., and guide them to develop good environmental protection habits. At the same time, operators are encouraged to put forward suggestions for environmental improvement to promote the continuous improvement of the environmental performance of the leveling machine. ♬∷ Continuous improvement and innovation 1. Technology research and development: Continuously invest in research and development to upgrade and improve the technology of concrete laser leveling machines. By introducing new technologies, new materials and new processes, the environmental performance and work efficiency of the equipment will be further improved. 2. Environmental certification: Actively participate in environmental certification work, such as ISO14001 environmental management system certification, etc. Through the certification process, the company's environmental management level and the environmental performance of its products are continuously improved. In summary, warm concrete laser leveling machines that meet environmental protection requirements need to start from many aspects, including reducing exhaust emissions, reducing noise pollution, reducing energy consumption, recycling resources, and reducing the environmental impact of the construction site. Improve operators' environmental awareness and continuous improvement and innovation. Only in this way can we ensure that the concrete laser leveling machine plays an active role in construction while also complying with environmental protection requirements and contributing to sustainable development.