Technical Knowledge
The correct way to store power trowels for a long time
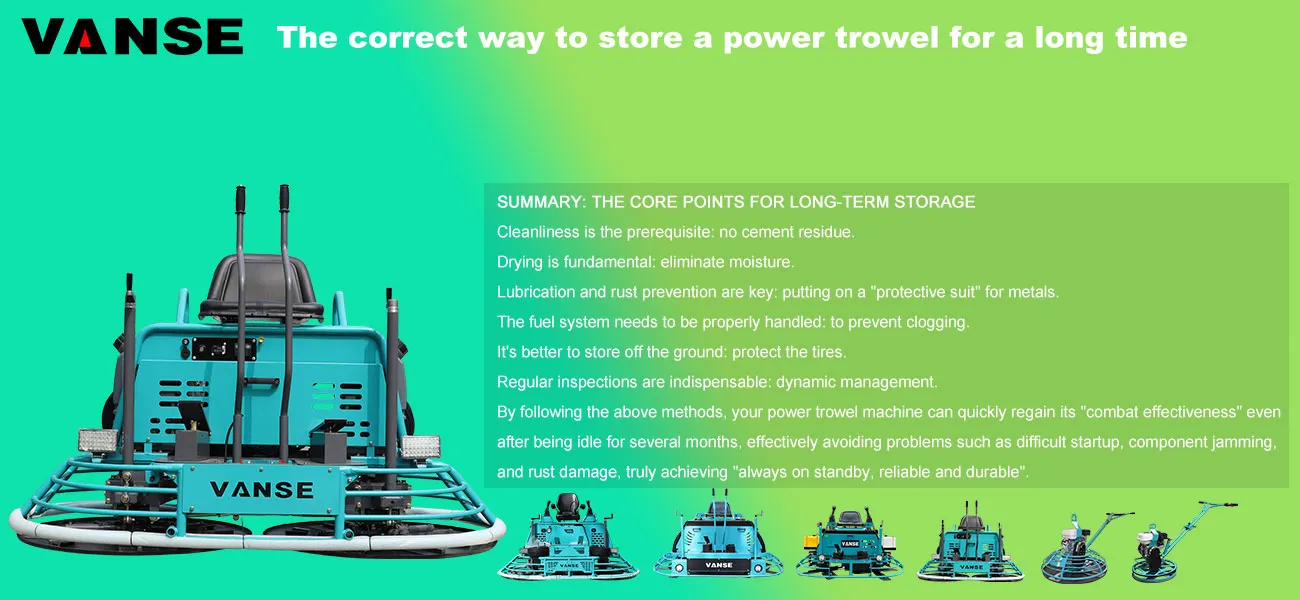
The long-term storage of the power trowel machine during the off-season of construction or during project intervals (usually referring to more than one month) is of vital importance. Proper storage and maintenance can greatly prevent equipment from rusting, aging and being damaged, ensuring that its performance remains as good as new when it is used again and extending its service life.
The following is the standard "seven-step method" for the long-term storage of a power trowel. Please be sure to follow the sequence.
Standard operating procedures for long-term storage of power trowels
Step 1: Thorough cleaning and inspection (immediately after construction)
This is the foundation of all steps and must never be stored with cement slurry on the machine.
High-pressure flushing: Use a high-pressure water gun or a large amount of clean water to thoroughly rinse all parts of the machine body, blades, chassis, walking wheels, etc., and remove all cement, mortar, and mud lumps. Pay special attention to cleaning the connection area of the blade, the lifting screw and the area around the bearing sealing ring.
Detail cleaning: Use tools such as scrapers and wire brushes to remove stubborn lumps.
Comprehensive inspection: During the cleaning process, check whether the blades are worn or deformed, whether the screws and nuts are loose, whether the machine body is cracked, and whether the cables/oil pipes are damaged. Record the problems to facilitate subsequent maintenance.
Step 2: Completely dry (the core to prevent rusting)
Move the machine to a well-ventilated, dry and rain-free indoor storage point.
Dry/blow dry all surface moisture with a dry cloth or compressed air, especially:
Exposed metal parts (lifting screw, adjusting rod).
Blade.
Engine surface.
All oil injectors and gaps.
Make sure that the inside and outside of the machine are completely dry, with no signs of dampness at all.
Step 3: Deep lubrication and rust prevention treatment (providing protection during the static period)
Drain the old grease and add new grease: Use a grease gun to inject an adequate amount of new grease into all grease nozzles (spindle of the cutter head, bearings of the traveling wheels, steering mechanism, etc.) until all the old grease that may contain water is completely squeezed out. This can expel moisture and form a protective film inside.
Apply anti-rust oil to key areas: Apply a layer of anti-rust oil or grease to all exposed metal surfaces prone to rust (non-friction contact surfaces). Key points include:
Lifting screw and thread: Thickly coated with grease.
Blade: Apply a thin layer of anti-rust oil to both sides (wipe it off before reuse).
Chassis metal frame.
Exposed bolts and nuts.
Engine maintenance (for gasoline/diesel engines) :
Change the engine oil: Drain the old oil when the engine is hot and add new oil to the specified mark.
Fuel system treatment (crucial!)" :
Option A (Recommended) : Completely drain the fuel from the fuel tank. Then start the engine and let it shut down naturally to deplete the residual fuel in the carburetor or fuel lines.
Option B: If it is impossible to empty the fuel tank, fill it up with fuel and add fuel stabilizer. Then run the engine for 5 to 10 minutes to allow the stabilizer to circulate throughout the fuel line. This can prevent the fuel from gelatinizing and clogging the carburetor and fuel injector.
Spark plug/fuel injector: Remove the spark plug, inject a small amount (about 10-15ml) of engine oil into the cylinder, manually and slowly pull the start rope several times to coat the cylinder wall with the engine oil, and then reinstall the spark plug (without connecting the high-voltage wire).
Step 4: Special treatment of the engine and electrical system
Disconnect the battery: If the machine has power to start the battery, the negative cable should be disconnected. Remove the battery, store it in a cool and dry place, and perform a charge maintenance every 1 to 2 months.
Protect the circuit: Wrap the exposed circuit joints with waterproof tape.
Air filter: Remove the air filter, clean or replace it. Stuff a clean cloth into the air intake to prevent dust from entering.
Step 5: Tire and blade processing
Tire: Lift the machine up to lift the tire off the ground to prevent the tread from being deformed and aged due to long-term single-point pressure. If it cannot be lifted, make sure the tire pressure is sufficient and move the position regularly.
Blade: The blade can be removed. After cleaning, apply anti-rust oil separately and store it. Or at least ensure that rust prevention measures have been taken on the machine.
Step 6: Select and prepare the storage environment
Ideal environment: In a dry, cool and well-ventilated warehouse or shed. Avoid outdoor storage.
Stay away from corrosion: Keep away from fertilizers, chemicals and damp ground.
Stable placement: Place the machine on a flat ground and level it with wooden blocks if necessary.
Step 7: Covering and Marking
Cover: Use a breathable dust cover (such as a canvas cover) to cover the entire machine. It is strictly prohibited to directly wrap with completely impermeable plastic sheeting, otherwise water vapor will condense inside, causing severe rust.
Marking: Hang a label that reads "Maintained and ready for storage" in a prominent position, and indicate the storage date and the date when the next inspection is required.
Inspection during storage and before activation
Storage period: Every 1-2 months, check the machine for any abnormalities (such as tire pressure, the integrity of the covering, and whether there is any rat damage or wire biting), and recharge the battery.
Before reactivation (very important!)" :
Remove the coverings and check the overall condition.
Check whether the grease in all parts has hardened and replenish or replace it if necessary.
Reinstall the battery (if it has been removed) and connect it firmly.
Remove the blockage at the air intake and reinstall the air filter.
Wipe off the excess anti-rust oil from the key friction areas (such as the contact surface between the blade and the ground).
Check the fuel and engine oil according to the normal start-up procedure, and then start the machine. First, run it at low speed without load for a few minutes to allow all components to lubricate and circulate. Only after there are no abnormal sounds can it be put into construction.
Summary: The core points for long-term storage
Cleanliness is the prerequisite: no cement residue.
Drying is fundamental: eliminate moisture.
Lubrication and rust prevention are key: putting on a "protective suit" for metals.
The fuel system needs to be properly handled: to prevent clogging.
It's better to store off the ground: protect the tires.
Regular inspections are indispensable: dynamic management.
By following the above methods, your power trowel machine can quickly regain its "combat effectiveness" even after being idle for several months, effectively avoiding problems such as difficult startup, component jamming, and rust damage, truly achieving "always on standby, reliable and durable".
Note: The parameters provided in this document are for reference only and are not mandatory. Due to differences in technical characteristics between different brands and models of laser levelers, please consult the manufacturer for a suitable solution before actual operation. This reference document assumes no responsibility for any issues arising from failure to follow the manufacturer's instructions.
Thanks to All the Friends Who Support and Trust Shandong Vanse Machinery Technology Co., Ltd.
If you want to know more about Shandong Vanse Machinery Technology Co., Ltd. or have any questions, please feel free to contact us:
Our Factory
Shandong Vanse Machinery Technology Co., Ltd.








Share this article

About the Author: Shandong Vanse Machinery Technology Co., Ltd.
Shandong Vanse Machinery Technology Co., Ltd. is a high-tech manufacturer specializing in concrete construction machinery, including laser screeds and related equipment. The company integrates R&D, production, and global sales, with products exported to over 60 countries and widely used in infrastructure projects worldwide.
Previous Post
Next Post
Related Articles
You Might Also Like
The ‘beauty’ work of the ground depends on the laser leveling machine (1)
The "beauty" work of the ground depends on the laser leveling machine (1) It has to be admitted that using a concrete laser leveling machine to smooth the ground is a more scientific method, which can greatly reduce the labor burden of the staff and save time and effort. However, when operating the equipment, it is still necessary to reduce the impact of some harmful factors on the normal use of the machine. 1. Minimize the influence of harmful factors 1. Avoid impurities For concrete laser leveling machines that work in harsh environments and complex conditions, first of all, use high-quality, matching parts, lubricating oil, and grease to block the source of harmful impurities; secondly, do a good job of mechanical protection on the job site Work, ensure that the corresponding mechanism can work normally, and prevent various impurities from entering the interior of the machine. For machinery that breaks down, try to go to a regular repair place for repairs. When on-site repairs, protective measures must also be taken to prevent the parts replaced during on-site repairs from being polluted by impurities such as dust before entering the machine. 2. Applicable temperature During the use of the concrete laser leveling machine, it is necessary to prevent overload operation at low temperature, ensure the normal operation of the low-speed preheating stage, and make the machine reach the specified temperature before driving or working. Do not ignore other problems because there are no problems at that time. Important role; Second, to prevent the machine from running at high temperature, check the values on various thermometers frequently during the operation of the machine, stop the machine immediately for inspection if any problem is found, and eliminate the fault in time. If the reason cannot be found for a while, the machine must still work with the disease without treatment. In normal work, pay attention to check the working condition of the cooling system. For water-cooled machines, it is necessary to check and add cooling water before work every day; for air-cooled machines, the dust on the air-cooling system should also be cleaned regularly to ensure the smooth flow of cooling air ducts. 3. Anti-corrosion During use, management and operators should take effective measures according to the local weather conditions and air pollution conditions at that time to reduce the impact of chemical corrosion on the machinery, with the focus on preventing the intrusion of rainwater and chemical components in the air to the machinery.How does the concrete laser leveling machine achieve high-precision ground leveling?
The concrete laser leveling machine to achieve high-precision ground leveling mainly relies on the following technologies and methods: 1. Laser technology: Concrete laser leveling machines use laser technology for high-precision positioning and measurement. By installing a laser transmitter and receiver on the equipment, the leveling can form a laser beam in the construction area, and the height and level of the laser beam can be monitored and controlled in real time through sensors and control systems. This technology can achieve high-precision automatic positioning and ensure the accuracy of the leveling machine's walking trajectory and height adjustment. 2. Precise hydraulic system: The concrete laser leveling machine is equipped with a precise hydraulic system, which enables fine flow control and height adjustment. The hydraulic system can accurately control the movement of the leveling head based on data fed back by the laser positioning system, thereby achieving high-precision ground leveling. 3. Automatic control system: The concrete laser leveler adopts an advanced automatic control system, which can automatically adjust the operating status of the leveler based on preset parameters and real-time feedback data. The control system can monitor the position, height and concrete paving thickness of the leveling machine in real time, and automatically adjust the movement trajectory and speed of the leveling head to ensure that the flatness of the ground meets the design requirements. 4. High-precision scraper and vibrator: The concrete laser leveling machine is equipped with high-precision scraper and vibrator, which can achieve precise concrete leveling. The scraper can accurately control the movement trajectory and height of the scraper based on the feedback data from the laser positioning system, making the concrete surface smoother. The vibrator can vibrate the concrete to improve the compactness and smoothness of the ground. 5. Repeated leveling multiple times: In order to ensure that the flatness of the ground meets high-precision requirements, the concrete laser leveling machine can perform multiple repeated leveling in the same area. This method further improves the flatness of the floor by eliminating any slight height differences that may have existed after initial leveling. 6. Operator experience: Although concrete laser leveling machines have a high degree of automation and precise control capabilities, operator experience is still very important to achieve high-precision ground leveling. Operators should have rich construction experience and skills, be familiar with different construction conditions and requirements, and be able to make necessary adjustments and treatments according to the actual situation to ensure the best leveling effect. 7. Equipment maintenance and calibration: In order to maintain the high-precision performance of the concrete laser leveling, regular maintenance and calibration of the equipment are also essential. Equipment should be inspected and cleaned regularly to ensure that all parts are in good working order. At the same time, the positioning system, hydraulic system and other key parameters of the equipment should be calibrated regularly to ensure that the measurement and control accuracy of the equipment meets the requirements. 8. Construction technology optimization: In addition to the technical advantages of the equipment itself, reasonable construction technology is also a key factor in achieving high-precision ground leveling. The construction unit should formulate a scientific construction plan based on the actual situation, including the selection of concrete materials, the design of the mix ratio, and the arrangement of the construction sequence. By optimizing the construction process, the quality of ground flatness can be further improved. In summary, the realization of high-precision ground leveling by a concrete laser leveling relies on the comprehensive application of a variety of technologies and methods. Through laser technology, precise hydraulic systems, automatic control systems, high-precision scrapers and vibrators, multiple repeated leveling and operator experience, regular maintenance and calibration of equipment, and optimization of the T-laying process, it can be significantly improved. The flatness of the ground meets the requirements of high-precision construction. At the same time, construction units should continue to explore new technologies and methods to further improve the quality and efficiency of ground flatness.How to operate concrete topping spreaders on uneven base layers without affecting material distribution accurac
Operating a topping spreader (typically used for dry-shake hardeners) on a fresh, uneven base layer is like trying to paint a straight line while walking on a waterbed. Because the spreader relies on a consistent "drop height" and "travel speed" to hit your target application rate (e.g., 5kg/㎡), any dip or tilt in the base layer can lead to patchy distribution and a structurally inconsistent wear layer. Here is how to maintain precision when the ground beneath you isn't cooperating. The most effective way to handle an uneven base is to avoid driving on it entirely. * How it works: Large-scale spreaders use a telescopic boom that extends over the fresh concrete. The Advantage: Since the machine's tracks or wheels stay on the stable, leveled subgrade or the previously poured (and hardened) lane, the "head" of the spreader remains perfectly level regardless of the "hills and valleys" in the wet concrete. Accuracy: This setup allows for a computer-controlled discharge rate that is decoupled from the unevenness of the wet slab. If you are using a spreader that must travel on the fresh concrete (like a walk-behind or a ride-on), your accuracy depends on Variable Rate Control. The Problem: When a spreader hits a "low spot" or soft patch, the wheels often slip or the operator slows down. If the hopper continues to drop material at a fixed rate, you end up with a "heavy" pile in the low spot. The Fix: Modern spreaders use encoders on the wheels. If the machine slows down due to the uneven terrain, the computer automatically slows the discharge rotor. Pro Tip: If your machine isn't automated, the operator must consciously "feather" the discharge trigger as they navigate difficult patches to avoid material "slugs." On high-tolerance projects with uneven bases, never try to drop the full amount of topping in a single pass. The 50/50 Rule: Apply 50% of the material in one direction (e.g., North-South) and the remaining 50% in the perpendicular direction (East-West). The Benefit: This cross-hatching pattern naturally "averages out" any distribution errors caused by the spreader tilting or surging over uneven spots. It ensures that even if one pass was slightly "light" due to a bump, the second pass will likely compensate for it. Accuracy starts before the spreader arrives. The laser Leveling must be used to create a "flat-enough" surface for the spreader to navigate. Strategy Action Result Initial Strike-off Laser Leveling makes a fast, leveling pass. Provides a consistent "bed" for the topping. Wait Time Allow the "bleed water" to disappear. Firms up the base so the spreader doesn't sink/bog down. Mechanical Integration Attach the spreader head to the laser Leveling (if compatible). Uses the laser's elevation accuracy to drop material at a precise height. The Solution: Use low-pressure flotation tires or wide tracks to spread the weight of the machine. Immediate Follow-up: A bull float or a "highway straightedge" must follow the spreader immediately to "knit" the topping into the base and erase the tracks before the material begins to hydrate. Technical Warning: If you are using metallic dry-shakes, distribution accuracy is even more critical. "Clumps" of metallic topping caused by uneven spreading can lead to localized delamination because the topping won't have enough moisture from the base slab to hydrate properly. Would you like me to detail the "Wash-out" test used to verify if your spreader is actually hitting the kg/㎡ target across the entire floor? Slump Consistency: If the concrete slump varies by even 1 inch (e.g., from a 5-inch slump to a 6-inch slump), the vibratory Leveling will "sink" differently. For Superflat results, the concrete must be identical truck-to-truck. Head-to-Head Overlap: When using a handheld vibratory Leveling, ensure each pass overlaps the previous one by 20–30%. This "erases" the line between passes. Would you like a list of the specific F-number tolerances required for "Category 1" VNA (Very Narrow Aisle) floors versus standard warehouse floors?. Contact us NOW Note: The parameters provided in this document are for reference only and are not mandatory. Due to differences in technical characteristics between different brands and models of laser levelers, please consult the manufacturer for a suitable solution before actual operation. This reference document assumes no responsibility for any issues arising from failure to follow the manufacturer's instructions.