Technical Knowledge
How to improve the construction quality of concrete laser leveling machine?
HOW TO IMPROVE THE CONSTRUCTION QUALITY OF CONCRETE LASER LEVELING MACHINE?
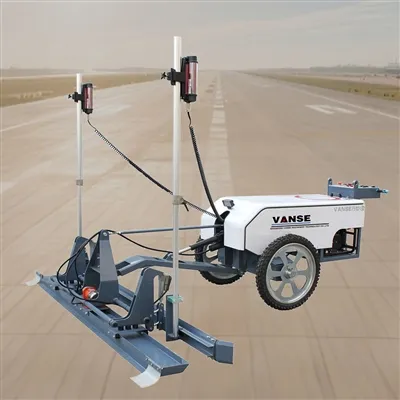
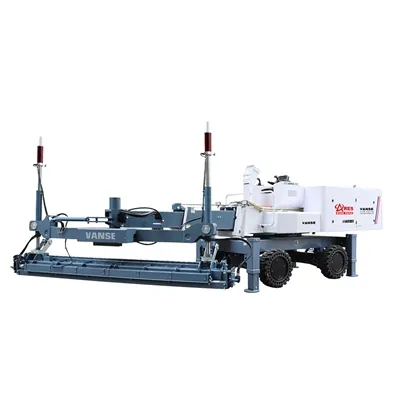
Improving the construction quality of concrete laser leveling machines is one of the key factors to ensure the overall quality of construction projects. Concrete laser leveling machines use laser technology to control the flatness and precision of the ground, but to achieve high-quality construction results, multiple factors need to be considered comprehensively. The following is a detailed analysis of how to improve the construction quality of concrete laser leveling machines.
Introduction
In the field of construction, concrete laser leveling machines are widely used in ground leveling operations due to their high efficiency and high precision. However, the improvement of construction quality depends not only on the equipment itself, but also requires strict construction management and operation procedures.
1. Preparation before construction
Sufficient pre-construction preparation is the basis for improving construction quality:
– **Equipment inspection: Ensure that the laser leveling machine is in the best working condition, including the laser system, control system and mechanical components.
– **Construction plan formulation: Develop a detailed construction plan according to the project requirements, including concrete mix ratio, pouring thickness and leveling process.
– **Operator training: Ensure that the operator is familiar with the equipment operation and construction process, and understands the key points of quality control.
2. Quality control of construction materials
The quality of construction materials directly affects the final construction quality:
– **Concrete ratio: strictly control the ratio of concrete to ensure that it meets the design requirements.
– **Raw material quality: select high-quality cement, aggregates and additives to avoid material problems affecting the construction quality.
3. Quality monitoring during construction
Quality monitoring during construction is the key to ensuring construction quality:
– **Laser system monitoring: real-time monitoring of the stability of the laser system to ensure the accuracy of the laser plane.
– **Flatness detection: regularly use professional equipment to detect the flatness of the concrete surface and adjust the working parameters of the leveling machine in time.
4. Accurate operation of construction equipment
Accurate operation is a direct means to improve construction quality:
– **Equipment adjustment: adjust the height and speed of the leveling machine in time according to the actual situation of the concrete and the construction environment.
– **Operation continuity: maintain the continuity of operation to avoid inconsistent flatness due to interruptions in operation.
5. Control of construction environment
A good construction environment is an external condition to ensure construction quality:
– **Environmental factor control: Control the temperature, humidity and light conditions of the construction site to avoid adverse factors affecting the coagulation and hardening of concrete.
– **Construction site management: Reasonably arrange the layout of the construction site to ensure the smooth construction process.
6. Maintenance management after construction
Reasonable maintenance management is crucial to ensure construction quality:
– **Timely covering: Cover the concrete surface in time after construction to prevent moisture from evaporating too quickly.
– **Curing time: Ensure sufficient curing time to fully harden the concrete.
7. Recording and analysis of construction data
Detailed recording and analysis of construction data will help to continuously improve construction quality:
– **Data recording: Record various parameters during the construction process, such as concrete temperature, pouring speed, leveling speed, etc.
– **Data analysis: Analyze data, find out factors that affect construction quality, and continuously optimize construction plans.
8. Acceptance standards for construction quality
Establish strict acceptance standards for construction quality:
– **Acceptance process: Establish a standardized acceptance process to ensure that each construction link meets quality requirements.
– **Acceptance tools: Use professional tools for quality acceptance, such as flatness measuring instruments, strength testers, etc.
9. Problem solving during construction
Quickly identify and solve problems during construction:
– **Problem identification: Quickly identify problems that occur during construction, such as concrete segregation, surface bubbles, etc.
– **Problem handling: Take appropriate measures to deal with the problem according to the nature of the problem, such as re-leveling, repairing, etc.
10. Technological innovation and application
Technological innovation is an important way to improve construction quality:
– **New process exploration: Continuously explore and experiment with new construction processes to improve construction efficiency and quality.
– **Technology integration: Integrate the latest technologies, such as intelligent control systems, to improve the level of construction intelligence.
11. Conclusion
Improving the construction quality of concrete laser leveling machines is a systematic project, which requires comprehensive consideration and management from multiple aspects such as pre-construction preparation, quality control of construction materials, quality monitoring during construction, precise operation of construction equipment, control of construction environment, maintenance management after construction, recording and analysis of construction data, acceptance standards for construction quality, problem solving during construction, and technological innovation and application. Through the implementation of these measures, the construction quality of concrete floors can be effectively improved to meet the construction quality and use requirements.
Thanks to All the Friends Who Support and Trust Shandong Vanse Machinery Technology Co., Ltd.
If you want to know more about Shandong Vanse Machinery Technology Co., Ltd. or have any questions, please feel free to contact us:
Our Factory
Shandong Vanse Machinery Technology Co., Ltd.








Share this article

About the Author: Shandong Vanse Machinery Technology Co., Ltd.
Shandong Vanse Machinery Technology Co., Ltd. is a high-tech manufacturer specializing in concrete construction machinery, including laser screeds and related equipment. The company integrates R&D, production, and global sales, with products exported to over 60 countries and widely used in infrastructure projects worldwide.
Previous Post
Next Post
Related Articles
You Might Also Like
How can maintenance of a concrete laser leveling machine extend its service life?
As high-precision, high-load engineering equipment, the core goal of maintenance for concrete laser leveling is to reduce component wear, prevent potential failures, and maintain stable performance, thereby fundamentally extending the equipment's service life. The following details key maintenance measures and their mechanisms for extending service life from four perspectives: daily, regular, specialized, and long-term. Daily maintenance is the first line of defense for equipment life and must be rigorously performed before, during, and after each operation. Focusing on inspecting components prone to wear and high-frequency operation, this ensures that operating with defects exacerbates component degradation. Maintenance phase Core inspection items Specific operations Effect on life extension Before the working 1. Powertrain (Engine/Motor) 1. Check the engine oil level (must be within the dipstick range), coolant/antifreeze level, and motor wiring for security and damage. 1. Prevents engine seizure due to lack of oil or coolant, and motor burnout due to wiring problems. 2. Hydraulic System 2. Check the hydraulic oil tank level (must meet the "operating fluid level" indicated on the equipment), hydraulic pipe joints for leaks, and hydraulic oil for emulsification/discoloration. 2. Prevents insufficient pressure in the hydraulic system due to lack of oil or leakage, which can cause stalling in the travel or leveling motion and increase wear on the hydraulic pump. 3. Laser System 3. Clean the laser transmitter/receiver lens (use a soft cloth to avoid scratches) and test the laser signal for stability (no flickering or disconnection). 3. Ensures laser accuracy, avoids leveling errors caused by signal anomalies, and prevents lens scratches that could affect subsequent use. 4. Travel/leveling mechanism 4. Check the scraper blades and blades for deformation/wear (wear exceeding 3mm requires prompt repair), and check whether the tire pressure/track tension of the travel wheels are normal. 4. Reduce the additional load on the scraper/blade due to deformation and avoid bearing wear on the traveling mechanism due to abnormal tire pressure/tension. Working 1. Equipment operating sound 1. Listen for any unusual noises from the engine/motor (such as "tapping" or "buzzing" due to overload), and any "hissing" or leaks from the hydraulic system. 1. Promptly detect abnormal component friction (such as bearing wear) to prevent component "stuck" and resulting in scrapping. 2. Temperature monitoring 2. Touch the outer wall of the hydraulic oil tank (temperature not exceeding 60°C) and the motor housing (temperature not exceeding 70°C). If the temperature exceeds the threshold, immediately shut down the machine. 2. Prevent hydraulic oil from oxidizing and deteriorating due to high temperatures (which can corrode hydraulic components) and motor winding burnout due to overheating. 3. Laser signal stability 3. Monitor the laser receiver indicator light in real time. If it flashes frequently, pause and inspect (this may indicate lens contamination or a transmitter malfunction). 3. Avoid repeated operations due to laser signal issues, reducing unnecessary equipment wear. After the working 1. Equipment cleaning 1. Use a high-pressure water jet (avoiding electrical connections) to flush any remaining concrete from the machine body (especially around the leveling scraper and wheel gaps, as hardened concrete can cause components to seize). Dry the laser lens. 1. Prevent wear on component surfaces (such as scraper blades) caused by hardened concrete, preventing component "stuck" from overloading the drive motor. 2. Component repositioning and tightening 2. Check the scraper and blade mounting bolts for looseness (tighten with a torque wrench according to the manufacturer's instructions). Store the laser transmitter and place it in a dedicated protective case. 2. Prevent loose bolts from causing component vibration and friction (such as blades colliding with the frame), protecting the laser components from external damage. 3. Storage environment 3. Park the machine on a dry, flat surface to avoid water accumulation that could corrode the chassis or uneven ground that could cause frame deformation. If the machine is not in use for an extended period, use outriggers to prop it up off the ground. 3. Reduce chassis rust and frame deformation (frame deformation will lead to a decrease in leveling accuracy and indirectly increase equipment load). Regular maintenance should be scheduled based on the equipment's usage (or workload) (refer to the equipment manual; typically, it is divided into four levels: 50 hours, 200 hours, 500 hours, and 1000 hours). The core goal is to replace aging components, repair worn parts, and optimize system performance to avoid cascading failures caused by overuse of components. Key components: Air filter, fuel filter (diesel engine), and leveling scraper. Operation: Remove the air filter element and blow out any dust from the inside out with compressed air (0.2-0.3 MPa). (If the filter element is damaged or contains excessive dust, it should be replaced to prevent dust from entering the engine cylinder and increasing piston wear.) Replace the fuel filter (to filter impurities from the diesel fuel, preventing them from clogging the injectors and causing reduced engine power and increased fuel consumption). Inspect the leveling scraper blade for wear and sharpen it with an angle grinder. (Keep it sharp to reduce leveling resistance and prevent the scraper from overloading the motor due to a blunt edge.) Key components: Hydraulic oil, engine oil, oil filter, and travel wheel bearings. Operation: Replace the hydraulic oil (use the type specified in the equipment manual, such as 46# anti-wear hydraulic oil; do not mix different types). Clean the hydraulic oil tank filter (to remove impurities and prevent clogging of the hydraulic valves). Replace the engine oil (according to the type specified in the manual, such as 15W-40 diesel oil) and the oil filter (to filter out metal debris in the oil to prevent scratches on the engine cylinder walls). Remove the travel wheels, inspect the bearings for any unusual noise or looseness, and apply high-temperature grease (such as lithium-based grease to reduce bearing friction and wear and prevent burnout). Key components: Laser system, hydraulic pump/motor, and leveling mechanism gearbox. Operation: Have the laser transmitter calibrated by a professional (the accuracy error must be within ±0.5mm/10m to avoid overcorrection of the leveling mechanism due to accuracy deviation, which may increase component wear). Check the operating pressure of the hydraulic pump/motor (use a pressure gauge and ensure it complies with the specifications in the manual. Abnormal pressure may indicate seal deterioration and should be replaced promptly to prevent internal leakage in the hydraulic components, which can lead to reduced efficiency and increased temperatures). Replace the gearbox lubricant (such as 85W-90 gear oil) and inspect the gears for wear. (If pitting/flaking is observed on the tooth surfaces, repair or replace them promptly to prevent gear breakage and machine downtime.) Key components: Engine piston rings, motor windings, and frame structure. Operation: Disassemble the engine cylinder head and inspect the piston rings for wear (if the gap exceeds 0.5mm, replace them to prevent "burning" of the engine oil, which can lead to reduced power and increased carbon deposits). Use an insulation resistance meter to check the motor winding insulation resistance (must be ≥ 0.5MΩ. If it falls below the standard, dry or replace the windings to prevent leakage or burnout). Inspect the frame welds for cracks (especially at the connection between the leveling mechanism and the frame. Use a flaw detector to inspect. Cracks should be repaired promptly to prevent frame breakage and potential safety hazards). Concrete laser leveling often face special operating conditions such as high dust levels, high humidity, and long-term continuous operation. These conditions require targeted maintenance to prevent accelerated wear and tear. Increase the frequency of air filter changes (check every 20 hours and replace every 50 hours) to prevent dust from entering the engine. Install a dust cover on the laser receiver housing (provided it does not affect signal reception). Clean the receiver interface with compressed air after daily operation to prevent dust from causing poor contact. Install a dust filter on the hydraulic oil tank vent to prevent dust from entering the hydraulic oil and increasing wear on hydraulic components. After work, use dry compressed air to dry the interior of the electrical box (such as the controller and wiring terminals) and apply insulating paste to prevent rust on the terminals, which can cause circuit failure. Spray anti-rust paint on chassis welds and bolted joints every three months to prevent rust from loosening components. Place desiccant in the laser transmitter battery compartment to prevent moisture and leakage, which could damage the transmitter motherboard. Stop the machine every 4 hours to check the hydraulic oil temperature (if above 60°C, stop the machine to cool down) and refill coolant. Check the tightness of the leveling scraper bolts between operations (high-frequency vibration can easily loosen bolts). At the end of each day's operation, re-grease the travel wheel bearings (high-frequency rotation accelerates grease consumption). Equipment Cleaning: Clean any remaining concrete from the equipment, inspect all components for damage or looseness, and refill lubrication points to prepare for the next use. Site Cleanup: Arrange tools, remove warning signs, and ensure the construction site is clear of safety hazards before leaving. If equipment needs to be idle for more than three months (e.g., during project breaks), "static wear" (such as rust, grease solidification, and battery depletion) can seriously affect its lifespan. The following maintenance is necessary: Thorough Cleaning: Rinse the machine body of any concrete residue, wipe dry, and spray rust-proof oil (on metal parts such as the frame and leveling blades). Fluid Treatment: Replace the engine and hydraulic oil with fresh oil (old oil contains impurities and oxidation products, which can corrode components if left idle for a long time). Run the hydraulic system at no load for 10 minutes to ensure the new oil is fully in the lines. Electrical Protection: Remove batteries (such as the laser transmitter battery and the starting battery), fully charge them, and store them separately. (Recharge them monthly to prevent battery plate sulfation due to low power, which is irreversible.) Place desiccant in the electrical compartment. Parking Protection: Prop the machine with outriggers to keep the wheels/tracks off the ground to prevent tire deformation and track aging due to prolonged pressure. Cover with rain and dust covers to protect rubber components from direct sunlight, which can degrade them. Periodic Activation: Start the machine once a month and run it at no load for 30 minutes (to activate all components and prevent grease solidification and bearing seizure). At the same time, test the laser system and travel/leveling functions for proper operation. Equipment lifespan is essentially a trade-off between component wear and repair speed. Scientific maintenance extends lifespan through the following three key points: Reduce sources of wear: Clean, dustproof, and waterproof components to prevent abrasive wear and chemical corrosion caused by impurities and moisture. Reduce the wear rate: Regularly lubricate and replace the oil to create an oil film and reduce dry friction between components. Repair wear promptly: Regularly inspect and replace wearing parts to prevent minor wear from escalating into component failure, thus preventing a chain reaction of failures (e.g., a stuck bearing causing a motor to burn out). Concrete laser leveling maintenance should adhere to the principle of "do not miss routine tasks, do not exceed scheduled tasks, do not neglect special tasks, and do not neglect tasks during idle time." This integration of maintenance into the entire lifecycle of the equipment should be practiced. Through consistent and precise maintenance, the service life of core components (such as the engine, hydraulic pump, and laser system) can be extended by over 50%, increasing the overall service life of the equipment from the typical 3-5 years to 6-8 years. This ensures that the equipment always operates with high precision and efficiency, reducing overall operating costs. Note: The parameters provided in this document are for reference only and are not mandatory. Due to differences in technical characteristics between different brands and models of laser levelers, please consult the manufacturer for a suitable solution before actual operation. This reference document assumes no responsibility for any issues arising from failure to follow the manufacturer's instructions.The Impact of Power Trowel Blade Angle and Speed on Surface Compactness
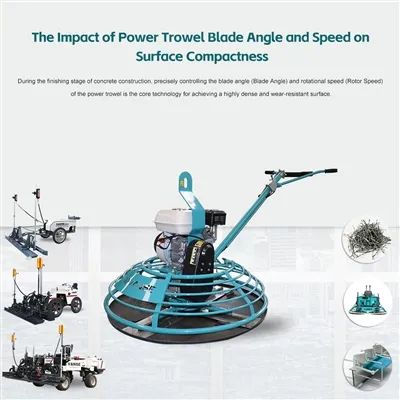
During the finishing stage of concrete construction, precisely controlling the blade angle (Blade Angle) and rotational speed (Rotor Speed) of the power trowel is the core technology for achieving a highly dense and wear-resistant surface. The blade angle (Blade Angle) determines the "pressing force": The physical mechanism is that the smaller the contact area, the greater the pressure. A small angle (such as 0° – 5°) causes the blade to almost lie flat on the ground, used for the initial leveling and slurry removal; as the concrete hardens, the angle needs to be gradually increased (such as 10° – 30°), so that the blade applies high pressure in a "cutting" posture, forcefully closing the capillary pores and squeezing out excess water and air, achieving densification. Studies have shown that correctly setting the blade angle can increase the compressive strength of the concrete surface by up to 15%. The rotational speed (Rotor Speed) determines the "operation frequency": The logic is the combination of kinetic energy and thermal effect. Low speed (50 – 90 RPM) is used in the initial stage to avoid disturbing the unstable surface; medium-high speed (100 – 150 + RPM) is used in the fine troweling stage, generating micro heat and high-frequency friction, promoting the rapid densification of the surface cement paste, forming a high-gloss "hard shell". Combining with the product knowledge base on Vanse Machinery's official website, the specific practical parameters and equipment support are as follows: Coarse scraping stage: Set the blade angle to 10° – 15°, and operate at a low speed (300 – 400 rpm) to remove loose mortar and small protrusions. Fine scraping stage: Gradually increase the angle to 25° – 30° and increase the speed to a medium-high speed (400 – 600 rpm) to enhance the surface density and gloss. For special requirements such as ultra-smooth floors, the angle can be adjusted to 30° – 45° during the final polishing. High-speed "polishing" stage: To achieve a "mirror-like" effect, maximize the blade angle (usually 20° – 30°) and speed, generate local heat through high-speed friction, and achieve the physical ultimate densification of the surface. High-grade/low water-cement ratio concrete (C40 and above): Sets quickly, with a short window period. The initial speed should be introduced earlier, using medium-low speed (approximately 60-80 RPM); during fine troweling, increase to medium-high speed (approximately 90-120 RPM), and gradually increase the blade angle (approximately 5-10°) to implement "cutting-style" polishing. Concrete containing retarders (summer/ large-scale construction): Sets slowly, requiring patience to build up support force. Initially, use low speed (approximately 50-70 RPM) to steadily scrape the surface; for subsequent polishing, maintain medium-low speed throughout to avoid "waveing" or "skinning" on the surface. Core adjustment principle: Just as emphasized in the Vanse technical documentation, "Observation is more important than presetting", there are no fixed values for parameters. The only standard is the immediate state of the concrete surface. Construction personnel should follow the principle of "from low speed to high speed, from small angle to large angle", and make dynamic adjustments. Too small angle: Leads to insufficient compaction, presence of pores on the surface, and reduced strength.应及时 increase the angle and accelerate the troweling during the fine troweling stage to make up for it. Too large angle: May scratch the hardened concrete surface or cause the machine to "chatter" and uneven wear. Should immediately reduce the angle and increase the walking speed. Inconsistent speed: If the initial speed is too fast, it will tear the surface and damage the flatness; if the later speed is too slow, it will result in insufficient compaction and dull luster. The blade angle and rotation speed are the core variables for the power trowel machine to achieve a dense concrete surface. By combining the precise staged parameters recommended by the Vanse Machinery website (rough troweling 10°-15°/300-400 RPM, fine troweling 25°-30°/400-600 RPM), and following the dynamic adjustment principle of "observation is more important than presetting", the construction team can effectively improve the construction quality and operational efficiency of the ground project. For more detailed trowel machine models and operation guidelines, you can directly visit the Vanse Machinery website or contact its technical team via email [email protected]. Note: The parameters provided in this document are for reference only and are not mandatory. Due to differences in technical characteristics between different brands and models of laser levelers, please consult the manufacturer for a suitable solution before actual operation. This reference document assumes no responsibility for any issues arising from failure to follow the manufacturer's instructions.The ‘beauty’ work of the ground depends on the laser leveling machine (1)
The "beauty" work of the ground depends on the laser leveling machine (1) It has to be admitted that using a concrete laser leveling machine to smooth the ground is a more scientific method, which can greatly reduce the labor burden of the staff and save time and effort. However, when operating the equipment, it is still necessary to reduce the impact of some harmful factors on the normal use of the machine. 1. Minimize the influence of harmful factors 1. Avoid impurities For concrete laser leveling machines that work in harsh environments and complex conditions, first of all, use high-quality, matching parts, lubricating oil, and grease to block the source of harmful impurities; secondly, do a good job of mechanical protection on the job site Work, ensure that the corresponding mechanism can work normally, and prevent various impurities from entering the interior of the machine. For machinery that breaks down, try to go to a regular repair place for repairs. When on-site repairs, protective measures must also be taken to prevent the parts replaced during on-site repairs from being polluted by impurities such as dust before entering the machine. 2. Applicable temperature During the use of the concrete laser leveling machine, it is necessary to prevent overload operation at low temperature, ensure the normal operation of the low-speed preheating stage, and make the machine reach the specified temperature before driving or working. Do not ignore other problems because there are no problems at that time. Important role; Second, to prevent the machine from running at high temperature, check the values on various thermometers frequently during the operation of the machine, stop the machine immediately for inspection if any problem is found, and eliminate the fault in time. If the reason cannot be found for a while, the machine must still work with the disease without treatment. In normal work, pay attention to check the working condition of the cooling system. For water-cooled machines, it is necessary to check and add cooling water before work every day; for air-cooled machines, the dust on the air-cooling system should also be cleaned regularly to ensure the smooth flow of cooling air ducts. 3. Anti-corrosion During use, management and operators should take effective measures according to the local weather conditions and air pollution conditions at that time to reduce the impact of chemical corrosion on the machinery, with the focus on preventing the intrusion of rainwater and chemical components in the air to the machinery.