Technical Knowledge
How to ensure that the flatness of the concrete floor meets the requirements?
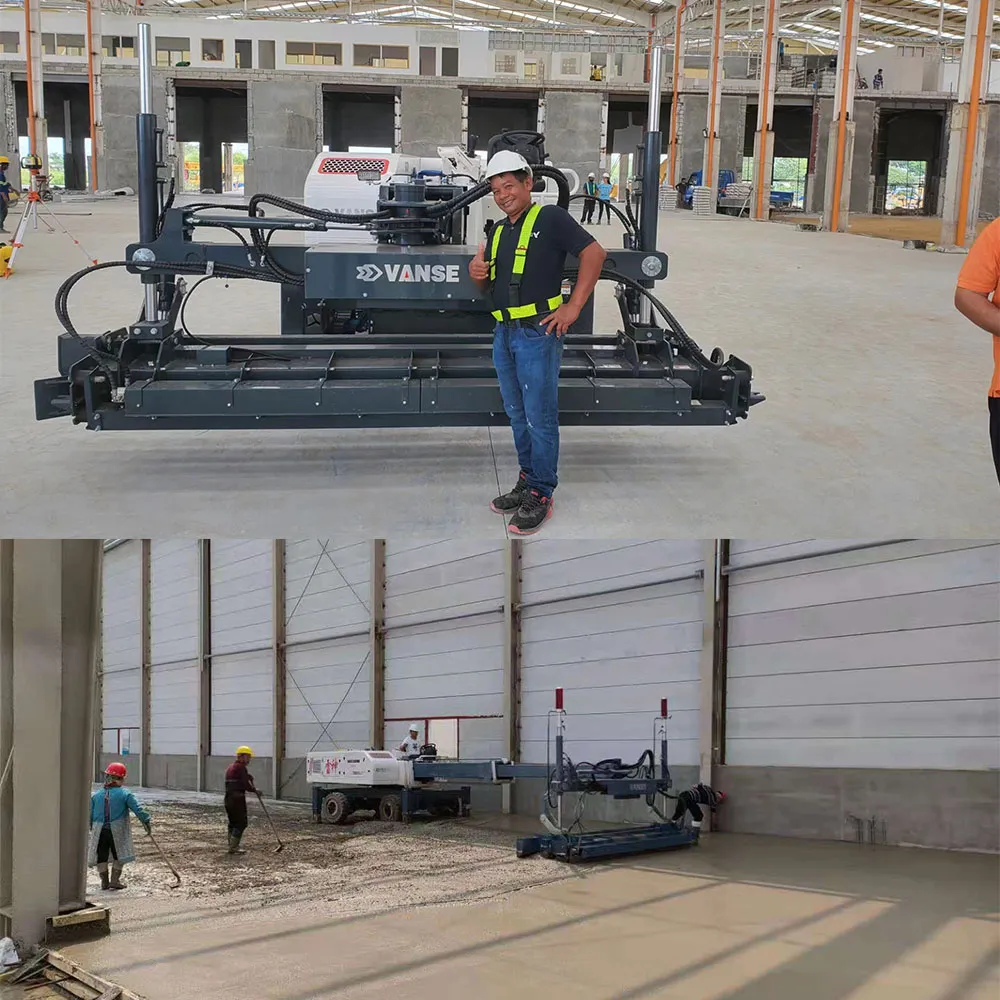
To ensure that the flatness of the concrete floor meets the requirements, the following aspects can be considered:
1. Preparation work before construction:
Before construction, technical explanations should be conducted to clarify the requirements and standards for flatness, and construction personnel should be trained and assessed to ensure that they understand and can meet these requirements. At the same time, measurement and setting out should be carried out to determine the elevation and horizontal baseline as the basis for construction.
2. Reasonable design of concrete mix proportion:
The mix proportion of concrete should be reasonably configured according to the design requirements to ensure the strength, durability and working performance of the concrete. During the configuration process, trial configuration and adjustment should be carried out to ensure that the various performance indicators of the concrete meet the requirements.
3. Quality control of formwork installation:
Formwork installation is one of the key factors affecting the flatness of the concrete floor. Templates that meet specifications and quality should be selected and inspected and adjusted before installation. During the installation process, it is necessary to ensure that the splicing of the formwork is tightly supported and stable to avoid problems such as misalignment and slurry leakage.
4. Quality control of concrete pouring:
During the concrete pouring process, the pouring speed and vibration quality should be controlled. Too fast a pouring speed may cause accumulation and unevenness of the concrete, affecting the flatness; insufficient or uneven vibration may cause problems such as honeycombing and pitting in the concrete. Therefore, the pouring speed should be reasonably controlled to ensure uniform distribution of concrete. At the same time, sufficient vibration should be carried out to ensure that the concrete is dense.
5. Quality control of surface treatment:
After the concrete pouring is completed, the surface should be processed in time. The surface should be smoothed with a flat scraper and other tools, and rolled with a roller and other tools to ensure that the surface is smooth and dense. During the surface treatment process, care should be taken to avoid excessive smoothing and calendering to avoid problems such as cracks on the surface.
6. Quality control of later maintenance:
After the concrete floor construction is completed, appropriate maintenance should be carried out to avoid problems such as cracking and shelling. Appropriate moisturizing measures should be taken, such as covering with straw bags, watering, etc., to keep the surface moist. At the same time, attention should be paid to controlling the curing time to avoid premature or too late curing that may cause quality problems on the surface.
7. Quality inspection and acceptance:
After the construction is completed, the quality inspection and acceptance of the flatness of the concrete floor should be carried out. Corresponding detection tools and methods, such as 3m rulers, levels, etc., should be used to detect and record the flatness of the ground. Parts that do not meet the requirements should be processed and repaired in time to ensure that the final flatness meets the requirements.
To sum up, to ensure that the flatness of the concrete floor meets the requirements, it is necessary to carry out sufficient preparations before construction, reasonably design the concrete mix ratio, and strictly control the quality of formwork installation, concrete pouring, surface treatment and post-maintenance at the same time. Quality inspection and acceptance. Only when these aspects are effectively controlled can the requirements for ground flatness be finally achieved.
Thanks to All the Friends Who Support and Trust Shandong Vanse Machinery Technology Co., Ltd.
If you want to know more about Shandong Vanse Machinery Technology Co., Ltd. or have any questions, please feel free to contact us:
Our Factory
Shandong Vanse Machinery Technology Co., Ltd.








Share this article

About the Author: Shandong Vanse Machinery Technology Co., Ltd.
Shandong Vanse Machinery Technology Co., Ltd. is a high-tech manufacturer specializing in concrete construction machinery, including laser screeds and related equipment. The company integrates R&D, production, and global sales, with products exported to over 60 countries and widely used in infrastructure projects worldwide.
Previous Post
Next Post
Related Articles
You Might Also Like
How does a concrete laser leveling machine work?
The core operating principle of a concrete laser leveling machine is a closed-loop control system combining "laser positioning reference + real-time signal feedback + automatic mechanical execution" to achieve high-precision leveling and vibration of the concrete surface. Essentially, this system replaces the traditional manual "relative level determination" with the laser's "absolute level reference," eliminating human error and ensuring that the flatness and levelness of the finished surface meet high standards. Its workflow can be broken down into four core steps: reference establishment, signal detection, command calculation, and mechanical execution. The detailed principles are as follows: Before understanding the principles, it is necessary to first understand the core components of the device. All actions revolve around the coordination of these three systems: System Name Core Components Core Functions Laser Positioning System Laser Transmitter, Laser Receiver Establishes an "absolute level/slope baseline" and detects height deviations between the concrete surface and the baseline in real time. Electrical Control System Central Controller (PLC), Sensors Receives deviation signals from the receiver, calculates them, and sends action commands (raise/lower, accelerate/decelerate) to the actuators. Mechanical Actuation System Leveling Scraper, Vibrator, Travel Mechanism Executes controller commands: adjusts scraper height for leveling, vibrators for compacting concrete, and travel mechanisms for moving the equipment. The operation of a concrete laser leveling is a dynamic closed-loop process of **"real-time detection → instant adjustment → continuous leveling"**, which can be divided into four steps: This is the prerequisite for high-precision leveling, the purpose of which is to set a fixed, unchangeable reference datum for the leveling surface (replacing the traditional "level + ruler" artificial datum). Operation: Place the laser transmitter on a stable support at the construction site (away from sources of vibration and electromagnetic interference). Use a level to align the transmitter so that it emits a 360° circular laser beam (which can be set to a "level reference" or a "preset slope reference," such as a 2% drainage slope). Principle: Lasers have the physical properties of strong directionality, good monochromaticity, and stable propagation. They exhibit virtually no attenuation over short distances (typically within 100 meters), forming an "absolute level/slope" baseline that remains stable despite manual operation or equipment movement. Key: The laser transmitter must be independently powered and securely fixed to prevent vibration or impact that could cause the baseline to shift. Any shift will cause errors in all subsequent leveling operations. The laser receiver (usually installed on the leveling support or top of the machine) is responsible for capturing the laser reference line in real time, comparing the "concrete surface height" with the "reference line height" and detecting the deviation value. Detection Process: The receiver contains multiple built-in photosensors (or photoelectric sensors). When a laser beam strikes the receiver, the photosensors at different locations determine the current concrete surface height based on the "height at which they are illuminated." If the location of the receiver illuminated by the laser is above a preset reference (indicating a low concrete surface), a signal indicating "raise the scraper" is output; if the location is below the reference (indicating a high concrete surface), a signal indicating "lower the scraper" is output. Deviation signals are transmitted to the central controller in real time via wired or wireless means (such as Bluetooth or radio frequency), typically at a frequency of 10 to 50 times per second, ensuring that the controller is instantly aware of surface height changes. Additional Note: Some high-end equipment may be equipped with multiple receivers (such as one at the front and one at the rear) to simultaneously detect heights at different locations, preventing single-detection errors caused by equipment tilt. The central controller (with a programmable logic controller (PLC) at its core) is the "brain" of the equipment. It receives deviation signals from the receiver, performs rapid calculations based on preset parameters (such as leveling thickness and vibration frequency), and generates specific execution instructions. Operational Logic: If the deviation is small (e.g., ±1mm), the controller will only fine-tune the oil flow in the scraper lift cylinder to achieve slight scraper movement, avoiding over-adjustment and surface fluctuations. If the deviation is large (e.g., ±5mm), the controller will increase the hydraulic cylinder movement and may also adjust the travel mechanism speed (e.g., slowing down the travel mechanism to allow the scraper sufficient time to level). If a "loss of signal" is detected (e.g., the receiver temporarily leaves the laser beam), the controller will immediately pause scraper adjustment and issue an alarm to avoid unintended action. Key: The controller's response speed directly impacts accuracy-high-quality equipment typically has a command calculation and execution delay of less than 0.5 seconds, allowing it to keep up with changes in concrete surface height in real time. The controller's instructions are ultimately transmitted to the mechanical execution system, which adjusts the height of the leveling scraper and compacts the concrete with the vibrator, completing the dual functions of "leveling + compacting". This is also the core advantage of laser leveling machines compared to traditional manual leveling. Leveling Scraper Operation: The scraper is driven by a hydraulic cylinder, raising and lowering in real time according to controller commands. When the concrete surface is low, the cylinder raises the scraper to reduce the amount of concrete removed (or even allows the concrete to naturally accumulate to the reference height). When the surface is high, the cylinder lowers the scraper to remove excess concrete and push it to the lower area, ensuring the surface is flush with the laser reference line. Synchronous Vibrator Operation: Under the scraper are typically multiple sets of high-frequency vibrators (vibrating at a frequency of 3,000 to 5,000 times per minute). These vibrators are inserted into the concrete while leveling, removing air bubbles and compacting the aggregate. This prevents honeycombing and rough surfaces caused by uneven vibration with traditional manual vibrating, while also creating a denser concrete surface and higher strength later on. Travel Mechanism: The equipment moves slowly on wheels or tracks (the travel speed is adjustable, typically 0.5 to 2 m/min), allowing the scraper and vibrator to continuously cover the concrete surface, avoiding "joints." Some ride-on models can also operate autonomously, reducing operator error. Traditional manual leveling relies on a "level rod + ruler" method, requiring repeated measurement and leveling. This is not only inefficient but also prone to poor flatness due to human judgment errors (such as visual deviation and uneven force). The core logic of the laser leveling machine is: The laser's absolute horizontal reference replaces the manually set relative reference, eliminating reference errors. The "detect → calculate → execute" automated closed-loop system replaces the manual "read the ruler → adjust" process, eliminating operator errors. High-frequency vibration combined with continuous leveling replaces the manual "scraping + vibrating" process, ensuring both smoothness and density. Ultimately, the result is a concrete surface construction effect with "millimeter-level precision (usually up to ±2mm/2m), high efficiency (3 to 5 times that of manual labor), and high density." This is particularly suitable for large-scale, high-precision ground projects (such as factories, garages, airport runways, etc.). Click the below to jump immediately!!! ARMOUR JOINT view more CONCRETE LASER LEVELING MACHINE view more POWER TROWEL view more SLIPFORM MACHINE view more STEEL FIBER view more TOPPING SPREADER view moreHow to determine the maintenance cycle of concrete laser leveling machine?
As an important equipment in modern construction, the efficient and precise leveling performance of concrete laser leveling machine greatly improves the quality and efficiency of the project. However, the long-term stable operation of any equipment is inseparable from scientific and reasonable maintenance. Therefore, determining the maintenance cycle of concrete laser leveling machine is a vital task. This article will discuss in depth how to determine the maintenance cycle of concrete laser leveling machine from the aspects of equipment use frequency analysis, working environment investigation, manufacturer recommended cycle, component wear inspection, maintenance record, maintenance cost analysis, and safety and performance evaluation. 1. Equipment use frequency analysis + – The use frequency of concrete laser leveling machine is one of the important factors affecting its maintenance cycle. The higher the frequency of equipment use, the faster the wear and aging of its internal mechanical parts, so more frequent maintenance is required. For equipment with high frequency use, the maintenance cycle should be shortened to ensure that the equipment is always in good working condition. On the contrary, for equipment with low frequency of use, the maintenance cycle can be appropriately extended Avoid unnecessary waste of resources. When conducting a frequency analysis, we need to carefully record each use of the equipment, including information such as usage time, workload, and working environment. Through the statistics and analysis of these data, we can derive the average frequency and characteristics of the equipment, which provides an important basis for determining the maintenance cycle. 2. Working environment inspection + – The working environment of the temperature-soluble soil laser leveling machine also has an important impact on its maintenance cycle. The equipment works in a harsh environment, such as dust, high temperature, etc., which will accelerate the corrosion and wear of its components. Therefore, when determining the maintenance cycle, the impact of the working environment must be fully considered. We should conduct on-site inspections of the working environment of the equipment to understand factors such as humidity, temperature, and dust concentration in the environment. At the same time, it is also necessary to pay attention to whether the equipment is often exposed to corrosive substances or subjected to strong mechanical shock during work. Based on this information, we can make appropriate adjustments to the maintenance cycle of the equipment to adapt to different working environments. 3. Manufacturer recommended cycle + – Equipment manufacturers usually give recommended maintenance cycles based on the design and manufacturing process of the equipment. These recommended cycles are usually based on the normal service life and expected wear of the equipment, and have certain reference value. When determining the maintenance cycle of the concrete laser leveling machine, we should refer to the recommended cycle provided by the manufacturer and make comprehensive considerations based on the actual use of the equipment and the working environment. If the equipment does not have any abnormal situation during use and the working environment is good, then maintenance can be carried out according to the cycle recommended by the manufacturer. However, if the equipment fails frequently or the working environment is bad, the maintenance cycle may need to be shortened. 4. Component wear inspection + – The various components of the concrete laser leveling machine will wear during use, and the different degrees of wear will directly affect the performance and life of the equipment. Therefore, regular wear inspection of the components of the equipment is an important basis for determining the maintenance cycle. When inspecting component wear, we should focus on the vulnerable parts and key components of the equipment, such as blades, bearings, seals, etc. By checking the wear of these components, we can understand the overall operating status of the equipment and then determine whether maintenance is needed. At the same time, according to the wear law of the components, the future wear trend can be predicted to provide a basis for formulating maintenance plans. 5. Maintenance records + – Maintenance records are important data reflecting the maintenance of equipment. By analyzing the maintenance records, we can understand the historical maintenance of the equipment and the operating status after each maintenance. This information is of great significance for determining the maintenance cycle. We should establish a complete maintenance record system to record the time, content, personnel and other information of each maintenance in detail. At the same time, we should also track and record the operation of the equipment after maintenance. Through the statistics and analysis of these records, we can find potential problems in the operation of the equipment, so as to carry out preventive maintenance in advance. 6. Maintenance cost analysis + – Maintenance cost is one of the important factors to be considered when determining the maintenance cycle of wet concrete laser leveling machine. Too frequent maintenance will increase maintenance costs, while too long maintenance cycle may lead to more equipment failures and increase the cost of overhaul or replacement of parts. Therefore, we need to conduct a comprehensive analysis of the maintenance cost of the equipment. This includes counting the cost of each maintenance and repair, and analyzing the relationship between the cost and the maintenance cycle. By finding the best balance point, we can reduce maintenance costs while ensuring the normal operation of the equipment. When conducting maintenance cost analysis, it is also necessary to consider the purchase cost and expected service life of the equipment. If the purchase cost of the equipment is high and the expected service life is long, then when determining the maintenance cycle, more attention should be paid to the long-term stable operation of the equipment and the reduction of long-term costs. 7. Safety and performance evaluation + – Safety and performance are key indicators for the operation of concrete laser leveling machines, and are also important bases for determining maintenance cycles. The safety of equipment includes the safety of operators and the safety of the equipment itself, while performance is directly related to construction quality and efficiency. Therefore, we need to regularly evaluate the safety and performance of the equipment. This includes checking whether the safety protection devices of the equipment are intact, whether the operation is convenient, and whether the operation is smooth. At the same time, it is also necessary to test and evaluate the performance indicators of the equipment, such as leveling accuracy and work efficiency. Based on the evaluation results of safety and performance, we can adjust the maintenance cycle. If the safety and performance of the equipment decline or fluctuate, the maintenance cycle should be shortened, and the problem should be checked and solved in time. On the contrary, if the safety and performance of the equipment are stable and good, the maintenance cycle can be appropriately extended. In summary, determining the maintenance cycle of the concrete laser leveling machine requires comprehensive consideration of equipment use frequency, working environment, manufacturer recommended cycle, component wear inspection, maintenance records, maintenance costs, safety and performance evaluation, and other aspects. Only by comprehensively considering these factors can we formulate a scientific and reasonable maintenance plan to ensure the long-term stable operation and efficient construction of the equipment. 8. Specific implementation of safety and performance evaluation + – When implementing safety and performance evaluation, it is necessary to first provide professional training to operators to ensure that they are familiar with the various safety operating procedures of the equipment and can correctly identify and deal with potential safety hazards. At the same time, the equipment manager or maintenance engineer also needs to conduct regular equipment inspections, focusing on whether the safety protection devices and warning signs of the equipment are complete and clear to ensure the safety of the operators. In terms of performance evaluation, professional testing equipment and methods can be used to quantitatively evaluate the various performance indicators of the concrete laser leveling machine. For example, by measuring the leveling accuracy and efficiency of the equipment, the performance status of the equipment can be intuitively understood. At the same time, the performance of the equipment can also be comprehensively evaluated in combination with the actual needs of the construction to determine whether it is necessary to adjust the maintenance cycle or take other improvement measures. In addition, with the continuous advancement of technology and the upgrading of equipment, we also need to pay attention to the safety performance and performance characteristics of the new concrete laser leveling machine. By comparing and analyzing the differences between new equipment and existing equipment, we can provide a reference for formulating a more scientific and reasonable maintenance cycle. 9. Dynamic adjustment of maintenance cycle + – It should be noted that the maintenance cycle of the concrete laser leveling machine is not static. With the increase of equipment use time, changes in working environment and technological progress, the maintenance cycle may need to be adjusted dynamically. Therefore, we should establish a dynamic maintenance cycle adjustment mechanism. This includes regular evaluation and analysis of the equipment's operating conditions, component wear, maintenance costs, etc., and timely adjustment of the maintenance cycle based on the evaluation results. At the same time, it is also necessary to pay attention to changes in industry standards and best practices, and promptly apply new experiences and practices to the maintenance of equipment. 10. Conclusion + – In summary, determining the maintenance cycle of concrete laser leveling machines is a complex and meticulous process that requires comprehensive consideration of multiple factors. Through scientific analysis, reasonable evaluation and dynamic adjustment, we can formulate a maintenance plan that meets the actual needs of the equipment, ensure the safe and stable operation of the equipment and efficient construction, and at the same time, this will also help reduce the maintenance cost of the equipment, extend its service life, and provide strong guarantees for the sustainable development of the enterprise. In future work, we should continue to deepen the research and practice of the maintenance cycle of warm concrete laser leveling machines, constantly explore new methods and means, improve the maintenance level and management efficiency of equipment, and at the same time strengthen exchanges and cooperation within the industry, share experience and resources, and jointly promote the progress and development of maintenance technology for concrete laser leveling machines.Can the elevation control accuracy of the concrete laser leveling machine meet the construction requirements of pharmaceutical clean workshops?
Selecting high-precision concrete laser leveling machines and standardizing construction not only meets the elevation control accuracy requirements but also is the preferred key equipment for achieving the high-standard floor requirements of pharmaceutical clean workshops. Below, I will provide you with a detailed analysis from three aspects: standards, principles, and practical operations The core requirements for the floor in a pharmaceutical clean workshop are: extremely high flatness, levelness, integrity and dust-free property. Flatness: Generally, the straightedge inspection standard of "±3mm/2m" or "±2mm/2m" is adopted, that is, a 2-meter straightedge is used for inspection, and the height difference at any position should not exceed 3mm or 2mm. Some high-standard areas (such as the core process zone) even require ±1.5mm/2m. Levelness (elevation control) : The absolute elevation error of the entire ground needs to be strictly controlled, usually within ±5mm/ tens of meters, to ensure that water in the ground area can flow smoothly to the floor drain and there will be no local water accumulation. Integrity: The ground must be cast as a seamless whole to prevent bacteria from breeding in the gaps. Wear-resistant and resistant to chemical corrosion: Meets the requirements of cleaning and disinfection. The technical principle of the laser leveling machine determines that it is inherently suitable for such high-precision requirements. Laser reference: A rotating laser emitter is set up outside the construction area, which will establish an absolutely horizontal laser reference surface within the construction area, with an accuracy of ±1.0mm/100m or even higher (such as ±0.5mm/100m). This reference plane will not deform. Real-time monitoring and automatic adjustment: The laser receiver on the leveler captures the laser signal in real time and transmits the information to the on-board computer control system. Hydraulic system execution: The control system drives the hydraulic cylinders at the four corners of the flattening head several times per second to automatically adjust the height of the scraper, ensuring that it always precisely remains at the elevation set on the laser reference surface. Traditional craftsmanship (using a ruler to scrape the bar) : It relies on the manual skills and physical strength of workers, and is prone to problems such as fatigue, visual errors, and the accuracy of formwork support, resulting in large cumulative errors and making it difficult to stably reach the standard of ±3mm/2m. Laser leveling machine: Eliminates human factors and formwork errors. The machine is completely controlled by an invisible laser beam, featuring stable and reliable precision, and is formed as a whole in one go, with extremely high efficiency. Although the equipment itself is highly precise, to ensure that the final outcome meets the requirements of a pharmaceutical clean workshop, the following points still need to be noted: For large clean areas in pharmaceutical factories (such as core production areas and packaging areas), it is recommended to use large ride-on laser leveling machines. Its self-weight is sufficient to effectively press concrete, forming a highly dense surface with the best flatness. For areas such as the periphery of the equipment, walls, and column bases that large equipment cannot cover, it is necessary to use a handheld laser leveling machine in conjunction for auxiliary operations to ensure consistent accuracy throughout the entire area. The foundation and template accuracy are the prerequisites: laser leveling machines cannot correct significant undulations of the foundation (such as steel mesh sheets, crushed stone bedding layers). The flatness of the foundation must be done in advance; otherwise, concrete materials will be wasted. The top elevation of the formwork must also be precisely calibrated with a level, as the leveling machine sometimes takes the formwork as the initial reference. The mix proportion and slump of concrete must be uniform and stable. The slump is recommended to be controlled at around 140mm±20mm. If it is too high, it will easily lead to uneven settlement; if it is too low, it will be difficult to level. Operators must be trained and familiar with the equipment principles and operation procedures. This includes the installation and calibration of laser emitters, as well as the planning of the traveling path for the leveling machine, etc. The ground that has been precisely leveled must be immediately subjected to seamless and comprehensive maintenance (such as spraying maintenance agents or covering with plastic film) to prevent cracking due to uneven water loss, which could damage the flatness. The control accuracy of elevation and flatness of the concrete laser leveling machine is not only a core technical means to "meet", but also to "guarantee" the construction requirements of pharmaceutical clean workshops. It achieves construction accuracy and consistency far exceeding manual levels through non-contact laser measurement and automated hydraulic control. To ensure everything goes smoothly, we suggest that you: Choose a reputable equipment supplier (for lease or purchase). Hire a concrete team with experience in the construction of pharmaceutical clean workshops. Before construction, conduct a detailed technical briefing to clearly define the requirements for flatness and elevation. During the construction process, a 2-meter straightedge and a level are used for simultaneous inspection. The adoption of laser leveling technology is a mature, reliable and efficient choice for building high-standard floors in pharmaceutical clean workshops. Note: The parameters provided in this document are for reference only and are not mandatory. Due to differences in technical characteristics between different brands and models of laser levelers, please consult the manufacturer for a suitable solution before actual operation. This reference document assumes no responsibility for any issues arising from failure to follow the manufacturer's instructions.